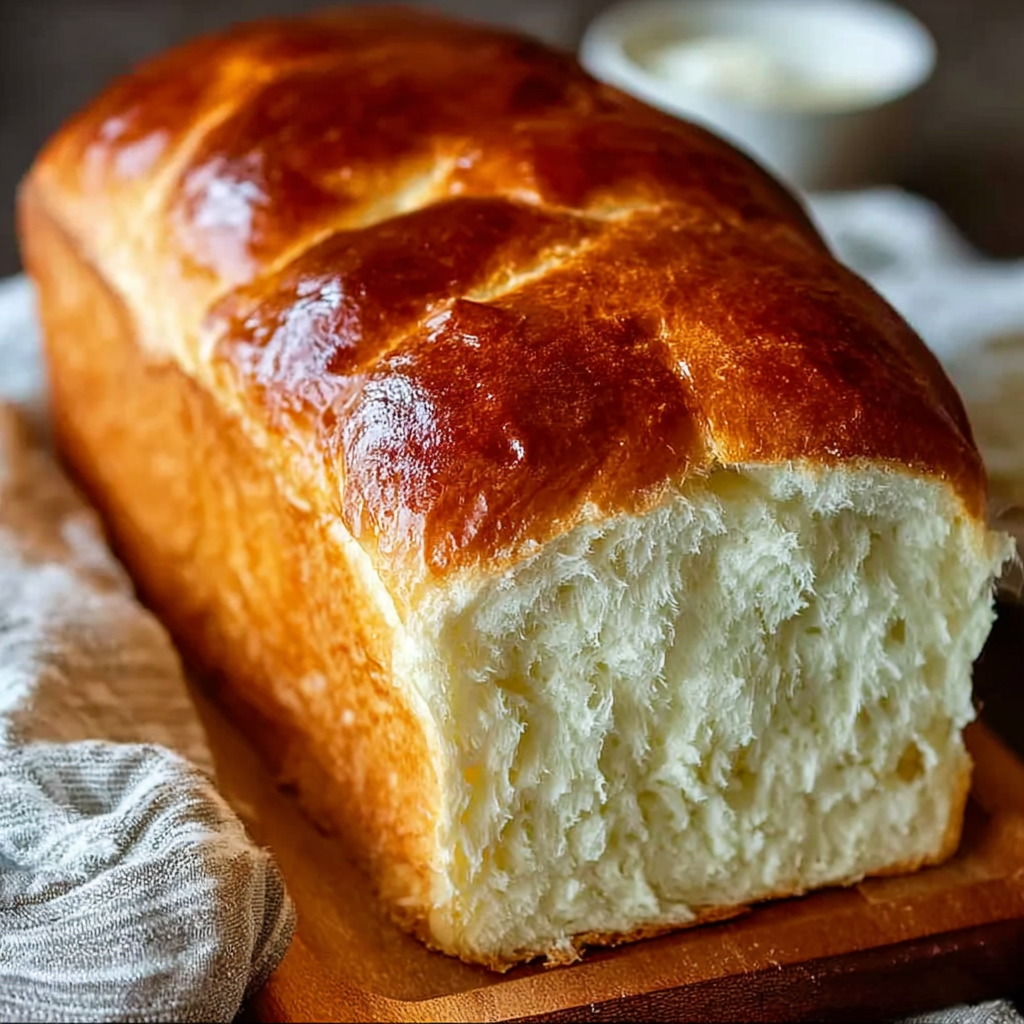
1.Homemade White Sandwich Bread
There’s something deeply satisfying about baking your own white sandwich bread at home. Not only do you control the ingredients, but you also get to enjoy a fresh, fluffy loaf that far surpasses store-bought varieties. The comforting aroma, the golden crust, and the pillowy texture all make homemade bread a must-try staple in any kitchen.
Many people are intimidated by the idea of baking bread, assuming it’s a complex or time-consuming task. However, this white bread recipe simplifies the process with clear, straightforward steps that yield a tender, soft loaf ideal for sandwiches, toast, and more. Unlike most commercial bread, this recipe skips preservatives and unnecessary additives, focusing on wholesome ingredients you likely already have at home.
This guide offers more than just a recipe — it’s a complete homemade sandwich bread tutorial, including best practices, variations, and solutions to common baking issues. You’ll not only learn to create the perfect loaf but also gain insight into the science of baking soft, airy bread. If you’ve ever wondered what really makes bread rise or what role each ingredient plays, this article will guide you through it. For a deeper dive into how yeast functions in baking, check out this explanation of yeast and its importance in bread making.
Homemade white bread isn’t just delicious — it’s also highly versatile. Whether you’re building a BLT, crafting the perfect grilled cheese, or meal prepping sandwiches for the week, a freshly baked loaf brings flavor and texture to every bite. If you’re curious about how bread has evolved over time, explore the history of bread and discover why it’s been a staple for centuries.
This tutorial will walk you through each phase of bread-making with clarity and detail, whether you’re a beginner or a seasoned home baker. Prepare to master the soft sandwich loaf you’ll want to bake again and again.
2. Why Make Your Own Sandwich Bread?
Making your own sandwich bread at home delivers a combination of freshness, flavor, and control that store-bought loaves simply can’t match. The process may take some time, but the reward is a loaf that’s warm, soft, and tailored exactly to your taste and dietary preferences.
One of the biggest reasons to bake your own white bread is the quality of ingredients. Commercial bread often contains preservatives, dough conditioners, and added sugars that aren’t necessary for great flavor or texture. When you bake at home, you can choose simple, wholesome ingredients like flour, milk, butter, and yeast, resulting in a cleaner, healthier loaf. To better understand what goes into your bread and how each ingredient contributes, refer to this guide on types of flour for baking, which can help you select the best one for your needs.
Cost-effectiveness is another benefit. A single homemade loaf usually costs far less than premium bakery bread, and you can make multiple loaves in one baking session. Plus, once you’ve mastered a basic white sandwich bread recipe, you can customize it easily by adding seeds, herbs, or switching flours. For inspiration, check out this Pinterest collection of easy bread recipes for beginners that shows how flexible bread-making can be.
The satisfaction of creating a warm, golden-brown loaf from scratch is unmatched. It’s a rewarding process that connects you to generations of home bakers before you. Not only does it make your kitchen smell amazing, but it also offers a sense of accomplishment. For many, baking bread becomes a meditative practice that brings joy and comfort.
And when it comes to taste and texture, homemade white bread wins every time. The softness, slight sweetness, and balanced crumb make it ideal for everything from grilled cheese sandwiches to delicate tea-time snacks. For creative uses of your finished loaf, explore these Pinterest sandwich ideas using soft bread to make the most of your homemade success.
3. Ingredients Breakdown: What You’ll Need
Crafting the perfect soft white sandwich bread starts with understanding the role each ingredient plays in building structure, flavor, and texture. While the list may seem simple, each item has a specific function that affects your final loaf. Here’s a breakdown of what you’ll need and why it matters.
-
All-Purpose or Bread Flour (3 ¾ cups / 450g)
This is the foundation of your dough. Bread flour has a higher protein content, typically around 12–14%, which leads to stronger gluten development and a chewier texture. All-purpose flour, on the other hand, gives a slightly softer crumb. Both work well, but bread flour may yield a taller, more structured loaf. For more details on the differences, this guide to flour types is a great reference. -
Active Dry Yeast (2 ¼ tsp / 1 packet)
Yeast is the life force of your bread. It ferments the sugars and produces carbon dioxide, which causes the dough to rise and develop that fluffy interior. Make sure your yeast is fresh—expired yeast will result in a dense, flat loaf. You can also use instant yeast, which doesn’t require proofing, though timing may vary slightly. To explore how this magical microorganism works, visit this article on how yeast functions in baking. -
Salt (1 ½ tsp)
More than just a flavor enhancer, salt controls yeast activity and strengthens the gluten structure. Without it, your bread may rise too quickly and collapse, leading to a weak texture. Salt also helps the loaf brown properly during baking. -
Sugar (2 tbsp)
Sugar feeds the yeast in the early stages of fermentation and contributes a mild sweetness that complements the soft texture. It also aids in creating a golden-brown crust. For those wanting a more natural touch, honey can be used as a substitute. -
Warm Milk (1 cup / about 110°F / 43°C)
Milk not only adds richness and tenderness to the crumb but also enhances the nutritional profile with protein and fats. The warmth activates the yeast while the dairy softens the texture, giving you that pillowy sandwich bread feel. For storing ideas after baking, browse Pinterest’s freezer-friendly bread ideas to ensure none of your loaf goes to waste. -
Warm Water (⅓ cup)
Combined with milk, water ensures the dough reaches the ideal moisture level. The temperature is important—too hot, and it kills the yeast; too cold, and it won’t activate. Aim for about 100–110°F. -
Unsalted Butter (2 tbsp, softened)
Butter enhances flavor and produces a soft crumb. It coats the flour, limiting gluten formation slightly, which keeps the bread from becoming tough. For extra softness, you can brush the top of your loaf with melted butter after baking.
Each of these ingredients contributes to the overall texture and flavor of your homemade sandwich bread. Understanding their roles gives you more control and confidence as you begin baking. If you’re eager to see how ingredients can be adapted, check out this Pinterest board with soft sandwich loaf inspiration for creative twists.
4. Choosing the Right Flour: All-Purpose vs Bread Flour
One of the most common questions when baking homemade white bread is whether to use all-purpose flour or bread flour. Both options are valid, but they affect the final texture, rise, and structure of your loaf in different ways. Understanding the differences will help you choose the right one for your ideal loaf.
All-Purpose Flour is the most commonly used flour in home kitchens. It typically has a protein content of around 10–12%, which is sufficient to form a soft, tender crumb. If you’re aiming for a fluffy sandwich bread with a delicate bite and lighter texture, all-purpose flour works perfectly. It also absorbs slightly less water, which can help beginners avoid overly sticky dough.
Bread Flour, on the other hand, contains more protein (about 12–14%) and is designed specifically for yeast-based recipes. The extra protein creates more gluten, which in turn produces stronger dough and better structure. Bread flour is ideal if you prefer a loftier loaf with more chew. It’s often used in professional bakeries for consistent rise and elasticity. If you’re curious about how gluten works to create structure, this article on gluten development offers helpful scientific insights.
When choosing between the two, consider what texture you want:
-
For softer sandwich-style bread, especially for children or delicate sandwiches, use all-purpose flour.
-
For taller loaves with more structure and durability, especially for toast or stacking multiple fillings, opt for bread flour.
You can also blend the two to get the best of both worlds. A 50/50 mix can yield a loaf with softness and structural integrity, perfect for daily sandwich use. This blend gives you a springy, tender texture that holds up well to spreads and toppings.
Need visual inspiration? Browse this Pinterest collection of baking tips for how different flours influence the look and feel of finished loaves. Understanding flour choice is key to customizing your bread to suit your taste and kitchen style.
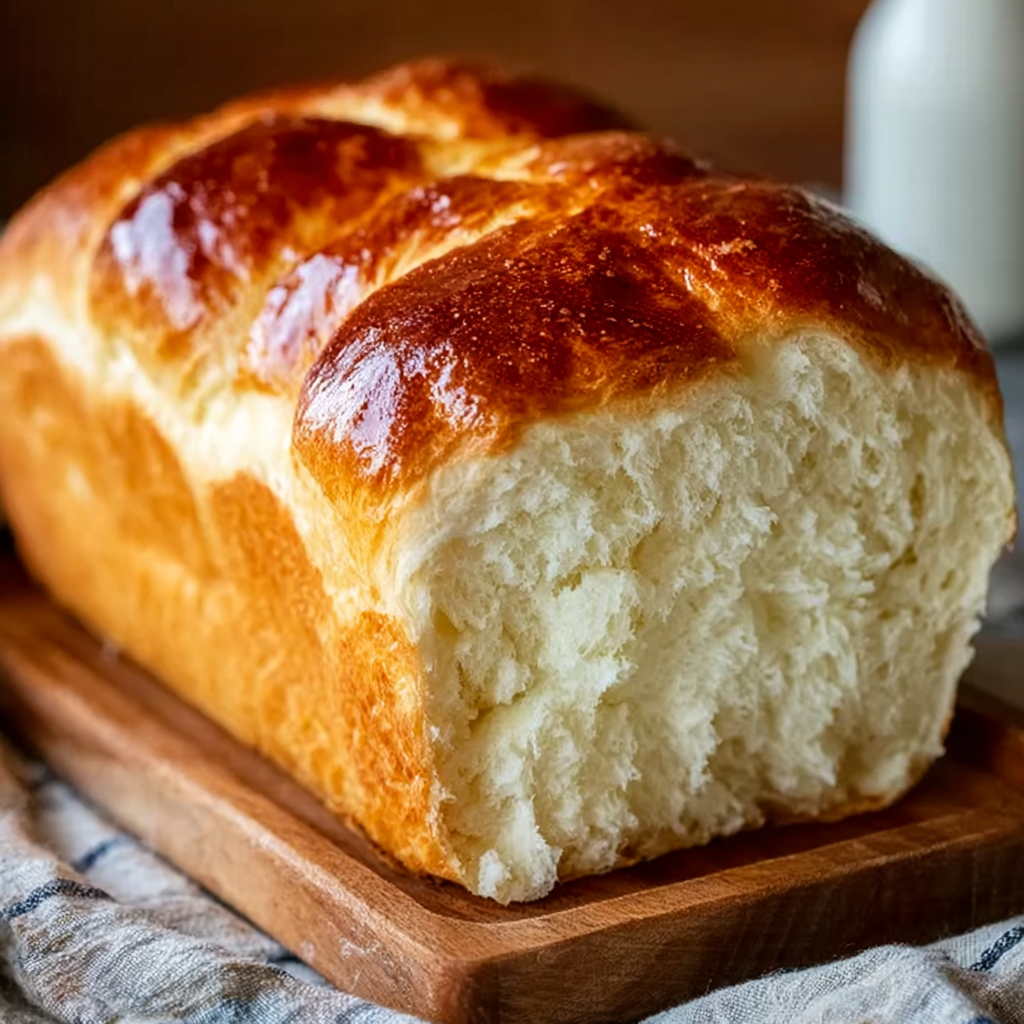
5. Step-by-Step Tutorial: Making the Softest White Bread
Creating homemade sandwich bread that’s soft, fluffy, and evenly baked is easier than you think when you follow a structured process. Here’s a clear step-by-step tutorial to walk you through every stage of this foolproof white bread recipe.
a. Activating the Yeast
Begin by combining 1 cup of warm milk, ⅓ cup of warm water, 2 tablespoons of sugar, and 2 ¼ teaspoons of active dry yeast in a large mixing bowl. Let the mixture sit for 5–10 minutes until it becomes frothy. This means your yeast is active and ready. If there’s no foam, your yeast may be expired or the liquid too hot.
For a deeper understanding of this process, check out this Wikipedia article on yeast, which explains how it ferments and helps your bread rise.
b. Mixing & Kneading the Dough
Add 2 tablespoons of softened unsalted butter and 1 ½ teaspoons of salt to the activated yeast mixture. Stir in about half of the 3 ¾ cups of flour, mixing until the dough starts to come together. Gradually add the rest of the flour, mixing well.
-
By hand: Transfer the dough to a floured surface and knead for about 10 minutes until it becomes smooth and elastic.
-
By stand mixer: Use the dough hook and knead on medium speed for about 8 minutes.
Don’t rush the kneading—it develops gluten, giving your white bread its ideal structure. If you’re curious about kneading mechanics, read more about proofing and kneading in baking to see how each stage contributes to the final loaf.
c. First Rise (Bulk Fermentation)
Place the dough into a lightly greased bowl and cover it with plastic wrap or a clean towel. Let it rise in a warm, draft-free spot for 1 to 1½ hours, or until it has doubled in size.
If you’re in a cold kitchen, try placing the bowl in the oven with just the oven light on—it provides gentle warmth ideal for yeast development.
d. Shaping the Loaf
Once the dough has risen, punch it down gently to release excess gas. Turn it onto a floured surface and shape it into a rectangle. Roll it tightly into a loaf shape, pinching the seam at the bottom.
Place the shaped dough into a greased 9×5-inch loaf pan.
e. Final Proof (Second Rise)
Cover the pan loosely and let the dough rise again for about 30–45 minutes, or until the dough rises just above the edge of the pan. This second rise gives your loaf the volume and fluffiness needed for a soft sandwich texture.
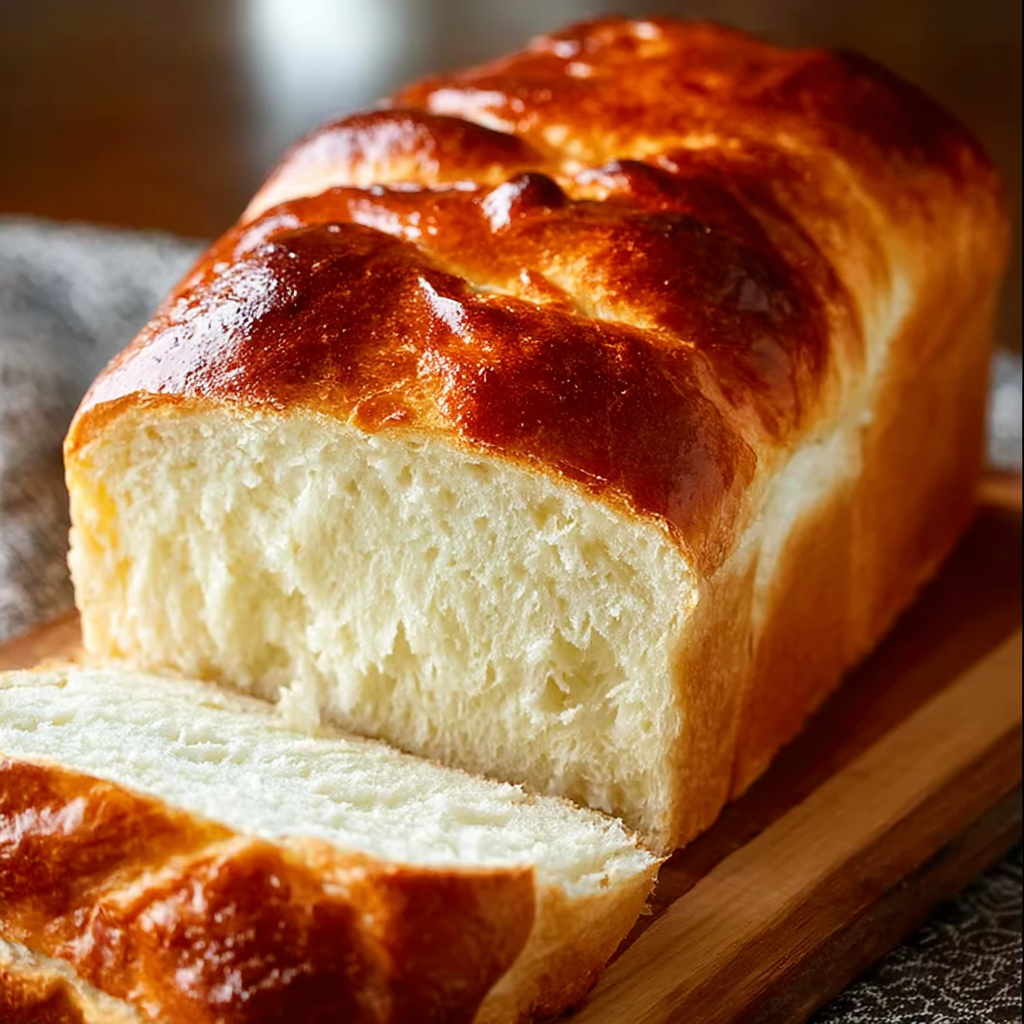
f. Baking and Cooling
Preheat your oven to 375°F (190°C). Bake the bread for 30–35 minutes, or until it’s golden brown and sounds hollow when tapped. If you have an instant-read thermometer, the internal temp should be 190–200°F.
Immediately remove the bread from the pan and let it cool completely on a wire rack before slicing. This prevents sogginess and helps the crumb set properly.
For extra flavor and softness, brush the top with melted butter while the loaf is still warm.
Explore Pinterest’s soft sandwich bread ideas for more tips on perfecting your loaf’s texture and shape.
6. Tips for Super Soft and Fluffy White Bread
Want next-level softness in your homemade sandwich bread? Follow these pro tips to get a tender crumb every time:
-
Use warm milk instead of water – Dairy fats create a more tender texture.
-
Avoid over-flouring the dough – Too much flour makes bread dry and dense.
-
Knead thoroughly – Proper gluten development ensures an airy, even crumb.
-
Add butter or oil – Fats coat gluten strands and prevent toughness.
-
Don’t overbake – Pull your bread out once the top is golden and the center reaches 190°F.
For more baking best practices, explore this Pinterest board on bread baking tips and level up your loaves.
7. How to Store Homemade Bread So It Stays Soft
Proper storage ensures your soft white bread stays fresh for days:
-
Let it cool completely before storing to avoid trapped moisture.
-
Store in a bread box or tightly sealed cloth bag to preserve softness and avoid mold.
-
Avoid refrigeration, which dries out the bread quickly.
-
Freeze for long-term storage – Slice the loaf, wrap slices in foil or plastic wrap, then store in a zip-top bag.
For great storage visuals, refer to these Pinterest freezer-friendly bread ideas to keep your bread fresh without waste.
8. Serving Suggestions: Best Uses for White Sandwich Bread
Once you’ve baked the perfect loaf, the real fun begins—using it! Here are some ways to enjoy your homemade white bread:
-
Classic sandwiches – Think BLT, turkey and cheese, ham and Swiss.
-
Toast with toppings – Avocado, butter and jam, nut butters.
-
Grilled cheese – The golden crust and soft interior melt cheese beautifully.
-
French toast – Slightly stale slices make the best custardy base.
-
Homemade breadcrumbs – Toast and pulse to use in recipes.
Need ideas? Check out these Pinterest sandwich recipes using homemade bread for creative inspiration.
9. Common Mistakes and Troubleshooting Tips
Even with simple ingredients, bread baking can go wrong. Avoid these common issues:
-
Bread didn’t rise? Yeast may be inactive, or liquid too hot. Use fresh yeast and warm (not hot) liquids.
-
Dense loaf? Likely under-kneaded. Ensure you knead until the dough is smooth and elastic.
-
Crust too hard? Bake time may be too long. Try brushing with butter right after baking.
-
Loaf collapsed after baking? Over-proofing is often the cause. Don’t let it rise too high during the second proof.
To explore more about how bread structure works, read this article on gluten, which breaks down how protein affects bread texture.
10. Variations and Add-ins for Custom Loaves
Once you’ve mastered the base white bread recipe, try these add-ins to personalize your loaf:
-
Honey or maple syrup in place of sugar for a different flavor profile.
-
Whole wheat flour (swap up to half) for added fiber and nuttiness.
-
Seeds – Mix in flax, sesame, or sunflower for texture.
-
Herbs and spices – Rosemary, thyme, or garlic powder add aroma and flavor.
-
Cheese – Fold in shredded cheddar or parmesan for a savory twist.
Browse this Pinterest collection of beginner-friendly bread variations for inspiration to customize your next bake.
11. FAQs – People Also Ask Section
How do I make my homemade bread soft and fluffy?
Use warm milk, add butter, and knead thoroughly. Avoid over-flouring and bake until just done. Brushing the loaf with butter post-bake also adds softness.
Why is my white bread not fluffy?
Insufficient kneading, inactive yeast, or overproofing can lead to dense bread. Ensure gluten is developed and proofing is monitored closely.
What flour makes the softest bread?
All-purpose flour produces soft bread with a tender crumb. Bread flour offers structure but a slightly chewier texture.
How long does homemade sandwich bread last?
Stored properly in a bread box or cloth bag, it lasts 3–4 days. You can freeze it for up to 3 months without losing quality.
Can I use instant yeast instead of active dry yeast?
Yes, use slightly less (about 2 tsp), and skip the proofing step. Mix it directly into your dry ingredients.
White Bread Recipe Soft Homemade Sandwich Bread Tutorial
This soft homemade white sandwich bread is the ultimate beginner-friendly loaf. Made with pantry staples like flour, yeast, and milk, it delivers a perfectly fluffy crumb and golden crust that’s ideal for sandwiches, toast, and more. With a simple step-by-step process, even first-time bakers can achieve bakery-quality results right at home.
- Author: Clara
Ingredients
- 3 ¾ cups (450g) all-purpose flour or bread flour
- 2 ¼ tsp (1 packet) active dry yeast
- 1 ½ tsp salt
- 2 tbsp sugar
- 1 cup warm milk (about 110°F / 43°C)
- ⅓ cup warm water
- 2 tbsp unsalted butter, softened
Instructions
In a large mixing bowl, combine warm water, warm milk, sugar, and yeast. Let it sit for 5–10 minutes until foamy.
Add the softened butter, salt, and about half of the flour. Stir until combined.
Gradually add the remaining flour, mixing until a soft dough forms. If using a stand mixer, switch to the dough hook and knead for about 8 minutes. If kneading by hand, turn the dough out onto a floured surface and knead for 10 minutes until smooth and elastic.
Place the dough in a greased bowl, cover it with a clean towel or plastic wrap, and let it rise in a warm spot until doubled in size, about 1 to 1 ½ hours.
Punch down the dough and shape it into a loaf. Place it into a greased 9×5-inch loaf pan.
Cover and let rise again until the dough rises just above the edge of the pan, about 30–45 minutes.
Preheat your oven to 375°F (190°C). Bake the bread for 30–35 minutes, or until golden brown and it sounds hollow when tapped.
Remove from the pan and let cool completely on a wire rack before slicing.
Notes
-
For best results, use fresh yeast and measure flour accurately.
-
Don’t skip the second rise—it’s key to an airy texture.
-
Bread is fully baked when it reaches an internal temperature of 190–200°F.
-
You can substitute honey for sugar for a naturally sweet touch.
-
Brush the top with melted butter for a softer crust and richer flavor