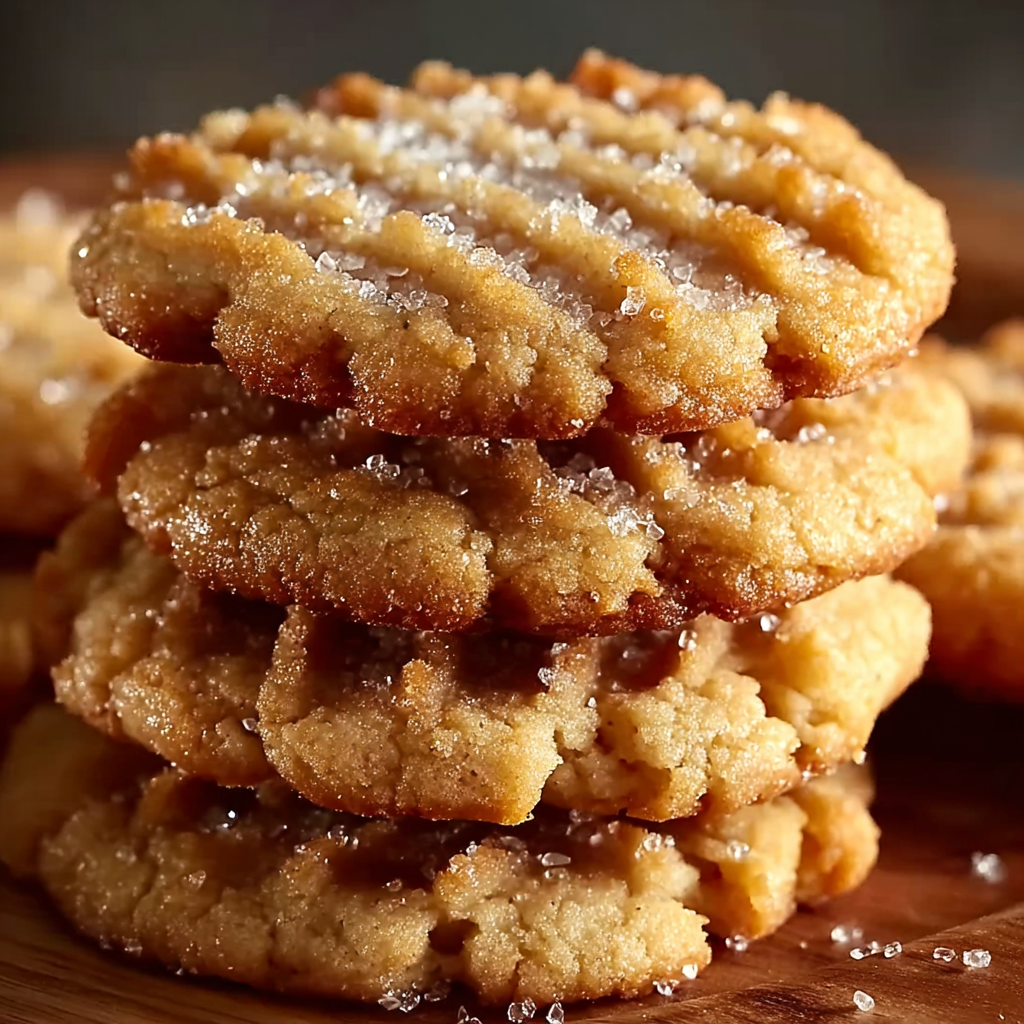
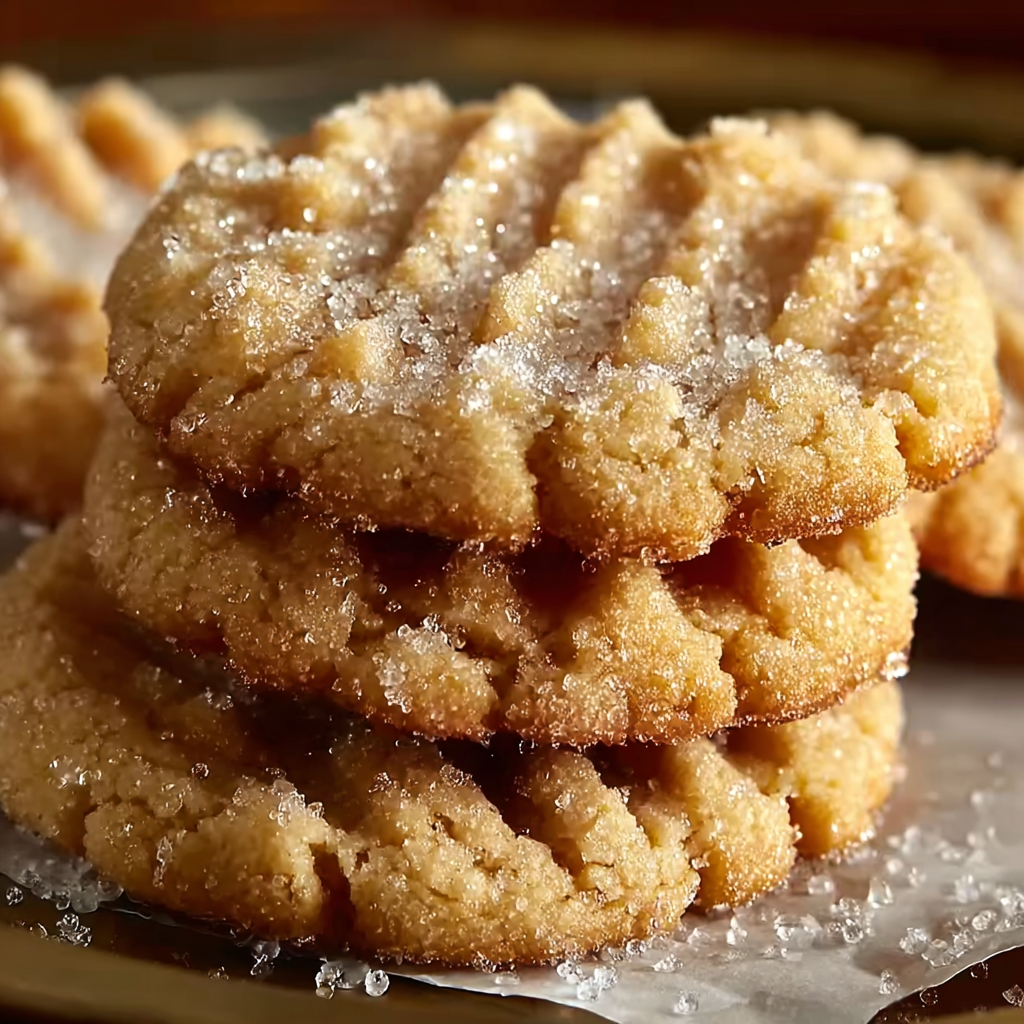
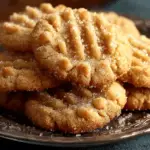
Washboard Cookies
Washboard cookies are a classic cookie recipe known for their nostalgic flavor, crunchy texture, and distinctive ridged appearance. These cookies are typically made with a rich blend of butter, brown sugar, and a mix of ingredients like rolled oats, coconut, and cornflakes, giving them a hearty yet sweet bite. The name “washboard” comes from the iconic pattern on the top of each cookie, usually created using a fork or a cookie press attachment.
This treat has stood the test of time thanks to its balance of soft chewiness and crisp edges. Though traditionally shaped by hand, using a cookie press has become an increasingly popular method for making uniform cookies quickly and efficiently. Whether you’re baking for a holiday cookie exchange or prepping snacks for the week, washboard cookies are easy to make and always crowd-pleasing.
One of the best things about these cookies is their flexibility. You can keep the classic flavor intact or introduce creative twists with new ingredients or textures. For example, using a cookie press not only speeds up the process but also improves presentation—especially helpful when preparing cookies for gifting. According to the Wikipedia page on cookie presses, cookie presses are designed to dispense consistent shapes, making them ideal for decorative baking. Additionally, rolled oats contribute to the cookie’s chewy center and have long been a staple in wholesome dessert recipes like oatmeal cookies.
If you’re concerned about cookie nutrition, you’ll be glad to know that it’s possible to make small adjustments to influence cookie calories without losing flavor. For example, replacing butter with alternatives like coconut oil or reducing sugar slightly can create a lighter version. You can read more about the nutritional content of traditional oatmeal cookies in this Wikipedia article, which provides insight into caloric breakdown and common ingredients.
This guide will cover everything from choosing the best flour to maintaining ideal dough consistency, along with simple tweaks to control calories. Whether you’re an experienced baker or just getting started, you’ll find practical tips and trusted advice to help you perfect this timeless cookie.
Why Use a Cookie Press for Washboard Cookies
Using a cookie press for washboard cookies offers more than just aesthetic appeal — it’s a practical, efficient way to streamline your baking while ensuring a consistent, professional look. Traditional methods of shaping cookies with a fork or spoon can be time-consuming, especially when you’re baking in bulk. A cookie press eliminates this by creating evenly sized cookies with the perfect washboard texture in seconds.
There are several key reasons why home bakers and professionals alike are turning to cookie presses for this classic recipe:
-
Uniformity: Every cookie comes out the same size and thickness, which ensures even baking. This is especially important when you’re watching cookie calories — uniform size means consistent nutritional values.
-
Speed: Pressing out cookies is faster than hand-shaping, especially when you’re making large batches for holidays or gifts.
-
Clean Finish: A cookie press creates smooth edges and precise patterns that elevate presentation, perfect for gifting or holiday cookie packaging.
According to the Wikipedia page on cookie presses, these tools are traditionally used for spritz cookies but are just as effective for any dough with the right consistency. In this recipe, the dough’s blend of all-purpose flour, oats, and butter creates a pliable yet firm texture that works well in a press — if needed, slight tweaks like chilling the dough can help maintain optimal consistency.
Pinterest is also full of inspiration for classic cookie recipe boards that show how bakers have used cookie presses creatively, from holiday patterns to elegant ridges. A properly shaped washboard cookie can make a simple dessert look bakery-quality, especially when packaged with care, as shown in holiday cookie packaging ideas.
Beyond appearance, the press ensures that your cookies bake evenly and don’t spread unpredictably — a common issue when shaping manually. If your goal is to produce a reliable batch of classic cookies every time, especially for gifting or selling, the cookie press is a game changer.
Classic Washboard Cookies Recipe (Step-by-Step)
Creating classic washboard cookies is simple, satisfying, and perfect for any baker looking to master a reliable go-to recipe. The ingredients combine wholesome textures and nostalgic flavors — a balance of rolled oats, shredded coconut, and crushed cornflakes all blended into a buttery dough. Below is a step-by-step breakdown to help you make the perfect batch.
Ingredients You’ll Need
-
1 cup unsalted butter, softened
-
1 cup brown sugar, packed
-
1 large egg
-
1 tsp vanilla extract
-
2 cups all-purpose flour
-
2 tsp baking powder
-
½ tsp salt
-
1 cup rolled oats
-
½ cup shredded coconut
-
½ cup crushed cornflakes
Each of these ingredients serves a purpose. The butter creates a rich base, brown sugar adds a hint of molasses-like depth, and the oats and coconut contribute to the chewy texture. You can explore the properties of baking powder and how it helps cookies rise just slightly, resulting in the soft yet firm finish that washboard cookies are known for.
Preparation Steps
-
Preheat the oven to 350°F (175°C). Line a baking sheet with parchment paper for an easy release and even browning.
-
In a large mixing bowl, cream together softened butter and brown sugar until light and fluffy. This step is essential for incorporating air and achieving the right texture.
-
Add the egg and vanilla extract, mixing thoroughly until combined.
-
In a separate bowl, whisk together flour, baking powder, and salt. Gradually mix the dry ingredients into the wet ingredients, stirring just until combined — avoid overmixing to prevent tough cookies.
-
Stir in oats, shredded coconut, and crushed cornflakes using a spatula or wooden spoon until evenly distributed.
-
If you’re using a cookie press, load the dough into the barrel following manufacturer instructions. Otherwise, roll dough into tablespoon-sized balls.
-
Place cookies on the baking sheet, leaving some space between them.
-
Flatten each cookie slightly using a fork or cookie press disk to create the washboard pattern.
-
Bake for 10–12 minutes, or until edges are golden brown. The centers will continue to set after baking.
-
Allow cookies to cool on the baking sheet for 5 minutes, then transfer them to a wire rack to cool completely.
Helpful Tips for Success
-
Room-temperature butter is key to a fluffy dough. If the butter is too cold or too melted, your cookies may spread too much or lose texture.
-
For a refined finish, use a cookie press with a ridged disk to mimic traditional washboard lines. If you’re making cookies for gifting, refer to Pinterest baking hacks for easy presentation ideas.
-
The dough should be firm yet pliable — soft enough to press, but not sticky. If needed, chill the dough for 10–15 minutes before using.
This foundational recipe sets the stage for delicious customizations and nutritional adjustments, which we’ll explore in upcoming sections. You can also look into types of flour to understand how different grains can alter texture and flavor for future variations.
Cookie Dough Consistency Tips
Achieving the right cookie dough consistency is critical for making perfect washboard cookies, especially when using a cookie press. The dough should be smooth, pliable, and firm enough to hold its shape, but not too stiff or too soft. A well-balanced dough ensures that each cookie presses cleanly and bakes evenly without spreading too much or crumbling.
What Should the Dough Feel Like?
-
Ideal texture: The dough should feel soft but not sticky. When you press it between your fingers, it should hold its shape without being greasy or dry.
-
For pressing: If you’re using a cookie press, the dough must be soft enough to pass through the barrel but firm enough to maintain the pattern. If the dough is too dry, it may crumble or resist pressing.
Common Dough Issues and Fixes
-
Too sticky?
Add 1 tablespoon of all-purpose flour at a time until the dough is easier to handle. Sticky dough will clog your cookie press and prevent clean shaping. -
Too dry or crumbly?
Mix in 1 teaspoon of milk or a bit more softened butter to bring moisture back. Overmixing or over-measuring flour can cause this issue. -
Too soft or warm?
Chill the dough in the refrigerator for 10–15 minutes before pressing. This improves handling and shape retention, especially if your kitchen is warm.
For more insight into types of flour and how they affect dough behavior, the Wikipedia entry on flour provides a helpful overview. The protein content in flour plays a role in the final texture—all-purpose flour is a reliable middle ground for cookies that need to be soft but sturdy.
Pinterest boards such as classic cookie recipes for holidays also highlight how dough texture impacts cookie appearance. Consistency isn’t just about function — it also influences visual appeal, especially for cookies that are packaged as gifts or shared at events.
Perfecting your dough’s consistency might take a batch or two, but once you’ve got it dialed in, the rest of the baking process becomes much easier and more predictable.
Baking Flour Tips for Perfect Washboard Cookies
Choosing the right flour and using it properly is one of the most important steps in getting perfect washboard cookies. While this recipe uses all-purpose flour, understanding how flour affects texture, moisture, and structure will give you better control over your cookies — whether you’re sticking with the classic or making adjustments for health or flavor.
Why All-Purpose Flour Works Best
-
All-purpose flour has a balanced protein content (usually around 10–12%), which gives washboard cookies just the right amount of structure while keeping them tender.
-
It allows the cookies to hold their shape during baking, especially when using a cookie press for uniform shapes.
According to Wikipedia’s guide on types of flour, different flours contain varying levels of protein and gluten. This affects how chewy or crumbly your final cookie will be.
Measuring Flour Accurately
-
Use the scoop-and-level method: spoon flour into a measuring cup and level it off with a knife. Avoid packing it in, which can lead to dry, dense cookies.
-
For best results, use a kitchen scale. 1 cup of all-purpose flour weighs about 120 grams.

Alternative Flours You Can Try
If you’re looking to experiment or make your cookies healthier, here are a few options:
-
Whole wheat flour: Adds a nuttier taste and more fiber but may make the cookies more dense. Start by replacing 25–50% of the all-purpose flour.
-
Almond flour: Great for a low-carb version, though it produces softer cookies. Combine it with a small amount of coconut or oat flour to maintain structure.
-
Oat flour: Enhances the oatmeal cookie feel and adds softness, though the cookies may spread more.
Keep in mind that switching flours can affect your dough’s texture, so you may need to adjust other ingredients like butter or liquids. You’ll find examples of creative flour swaps in Pinterest baking hacks that show how to maintain balance while experimenting with healthier options.
Using the right flour — and the right amount — is key to producing classic cookies that bake evenly, taste great, and keep their signature washboard texture.
Understanding Cookie Calories
If you’re paying attention to cookie calories, washboard cookies offer a balanced treat — indulgent yet not overly heavy. While packed with flavor and texture from butter, oats, and coconut, there are plenty of ways to manage calorie count without compromising on taste or appearance.
How Many Calories Are in a Washboard Cookie?
A standard washboard cookie (1 tablespoon dough) contains approximately 90–110 calories, depending on size and ingredient proportions. Key contributors include:
-
Butter: A full cup contributes around 1,600 calories to the batch.
-
Brown sugar: Adds sweetness and moisture but also contributes about 800 calories.
-
Coconut and oats: Add fiber and texture, each with about 150–200 calories per half-cup.
For a batch of 36 cookies, that averages out to just under 100 calories each.
You can find a breakdown of general cookie calories and how ingredients affect the total in this Wikipedia article, which outlines how caloric content is calculated and tracked.
Why Calorie Awareness Matters
-
Portion control: Using a cookie press ensures even sizes, helping with accurate calorie tracking.
-
Ingredient swaps: You can reduce calories significantly by tweaking just a few components.
Pinterest features several baking hack boards that illustrate how to adjust recipes for lighter results without sacrificing flavor or texture.
Understanding what drives the calorie count in your cookies allows you to adjust based on your dietary goals — whether that means cutting down sugar, choosing leaner fats, or increasing fiber. These changes will be covered in the next section on low-calorie and healthy swaps.
Low-Calorie and Healthier Ingredient Swaps
If you’re looking to lighten up your washboard cookies or make them more nutritious, small ingredient swaps can go a long way. The key is to substitute without losing the signature texture and flavor that make these cookies classic.
Butter Alternatives
-
Coconut oil: Offers a slightly tropical flavor and is plant-based. Use in equal parts for butter.
-
Greek yogurt: Substitute up to ½ cup for butter to cut fat and add protein. Helps retain moisture.
Sugar Swaps
-
Coconut sugar: Lower on the glycemic index but maintains a caramel flavor similar to brown sugar.
-
Maple syrup or honey: Natural alternatives that sweeten effectively. Reduce other liquids slightly if using syrups.
Explore sweetener profiles in Pinterest boards that offer visual guides for sugar alternatives.
Flour Upgrades
-
Almond flour: Reduces carbs and adds a nutty richness.
-
Oat flour: Adds fiber and keeps the oatmeal cookie essence.
These alternatives may slightly change texture, so make small test batches before committing to a full swap. Understanding flour differences — as explained in the Wikipedia flour guide — helps tailor your cookies without unwanted surprises.
Reduce Portion Size
-
Use smaller press disks or reduce the dough amount per cookie for built-in calorie control.
-
Label calorie amounts per serving if gifting or sharing with calorie-conscious friends.
These healthy tweaks allow you to enjoy classic cookies guilt-free and can even enhance the flavor or texture in new ways.
Flavor Variations on the Classic Recipe
One of the most enjoyable aspects of making washboard cookies is how easy they are to customize. Once you’ve mastered the classic flavor, try adding your own twist with mix-ins or flavor enhancers.
Popular Add-ins
-
Mini chocolate chips for sweetness and gooey texture
-
Dried cranberries for tartness and color
-
Chopped walnuts or pecans for a satisfying crunch
Flavor Boosters
-
Cinnamon or nutmeg: A small pinch transforms the cookie into a cozy fall treat.
-
Almond extract: Swaps easily with vanilla and adds depth.
-
Zest of lemon or orange: Brightens the flavor and balances the sweetness.
Explore combinations like coconut + white chocolate or oats + raisins to mimic other beloved cookie profiles. Boards like Pinterest’s classic holiday cookies offer visuals for pairing flavors with your favorite base dough.
With such versatility, your washboard cookies can suit any season, event, or dietary need while still honoring their traditional roots.
Tips for Gifting or Batch Baking Washboard Cookies
Whether you’re prepping for the holidays or making cookies for an event, washboard cookies are ideal for batch baking and gifting. Their classic flavor, crisp ridges, and sturdy texture make them perfect for packaging and transport.
Scaling Your Recipe
-
Double or triple the recipe for large events — just keep dough chilled between batches.
-
Use a stand mixer to handle larger quantities of dough efficiently.
-
Consider using two cookie presses to speed up shaping if you’re baking with others.
Storing and Freezing
-
Store in an airtight container at room temperature for up to 5 days.
-
Freeze unbaked dough in pre-portioned scoops for up to 2 months.
-
Fully baked cookies freeze well if separated with parchment.
Pinterest boards with holiday cookie packaging ideas show how to dress up cookies with seasonal flair — cellophane bags, ribbons, boxes, or tins.
Presentation Tips for Gifting
-
Stack cookies neatly in rows and tie with food-safe string or twine.
-
Include a handwritten label with flavor notes and storage instructions.
-
Mention any special ingredients or allergy info if applicable.
This extra effort transforms a simple treat into a thoughtful, personal gift that everyone appreciates.
Common Baking Issues & Fixes for Washboard Cookies
Even the most experienced bakers occasionally run into problems. Here are the most common washboard cookie issues — and how to fix them.
Cookies Spread Too Much
-
Cause: Butter was too soft or dough too warm.
-
Fix: Chill dough for 10–20 minutes before baking.
Cookies are Too Crumbly
-
Cause: Too much flour or overbaking.
-
Fix: Use precise measurements and reduce baking time by 1–2 minutes.
Cookie Press Not Releasing Dough
-
Cause: Dough too dry or sticky.
-
Fix: Adjust with milk (if dry) or flour (if sticky) until dough is smooth.
Washboard Pattern Isn’t Showing
-
Cause: Dough too soft or flattening too much in the oven.
-
Fix: Chill dough and press slightly deeper to define the ridges.
Refer to baking powder tips to better understand how leavening agents influence spread and rise.
With these quick fixes, you’ll be able to troubleshoot on the fly and keep your cookies consistent every time.
FAQs – People Also Ask
Can I use a cookie press for oatmeal-based doughs?
Yes, as long as the dough is pliable and not overloaded with large mix-ins. If using oats, make sure they are finely rolled to pass easily through the press. Refer to the rolled oats Wikipedia article for distinctions between oat types.
What’s the best flour to use for crispy cookies?
All-purpose flour is versatile, but if you want extra crispiness, blend it with a small amount of rice flour. This combination reduces moisture for a firmer bite. You can read more about flour types here.
Are washboard cookies suitable for gluten-free baking?
Yes, with the right flour substitute. Almond or oat flour works best, but you may need to add a binding agent like xanthan gum. Adjust liquids slightly to compensate for different absorption rates.
How do I reduce calories in cookie recipes without losing flavor?
Use swaps like Greek yogurt for butter, coconut sugar instead of brown sugar, and smaller portion sizes. See examples in Pinterest healthy cookie recipes.
Why do my cookies flatten too much when baked?
Usually due to overly warm dough or soft butter. Chill your dough before baking and avoid overmixing. Baking sheets without parchment can also cause spread — always line with paper for best results.
PrintWashboard Cookies Recipe Guide with Baking Flour Tips and Cookie Calories
These classic washboard cookies blend chewy oats, toasted coconut, and buttery cornflake crunch into a nostalgic treat. Shaped using a cookie press or fork for that signature ridged finish, they bake golden and crisp on the edges with soft, hearty centers. Perfect for holiday gifting, afternoon snacks, or freezing for later — they’re as practical as they are delicious.
- Author: Clara
Ingredients
- 1 cup unsalted butter, softened
- 1 cup brown sugar, packed
- 1 large egg
- 1 tsp vanilla extract
- 2 cups all-purpose flour
- 2 tsp baking powder
- ½ tsp salt
- 1 cup rolled oats
- ½ cup shredded coconut
- ½ cup crushed cornflakes
Instructions
Preheat your oven to 350°F (175°C) and line a baking sheet with parchment paper.
In a large mixing bowl, cream together the softened butter and brown sugar until light and fluffy.
Add the egg and vanilla extract, mixing well to combine.
In a separate bowl, whisk together the flour, baking powder, and salt. Gradually add the dry ingredients to the butter mixture, stirring until just combined.
Stir in the oats, shredded coconut, and crushed cornflakes.
Roll the dough into tablespoon-sized balls and place them on the prepared baking sheet.
Flatten each cookie slightly using a fork to create a washboard pattern.
Bake for 10-12 minutes, or until the edges are golden brown.
Allow the cookies to cool on the baking sheet for 5 minutes before transferring to a wire rack to cool completely.
Enjoy your homemade washboard cookies! Let me know if you’d like to adjust or flavor them further.
Notes
-
Make sure butter is truly softened, not melted.
-
Use finely crushed cornflakes for easier shaping.
-
Chill dough if using a cookie press and it feels sticky.
-
Store at room temperature up to 5 days or freeze for up to 2 months.
-
Add spices or nuts for a custom flavor twist.
-
Great with tea, coffee, or crumbled over ice cream.
-
For lower calories, reduce butter slightly and use coconut sugar.
-
Use scoop-and-level method for flour to prevent dryness.