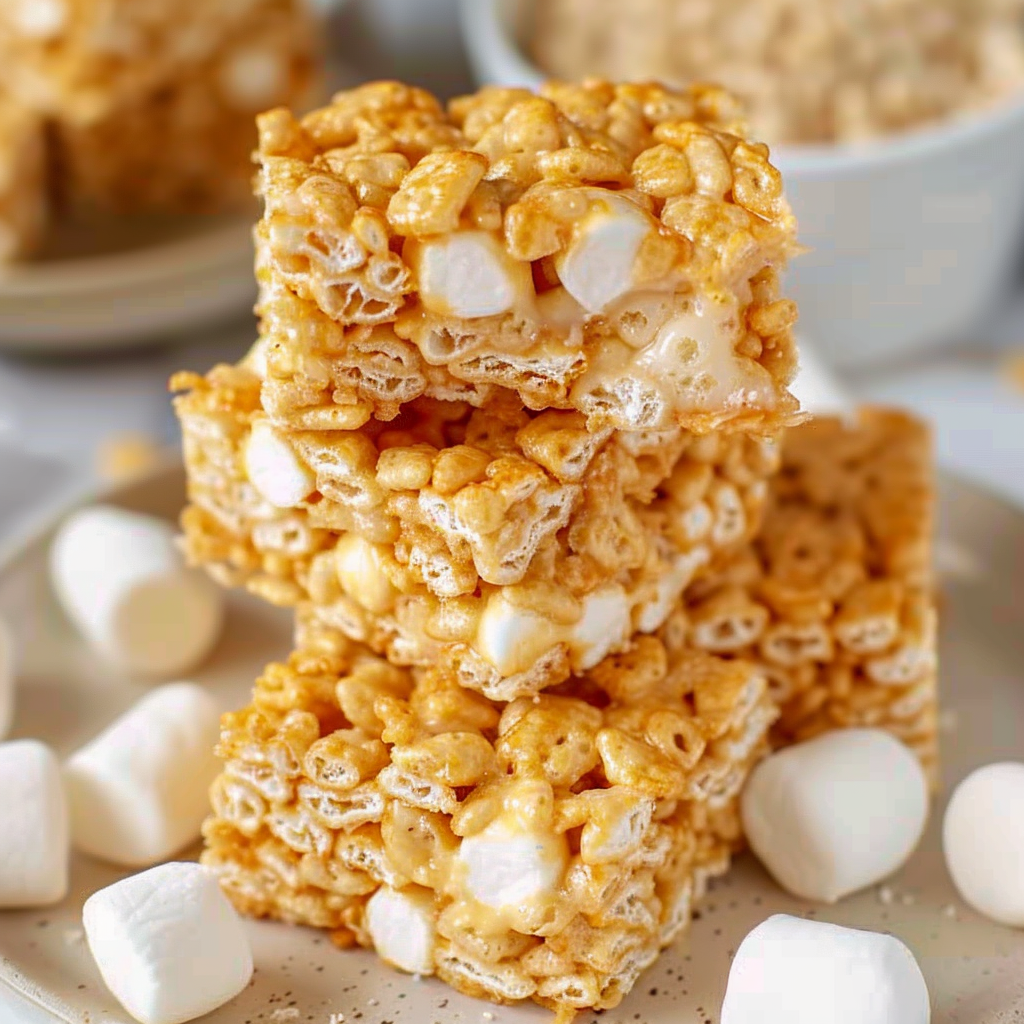
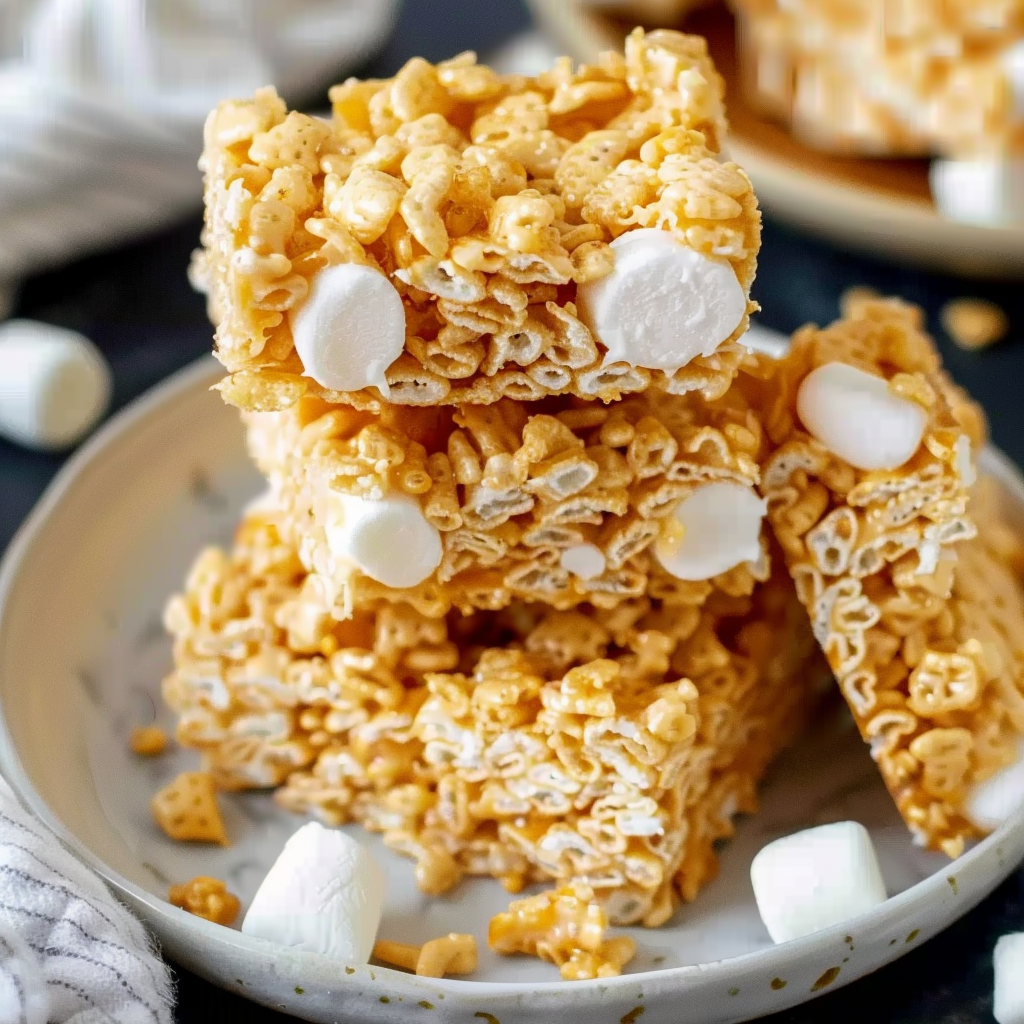
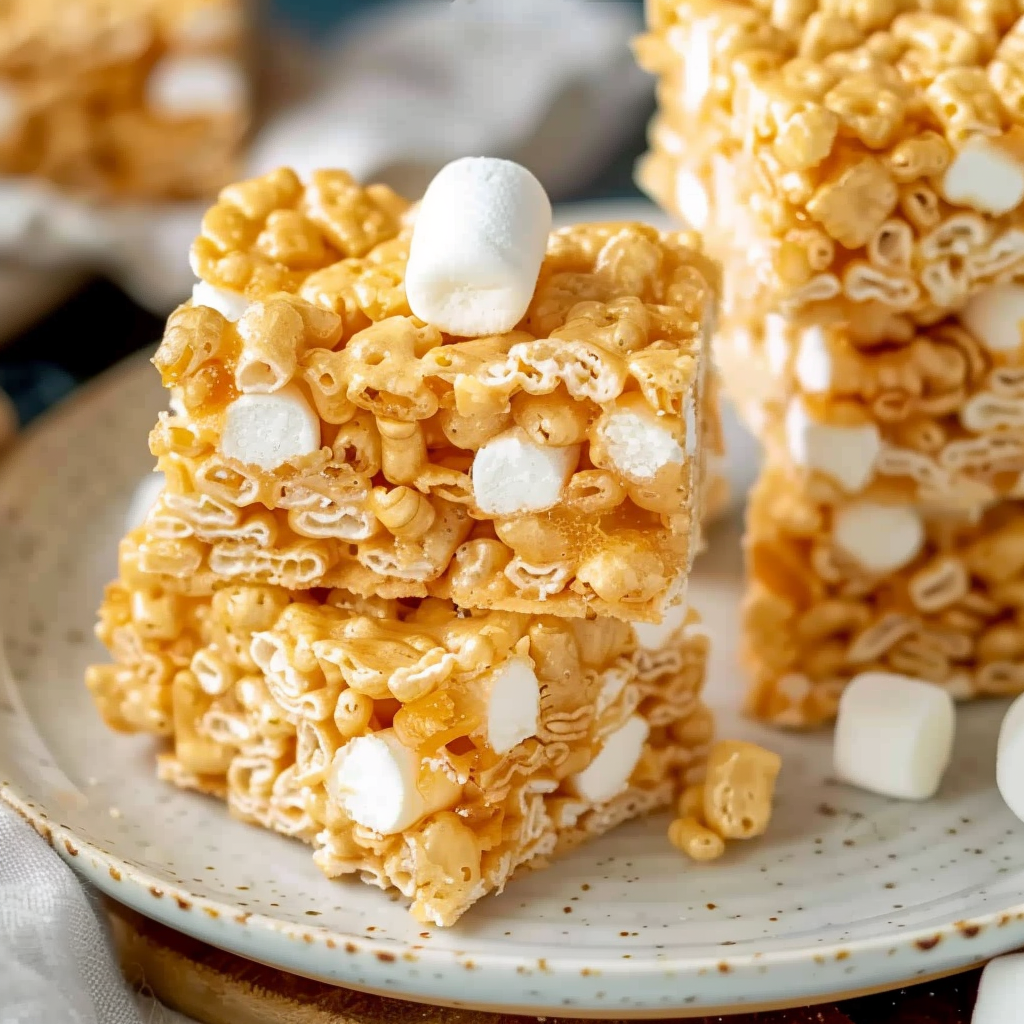
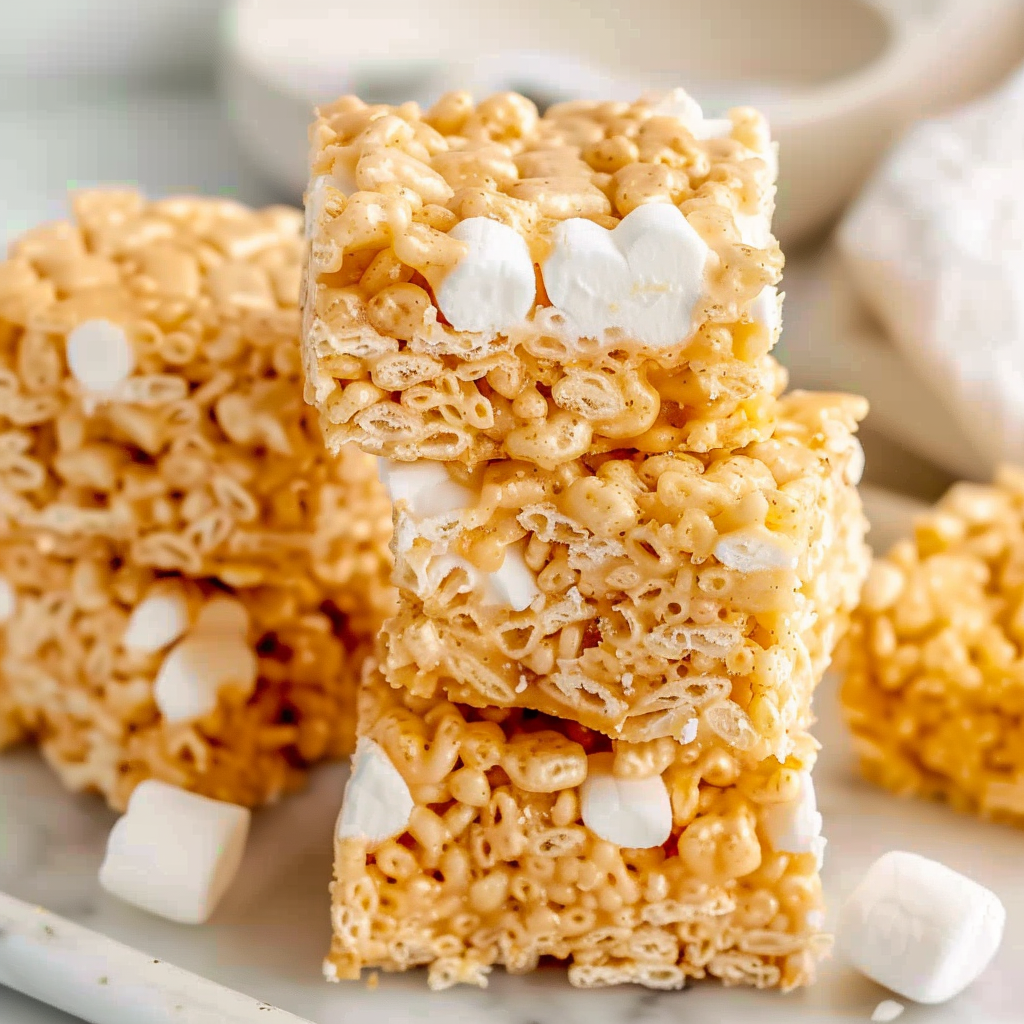
The Ultimate Chewy Marshmallow Squares
There’s something timeless and irresistibly comforting about a pan of chewy Rice Krispie treats. Whether you’re revisiting nostalgic flavors from childhood or whipping up a quick dessert for a party, these marshmallow squares deliver every time. With just a handful of ingredients—Rice Krispies cereal, mini marshmallows, and butter—you can create a dessert that’s not only quick but also endlessly customizable.
These treats are especially beloved for their perfect texture: slightly crispy, deliciously gooey, and just the right amount of sticky. They’re ideal for every occasion, from lunchbox snacks to festive bake sales. And when you make them the ultimate way—enhancing the flavor with a hint of vanilla extract or adding colorful candies for a seasonal twist—they transform from basic to brilliant. Their no-bake nature also makes them a go-to for busy parents and beginner bakers alike.
Over the years, variations like Halloween Rice Krispie Treats have added a fun twist to this classic. You can even explore indulgent upgrades like Salted Caramel Krispie Treats that mix sweet and salty for a grown-up version of this kid-favorite. Looking to dive deeper into where these chewy bars began? The history of Rice Krispie Treats reveals that they were originally invented in 1939 by Kellogg’s employees—proof that this treat has stood the test of time.
Today, their popularity spans generations, evolving from a basic snack to a Pinterest-worthy dessert. Browse trending easy party desserts or browse fall bake sale recipes and you’ll find dozens of takes on this marshmallow-filled favorite. And if you’re in search of the ultimate Rice Krispie Treats recipe, you’re in the right place. Stay tuned as we break down the history, ingredients, and flavor-packed techniques that will elevate your treats from good to unforgettable.
The Origin of Rice Krispie Treats: A Brief History
Before we dive into the ultimate chewy marshmallow squares, it’s worth knowing how this iconic dessert began. The Rice Krispie Treat wasn’t just a happy accident—it was a creative innovation born in the late 1930s. In 1939, Mildred Day and Malitta Jensen, two employees at Kellogg’s, invented the original Rice Krispie Treats recipe as a fundraising idea for the Camp Fire Girls organization. This simple combination of crisped rice cereal, melted marshmallows, and butter quickly captured hearts for its ease, taste, and fun texture. You can explore more about this sweet invention in the History of Rice Krispie Treats, where its origin story remains one of America’s most delightful culinary tales.
From that humble beginning, the recipe spread rapidly across households. Its popularity grew not only because it was quick and affordable, but also because it was a no-bake dessert—a rarity at the time. This simplicity remains its biggest charm. The treat became a symbol of homemade comfort, shared at school lunches, bake sales, and holiday parties. You can find similar no-bake dessert recipes that share the same spirit of ease and creativity.
By the 1950s, Rice Krispie Treats had become a cultural staple, featured in cookbooks and even in brand promotions. Over the decades, countless variations have emerged, from chocolate-dipped to Halloween-themed Rice Krispie Treats shaped like pumpkins. Modern creators have embraced colorful spins, like the Halloween desserts trending across Pinterest, often decorated with candy eyes or spooky icing.
As food trends evolved, bakers began experimenting with salted caramel, browned butter, and vanilla bean to create richer flavors while maintaining the original chewy-crispy texture. The introduction of natural food coloring and fun add-ins helped these treats adapt to every season and theme. Today, they’re not just a nostalgic bite—they’re a creative canvas for flavor innovation and festive decoration.
What Makes This the “Ultimate” Rice Krispie Treats Recipe?
Not all Rice Krispie Treats are created equal. While the classic version has only a few ingredients, small adjustments in technique and ingredient quality can turn ordinary into extraordinary. This section breaks down exactly why this is the ultimate recipe for chewy marshmallow squares—and how to achieve that perfect bite every time.
The key lies in ingredient ratios and preparation technique. The chewiness depends heavily on using the right amount of mini marshmallows to Rice Krispies cereal. In this recipe, the balance of 6 cups of cereal to a full 10-ounce bag (about 5½ cups) of marshmallows ensures a soft, gooey texture that holds its shape without becoming too firm.
Butter quality also plays a huge role. For rich flavor, use real, unsalted butter. Avoid margarine or butter substitutes, as they contain more water and less fat, which can make the final treats soggy or rubbery. Melting the butter slowly over low heat gives a smoother base and enhances richness. For those who like deeper flavor, browning the butter slightly before adding the marshmallows adds a nutty depth that elevates the entire dessert.
A splash of vanilla extract—though optional—is another flavor enhancer. It adds warmth and brings out the sweetness of the marshmallows. Learn more about this natural flavoring in the vanilla extract entry from Wikipedia. When mixed in just after removing the pot from heat, it preserves its full aroma without cooking off.
Another crucial tip is the mixing and pressing technique. Once the marshmallows are melted, you need to stir in the cereal quickly and evenly, before the mixture begins to cool. Pressing the mixture into the pan should be done gently. Overpacking compresses the air pockets, making the bars dense instead of light and chewy. To avoid sticking, use a buttered spatula or a piece of wax paper lightly coated with oil.
Texture is everything. The goal is to get that crispy yet chewy feel in every bite. Too much cereal makes them dry. Too little, and they won’t hold their shape. This is why it’s helpful to follow a tested ratio like the one in this ultimate recipe.
Online communities have embraced this approach. Scroll through kid-friendly Halloween snacks or easy party desserts, and you’ll find creators echoing these same techniques—rich butter, more marshmallow, gentle pressing—for that picture-perfect, gooey result.
Finally, one of the best parts of this recipe is its customizability. While the base remains simple, it’s easy to add layers of flavor or festive touches. From salted caramel swirls to chocolate drizzle or colorful sprinkles, this treat can be dressed up for any occasion while keeping its irresistible base.
Ingredient Breakdown & Substitutions
To achieve the ultimate Rice Krispie Treats, understanding each ingredient’s role is essential. While the recipe only calls for a few simple components, the quality, proportion, and timing of each make a significant difference in flavor and texture. Here’s a complete breakdown of each ingredient—plus smart substitutions and enhancements to match your flavor preferences or dietary needs.
Rice Krispies Cereal
The base of the treat is, of course, crisped rice cereal. While generic brands can work, using the original Kellogg’s Rice Krispies ensures consistent crispness and a neutral flavor that complements the sweetness of marshmallows and butter. The cereal should be fresh and stored in a sealed bag to prevent sogginess.
-
Substitutes: You can swap in cereals like Fruity Pebbles for a colorful twist or chocolate puffed rice cereal for a more indulgent version.
-
Tip: Check out the Fruity Pebbles version for inspiration on colorful variations.
Mini Marshmallows
Mini marshmallows are the glue that binds these squares together. They melt faster and more evenly than large ones. Using fresh marshmallows ensures the gooey, soft texture you want in a chewy marshmallow square.
-
Substitutes: Large marshmallows can work in a pinch. Just chop them roughly and measure by volume.
-
Flavor tip: Use flavored marshmallows (like strawberry or vanilla swirl) for a subtle twist. Learn more about their base ingredients in this article on marshmallows.
Butter
Butter not only adds flavor but also prevents sticking and balances the sweetness of the marshmallows. Use unsalted butter so you can control the salt level yourself.
-
Substitutes: Plant-based butter or coconut oil can be used for dairy-free versions. However, note that these will slightly alter the flavor.
-
Enhancement: Try browning the butter before adding marshmallows for a nutty, caramelized base.
Vanilla Extract (Optional)
While optional, pure vanilla extract enhances the overall flavor profile by adding warm, aromatic notes. Add it after melting the marshmallows, once the mixture is off the heat, to retain its full potency. Find out more about its production and uses in this vanilla extract guide.
-
Substitutes: Vanilla bean paste or almond extract (use sparingly) for a deeper or nutty flavor variation.
Optional Add-ins and Toppings
One of the joys of Rice Krispie treats is how adaptable they are. Add-ins let you tailor the bars to different holidays, flavor profiles, or personal preferences.
-
Chocolate chips: Stir in mini chips or drizzle melted chocolate over cooled treats.
-
Peanut butter: Mix in ¼ cup with the melted butter for a nutty boost.
-
Sprinkles or candy: Ideal for Halloween Rice Krispie Treats—add orange and black sprinkles or chopped candy corn.
-
Caramel drizzle: Perfect for the salted caramel krispie treats variation. Use melted soft caramel candies or store-bought caramel sauce. Learn about caramel and how it can enhance both taste and texture.
-
Food coloring: Use food coloring to dye the marshmallow mixture for themed parties—like orange for Halloween or pastel for spring.
For those planning festive treats, check out trending ideas on Halloween desserts or fall bake sale recipes to see how other bakers decorate and flavor their bars.
Whether you’re making a classic batch or customizing for a holiday event, these ingredient tips and swaps ensure your Rice Krispie Treats will be chewy, flavorful, and always crowd-pleasing.
Step-by-Step Recipe for Chewy Marshmallow Squares
Making the ultimate Rice Krispie Treats is quick and easy, but every step matters if you’re after the perfect chewy texture and buttery flavor. Here’s how to get it right every time.
1. Prepare Your Pan
Start by greasing a 9×13 inch baking dish with butter or non-stick spray. Alternatively, you can line it with parchment paper for easier removal and less cleanup.
-
Tip: Greasing your hands or a spatula with butter will help you press the mixture into the pan without it sticking.
2. Melt the Butter
In a large saucepan, melt 4 tablespoons of unsalted butter over low heat. Don’t rush this step—slow melting ensures the butter doesn’t brown or burn unless you’re intentionally going for a nutty flavor variation.
-
Optional: Brown the butter slightly for a deeper, richer taste, perfect for grown-up versions or salted caramel krispie treats.
3. Add Marshmallows
Once the butter has melted completely, add the entire 10 oz bag of mini marshmallows (about 5½ cups). Stir constantly until the marshmallows are fully melted and smooth.
-
If you’re coloring the mix for Halloween Rice Krispie Treats, now is the time to stir in a few drops of food coloring.
-
For flavor upgrades, now is the time to add 1 tsp of pure vanilla extract.
4. Stir in the Cereal
Remove the pan from the heat and quickly add 6 cups of Rice Krispies cereal. Stir until the cereal is evenly coated in the marshmallow mixture.
-
Work fast—once it starts to cool, it becomes harder to mix.
-
Tip: For ideas on colorful and fun flavor combinations, browse kid-friendly Halloween snacks.
5. Press into Pan
Using a buttered spatula or wax paper, press the mixture evenly into the prepared pan. Don’t press too hard—gentle pressure keeps the texture light and chewy instead of dense.
-
Optional toppings: chocolate chips, candies, sprinkles, or crushed cookies.
6. Cool and Cut
Let the treats cool at room temperature for 30–40 minutes. Once firm, use a sharp knife to cut them into squares.
-
For clean edges, use a buttered or lightly oiled knife.
-
For themed treats, consider cookie cutters or molds to create shapes like pumpkins or stars.
These chewy marshmallow squares are now ready to serve. Perfect for bake sales, holidays, or a quick dessert fix.
Halloween Rice Krispie Treats: A Festive Twist
Turning Rice Krispie Treats into Halloween-themed desserts is an easy way to get festive without extra fuss. These treats are perfect for school parties, trick-or-treat nights, or fall bake sales.
How to Add Halloween Flair
-
Color It: Add orange food coloring to the melted marshmallows before stirring in the cereal. This gives your treats a pumpkin-orange glow.
-
Shape It: Form into balls and press a small green candy on top to resemble pumpkins. Or use Halloween-shaped cookie cutters—bats, ghosts, or skulls.
-
Decorate It:
-
Press in candy eyes, chocolate chips, or Halloween sprinkles before the mix cools.
-
Drizzle with colored chocolate or black icing for a spooky touch.
-
Browse Halloween desserts and easy party desserts for inspiration.
These treats are just as chewy and delicious as the classic version but with added fun for the season. You can even package them individually for handouts or party favors.
Salted Caramel Rice Krispie Treats Recipe
Want to take your Rice Krispie Treats to the next level? Enter the salted caramel version—a decadent, sweet-and-salty spin that’s a hit with both kids and adults.
Ingredients
-
6 cups Rice Krispies cereal
-
4 tbsp unsalted butter
-
10 oz mini marshmallows
-
1 tsp vanilla extract
-
1 cup soft caramel candies or ½ cup caramel sauce
-
Flaky sea salt for topping
How to Make
-
Follow the classic steps: melt butter, add marshmallows, stir in vanilla, then cereal.
-
Add the soft caramel candies into the marshmallow mixture while melting, or drizzle caramel sauce over the finished treats.
-
Sprinkle with flaky sea salt immediately after pressing into the pan.
Learn more about what makes caramel so addictive in this caramel article.
The contrast of gooey caramel and light crunch makes this version ideal for adult gatherings, autumn parties, or gourmet bake sales.
Creative Flavor Variations to Try
The beauty of Rice Krispie Treats is their flexibility. Here are some delicious twists you can try beyond Halloween and salted caramel:
-
Chocolate Chip: Add mini chocolate chips after mixing the cereal (once it’s slightly cooled so they don’t melt).
-
Peanut Butter: Stir ¼ cup creamy peanut butter into the melted marshmallow mix.
-
Cookies & Cream: Add crushed Oreos right before pressing into the pan.
-
S’mores: Mix in graham cracker pieces and mini chocolate chunks.
-
Fruity Pebbles: Replace Rice Krispies with Fruity Pebbles for a colorful, fruity spin. Find inspiration on Pinterest.
Each of these variations keeps the base chewy and delicious, while adding new textures and flavors.
Storage Tips & Make-Ahead Advice
Proper storage keeps your chewy marshmallow squares fresh and tasty.
-
Room temperature: Store in an airtight container for up to 3 days. Layer with wax paper to avoid sticking.
-
Freezing: Freeze for up to 6 weeks, separating layers with parchment. Let them thaw at room temperature before serving.
-
Refresh tip: If treats start to harden, microwave a square for 5–10 seconds to soften.
These treats are perfect for making ahead of parties, bake sales, or busy weeks.
Common Mistakes to Avoid
Even a simple recipe like this has a few pitfalls. Here’s how to avoid the most common Rice Krispie Treats disasters:
-
Overheating the marshmallows: This makes treats hard and dry. Always melt on low heat.
-
Overpacking the pan: Pressing too firmly creates dense, brick-like bars.
-
Stale cereal: Make sure your Rice Krispies are fresh and crisp.
-
Skipping butter: It’s not just for flavor—it also improves texture and prevents stickiness.
Avoiding these mistakes ensures your Rice Krispie Treats stay soft, chewy, and delicious.
FAQ
Why are my Rice Krispie treats hard?
They were likely overcooked or the marshmallows were overheated. Melt ingredients on low heat and avoid pressing the mix too firmly into the pan.
How do you make Rice Krispie treats more chewy?
Use more marshmallows (at least 5½ cups for every 6 cups of cereal) and don’t overheat them. Gentle pressing also helps maintain chewiness.
Can I use large marshmallows instead of mini?
Yes, but chop them up and measure by volume, not by count. They may take slightly longer to melt.
How long should Rice Krispie treats sit before cutting?
Let them cool at room temperature for at least 30 minutes to firm up enough for clean slicing.
Can I freeze Rice Krispie treats?
Yes. Freeze between layers of wax paper in an airtight container for up to 6 weeks.
What happens if you put too much butter or marshmallow?
Too much butter can make them greasy. Too many marshmallows can make them too sticky to slice. Stick to the balanced ratio for best results.
Ultimate Rice Krispie Treats Recipe Chewy Marshmallow Squares

These Ultimate Rice Krispie Treats are irresistibly chewy, buttery, and packed with gooey marshmallow goodness. Perfect for parties, holidays, or a quick sweet snack, they’re easy to customize with flavors like salted caramel, chocolate chip, or fun Halloween decorations. This no-bake dessert comes together in under 15 minutes and stays soft and delicious for days. A guaranteed crowd-pleaser that both kids and adults will love.
- Author: Clara
Ingredients
- 6 cups Rice Krispies cereal
- 4 tbsp butter
- 1 (10 oz) bag mini marshmallows (about 5 ½ cups)
- 1 tsp vanilla extract (optional)
Instructions
Grease a 9×13 inch baking dish or line it with parchment paper.
In a large saucepan, melt the butter over low heat.
Add the marshmallows and stir constantly until completely melted and smooth.
Remove from heat and stir in vanilla extract, if using.
Quickly add the Rice Krispies cereal and stir until evenly coated.
Press the mixture into the prepared pan using a buttered spatula or wax paper. Flatten gently without compacting too much.
Let cool at room temperature for about 30 minutes, then cut into squares and serve.
Notes
-
For best texture, always use fresh cereal and fresh marshmallows.
-
Don’t rush the melting process—low and slow gives the smoothest results.
-
Try browning the butter for a nutty, rich depth of flavor.
-
Add-ins like chocolate chips, peanut butter, or crushed candy can elevate your treats.
-
Use food coloring and themed sprinkles for seasonal variations—great for Halloween, Christmas, or birthdays.
-
Keep a sheet of wax paper or a buttered spatula on hand to make pressing the mixture easy and mess-free.
-
Store leftovers in an airtight container for best freshness and flavor.