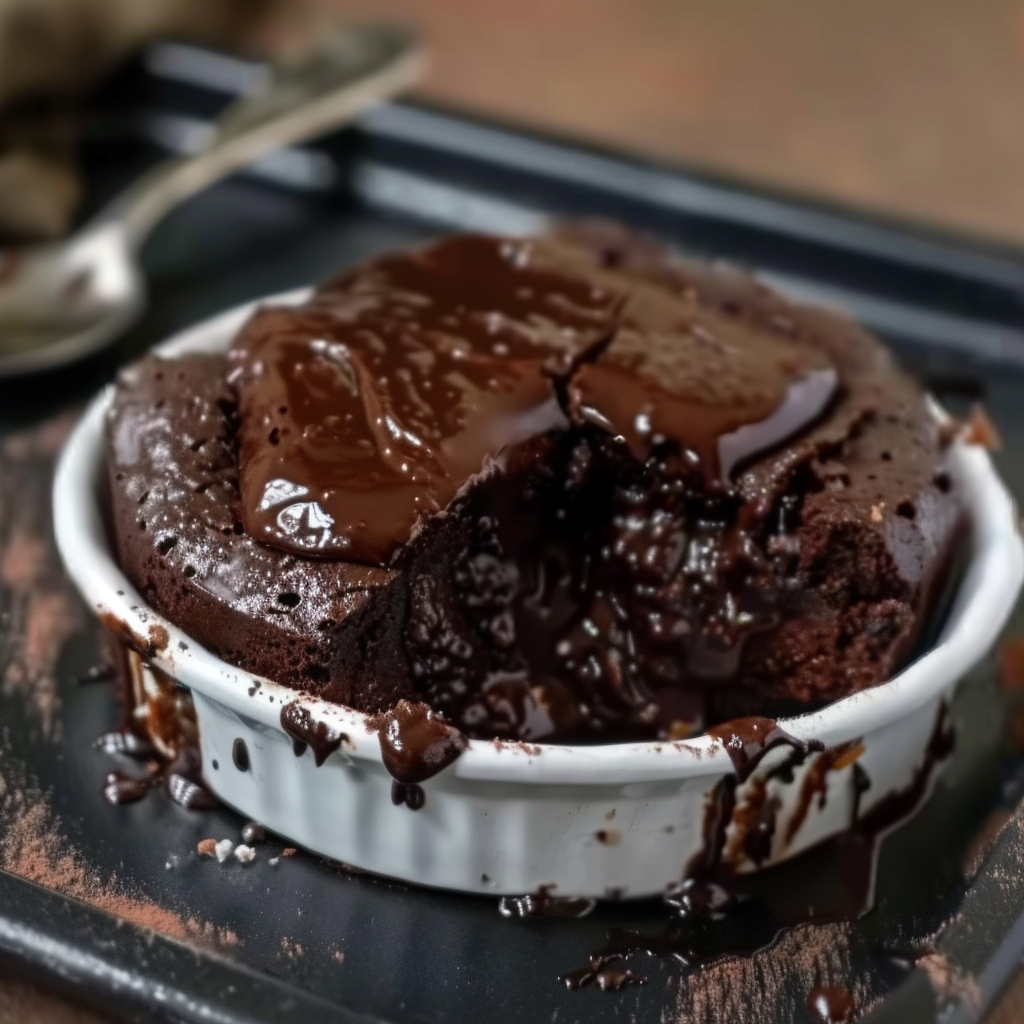
1.Ultimate Chocolate Lava Pudding Cake
There’s something irresistibly indulgent about a warm, gooey chocolate lava pudding cake that oozes rich molten chocolate from the center. Unlike traditional cakes, this decadent dessert offers an exciting contrast of textures—soft, moist cake on top, with a velvety, hot fudge pudding center beneath. This recipe combines the best of a molten lava cake with the self-saucing magic of a classic pudding cake, making it a standout treat for any occasion.
What sets this recipe apart is its simplicity. With just a handful of basic pantry ingredients, you can create a luxurious dessert that tastes like it came straight from a high-end bakery. The use of unsweetened cocoa powder delivers an intense chocolate flavor, while the unique layering technique forms a luscious, lava-like sauce during baking. And for those who love convenience, this can even be made in a slow cooker, making it ideal for busy weeknights or easy entertaining. If you’re curious about how slow cookers function in dessert-making, you can check out the Crock-Pot technique for a deeper understanding.
Whether you’re serving this at a holiday dinner or just craving something sweet on a Sunday night, this ultimate chocolate lava pudding cake guarantees satisfaction. It pairs perfectly with a scoop of vanilla ice cream or a dollop of whipped cream, elevating the experience into a true dessert masterpiece. For those who love experimenting with chocolate cake variations, you’ll find inspiration in this rich chocolate cake history, which sheds light on how cakes like this have evolved. Additionally, you can explore related serving ideas on this Pinterest board for molten cake desserts, offering creative ways to present your creation.
This dessert not only captures the heart of chocolate lovers but also caters to those who appreciate the fusion of flavor, texture, and nostalgia. It’s more than just a cake—it’s an experience.
2. What Makes This Chocolate Lava Cake Special?
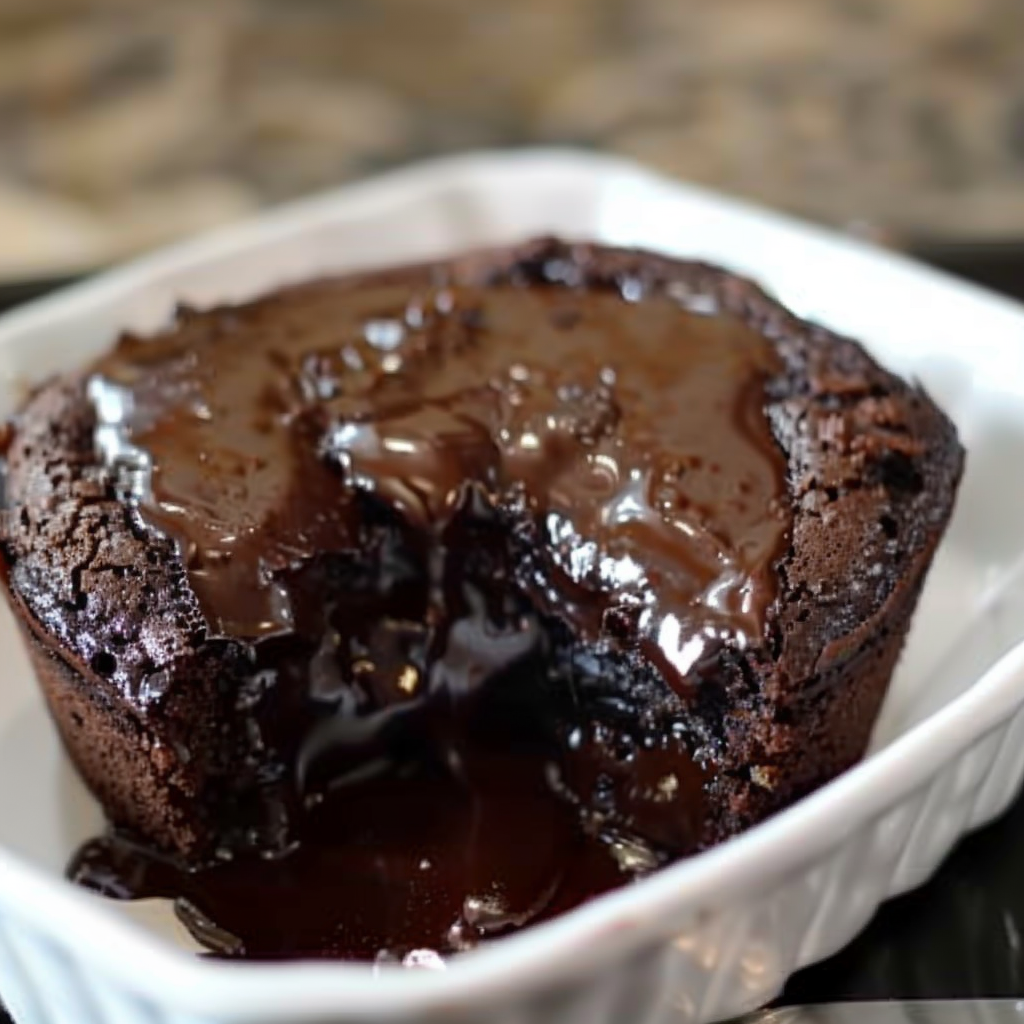
This chocolate lava pudding cake stands out not just for its gooey molten center, but also for how effortlessly it comes together. Unlike traditional lava cakes that rely on precise baking times and rich ganache fillings, this version uses a self-saucing method that naturally forms a hot fudge pudding layer beneath the soft cake top.
Here’s why this cake is truly unique:
-
Fudge-Forward Flavor: Thanks to a double dose of unsweetened cocoa powder—both in the batter and in the topping—this dessert delivers an intensely chocolatey experience without the need for melted chocolate bars or chips.
-
Moist, Tender Texture: The cake remains soft and moist due to the hot water poured on top before baking. This helps to form the sauce while gently steaming the cake as it bakes.
-
No Fancy Equipment Required: All you need is a basic mixing bowl, a whisk, and an 8-inch square baking dish. It’s also incredibly easy to adapt for the slow cooker, making it a perfect Crock-Pot dessert for holidays or potlucks. Find more slow cooker dessert ideas on this Pinterest slow cooker lava cake board.
-
Versatile and Customizable: This recipe forms the ideal base for flavor variations—add espresso for mocha depth, a peanut butter swirl for richness, or even fruit for contrast.
-
No Room for Error: Because the lava effect is created by the topping mix and hot water, there’s no worry about undercooking or the center failing to melt. The dessert naturally forms a pudding-like base, which makes it more forgiving than traditional lava cakes.
To understand the science behind the sauce, read about how traditional pudding desserts use layered ingredients and heat to form separate textures. This recipe leverages that same method to produce an oozy, chocolate lava center that defines indulgence.
If you’re looking for more dessert inspiration or ideas for flavor pairings, this Pinterest board on chocolate pudding cake offers a wide array of creative twists and toppings you can try next.
3. A Quick History of Lava Cakes & Pudding Cakes
The origins of molten chocolate lava cake trace back to the 1980s, when celebrated chef Jean-Georges Vongerichten claimed to have created it by accidentally underbaking a chocolate sponge cake. What was meant to be a mistake quickly became a beloved dessert trend—one that swept through fine dining restaurants and home kitchens alike. This dessert is known for its iconic warm center that flows out when cut, giving it the name “lava cake.” Learn more about its culinary background in this molten lava cake history entry.
However, the idea of a dessert with a soft center or sauce isn’t new. In fact, the self-saucing pudding cake dates back even further and has deep roots in American and British baking traditions. These cakes feature a clever layering of batter, sugar, and liquid that, when baked, creates a cake on top and a sauce or pudding beneath. The result? A comfort dessert that combines texture and temperature in the most satisfying way.
The beauty of this ultimate chocolate lava pudding cake lies in how it combines both dessert styles. It features the elegant presentation of a lava cake with the foolproof technique of a pudding cake. You don’t need ramekins or special baking molds; a standard baking dish or Crock-Pot will do the job.
By using pantry staples and a layered baking method, this hybrid dessert ensures consistent, rich results every time. For a look at the ingredients that give this cake its intense chocolate flavor, you can explore cocoa solids, which form the base of the unsweetened cocoa powder used here. Additionally, if you’re seeking dessert presentation tips, this Pinterest collection of ultimate chocolate lava cakes provides creative visual ideas to make your cake look as good as it tastes.
4. Ingredients Breakdown & Tips for Best Results
This fudge-rich chocolate lava pudding cake uses basic, easy-to-find ingredients, yet the result is a decadent, restaurant-style dessert with a molten center. Here’s a complete breakdown of what you’ll need and how to make the most of each component.
Dry Ingredients
-
1 cup all-purpose flour
Acts as the base structure for the cake. For a gluten-free version, substitute with a 1:1 gluten-free flour blend. -
¾ cup granulated sugar
Sweetens the cake without overpowering the cocoa. You can reduce the amount slightly if using a sweeter topping. -
2 tbsp unsweetened cocoa powder
Provides a deep chocolate flavor. Be sure to use high-quality cocoa with high cocoa solids content for a richer taste. -
2 tsp baking powder
Helps the cake rise and stay fluffy. -
¼ tsp salt
Enhances the chocolate flavor and balances the sweetness.
Wet Ingredients
-
½ cup milk
Contributes to the cake’s moisture. You can use any milk—dairy or non-dairy. Almond or oat milk work well in vegan versions. -
2 tbsp melted butter
Adds richness. For dairy-free, use melted coconut oil or vegan butter. -
1 tsp vanilla extract
Complements the chocolate and adds depth.
Topping Ingredients
-
½ cup brown sugar
Sweet and molasses-rich, it caramelizes during baking to create a fudgy sauce. -
¼ cup unsweetened cocoa powder
Doubles the chocolate intensity by combining with brown sugar for the sauce layer. -
1 ¼ cups hot water
This is poured over the top before baking—without stirring. It helps dissolve the topping and sink to the bottom, forming the hot pudding center. This classic technique is key in self-saucing pudding recipes.
Ingredient Tips for Success
-
Do not stir after adding the topping and water. This is crucial for forming the lava center.
-
Use freshly boiled water to ensure it mixes properly with the topping as it bakes.
-
Grease your baking dish well to prevent sticking.
-
For an elevated experience, consider adding chocolate chips, espresso powder, or even a spoonful of peanut butter into the batter before baking.
For those who enjoy exploring variations, the Pinterest collection of easy holiday desserts provides inspiration for festive additions or presentation ideas. Want more visual examples of topping techniques? Visit this Pinterest board on chocolate pudding cake ideas to spark creativity.
This cake is proof that a few simple ingredients, when layered and baked correctly, can create a luxurious molten dessert experience right from your own kitchen.
5. Tools You’ll Need
You don’t need fancy tools or professional equipment to make this chocolate lava pudding cake. In fact, that’s part of what makes it so appealing—it’s simple, accessible, and easy to prepare with standard kitchen items. Here’s what you’ll need:
-
Mixing bowls – One for the batter and one for the topping mixture. Use medium-sized bowls to give yourself room to mix thoroughly.
-
Whisk or spoon – A whisk is best for blending the batter evenly and preventing lumps.
-
Measuring cups and spoons – Precision matters here, especially for the cocoa and hot water.
-
8-inch square baking dish – This is the ideal size to ensure the cake cooks evenly and the pudding layer forms properly. A glass or ceramic dish is preferred.
-
Slow cooker (optional) – If using the Crock-Pot method, make sure it has a minimum capacity of 4 quarts. See more about how a slow cooker works if you want to understand why it’s perfect for gooey desserts.
-
Rubber spatula – Handy for spreading the batter evenly in the dish.
-
Serving spoon – For scooping and revealing that delicious molten center.
If you’re new to pudding cakes or want more visual guidance, check out this Pinterest board featuring lava cake ideas for photos of recommended bakeware and setup.
6. Nutritional Information (Estimated per Serving)
This recipe yields approximately 6 servings. Nutritional values are estimated based on standard ingredients and may vary depending on substitutions:
-
Calories: 310
-
Total Fat: 9g
-
Saturated Fat: 5g
-
Carbohydrates: 55g
-
Sugar: 35g
-
Protein: 3g
-
Fiber: 2g
-
Sodium: 210mg
For those interested in lowering sugar or fat, you can substitute the granulated sugar with a natural sweetener or reduce the butter by half and replace it with applesauce. If you’d like to explore more healthy swaps or vegan baking tips, you can get ideas from this Pinterest board featuring easy holiday dessert recipes.
7. Step-by-Step Instructions
Oven Method
-
Preheat oven to 350°F (175°C). Lightly grease an 8-inch square baking dish with butter or non-stick spray.
-
In a mixing bowl, whisk together flour, granulated sugar, 2 tablespoons cocoa powder, baking powder, and salt.
-
Add milk, melted butter, and vanilla extract. Mix until the batter is smooth.
-
Spread the batter evenly into the greased baking dish using a rubber spatula.
-
In a separate bowl, combine brown sugar and ¼ cup cocoa powder. Sprinkle this mixture evenly over the batter—do not stir.
-
Gently pour the hot water over the top of the mixture. Again, do not stir—this is key for the lava effect.
-
Bake for 35 to 40 minutes, or until the top appears set and the center jiggles slightly.
-
Remove from oven and let sit for 5 minutes to allow the sauce to settle.
Crockpot Method
-
Lightly grease the inside of your Crock-Pot with butter or spray.
-
Prepare batter and topping as described above.
-
Pour batter into the Crock-Pot, then sprinkle with the topping mixture.
-
Carefully pour the hot water over the top.
-
Cover and cook on HIGH for 2 to 2.5 hours or LOW for 3.5 to 4 hours.
-
The cake should puff up while a gooey pudding forms underneath.
-
Turn off the heat and allow it to cool slightly before serving.
For more visual reference, visit this Pinterest slow cooker lava cake guide to see step-by-step photos.
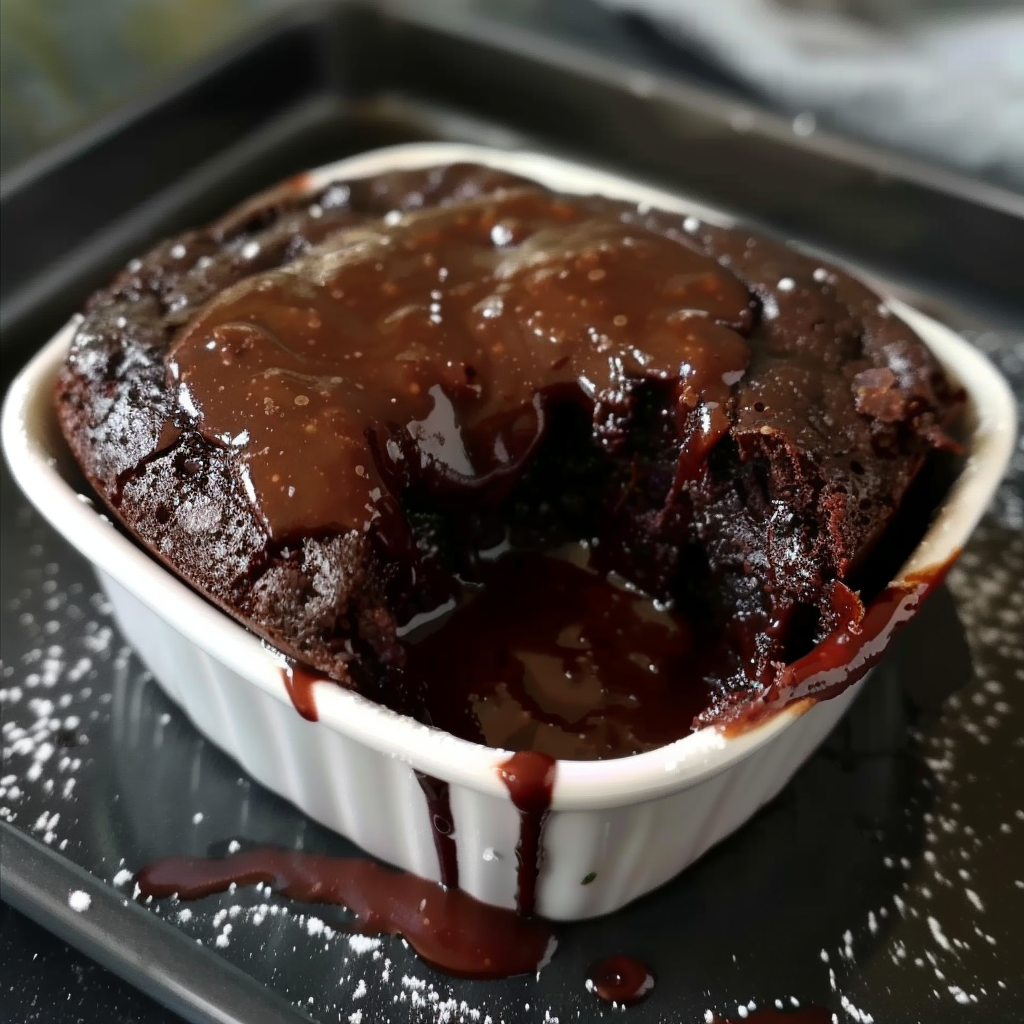
8. Serving Suggestions & Toppings
To truly elevate this dessert, serve it while warm. The contrast of the hot pudding and the cool topping adds another layer of indulgence:
-
Vanilla ice cream – A classic pairing that balances the richness of the chocolate.
-
Fresh whipped cream – Light and airy, perfect with the molten texture.
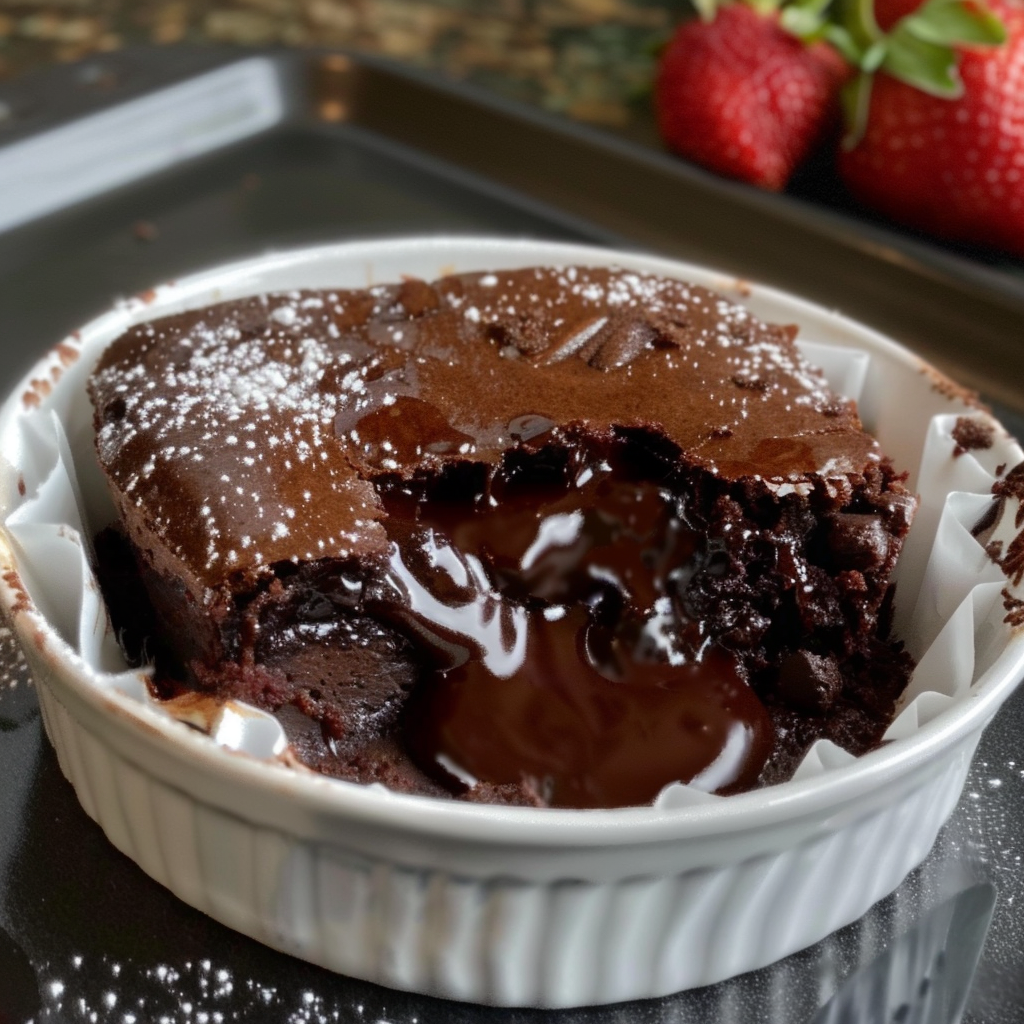
-
Fresh berries – Add raspberries or strawberries for a tart contrast.
-
Crushed nuts – Walnuts or pecans provide a satisfying crunch.
-
Powdered sugar dusting – For a polished presentation.
Explore more plating inspiration on this Pinterest board for molten cake serving tips.
9. Storage and Reheating Tips
Although best enjoyed fresh, this cake can be stored and reheated without losing its charm:
-
Storage: Keep leftovers in an airtight container in the fridge for up to 3 days.
-
Reheating: Microwave individual portions for 20–30 seconds until warm and gooey again.
-
Avoid freezing, as it alters the texture of the pudding layer.
For more cake preservation tips, check out this rich chocolate cake reference, which outlines common practices for storing moist cakes.
10. Flavor Variations and Add-ins
Make this recipe your own with simple tweaks and creative ingredients:
-
Mocha Lava Cake: Add 1 tsp instant espresso powder to the batter.
-
Peanut Butter Center: Swirl a tablespoon of peanut butter into the batter before baking.
-
Mint Chocolate: Add peppermint extract or crushed mint candies.
-
Raspberry-Chocolate Fusion: Drop small spoonfuls of raspberry jam into the batter before baking.
-
Caramel Drizzle: Top with warm caramel sauce just before serving.
-
Vegan Option: Use plant-based milk, dairy-free butter, and swap granulated sugar with coconut sugar.
For more recipe adaptations, get inspired by this Pinterest board on chocolate pudding cake ideas.
11. Common Mistakes to Avoid
Avoid these pitfalls to ensure your lava pudding cake comes out perfect every time:
-
Overbaking: This will dry out the cake and eliminate the gooey center. Always bake until just set.
-
Stirring the water into the batter: Resist the urge—this ruins the layering needed for the pudding effect.
-
Using cold water: Always use freshly boiled hot water for the topping to dissolve correctly and sink below.
-
Incorrect pan size: Too large a pan results in a thinner cake and not enough sauce.
-
Skipping the rest time: Letting it rest after baking helps the pudding thicken slightly.
12. FAQs
What is the difference between chocolate lava cake and molten cake?
They’re the same in concept—both feature a gooey, flowing center. “Lava cake” is a specific name, while “molten” describes the texture. Learn more from this molten lava cake article.
Can you make chocolate lava pudding cake in advance?
Yes. Bake ahead and store in the refrigerator. Reheat portions in the microwave before serving to revive the gooey texture.
Why doesn’t my lava cake have a molten center?
Overbaking or using a pan that’s too wide can prevent the pudding from forming properly.
Can I use boxed cake mix instead?
You can, but results vary. Adjust sugar, cocoa, and topping proportions to suit the mix.
Can I make this gluten-free or vegan?
Yes. Use gluten-free flour, plant milk, and vegan butter substitutes. The result is still rich and satisfying.
Ultimate Chocolate Lava Pudding Cake Recipe With Molten Center

This fudge-rich chocolate lava pudding cake is the perfect blend of indulgent and easy. With a warm, molten center and a soft, fluffy cake topping, it’s a show-stopping dessert that comes together with pantry staples and minimal prep. Whether made in the oven or slow cooker, this dessert guarantees rich chocolate flavor and a comforting finish. Serve it with a scoop of ice cream for the ultimate experience.
- Author: Clara
Ingredients
- 1 cup all-purpose flour
- ¾ cup granulated sugar
- 2 tbsp unsweetened cocoa powder
- 2 tsp baking powder
- ¼ tsp salt
- ½ cup milk
- 2 tbsp melted butter
- 1 tsp vanilla extract
For the topping:
- ½ cup brown sugar
- ¼ cup unsweetened cocoa powder
- 1 ¼ cups hot water
Instructions
Preheat your oven to 350°F (175°C).
In a mixing bowl, whisk together flour, granulated sugar, cocoa powder, baking powder, and salt.
Add milk, melted butter, and vanilla extract to the dry ingredients. Stir until combined and smooth.
Spread the batter evenly into a greased 8-inch square baking dish.
In a separate bowl, mix brown sugar and cocoa powder. Sprinkle this mixture evenly over the batter in the baking dish.
Carefully pour the hot water over the top. Do not stir.
Bake for 35-40 minutes, or until the center is almost set. The cake will rise to the top, and a gooey chocolate sauce will form underneath.
Let the cake cool for a few minutes before serving. Spoon out portions to reveal the lava-like pudding at the bottom. Serve warm.
Notes
-
Don’t skip the layering step: topping goes over the batter, then hot water is poured on top without stirring.
-
For a deeper chocolate flavor, use high-quality cocoa powder.
-
Let the cake rest after baking to allow the sauce to thicken slightly.
-
Recipe works beautifully in both oven and Crock-Pot versions.
-
Best enjoyed warm, immediately after baking.