Why Homemade Whipped Cream is a Game-Changer
If you’ve ever reached for a can of store-bought whipped topping and found it lacking in flavor or texture, it’s time to discover the only whipped cream recipe you’ll ever need. Making whipped cream at home is not only fast and simple—it delivers a freshness and richness that packaged versions just can’t match.
Unlike aerosol cans filled with stabilizers and artificial sweeteners, homemade whipped cream uses just a few real ingredients, resulting in a smooth, fluffy texture that’s perfect for topping desserts, beverages, and even breakfast favorites. Within minutes, you can whip up a bowl of luxurious cream that tastes better, holds its shape longer, and can be customized to suit your dish.
One of the biggest advantages of preparing your own whipped cream is the control you have over the ingredients. By starting with heavy cream—a high-fat dairy product used in both sweet and savory cooking—you’re building a strong foundation. Learn more about what makes heavy cream the ideal base for whipped toppings and why it’s essential to keep it cold during the whipping process.
If you’re interested in enhancing your presentation or adding unique flavors, homemade whipped cream is incredibly versatile. Whether you’re topping off a warm mug of coffee or dressing up a cake, a dash of vanilla extract or a spoonful of powdered sugar transforms it into a dessert essential. You can even explore creative visual ideas from Pinterest’s whipped cream desserts to get inspired.
In this guide, you’ll learn how to make whipped cream at home in minutes using ingredients you likely already have in your kitchen. From understanding the science behind the peaks to discovering the best ways to store your creation, this is your complete walkthrough to mastering one of baking’s most essential basics.

What is Whipped Cream?
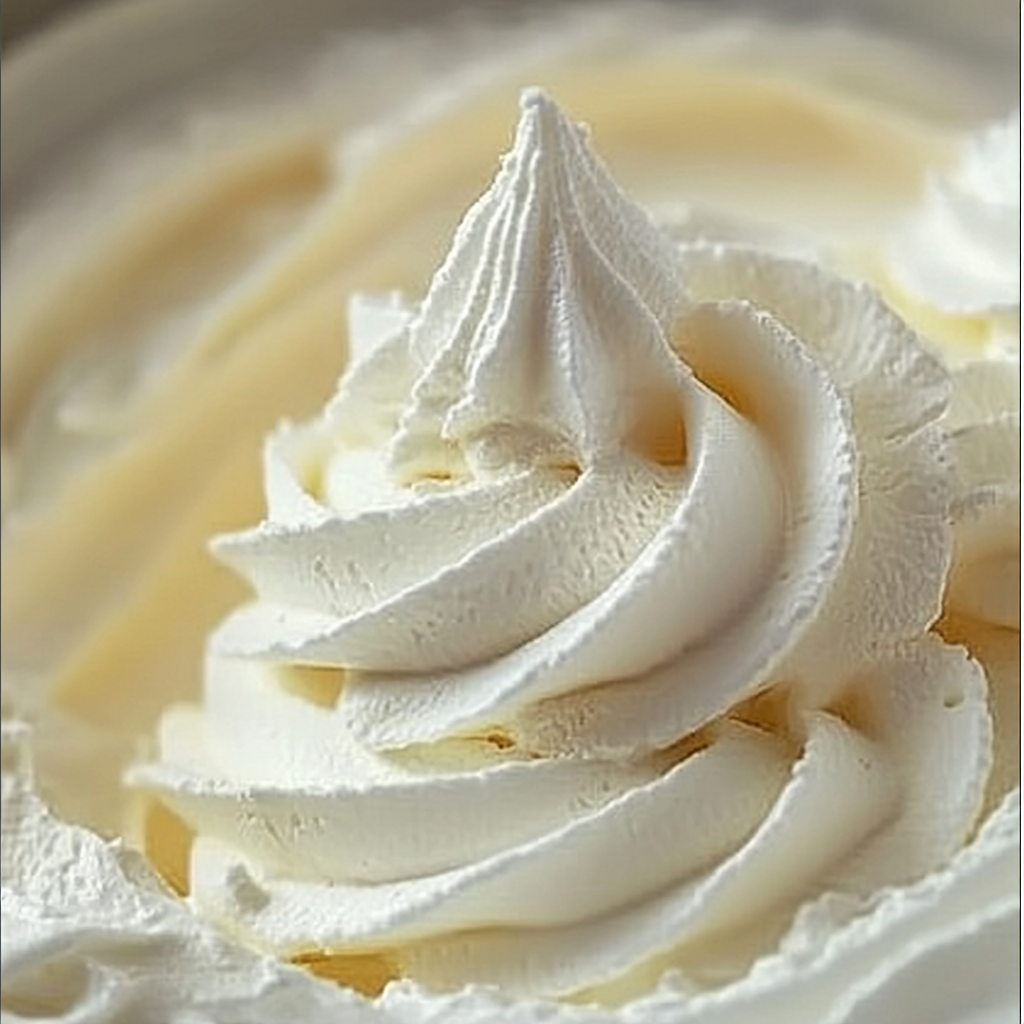
Whipped cream is a light, airy topping made by whipping heavy cream until it traps air and forms soft or stiff peaks. As the cream is whipped, the fat molecules surround the air bubbles, creating a stable structure that transforms the liquid into a fluffy, cloud-like consistency. It’s a staple in the world of desserts and can instantly elevate everything from pies and cakes to hot beverages and breakfast items.
This transformation from liquid to fluff relies on the cream’s fat content, which must be at least 30% for proper whipping. Products labeled as “heavy cream” or “heavy whipping cream” typically contain 36% fat or more, making them ideal for achieving that rich, stable texture. Learn more about the chemistry of emulsions from Wikipedia’s article on emulsions, which explains how fat and air interact during the whipping process.
Whipped cream shouldn’t be confused with other commercial substitutes like “whipped topping” or “Cool Whip.” These alternatives often contain hydrogenated oils, high fructose corn syrup, and artificial flavors. While they may offer shelf stability, they fall short in taste, texture, and nutritional quality. In fact, real whipped cream—especially when made at home—has a noticeably fresher flavor and creamier mouthfeel.
The versatility of whipped cream goes beyond just sweets. In some savory dishes, unsweetened whipped cream can be used as a light garnish or incorporated into sauces. But its most beloved role is as a finishing touch for classic desserts. You can even check out stunning ideas for presentation and serving on Pinterest’s homemade dessert toppings.
With such a simple ingredient list and so many uses, it’s no wonder whipped cream continues to be a timeless kitchen essential.
Ingredients You Need for Perfect Whipped Cream
Creating the perfect whipped cream begins with choosing the right ingredients. With just three core components, this recipe is deceptively simple—but each element plays a key role in delivering that smooth, fluffy texture and balanced flavor. Here’s what you’ll need:
1. Heavy Whipping Cream
The foundation of any good whipped cream recipe is heavy whipping cream, which contains 36% or more milk fat. This high fat content is crucial—it’s what allows the cream to hold air when whipped, creating soft or stiff peaks. For best results:
-
Make sure the cream is cold before whipping. This helps the fat emulsify properly and hold its structure.
-
Avoid ultra-pasteurized cream if possible, as it can be harder to whip.
To understand why fat is essential in creating whipped textures, explore the structure of cream in this Wikipedia article on cream.
2. Powdered Sugar
Powdered sugar (also called confectioners’ sugar) is preferred in whipped cream because it dissolves easily and provides a smooth, even sweetness. It also contains a small amount of cornstarch, which can help slightly stabilize the cream. You can:
-
Adjust the sweetness to taste, typically 1–2 tablespoons per cup of cream.
-
Substitute with granulated sugar, honey, or maple syrup, though these may slightly affect the texture.
If you want to dig deeper into how powdered sugar differs from other sweeteners, this Wikipedia page on powdered sugar offers detailed insights.
3. Vanilla Extract (Optional but Recommended)
Adding vanilla extract elevates the flavor of whipped cream, giving it a warm, aromatic note that complements most desserts. While optional, it’s highly recommended. For variation, you can substitute with:
-
Almond extract for a nutty twist
-
Citrus zest for a refreshing flavor
-
Peppermint extract for seasonal uses
Check out the composition and origin of vanilla in Wikipedia’s guide to vanilla extract.
Bonus Ingredient Ideas
For those who want to explore beyond the basics, consider experimenting with:
-
Cocoa powder for chocolate whipped cream
-
Spices like cinnamon or nutmeg
-
Alcoholic flavors like bourbon or Baileys
For more creative flavor variations, browse through Pinterest’s flavored whipped cream inspirations.
Ingredient Checklist
-
1 cup cold heavy whipping cream
-
2 tablespoons powdered sugar (adjust to taste)
-
½ teaspoon vanilla extract (optional)
With just these ingredients, you’ll be on your way to making whipped cream at home in minutes, fresh and full of flavor.
Tools & Equipment: What You Need
To make whipped cream at home, you don’t need fancy equipment—just a few basic kitchen tools. However, using the right tools can greatly improve your results and ensure a smooth, fluffy texture every time. Here’s what you should have on hand:
1. Mixing Bowl
A medium or large mixing bowl is essential. For best results:
-
Use a metal or glass bowl, as these hold cold temperatures better than plastic.
-
Chill the bowl in the refrigerator or freezer for 10–15 minutes before whipping.
This helps maintain the cold environment necessary for heavy cream to whip properly. A chilled bowl makes a noticeable difference in the speed and volume of the cream.
2. Electric Mixer (Hand or Stand)
The most efficient way to make whipped cream is with an electric mixer:
-
A hand mixer is easy to use and gives you full control over speed and consistency.
-
A stand mixer with a whisk attachment is ideal if you’re whipping larger batches.
For those curious about how the whisking mechanism aerates cream, learn more about the design and science of a whisk.
3. Whisk (for Manual Whipping)
If you don’t have an electric mixer, a simple balloon whisk and some arm strength can do the job. While more time-consuming, manually whipping cream allows for greater precision, helping you avoid overbeating. It typically takes 8–10 minutes by hand.
Manual whipping is great for small servings or if you’re going for an old-fashioned approach. Just be sure to use a chilled bowl and whisk for best results.
4. Mason Jar (Alternative Method)
Yes, you can make whipped cream in a mason jar! This fun and convenient method is great for kids or when you don’t have mixers available:
-
Fill the jar halfway with cold cream and add sweeteners.
-
Shake vigorously for 3–5 minutes until soft peaks form.
Explore a step-by-step visual guide using the mason jar whipped cream hack on Pinterest.
Optional Accessories
-
Rubber spatula: For gently folding in additional flavors
-
Piping bag: For decorative dessert toppings
-
Fine mesh sieve: To dust cocoa or cinnamon on top for garnish
With these tools ready, you’ll be equipped to whip up restaurant-quality whipped cream at home in minutes. Whether you use a stand mixer or shake it in a jar, consistency and chill are the keys to success.

Step-by-Step Recipe: How to Make Whipped Cream at Home
Making whipped cream from scratch is fast, satisfying, and requires only a few simple steps. Follow this process to get that perfect, cloud-like texture every time.
Step 1: Chill Your Equipment
-
Place your mixing bowl and beaters (or whisk) in the refrigerator or freezer for 10–15 minutes before use.
-
This step is critical—cold tools help the heavy cream emulsify and whip more quickly.
Why it works: When cream and tools are cold, the fat solidifies enough to trap and hold air. Learn how emulsions work from Wikipedia’s entry on emulsions to understand the science behind this process.
Step 2: Measure Your Ingredients
-
Pour 1 cup of cold heavy whipping cream into your chilled bowl.
-
Add 2 tablespoons of powdered sugar (or adjust to taste).
-
Add ½ teaspoon of vanilla extract (optional but highly recommended).
This is your base, but you can customize the flavor later. For those seeking creative variations, Pinterest’s flavored whipped cream collection is a great place to explore.
Step-by-Step Recipe: How to Make Whipped Cream at Home
Step 3: Start Whipping
-
Begin mixing on medium speed using a hand or stand mixer.
-
After about a minute, increase the speed to medium-high.
Watch the texture carefully. At first, the cream will foam and begin to thicken.
Step 4: Monitor Peak Stages
-
Soft peaks: The cream will form peaks that barely hold their shape and droop slightly. Perfect for light toppings.
-
Medium peaks: Slightly firmer and hold better. Great for pies or layering.
-
Stiff peaks: Peaks stand straight up when you lift the beater. Ideal for piping or recipes that need structure.
Avoid overmixing—it can quickly turn into butter. If you pass stiff peaks, you may notice a grainy texture as the fat begins to separate from the liquid.
Step 5: Taste and Adjust
-
You can fold in more sugar or a dash of flavoring at this stage if needed.
-
Try cinnamon, cocoa, almond extract, or even a splash of bourbon.
Need flavor ideas? Take inspiration from Pinterest’s whipped cream desserts for creative applications.
Step 6: Use or Store Immediately
-
Serve immediately for best texture.
-
If storing, place in a sealed container in the refrigerator for up to 24 hours.
-
If it deflates slightly, just give it a quick re-whip.
Explore options for long-term storage and flavor-safe containers by viewing homemade dessert toppings on Pinterest.
How Long Does Homemade Whipped Cream Last?
While homemade whipped cream is best when fresh, you can store it for short periods if needed. Here’s how to make the most of its shelf life:
-
Refrigerator: Store in an airtight container for up to 24 hours.
-
Re-whipping: If it softens, beat gently for a few seconds to bring it back to life.
-
Freezer: For long-term use, pipe dollops onto a baking sheet and freeze. Once solid, transfer to a bag. Thaw in the fridge.
Need stabilization? Add a pinch of cornstarch, cream of tartar, or use stabilized whipped cream methods from Wikipedia’s article on powdered sugar (which contains cornstarch) to extend its life.
Avoid storing it uncovered or stirring too often, which can lead to texture loss.
Pro Tips for Fluffy, Stable Whipped Cream Every Time
Achieving consistently airy, stable whipped cream comes down to a few essential techniques. Here’s how to perfect your method:
-
Chill everything: Bowl, beaters, and cream should all be cold.
-
Use full-fat cream: Less than 30% fat won’t whip properly.
-
Start slow, finish strong: Begin whipping on low to avoid splashing, then increase to medium-high.
-
Don’t walk away: Watch for your desired peak stage, and stop immediately once it’s reached.
Want extra stability? A small amount of cream of tartar or cornstarch can help hold peaks longer.
For DIY hacks like mason jar whipped cream, check out this clever Pinterest hack—a fun and practical method for quick batches.
Flavor Variations: Take Your Whipped Cream to the Next Level
Once you’ve mastered the basics, try these flavorful twists to make your homemade whipped cream stand out:
-
Chocolate Whipped Cream: Add 2 tbsp of unsweetened cocoa powder.
-
Citrus Whipped Cream: Fold in orange or lemon zest for brightness.
-
Spiced Whipped Cream: Add cinnamon, nutmeg, or pumpkin spice.
-
Boozy Whipped Cream: Add 1 tbsp of bourbon, Baileys, or amaretto.
-
Mint or Almond Flavors: Use food-safe extracts for subtle hints.
Need ideas for pairing your whipped cream with desserts? Explore visually stunning combinations on Pinterest’s whipped cream desserts.
Each variation pairs beautifully with fruit, cakes, coffee, or hot chocolate—turning your whipped cream into a signature topping.
Delicious Ways to Use Whipped Cream
Whipped cream is endlessly versatile. Here are some of the best ways to enjoy it:
-
Cakes and cupcakes: A soft layer or piped swirl on top.
-
Pies: Especially pumpkin, chocolate silk, or pecan.
-
Coffee and hot drinks: Dollop on lattes, mochas, or hot chocolate.
-
Breakfast: Add to pancakes, waffles, or crepes with fruit.
-
Parfaits and trifles: Layer with sponge cake and berries.
Find more ideas for presentation and recipes using homemade dessert toppings to elevate any dish.
Use homemade whipped cream anywhere you’d normally use store-bought—only now, it’s richer, fresher, and completely customizable.
Troubleshooting Common Problems
Even simple recipes can go sideways. Here’s how to fix and prevent the most common whipped cream issues:
-
Why won’t it whip?
-
Likely too warm. Chill cream and tools, and try again.
-
-
Too runny?
-
Not whipped enough. Continue beating in short bursts until peaks form.
-
-
Too stiff or grainy?
-
You overbeat it. Add 1–2 tablespoons of fresh cream and gently fold to smooth it.
-
-
Turned into butter?
-
You’ve gone too far. It’s now butter—great for toast, but not dessert.
-
For inspiration or help fixing your whipped cream, explore step-by-step visuals in Pinterest’s whipped cream boards.

Frequently Asked Questions (FAQs)
-
Can I make whipped cream without an electric mixer?
Yes. Use a whisk or try the mason jar method. It takes more time but works great in small batches. -
Can I use milk instead of heavy cream?
No. Milk doesn’t have enough fat to whip. You need heavy whipping cream with at least 30% fat. -
What’s the difference between whipped cream and Cool Whip?
Whipped cream is made from real cream. Cool Whip contains oils, corn syrup, and stabilizers. -
Is powdered sugar necessary for whipped cream?
No, but it blends best. You can use granulated sugar or other sweeteners. Learn more from Wikipedia’s powdered sugar article. -
Can I freeze homemade whipped cream?
Yes. Pipe dollops onto parchment, freeze, then store in bags. Thaw in the fridge before use. -
How do I make whipped cream that holds its shape longer?
Add a stabilizer like cornstarch, gelatin, or cream of tartar. -
How long should I whip cream to get stiff peaks?
Typically 3–5 minutes with a mixer. Watch closely after soft peaks form. -
Can I make whipped cream ahead of time?
Yes. Store for up to 24 hours. Re-whip briefly if it softens. -
Can I add food coloring to whipped cream?
Yes. Use gel food coloring for best results without thinning the cream. -
Is heavy cream the same as whipping cream?
Not exactly. Heavy cream has slightly more fat (36%) than whipping cream (30–35%), making it better for stiff peaks.