1. Why Rocky Road Fudge Is the Ultimate Quick Dessert
There’s something timeless about Rocky Road Fudge—a rich, chewy, chocolatey square that brings smiles with every bite. It’s one of those quick dessert recipes that checks every box: minimal ingredients, no baking, and a texture that sets perfectly every time. Whether you’re whipping it up for a last-minute gathering or prepping for holiday treat boxes, this fudge recipe delivers on taste, nostalgia, and simplicity.
What makes this version so special? It always sets right, thanks to a smart combination of ingredients like sweetened condensed milk, peanut butter, and semi-sweet chocolate chips. Unlike traditional fudge, which can be fussy with candy thermometers and boiling points, this easy rocky road recipe keeps things foolproof. It’s no wonder it’s the one recipe everyone bookmarks during the holiday season.
Historically, Rocky Road originated as a way to use broken confections and mix-ins—something fun and spontaneous. Today, it has evolved into a classic comfort food dessert. With layers of marshmallows, chocolate, and salted peanuts, it creates the perfect balance of creamy, chewy, and crunchy textures. For those interested in the sweet origin of this dessert, you can explore the history of rocky road desserts.
Want to gift it, freeze it, or serve it at a party? This is the crowd-pleasing rocky road fudge recipe that adapts to any occasion. If you’re a fan of no-bake treats, you’ll love the ideas on this no-bake dessert inspiration board, perfect for more weekend-worthy sweets.
2. What Is Rocky Road Fudge?
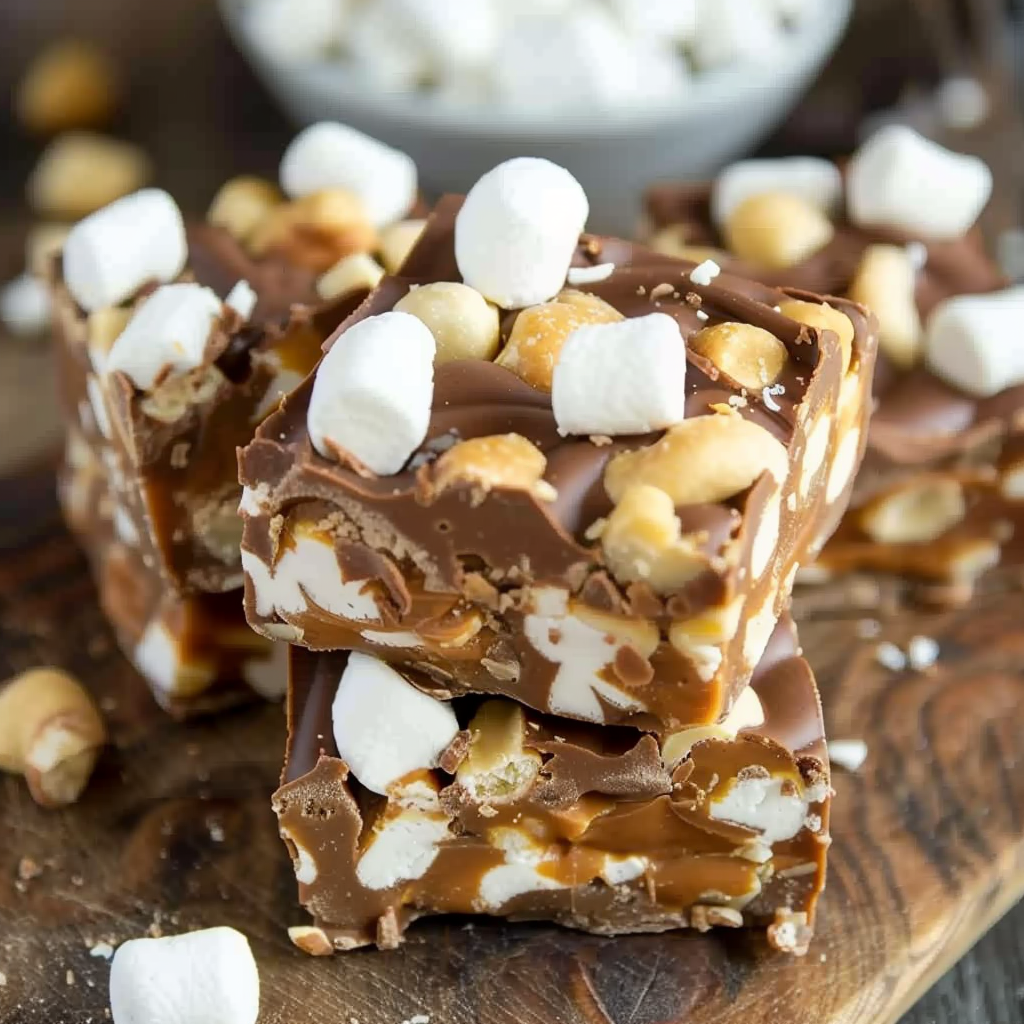
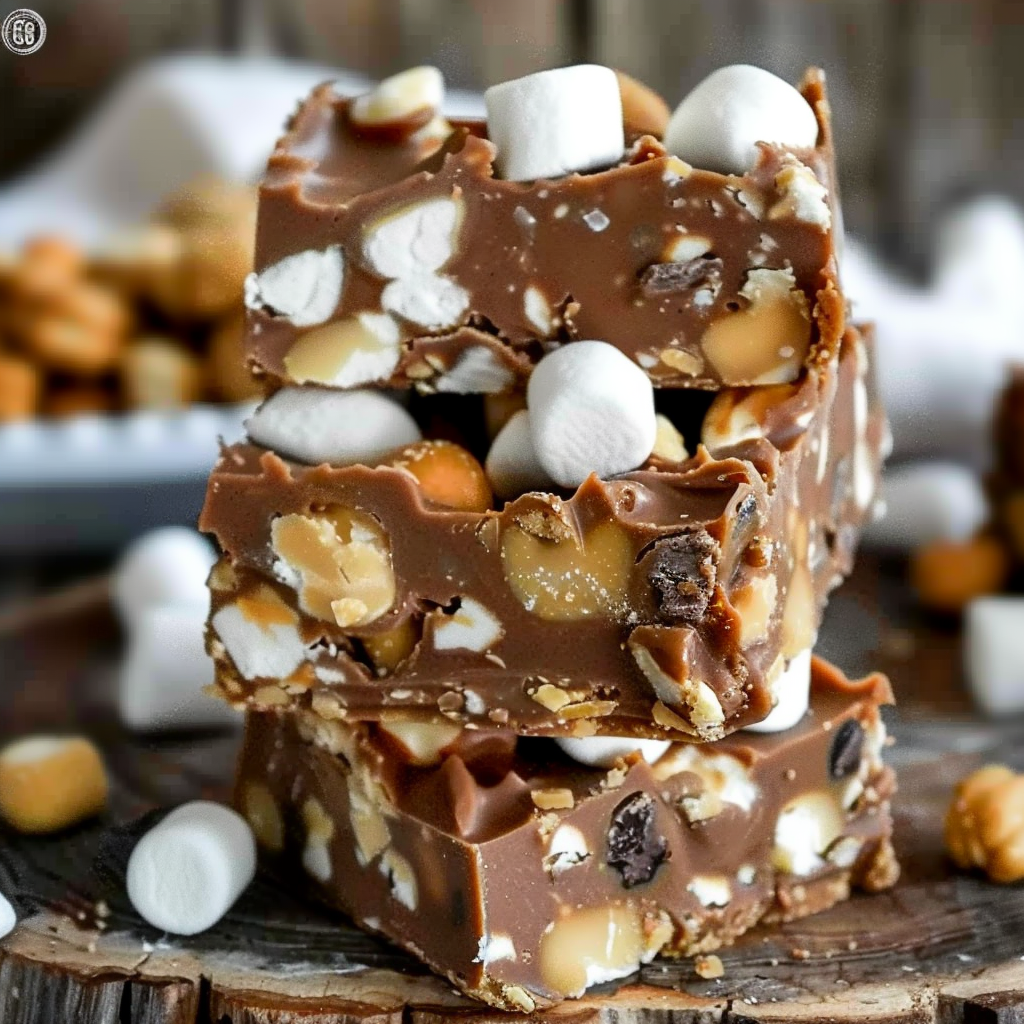
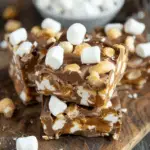
Rocky Road Fudge is a classic, no-bake dessert that blends smooth chocolate, soft marshmallows, and crunchy peanuts into one irresistible bite. Unlike traditional fudge that requires a candy thermometer and careful boiling, this simplified version uses just a few pantry staples and sets perfectly every time.
At its core, the name “Rocky Road” reflects the mixture of textures—soft, crunchy, and chewy—combined into one unified treat. The origins of rocky road desserts can be traced back to early 20th-century America, where the concept was to mix leftover confections with chocolate to avoid waste. Today, it’s a beloved staple found in everything from ice cream to baked bars. You can read more about the history of rocky road desserts to understand how it evolved from a thrift-friendly sweet into a dessert icon.
This fudge recipe specifically stands out because of its foolproof setting ability. Thanks to sweetened condensed milk, a rich and thick base, combined with peanut butter for creaminess and semi-sweet chocolate chips for depth, the mixture firms up in the fridge with zero fuss. These ingredients work together chemically to deliver a consistent texture every time. Learn more about sweetened condensed milk and how it plays a crucial role in no-bake desserts.
The versatility of this treat is another reason it’s so loved. From holiday platters to homemade edible gifts, Rocky Road Fudge adapts effortlessly. Explore creative presentation ideas and seasonal twists on this holiday treat inspiration board for your next dessert lineup.
3. Why This Recipe Always Sets: The Science Behind Foolproof Fudge
One of the biggest frustrations with making traditional fudge is its unpredictability—it’s either too soft to cut or turns out dry and crumbly. What makes this rocky road fudge recipe unique is that it always sets right, without requiring any special equipment or advanced technique.
The secret lies in its core ingredients. Using sweetened condensed milk instead of evaporated milk or cream simplifies the entire process. Since it’s already thick and sugar-rich, it provides the necessary structure without needing a precise boiling point. When combined with semi-sweet chocolate chips, the mixture creates a solid foundation that cools into a firm, sliceable consistency. The chemistry of these two ingredients eliminates the need for a candy thermometer. You can read more about how fudge works chemically and why sweetened condensed milk plays a stabilizing role.
Adding peanut butter is another game-changer. Aside from adding creaminess and flavor, peanut butter contributes healthy fats and proteins that support a stable set. The type you use—creamy or crunchy—also affects the texture. Creamy peanut butter ensures a smoother finish, while crunchy adds extra bite. Learn more about the properties of peanut butter and how it enhances both flavor and structure in desserts.
Many beginner bakers also make the mistake of freezing fudge too quickly. While this may seem like a shortcut, it can cause separation or crystallization. Instead, letting the fudge rest in the fridge for a minimum of two hours allows gradual cooling and consistent firmness. For long-term storage and presentation inspiration, explore this curated homemade edible gifts collection on Pinterest for clever packaging ideas and flavor combinations.
4. Ingredients Breakdown: What You Need and Why
To create rocky road fudge that always sets right, each ingredient plays a specific role in taste, texture, and structure. Here’s a breakdown of what you’ll need and why it works so well:
-
2 cups peanut butter (creamy or crunchy)
Peanut butter adds richness and helps the fudge set without becoming brittle. The fat content gives it a smooth texture, while crunchy peanut butter adds an extra layer of texture. It also balances the sweetness of the condensed milk and chocolate. Learn more about the history and uses of peanut butter in desserts. -
1 can (14 oz) sweetened condensed milk
This is the binding agent that holds everything together. It provides sweetness, structure, and a thick, creamy base. Because it doesn’t require cooking to activate, it allows the fudge to set reliably in the fridge. For details on how it’s made, explore sweetened condensed milk. -
2 cups semi-sweet chocolate chips
Semi-sweet chocolate offers a deep, rich cocoa flavor without overwhelming sweetness. It melts evenly and pairs well with both marshmallows and nuts. The balance of cocoa solids and fat makes it ideal for no-bake desserts. Visit this chocolate overview to understand how cocoa content affects texture. -
2 cups mini marshmallows
These add chewiness and iconic rocky road appeal. They’re mixed in last to avoid melting completely. Marshmallows also provide a visual contrast and softness that breaks up the dense fudge. You can dive deeper into their composition and history in this marshmallow article. -
1 cup chopped salted peanuts
Peanuts bring crunch and a salty balance to the sweetness. Salt enhances the chocolate flavor and makes each bite more dynamic. You can swap them out for other nuts, like almonds or pecans, depending on your preference. -
1 tsp vanilla extract
Though subtle, vanilla rounds out the flavors and ties everything together. A good quality extract adds warmth and complexity. -
Optional toppings
To customize the recipe, try:-
Sea salt flakes for a gourmet finish
-
Sprinkles for festive flair
-
Crushed pretzels for added crunch and a sweet-salty twist
-
For more creative variations, scroll through this popular easy fudge recipe board to explore other ingredient combinations.
These ingredients are chosen not only for flavor but for functionality—each one contributes to the fudge’s no-fail setting power. Whether you’re aiming for an everyday treat or a special holiday gift, this combination delivers consistent results every time.
5. Step-by-Step: How to Make Rocky Road Fudge (With Pro Tips)
Making rocky road fudge at home is surprisingly simple, and with the right steps, you’ll get a smooth, perfectly set dessert every time. Here’s the foolproof method, along with expert tips to avoid common mistakes.
Step 1: Line Your Pan Properly
-
Use an 8×8-inch square pan and line it with parchment paper, leaving an overhang on two sides.
-
This makes it easier to lift the fudge out once it’s set—no sticking or breaking.
Pro Tip: Lightly grease the pan before placing the parchment to keep it in place while pouring the mixture.
Step 2: Melt the Base Ingredients
-
In a medium saucepan over medium heat, combine:
-
2 cups peanut butter
-
1 can sweetened condensed milk
-
2 cups semi-sweet chocolate chips
-
-
Stir constantly with a silicone spatula or wooden spoon until the mixture is smooth and fully melted.
Pro Tip: Don’t overheat. Stir gently and consistently to avoid seizing the chocolate. If the chocolate clumps or burns, it won’t set properly.
Learn more about the properties of chocolate and how heat affects its texture in fudge.
Step 3: Add Vanilla and Mix-ins
-
Once melted, remove the pan from the heat. Stir in:
-
1 tsp vanilla extract
-
2 cups mini marshmallows
-
1 cup chopped salted peanuts
-
-
Fold them in quickly to avoid melting the marshmallows completely.
Pro Tip: Add the marshmallows last and stir gently so they stay intact and visible in each slice.
Explore more ingredient combination ideas from this no-bake dessert inspiration board for texture and flavor variations.
Step 4: Spread and Chill
-
Pour the mixture into the prepared pan and spread it evenly with a spatula.
-
Tap the pan lightly on the counter to remove any air bubbles.
-
Refrigerate for at least 2 hours, or until completely firm.
Pro Tip: Don’t freeze to speed up the setting—it can cause the chocolate to crack or separate.
Step 5: Slice and Store
-
Once firm, lift the fudge out of the pan using the parchment overhang.
-
Cut into small squares with a sharp knife, wiping the blade clean between cuts for neat edges.
For storage:
-
Place pieces in an airtight container with parchment between layers.
-
Store in the fridge for up to 2 weeks, or check out this Pinterest board on edible gifts for creative packaging tips.
This simple, reliable process ensures your easy rocky road fudge sets correctly and tastes delicious every single time. It’s the reason so many people save and return to this recipe for holidays, gifts, and spontaneous chocolate cravings.
6. Easy Variations to Try
One of the best things about rocky road fudge is its flexibility. With just a few swaps or additions, you can tailor the recipe for different dietary needs, flavor preferences, or seasonal occasions—all while keeping the foolproof setting power intact.
Here are some creative and easy rocky road variations to inspire your next batch:
-
Nut-Free Rocky Road
Replace the salted peanuts with crispy rice cereal, crushed pretzels, or sunflower seeds. This keeps the crunch without using any nuts, making it school-safe and allergy-friendly. You can find nut-free inspiration on this Pinterest board of easy fudge recipes. -
Holiday Rocky Road
Add crushed candy canes, red and green sprinkles, or a drizzle of white chocolate to make a festive version perfect for Christmas. These small tweaks give a seasonal look and flavor, great for holiday platters or gifting. -
Double Chocolate Fudge
Use a mix of dark chocolate chips and milk chocolate for a layered flavor. This adds richness without altering the recipe’s setting consistency. For more ideas on layering chocolate flavors, check out the chocolate guide to better understand cocoa percentages. -
Vegan/Dairy-Free Version
Swap the sweetened condensed milk for a dairy-free alternative and use vegan marshmallows and chocolate. Brands now offer excellent substitutes that mimic the texture and sweetness of the originals. A few adjustments, and you’ve got a vegan rocky road everyone can enjoy. -
No Peanut Butter? No Problem.
Substitute peanut butter with almond butter, cashew butter, or tahini. Each brings a unique flavor while maintaining the creaminess and structure essential to the fudge’s consistency.
Explore more flavor combos and presentation tips on this holiday treat idea board. Whether you’re making a themed dessert table or looking for the perfect edible gift, these variations will make your rocky road fudge stand out.
7. Common Mistakes and How to Avoid Them
Even a simple recipe like rocky road fudge can go wrong if a few critical steps are missed. Below are the most common errors people encounter—and how to fix or avoid them—so your fudge always sets right and delivers on taste and texture every time.
-
Fudge Didn’t Set Properly
-
Problem: The fudge is too soft or sticky even after refrigeration.
-
Solution: This is usually due to underheating the base mixture or using incorrect ingredient ratios. Ensure the chocolate chips and peanut butter are fully melted and well-combined with the sweetened condensed milk. Avoid adding extra liquids or using low-fat substitutes, which can prevent setting.
-
-
Chocolate Seized or Became Grainy
-
Problem: Overheating or introducing water into the mixture can cause chocolate to seize.
-
Solution: Always melt over medium heat and stir continuously. Use a dry spatula and avoid using wet utensils or bowls. Learn more about how temperature impacts chocolate structure for better control during melting.
-
-
Texture Was Too Oily or Gritty
-
Problem: This can happen when using natural peanut butter, which separates more easily.
-
Solution: Use conventional creamy peanut butter with emulsifiers to keep the mixture smooth and integrated. Stir peanut butter well before adding, especially if using a jar where oil separates.
-
-
Marshmallows Melted Completely
-
Problem: Added too early while the base was still hot.
-
Solution: Wait until the mixture is off heat and has cooled slightly before folding in mini marshmallows. This keeps their shape and chewiness intact.
-
-
Fudge Is Too Sweet
-
Problem: Too many sweet mix-ins or sugary toppings.
-
Solution: Balance with salted peanuts or a light sprinkle of sea salt flakes on top. You can also use dark chocolate chips instead of milk chocolate for a less sweet base.
-
Avoiding these common pitfalls ensures your fudge sets with a perfect bite every time. For more texture ideas and visual inspiration, browse this curated Pinterest board on no-bake desserts for insight on achieving that ideal fudge finish.
8. How to Store & Freeze Rocky Road Fudge
Storing rocky road fudge correctly keeps it fresh, flavorful, and firm for days or even weeks. Whether you’re making it ahead of time for a party or preserving leftovers, these simple guidelines will help you maintain its ideal texture and taste.
Storing in the Fridge
-
Place fudge squares in an airtight container.
-
Use parchment or wax paper between layers to prevent sticking.
-
Store in the refrigerator for up to 2 weeks.
Pro Tip: Let fudge sit at room temperature for 5–10 minutes before serving. This softens the chocolate slightly, making each bite even creamier.
Freezing for Long-Term Storage
-
Wrap individual pieces tightly in plastic wrap or foil.
-
Place wrapped pieces in a freezer-safe bag or container.
-
Freeze for up to 3 months.
Thawing Tips:
-
Thaw in the fridge overnight.
-
Avoid microwaving to defrost—it may melt unevenly.
Proper storage not only preserves flavor but also makes this a great make-ahead option for gift-giving. Explore creative packaging ideas on this Pinterest board for edible gifts to turn your fudge into a beautiful treat box.
9. When to Serve: Occasions & Presentation Ideas
Rocky road fudge is incredibly versatile, making it ideal for everything from casual family treats to festive celebrations. Its easy prep and long shelf life also make it a go-to option for edible gifting.
Best Times to Serve
-
Holidays: Christmas, Thanksgiving, or Easter dessert platters
-
Potlucks & Parties: Easy to slice and serve for large groups
-
Weekend Treats: Quick, satisfying dessert with minimal cleanup
-
Birthday Favors: Wrap in small gift bags with custom tags
Presentation Tips
-
Cut into neat squares and arrange on a tiered dessert tray
-
Add a light sea salt or sprinkle topping for contrast
-
Wrap pieces in wax paper and tie with ribbon for gift boxes
-
Pair with cookies or brownies for a dessert sampler platter
For visual inspiration and packaging ideas, browse this Pinterest collection of holiday treats that show how to make your fudge stand out on any table or gift basket.
10. Printable Recipe Card (Embed or Include Template)
Ingredients:
-
2 cups peanut butter (creamy or crunchy)
-
1 can (14 oz) sweetened condensed milk
-
2 cups semi-sweet chocolate chips
-
2 cups mini marshmallows
-
1 cup chopped salted peanuts
-
1 tsp vanilla extract
Instructions:
-
Line an 8×8-inch pan with parchment, leaving overhang.
-
In a saucepan over medium heat, melt together peanut butter, condensed milk, and chocolate chips until smooth.
-
Remove from heat. Stir in vanilla, marshmallows, and peanuts.
-
Pour into the prepared pan and spread evenly.
-
Refrigerate for 2+ hours until firm.
-
Lift out and cut into squares.
-
Store in fridge in an airtight container.
This easy rocky road recipe sets perfectly every time and stores beautifully for days or even weeks. For a twist on presentation or flavor, explore ideas from this easy fudge recipe board and customize your batch for any season or celebration.

11. FAQs: Rocky Road Fudge Questions Answered
Why didn’t my rocky road fudge set?
This usually happens if the base wasn’t heated enough to fully melt the ingredients or if substitutions like low-fat peanut butter or evaporated milk were used. Stick with sweetened condensed milk and gently heat the mixture until smooth.
Can I make rocky road fudge without nuts?
Yes! You can replace salted peanuts with crispy rice cereal, crushed pretzels, or just leave them out entirely. This keeps the texture interesting while making the fudge nut-free.
What’s the best chocolate for rocky road fudge?
Semi-sweet chocolate chips work best for balanced flavor and a firm set. For a deeper flavor, try mixing in dark chocolate chips (over 60% cocoa). Learn more about chocolate types in this Wikipedia article on chocolate.
Can I use marshmallow fluff instead of mini marshmallows?
You can, but the texture will be smoother and more uniform. Traditional mini marshmallows give the classic rocky road texture with chewy pockets throughout the fudge.
How long does rocky road fudge last in the fridge?
Stored in an airtight container, fudge will stay fresh for up to 2 weeks. For longer storage, freeze individual pieces for up to 3 months.
Can I freeze rocky road fudge?
Absolutely. Wrap pieces tightly and place them in a freezer-safe container. Thaw overnight in the fridge before serving.
Is rocky road fudge gluten-free?
Yes, if all ingredients used are certified gluten-free. Double-check your marshmallows, chocolate chips, and any mix-ins for hidden gluten-containing additives.
For more variations and gluten-free dessert ideas, explore this Pinterest board of no-bake dessert recipes for inspiration.
PrintQuick Dessert Recipes Rocky Road Fudge That Always Sets Right
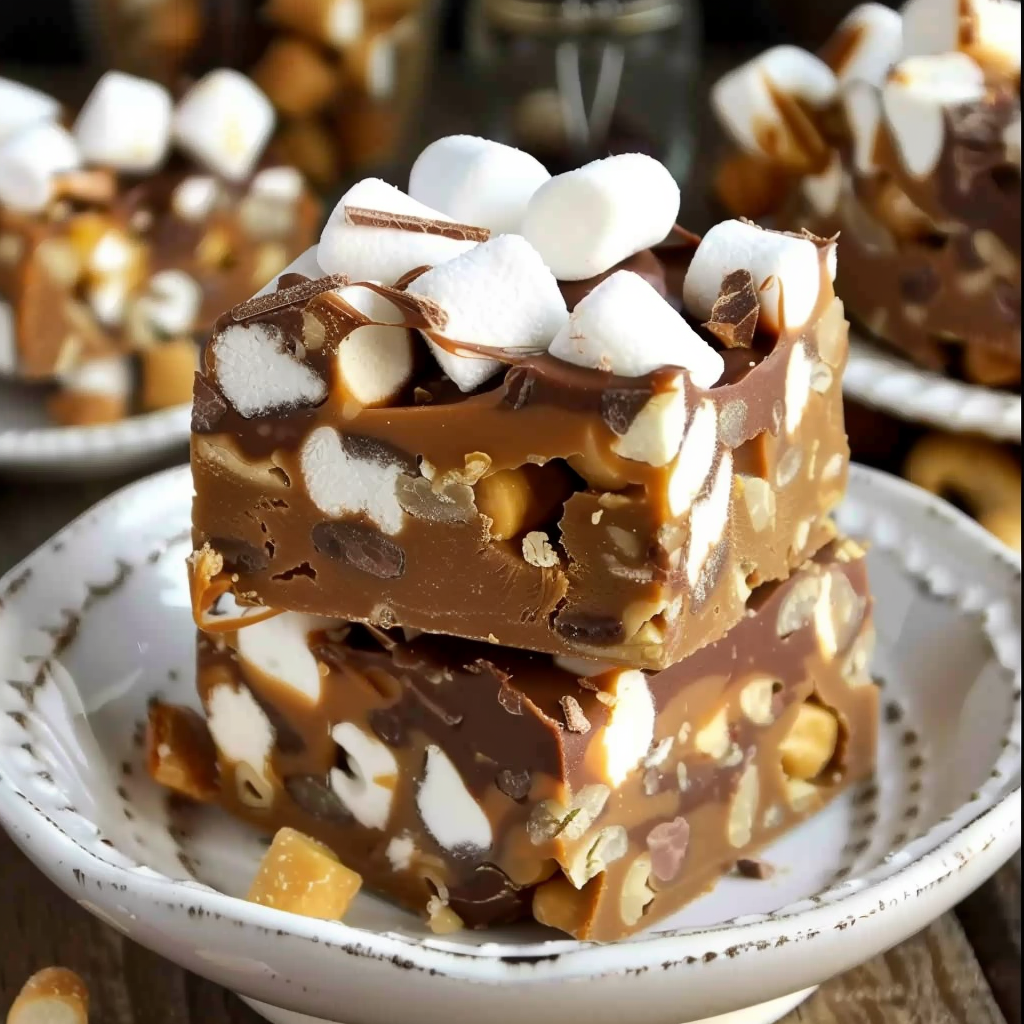
This Rocky Road Fudge is the ultimate quick dessert recipe—no baking required and sets perfectly every time. Made with creamy peanut butter, rich semi-sweet chocolate, and fluffy mini marshmallows, this nostalgic treat is ideal for holidays, potlucks, or anytime you’re craving something sweet, chewy, and crunchy. With just a few ingredients and one pot, it’s a foolproof dessert that anyone can make.
- Author: Clara
Ingredients
- 2 cups peanut butter (creamy or crunchy)
- 1 can (14 oz) sweetened condensed milk
- 2 cups semi-sweet chocolate chips
- 2 cups mini marshmallows
- 1 cup chopped salted peanuts
- 1 tsp vanilla extract
Instructions
- Line an 8×8-inch pan with parchment paper, leaving some overhang for easy removal.
- In a saucepan over medium heat, combine peanut butter, sweetened condensed milk, and chocolate chips.
- Stir continuously until the mixture is melted and smooth, then remove from heat.
- Stir in vanilla extract, marshmallows, and chopped peanuts. Mix until evenly combined.
- Pour the mixture into the prepared pan and spread evenly with a spatula.
- Refrigerate for at least 2 hours or until set.
- Once firm, lift the fudge out of the pan using the parchment overhang and cut into squares.
- Store in an airtight container in the fridge.
Notes
-
Always use sweetened condensed milk, not evaporated milk.
-
Stir constantly while melting to prevent the chocolate from seizing.
-
Add marshmallows and peanuts off the heat to retain texture.
-
Let the fudge chill fully in the fridge before slicing.
-
For nut-free options, try crispy rice cereal or crushed pretzels.
-
Use a sharp knife and clean between cuts for neat squares.
-
Store in an airtight container for up to 2 weeks in the fridge or freeze for up to 3 months.