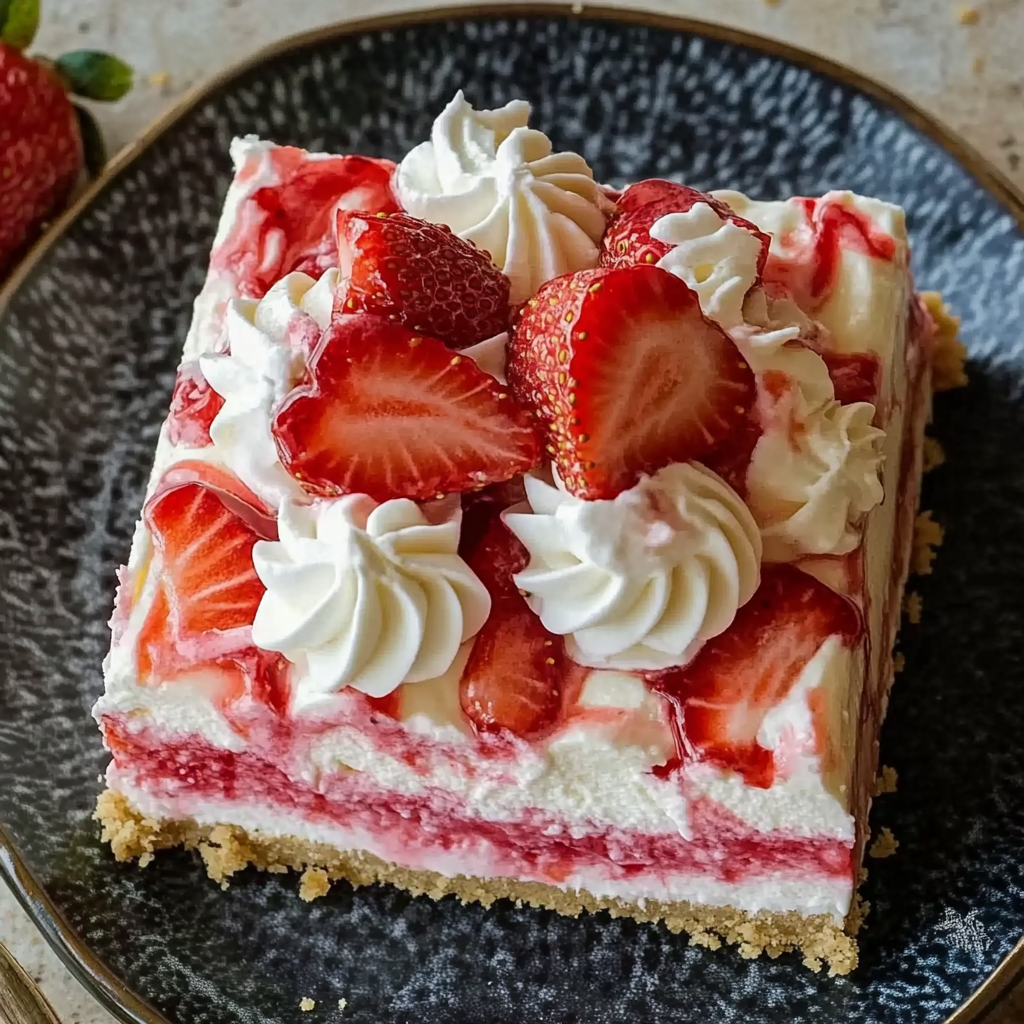
No-Bake Strawberry Jello Lasagna is the ultimate dessert for those who want to impress without breaking a sweat. This layered treat combines a buttery graham cracker crust, a creamy cheesecake filling, and a refreshing strawberry Jello layer, all topped off with a cloud of whipped topping. Whether you’re hosting a summer barbecue or craving a sweet and simple treat, this dessert has you covered.
The best part? There’s no need to turn on your oven! Perfect for warm days when baking feels like a chore, this easy, no-bake recipe is a lifesaver. It’s also incredibly versatile—you can customize it with different Jello flavors or fruits to suit any occasion.
If you’re curious about how no-bake desserts like this have become such a trend, it’s worth noting that they save time while delivering incredible flavor. In fact, no-bake desserts like this one are celebrated for their simplicity and adaptability, as highlighted on the Wikipedia page about desserts.
But before we dive into the step-by-step recipe, let’s take a closer look at the ingredients and how to make substitutions if needed.
Why No-Bake Desserts Are So Popular
There’s a reason no-bake recipes are stealing the spotlight in the dessert world. First, they save time—there’s no waiting for an oven to preheat or hours spent baking layers. Instead, you can whip up something as impressive as Strawberry Jello Lasagna in just a few steps.
Another reason is the versatility of no-bake desserts. Whether it’s summer and you’re avoiding the heat, or you’re simply looking for a low-effort dish for a party, this type of dessert delivers every time. Recipes like these are particularly popular on Pinterest, where creative no-bake ideas inspire home chefs worldwide.
Finally, no-bake recipes allow for plenty of customization. From swapping the crust to experimenting with fillings, you can personalize them to fit dietary restrictions or taste

Ingredients Overview and Substitutions
To create the perfect No-Bake Strawberry Jello Lasagna, it’s important to understand the role of each ingredient. Here’s a breakdown of the key components and some handy substitution tips to make the recipe work for everyone.
Graham Cracker Crust
The crust provides the foundational texture and flavor for this dessert. Made from graham cracker crumbs, melted butter, and a touch of sugar, it’s buttery, slightly sweet, and perfectly crumbly.
- Substitution ideas: You can replace graham crackers with crushed digestive biscuits, Oreo crumbs (for a chocolatey twist), or gluten-free crackers for a celiac-friendly option. For more guidance, check out this Wikipedia page about graham cracker crusts.
Cream Cheese Layer
This layer is where the magic of smoothness happens. The combination of softened cream cheese, powdered sugar, and whipped topping creates a light yet decadent texture.
- Tips for substitutions: If you’re looking for a dairy-free version, try using vegan cream cheese or coconut cream instead. Homemade whipped cream can replace store-bought whipped topping for a fresher taste—find more options on Wikipedia’s whipped cream guide.
Strawberry Jello Layer
The highlight of this dessert is undoubtedly the strawberry-flavored Jello, which pairs perfectly with fresh strawberries. It adds both color and a fruity punch that makes each bite irresistible.
- Alternatives: Experiment with other Jello flavors like raspberry, lime, or orange for a different twist. You can even swap Jello for unflavored gelatin and blend in real fruit juices to make the dessert more natural. For inspiration, explore creative Jello recipes on Pinterest.
Whipped Topping and Garnish
The final touch is a generous layer of whipped topping and freshly sliced strawberries. It ties everything together with a light, airy finish and enhances the dessert’s visual appeal.
- Optional toppings: Add chocolate shavings, crushed nuts, or even a drizzle of fruit syrup for added flair.
Understanding these components helps ensure you can adapt the recipe to suit your preferences or dietary needs. Now that you’ve got a handle on the ingredients, it’s time to dive into the step-by-step process of creating this stunning dessert.
How to Prepare the Graham Cracker Crust
The graham cracker crust is the essential base of this dessert, providing a buttery, crumbly foundation that pairs beautifully with the creamy and fruity layers above. Follow these steps to create a crust that holds together perfectly:
Ingredients You’ll Need:
- 2 ½ cups graham cracker crumbs
- ½ cup melted butter
- 2 tbsp granulated sugar
Step-by-Step Instructions:
- Combine the Ingredients:
In a medium-sized mixing bowl, combine the graham cracker crumbs, melted butter, and granulated sugar. Stir until the mixture resembles damp sand and all the crumbs are evenly coated. - Press the Mixture Into the Pan:
Using a spatula or the back of a spoon, press the mixture firmly into the bottom of a 9×13-inch dish. Make sure to distribute it evenly to create a consistent crust layer. Pro tip: Use the flat bottom of a measuring cup to compact the crust for a more uniform base. - Chill the Crust:
Place the dish in the freezer for 10–15 minutes to allow the crust to set. This step ensures that the crust stays firm and doesn’t crumble when you add the next layer.
Pro Tips for Success:
- If you’re using alternative crackers like Oreos or gluten-free options, ensure they’re finely crushed for even binding.
- To avoid a greasy crust, measure the butter accurately.
- For extra flavor, consider adding a pinch of cinnamon to the graham cracker mixture.
The crust is now ready to support the creamy and fruity layers that make this dessert a showstopper. Next up, we’ll move on to the smooth and indulgent cream cheese layer.
Creating the Cream Cheese Layer
The cream cheese layer is where the magic of smoothness and flavor happens. This layer provides a rich, tangy contrast to the sweet crust and fruity Jello topping, making it the heart of this dessert.
Ingredients You’ll Need:
- 16 oz (450g) cream cheese, softened
- 1 cup powdered sugar
- 1 tsp vanilla extract
- 2 cups whipped topping (such as Cool Whip)
Step-by-Step Instructions:
- Soften the Cream Cheese:
Ensure your cream cheese is at room temperature before starting. Softening it makes it easier to mix, ensuring a creamy, lump-free texture. If needed, you can microwave the cream cheese for 10–15 seconds (in short intervals) to speed up the process. - Beat the Mixture Until Smooth:
In a large mixing bowl, use a hand or stand mixer to beat the softened cream cheese, powdered sugar, and vanilla extract until the mixture is smooth and fluffy. This step ensures the layer has a consistent and silky texture. - Fold in the Whipped Topping:
Gently fold the whipped topping into the cream cheese mixture using a spatula. This step adds airiness and a light texture to the layer. Be careful not to overmix, as it can deflate the whipped topping. - Spread Over the Crust:
Once the crust is chilled and firm, evenly spread the cream cheese mixture over it. Use an offset spatula for a smooth, level layer. Refrigerate the dish while preparing the strawberry Jello layer.
Pro Tips for Perfect Cream Cheese Layers:
- If your cream cheese is too cold, it can create lumps in the mixture. Take your time to ensure it’s properly softened before beating.
- Want a flavor twist? Add a hint of lemon zest or almond extract for an extra dimension of flavor.
- For a creamier, less sweet layer, reduce the powdered sugar slightly.
This cream cheese layer is what gives the dessert its luscious, melt-in-your-mouth quality. Once it’s evenly spread and chilled, the dessert is ready for the stunning strawberry Jello layer that will take it to the next level.
The Strawberry Jello Layer: How to Get It Perfect
The strawberry Jello layer is the vibrant, fruity centerpiece of this dessert. It adds a pop of color and a refreshing flavor that complements the creamy layer below. Follow these steps to achieve the perfect consistency and presentation.
Ingredients You’ll Need:
- 1 (3 oz) package strawberry-flavored Jello
- 1 cup boiling water
- 1 cup cold water
- 2 cups fresh strawberries, sliced
Step-by-Step Instructions:
- Dissolve the Jello:
In a medium-sized mixing bowl, pour 1 cup of boiling water over the strawberry Jello powder. Stir thoroughly until the Jello is completely dissolved. This ensures there are no grainy bits in the final layer. - Add Cold Water:
Stir in 1 cup of cold water to the dissolved Jello mixture. This step helps cool the liquid so it doesn’t melt the cream cheese layer when poured. - Cool the Mixture:
Let the Jello mixture sit at room temperature for 10–15 minutes to cool slightly. Avoid skipping this step, as pouring hot Jello can ruin the integrity of the cream cheese layer. - Arrange the Strawberries:
Evenly distribute the sliced fresh strawberries over the chilled cream cheese layer. Arrange them in rows or a decorative pattern for visual appeal. - Pour the Jello:
Carefully pour the cooled Jello mixture over the arranged strawberries. Pour slowly and evenly to avoid disturbing the cream cheese layer or strawberries. - Refrigerate Until Set:
Place the dish in the refrigerator for at least 4–6 hours, or until the Jello is fully set. The longer it chills, the firmer the dessert will be when sliced.
Pro Tips for Success:
- If you prefer a firmer texture, use slightly less cold water in the Jello mixture.
- For an extra burst of flavor, try soaking the sliced strawberries in a tablespoon of sugar or lemon juice before arranging them.
- Want a layered fruit effect? Add a mix of strawberries and other berries like blueberries or raspberries.
This strawberry Jello layer is what gives the dessert its signature look and taste. The vibrant red hue and fruity aroma are sure to make this dessert the star of any gathering.
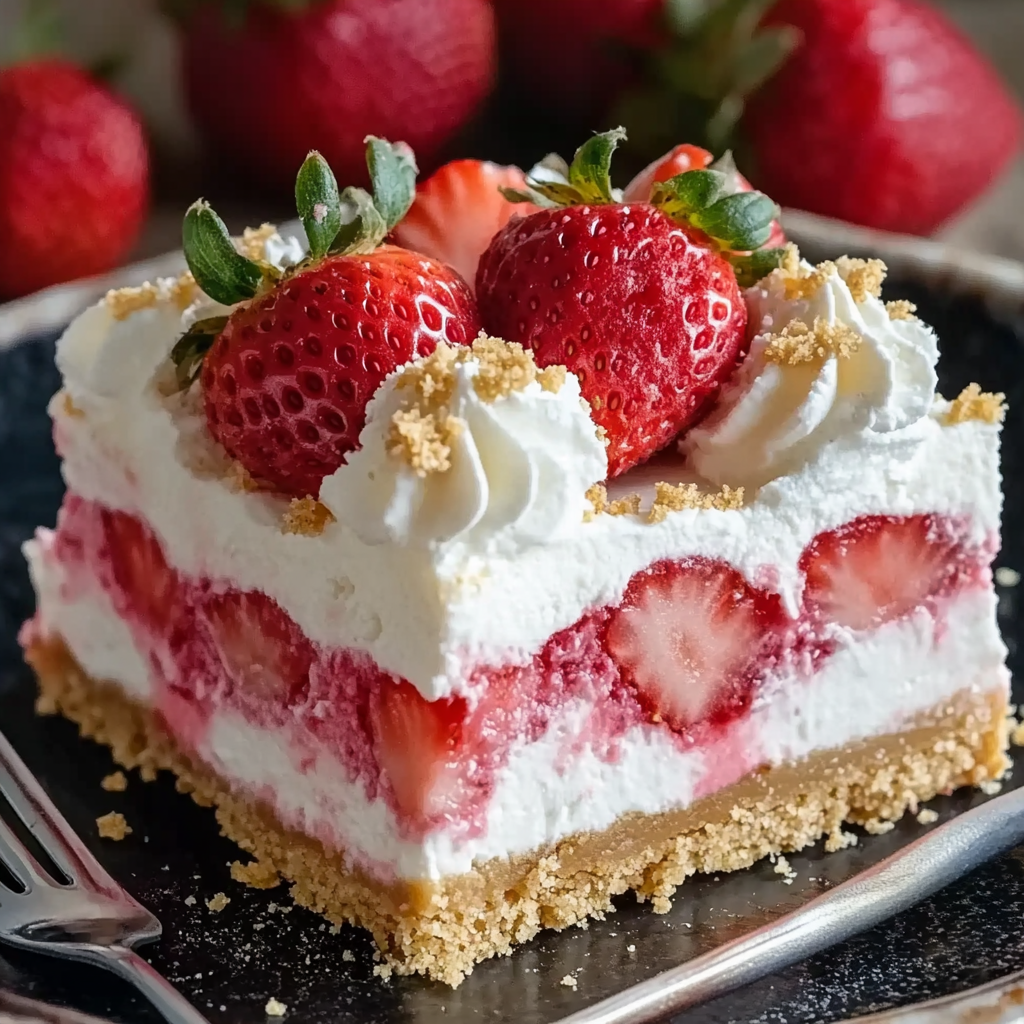
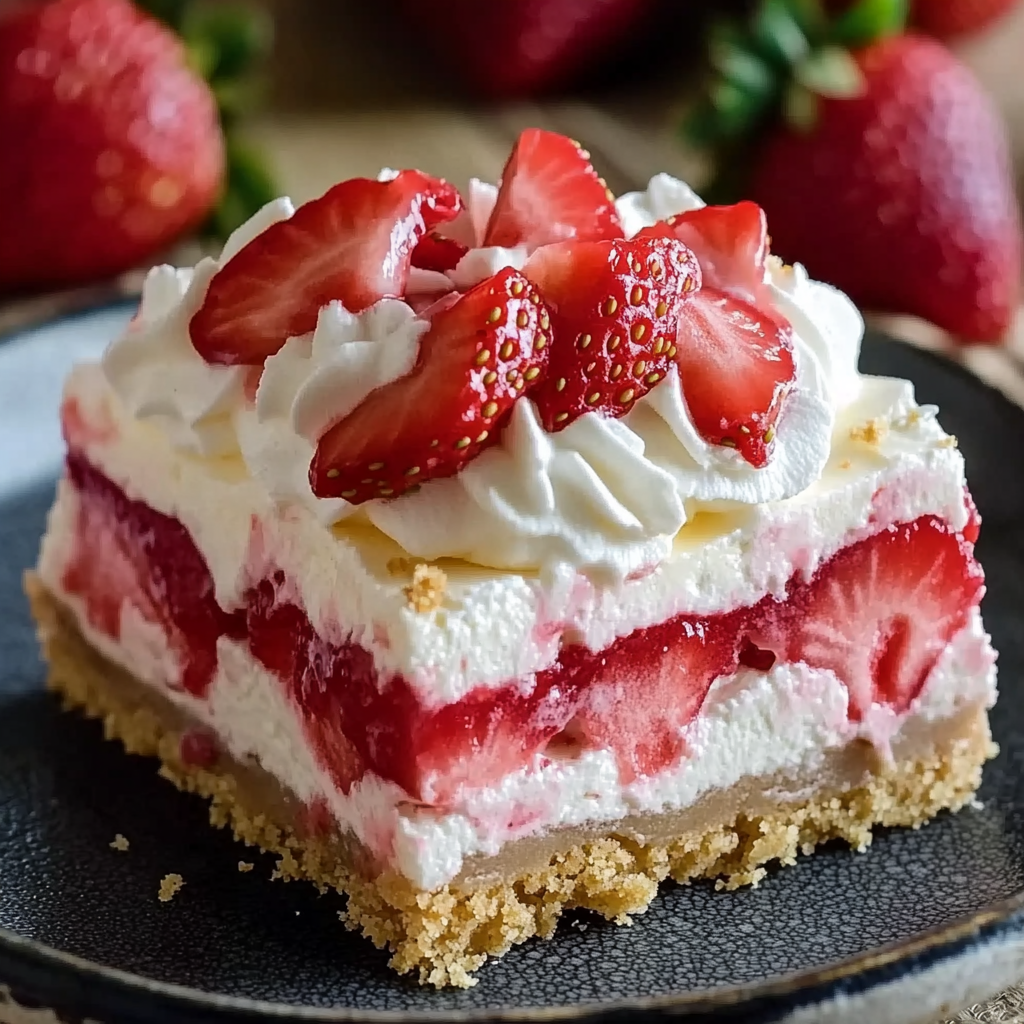
Final Touches: Whipped Topping and Garnish
The final layer of whipped topping is the finishing touch that ties this dessert together. It adds lightness, balances the flavors, and provides the perfect base for the decorative garnish. Here’s how to make your No-Bake Strawberry Jello Lasagna look as amazing as it tastes.
Ingredients You’ll Need:
- 1 ½ cups whipped topping
- Extra sliced strawberries for garnish
Step-by-Step Instructions:
- Spread the Whipped Topping:
Once the strawberry Jello layer has fully set, evenly spread the whipped topping over the top. Use an offset spatula or the back of a spoon to create a smooth, even layer. For a decorative effect, swirl the whipped topping slightly with the spatula. - Add Garnish:
Arrange sliced fresh strawberries on top of the whipped topping as a garnish. You can create patterns like rows, a circle, or even a heart for special occasions.- Optional: Sprinkle crushed graham crackers over the top for extra crunch, or add a drizzle of chocolate syrup for a more indulgent twist.
- Chill Before Serving:
Place the dessert back into the refrigerator for 15–30 minutes to allow the whipped topping to firm up slightly. This step ensures clean, defined layers when slicing.
Pro Tips for Picture-Perfect Presentation:
- Use a sharp knife to slice the dessert, wiping it clean between cuts for neat edges.
- Garnish with fresh mint leaves for a pop of color that complements the strawberries.
- Serve the dessert chilled to keep the layers intact and enhance the flavors.
With the whipped topping and garnish complete, your No-Bake Strawberry Jello Lasagna is ready to serve! The contrast of textures—from the crumbly crust to the creamy center and fruity Jello—makes each bite irresistible.
Creative Twists on Strawberry Jello Lasagna
While the classic No-Bake Strawberry Jello Lasagna is already a winner, there are plenty of ways to customize this dessert to suit your preferences or wow your guests with something unique. Here are some creative twists to take this recipe to the next level:
1. Try a Different Crust
- Chocolate Lovers: Swap the graham cracker crust for crushed Oreos or chocolate wafer cookies to add a rich, chocolatey base.
- Nutty Flavor: Mix in finely chopped pecans or almonds with the graham cracker crumbs for a nutty crunch.
- Gluten-Free Option: Use gluten-free graham crackers or crushed rice cakes for those with dietary restrictions.
2. Experiment with Jello Flavors
- Berry Blast: Replace strawberry Jello with raspberry or mixed berry Jello for a tangier flavor.
- Citrus Twist: Lime or orange Jello adds a refreshing, zesty contrast to the creamy layers.
- Layered Jello Effect: Create two or three Jello layers with complementary colors and flavors, like raspberry and peach.
3. Add More Fruits
- Incorporate a mix of fruits like blueberries, raspberries, or mango chunks for a medley of flavors and textures.
- Arrange the fruit in decorative patterns, like stripes or a gradient, for a show-stopping presentation.
4. Create a Healthier Version
- Use low-fat cream cheese and sugar-free Jello to cut down on calories.
- Substitute the powdered sugar with a natural sweetener like honey or stevia.
- Replace Cool Whip with homemade whipped cream made from coconut milk for a dairy-free option.
5. Play with the Topping
- Add shaved white or dark chocolate on top of the whipped topping for an indulgent touch.
- Sprinkle toasted coconut flakes for a tropical vibe.
- Drizzle caramel or strawberry syrup over the whipped topping for added sweetness and visual flair.
Why Experiment?
Customizing this recipe is easy, and these variations make it versatile enough for any occasion, whether you’re hosting a birthday party, preparing a festive holiday dessert, or simply trying something new for your family. For even more inspiration, explore layered desserts on Pinterest.
By experimenting with these ideas, you can turn the classic Strawberry Jello Lasagna into your own signature creation!
Troubleshooting Common Issues
Even with a straightforward recipe like No-Bake Strawberry Jello Lasagna, small missteps can sometimes occur. Don’t worry—these tips will help you troubleshoot the most common problems and ensure your dessert turns out perfectly every time.
1. The Crust is Too Crumbly
- Problem: The crust doesn’t hold together when sliced or crumbles apart during serving.
- Solution:
- Make sure you’re using the correct ratio of graham cracker crumbs to butter. The butter binds the crumbs, so if the crust is falling apart, you might need to add a bit more melted butter.
- Press the crust firmly into the pan using the flat bottom of a measuring cup to compact it properly.
- Chill the crust in the freezer for 15–20 minutes to ensure it sets before adding the next layer.
2. Cream Cheese Layer is Runny or Lumpy
- Problem: The cream cheese layer doesn’t hold its shape or has lumps.
- Solution:
- Ensure the cream cheese is softened to room temperature before mixing. Cold cream cheese will create lumps.
- Beat the cream cheese, powdered sugar, and vanilla extract thoroughly before folding in the whipped topping. Overmixing the whipped topping can also cause the layer to become too runny.
- Refrigerate the layer for 30 minutes before adding the Jello layer to give it more time to firm up.
3. Jello Layer Leaks Into the Cream Cheese Layer
- Problem: The Jello seeps into the cream cheese layer instead of forming a distinct layer.
- Solution:
- Allow the Jello mixture to cool to room temperature before pouring it over the cream cheese layer. Hot Jello can melt the cream cheese mixture, causing the layers to mix.
- Make sure the cream cheese layer is fully chilled and firm before adding the Jello.
4. Jello Doesn’t Set Properly
- Problem: The Jello remains liquid or too soft even after hours of chilling.
- Solution:
- Ensure the Jello powder is fully dissolved in the boiling water before adding the cold water. Undissolved Jello powder can prevent proper setting.
- Measure the water accurately—too much liquid can dilute the Jello and prevent it from setting.
5. Layers Slide When Slicing
- Problem: The dessert layers shift or collapse when cut.
- Solution:
- Chill the dessert for the recommended time (at least 4–6 hours, or overnight for best results). Proper chilling ensures the layers are firm and stable.
- Use a sharp knife to cut the dessert, and wipe it clean between slices for neat edges.
Pro Tip for Avoiding Issues Altogether
Take your time with each step and don’t rush the chilling process. Patience is key to ensuring each layer sets properly before moving on to the next. For more general tips on layered desserts, check out the helpful guide on Wikipedia.
By following these troubleshooting tips, you can overcome any challenges and create a perfectly layered, visually stunning dessert every time.
FAQs: Frequently Asked Questions About No-Bake Strawberry Jello Lasagna
Here are some of the most commonly asked questions about making No-Bake Strawberry Jello Lasagna. These answers will help clarify any doubts and ensure your dessert turns out perfect!
1. Can I use frozen strawberries instead of fresh ones?
Yes, you can use frozen strawberries, but be sure to thaw them completely and drain any excess liquid before using. This prevents the Jello layer from becoming watery. Keep in mind that fresh strawberries provide better texture and visual appeal for garnishing.
2. How long does the dessert stay fresh in the fridge?
No-Bake Strawberry Jello Lasagna can stay fresh for up to 3 days when stored in an airtight container in the refrigerator. After that, the layers may begin to separate or lose their texture.
3. Can I make this dessert ahead of time?
Absolutely! This dessert is perfect for making ahead. Prepare it the night before and refrigerate overnight to ensure all the layers are set and the flavors have blended beautifully.
4. Is there a way to make this recipe healthier?
Yes, you can make a few substitutions to create a healthier version:
- Use sugar-free Jello.
- Replace the powdered sugar with a natural sweetener like stevia or monk fruit.
- Opt for low-fat cream cheese and whipped topping.
- Choose a crust made from whole-grain crackers or oats.
5. What’s the best way to ensure clean layers when slicing?
To achieve clean and sharp layers:
- Refrigerate the dessert for the full recommended time, preferably overnight.
- Use a sharp knife and wipe it clean between each cut to prevent smearing the layers.
- Serve chilled to maintain the integrity of the layers.
6. How can I make this dessert gluten-free?
To make this dessert gluten-free:
- Use gluten-free graham crackers for the crust.
- Double-check that all other ingredients, such as Jello and whipped topping, are labeled gluten-free.
7. Can I substitute gelatin for Jello?
Yes, unflavored gelatin can be used as a substitute for Jello. Dissolve the gelatin in boiling water, then mix in fruit juice for flavor. Keep in mind that the color and taste may differ from traditional Jello.


