1.No Bake Peanut Butter Balls
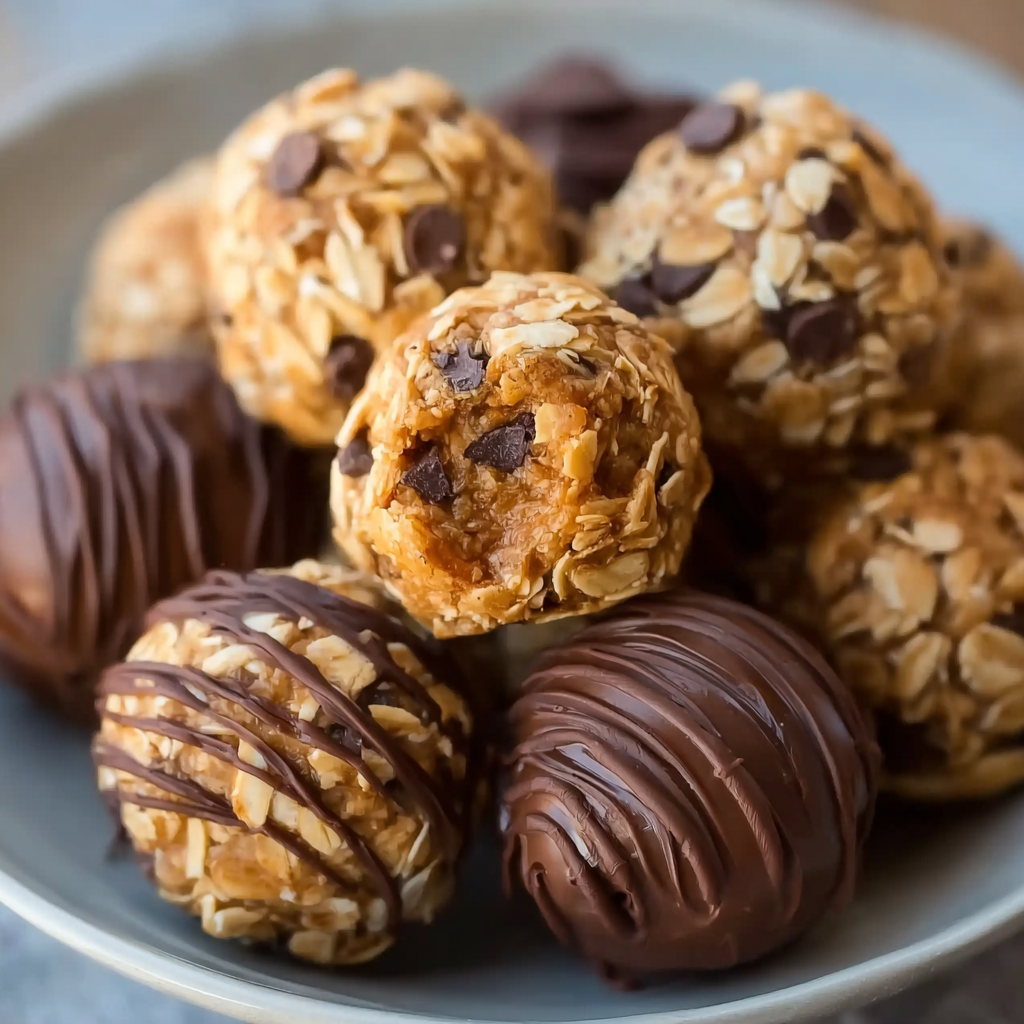
No bake peanut butter balls are a delicious, simple dessert that has earned a place in the hearts of families, busy bakers, and sweet tooths alike. These bite-sized treats combine the rich, nutty taste of peanut butter with the smooth sweetness of chocolate, creating a perfect blend of flavor and texture — all without the need for an oven. Whether you’re prepping for a holiday gathering, a school bake sale, or just need a quick snack fix, this easy dessert recipe delivers every time.
One of the main reasons these treats are so popular is their minimal ingredient list. You only need four basic ingredients, most of which are probably already in your pantry. The preparation is straightforward and requires no baking skills, making it an ideal recipe for kids and beginners. The entire process takes less than 30 minutes of active work, and the result is a batch of indulgent, melt-in-your-mouth peanut butter balls that rival any store-bought candy.
No bake desserts like these have seen a surge in popularity due to their convenience and versatility. On platforms like Pinterest’s no bake dessert recipes, you’ll find hundreds of creative variations that make this classic recipe adaptable for any occasion. Plus, since there’s no oven involved, these are perfect for warm-weather months or small kitchens where baking isn’t an option.
The combination of creamy peanut butter, powdered sugar, and vanilla extract creates a smooth, moldable dough that’s easy to work with and naturally satisfying. When coated in a layer of semisweet chocolate—which you can learn more about in this Wikipedia guide to types of chocolate—the texture becomes perfectly balanced. For those wanting to explore ingredient options, the Wikipedia entry on peanut butter breaks down its types, flavors, and variations that could subtly change the flavor profile of your dessert.
Whether served chilled at parties, included in lunchboxes, or gifted in homemade treat boxes, these no bake peanut butter balls are guaranteed to be a hit.
2. What Makes No Bake Desserts So Popular?
The appeal of no bake desserts lies in their unmatched convenience. Unlike traditional baked goods, these recipes don’t require ovens, timers, or exact temperatures, which makes them incredibly beginner-friendly. This is especially helpful for teens, college students, or anyone working with limited kitchen space or tools.
For starters, no bake peanut butter balls eliminate the stress of baking, allowing you to create delicious treats with minimal effort. They’re perfect for hot summer days when turning on the oven isn’t ideal. On platforms like Pinterest’s holiday dessert ideas, you’ll see how popular no bake treats have become, especially around festive seasons when time is short and demand for quick treats is high.
In addition, the ingredients used in no bake recipes tend to be pantry staples — think peanut butter, powdered sugar, and vanilla extract, as explained in this Wikipedia article on vanilla extract. This accessibility makes them ideal for last-minute gatherings, potlucks, or unexpected guests. There’s no need to buy special tools or exotic ingredients; just mix, chill, and enjoy.
Lastly, no bake desserts are incredibly versatile. You can customize the base recipe with your favorite flavors, add-ins, or coatings — from shredded coconut to sprinkles — to match any event or taste. Whether you want something healthy or indulgent, simple or decorative, the no bake format allows for endless creativity without compromising on flavor.
3. Key Benefits of Peanut Butter Balls
Peanut butter balls offer more than just a quick fix for your sweet cravings — they come with several standout benefits that make them a favorite for families and dessert lovers alike.
-
Quick and easy to prepare: With only four core ingredients and no baking required, you can have a batch ready in under an hour. This makes them ideal for busy weeknights or when you need a last-minute party treat.
-
Highly customizable: You can easily tweak the flavor by changing the nut butter (like almond or cashew) or by adding different coatings and mix-ins. Many recipes on Pinterest’s dessert ball ideas showcase versions with oats, coconut, or crushed candy.
-
Perfect for all occasions: Whether it’s a birthday party, Christmas, or a school snack, these treats fit right in. They store well and can be made in large batches.
-
Kid-friendly: Since there’s no heat involved, kids can help roll the dough or decorate the finished balls, making it a fun and safe kitchen activity.
-
Budget-friendly: The ingredients are inexpensive and commonly found in most households, which makes this a great go-to recipe for families looking to save without compromising on flavor.
-
Rich taste and satisfying texture: The combination of creamy peanut butter and smooth chocolate creates a texture that’s soft, chewy, and just the right amount of indulgent. If you’re curious about how different types of peanut butter can affect the texture, you can check out this Wikipedia guide on peanut butter.
With so many advantages packed into one small treat, it’s no wonder no bake peanut butter balls remain a timeless dessert staple.
4. Ingredients Overview & Alternatives
The basic no bake peanut butter balls recipe calls for just four simple ingredients, but each one plays an essential role in delivering the ideal flavor and texture. Here’s a closer look, along with smart substitutions.
-
1 cup creamy peanut butter
This is the base of the recipe. Creamy peanut butter is preferred for smooth texture, but crunchy peanut butter can be used if you like added texture. If you need a nut-free option, try sunflower seed butter or soy nut butter. -
1/4 cup unsalted butter, softened
Unsalted butter helps the mixture hold together and adds richness. For dairy-free or vegan versions, substitute with plant-based margarine or coconut oil. -
2 cups powdered sugar
Powdered sugar sweetens and helps form a moldable dough. If you’re looking to reduce sugar, consider using a sugar-free powdered sweetener. To learn more about the role of powdered sugar, visit Wikipedia’s icing sugar page. -
1/2 teaspoon vanilla extract
This enhances the flavor, giving depth and warmth. Real vanilla is best, and you can learn about how it’s made in this Wikipedia article on vanilla extract.
Optional but highly recommended:
-
2 cups semisweet chocolate chips
Used for coating. You can switch it up with dark chocolate or white chocolate, depending on your preference. This Wikipedia guide to chocolate types offers useful insight into the different options. -
1 tablespoon coconut oil or shortening
Adding this helps create a smoother, glossier chocolate coating. It’s optional but gives the final product a more professional look.
These ingredients not only create the perfect dessert bite but also allow for lots of room to get creative with variations and substitutions.
5. Equipment Needed
You don’t need any fancy tools to make no bake peanut butter balls. Just a few basic kitchen items will do:
-
Mixing bowl
-
Hand mixer or spoon
-
Baking sheet
-
Parchment paper
-
Measuring cups and spoons
-
Forks or toothpicks (for dipping in chocolate)
-
Microwave-safe bowl (for melting chocolate)
Since the process doesn’t involve baking, there’s no need for an oven or special baking pans — making this one of the most accessible no bake dessert recipes around.

6. Step-by-Step Instructions with Tips
Follow these simple steps to create delicious peanut butter balls every time:
-
Mix the base ingredients:
In a large mixing bowl, combine 1 cup creamy peanut butter, 1/4 cup softened unsalted butter, 2 cups powdered sugar, and 1/2 teaspoon vanilla extract. Use a hand mixer or spoon to blend everything until smooth and firm. -
Form the balls:
Scoop out about 1 tablespoon of the mixture and roll it between your palms to form a ball. Repeat until all the mixture is used. Place each ball on a parchment-lined baking sheet. -
Chill:
Refrigerate the balls for at least 30 minutes. This step is crucial for keeping them firm during the chocolate dipping process. -
Melt the chocolate:
In a microwave-safe bowl, combine 2 cups semisweet chocolate chips with 1 tablespoon coconut oil (optional). Heat in 30-second intervals, stirring in between, until smooth. For best results, explore some Pinterest chocolate dipping tips. -
Dip the balls:
Using a fork or toothpick, dip each chilled peanut butter ball into the melted chocolate, coating it fully. Let the excess chocolate drip off before placing it back on the parchment paper. -
Set and store:
Once all the balls are coated, return them to the fridge until the chocolate is fully set. Store them in an airtight container in the refrigerator for up to 2 weeks.
7. Troubleshooting Common Issues
Even simple recipes can have hiccups. Here are solutions to common problems:
-
Too sticky to roll: Add a bit more powdered sugar to firm up the dough.
-
Chocolate too thick: Add a teaspoon of coconut oil or shortening to thin it out.
-
Balls falling apart in chocolate: Chill longer before dipping or freeze for 10 minutes.
-
Chocolate cracking after setting: Let the balls warm slightly before dipping to reduce temperature shock.
If you’re experimenting with new flavors or coatings, browse Pinterest’s kid-friendly snacks for more tips and visual inspiration.
8. Storage Instructions
Proper storage ensures your peanut butter balls stay fresh and tasty:
-
Refrigerator: Store in an airtight container for up to 2 weeks.
-
Freezer: Freeze on a tray first, then transfer to a sealed bag. Keeps well for 2–3 months.
-
Serving: Allow frozen balls to sit at room temperature for 10 minutes before serving.
These also make great additions to easy homemade gifts, especially when packaged in festive tins or bags.
9. Flavor Variations and Add-Ins
This recipe is highly adaptable. Here are a few fun and flavorful ways to personalize your no bake peanut butter balls:
-
Coatings:
-
Crushed graham crackers
-
Shredded coconut
-
Mini sprinkles
-
Crushed nuts
-
-
Mix-ins:
-
Mini chocolate chips
-
Chopped dried fruit
-
Crushed pretzels
-
Cookie crumbs
-
-
Seasonal flavors:
-
Peppermint extract for a holiday twist
-
Pumpkin spice for fall
-
Sea salt for a sweet-salty finish
-
For those looking to boost nutrition, try adding a tablespoon of protein powder or ground flaxseeds. You can also replace some sugar with honey or maple syrup for a slightly healthier version.
Explore more creative takes on this recipe through Pinterest’s dessert balls collection.
10. Kid-Friendly & Family Activity Tips
Peanut butter balls are not only tasty but also a great way to bring families together in the kitchen. Here’s how:
-
Safe and easy for kids: Since there’s no oven involved, even young children can help roll the dough or decorate the finished balls.
-
Use fun shapes and molds: Heart shapes for Valentine’s Day or stars for birthdays.
-
Decorating bar: Set up bowls of sprinkles, crushed cookies, or mini candies and let kids dip and decorate their own.
For more ideas, check out Pinterest’s kid snack inspiration.
11. Serving Suggestions & Occasions
These no bake treats are versatile and suit nearly any occasion:
-
Serve on a dessert tray with other bite-sized goodies
-
Wrap as gifts in festive bags or tins
-
Pack in lunchboxes as a sweet surprise
-
Include in holiday cookie swaps
-
Pair with coffee or hot cocoa for a cozy treat
They also make a great option for birthdays, bake sales, or just a fun weekend project. For more ideas, explore Pinterest’s holiday dessert ideas.
12. FAQs: People Also Ask
Can you make peanut butter balls ahead of time?
Yes! You can prepare them several days in advance. Store them in the fridge or freezer to keep them fresh for your event or gathering.
Can you use natural peanut butter?
Yes, but the consistency can be runnier. To fix this, chill the mixture longer and add more powdered sugar if needed.
Can peanut butter balls be frozen?
Absolutely. Flash freeze them on a baking sheet, then transfer to a sealed bag. They can last for 2–3 months in the freezer.
Why are my peanut butter balls too soft?
This usually means the mixture needs more powdered sugar or more chilling time. If using natural peanut butter, it may help to refrigerate it before mixing.


