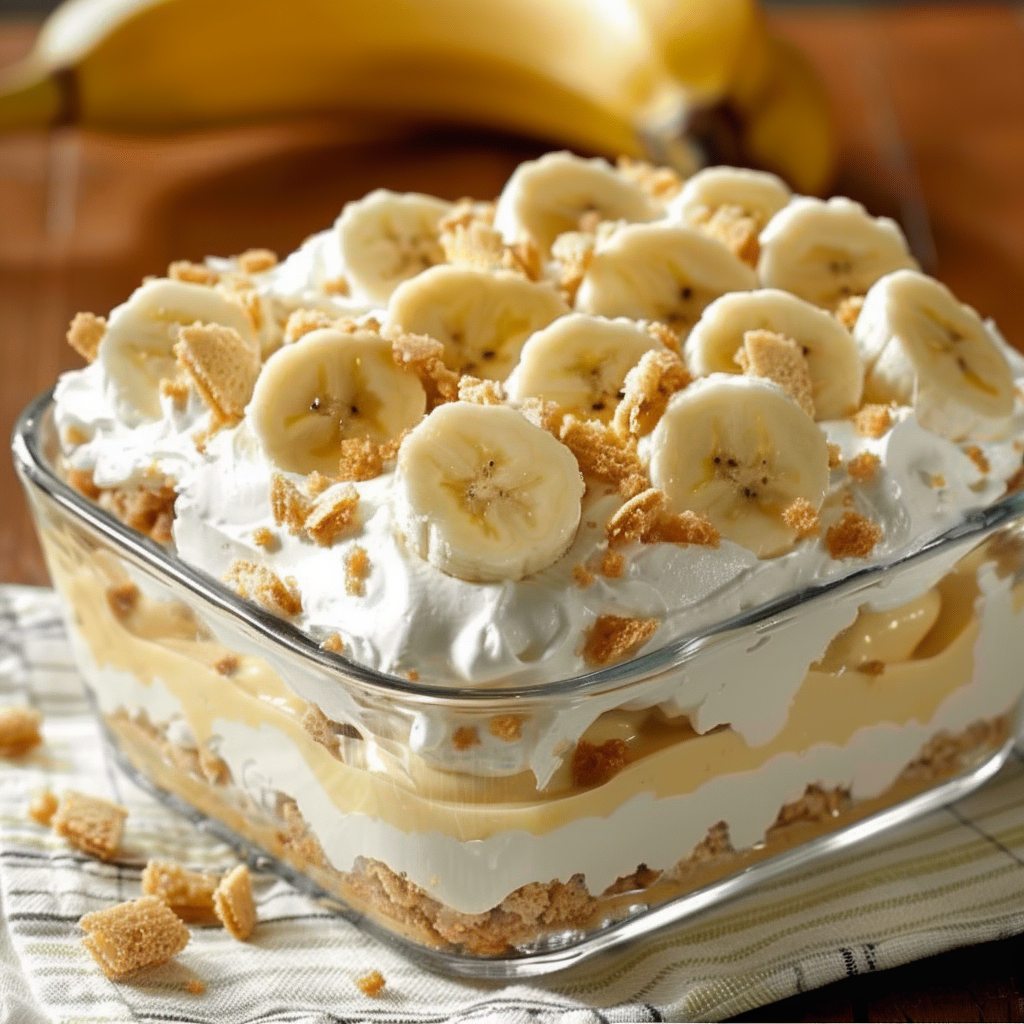
Why No Bake Banana Pudding Lush is a Crowd Favorite
When the weather heats up and you’re craving something sweet but don’t want to turn on the oven, no bake desserts become a go-to solution. Among the most beloved is the no bake banana pudding lush, a creamy, layered dessert that brings nostalgic comfort and easy elegance to your table. It combines all the flavor of traditional banana pudding but with added structure and a modern layered twist.
What makes this dessert stand out is its simple construction and stunning presentation. With just a few ingredients — like instant banana pudding, vanilla wafers, cream cheese, and whipped topping — you can build a multi-layered treat that looks professionally made. Each bite delivers a contrast in texture and flavor, from the buttery crunch of the crust to the airy cream cheese layer, the smooth banana pudding, and finally the garnish of fresh bananas and wafer crumbles.
Layered desserts like this have become increasingly popular for gatherings and parties. Their visual appeal and customizable nature make them ideal for serving a crowd. On platforms like Pinterest, variations of banana pudding lush frequently trend for holidays, summer BBQs, and birthdays. If you’re looking for a no bake dessert that feels like a bakery-quality treat without the hassle, this is the recipe to keep in your rotation. For those interested in the dessert’s roots, you can explore the history of banana pudding and how it evolved into the modern lush format.
What you’ll love most is how little effort it takes to create something that looks elaborate. No bake banana pudding lush is proof that with a few pantry staples and thoughtful layering, you can impress guests or simply treat yourself with minimal effort.
What is a “Lush” Dessert?
A lush dessert is a no-bake, multi-layered treat typically built with a cookie or graham cracker crust, a creamy middle layer (often cream cheese-based), a pudding layer, and a fluffy whipped topping. These desserts are often chilled to set rather than baked, making them ideal for quick dessert recipes and hot weather months when ovens are best left off.
The term “lush” refers not only to the dessert’s rich and creamy texture but also to its indulgent appearance. Unlike single-layered puddings or parfaits, a lush is stacked in layers that hold their form when sliced — giving it a polished, bakery-style finish. You can find numerous variations like chocolate lush, lemon lush, and of course, banana pudding lush, all featuring a similar format but different flavor profiles.
Banana pudding lush specifically brings a Southern twist to this layered concept by incorporating instant banana pudding, vanilla wafers, and sliced bananas. It’s essentially a hybrid between classic banana pudding and more structured layered desserts. What elevates this variation is how it transforms traditional banana pudding into a more elegant and sliceable format.
The roots of layered desserts go back decades and overlap with classics like icebox cakes and refrigerator pies. As explained in the Graham cracker crust article, many of these desserts rely on cookie bases that firm up when chilled, creating the perfect contrast to the creamy fillings above.
With the rise of platforms like Pinterest, lush desserts have enjoyed a resurgence, thanks to their visual appeal and no-fuss preparation. They’re perfect for make-ahead desserts, potlucks, and weeknight treats. Whether served in a baking dish or portioned into individual jars, their layered elegance makes them irresistible and easy to customize.
Ingredients Breakdown: Choosing the Right Layers
The beauty of a no bake banana pudding lush lies in its simplicity and versatility. Each layer adds texture and flavor, and choosing the right ingredients ensures a stable, delicious dessert that holds its shape and satisfies every bite. Here’s a detailed breakdown of each essential layer and how to make the most of your ingredients.
Crust Layer
-
Vanilla wafers are the classic base for banana pudding desserts, providing both flavor and crunch. Crushing them finely creates a more cohesive crust that holds together better when sliced.
-
Melted unsalted butter binds the crumbs and creates that firm, slightly chewy bottom layer. Use just enough to moisten the crumbs without making them soggy.
-
Alternative crust options include graham cracker crusts, shortbread cookies, or even crushed Oreos for a chocolate-banana twist.
Tips:
-
Use a food processor for a finer crumb texture.
-
Press the mixture firmly into the bottom of a 9×9 dish using a flat-bottomed glass or measuring cup.
-
Chill the crust before layering to set it properly.
Cream Cheese Layer
-
This layer provides richness and structure. Use softened cream cheese to ensure a smooth blend.
-
Powdered sugar adds sweetness without grittiness.
-
Folding in whipped topping lightens the texture, creating a mousse-like consistency.
Tips:
-
Beat the cream cheese and sugar first until completely smooth before folding in the whipped topping.
-
For extra flavor, add a splash of vanilla extract or a pinch of cinnamon.
Banana Pudding Layer
-
Choose a quality instant banana pudding mix—this ensures quick setting and a firm consistency that holds its shape.
-
Use cold milk (preferably whole milk) for best results when whisking.
-
Fold in additional whipped topping to soften the pudding and make it easier to spread.
You can explore how pudding functions as a thickened dessert by visiting the instant pudding article, which explains how these mixes work without heat.
Tips:
-
Whisk the pudding for exactly 2 minutes to activate thickening agents.
-
Don’t let the pudding set completely before spreading—it should be thickened but still spreadable.
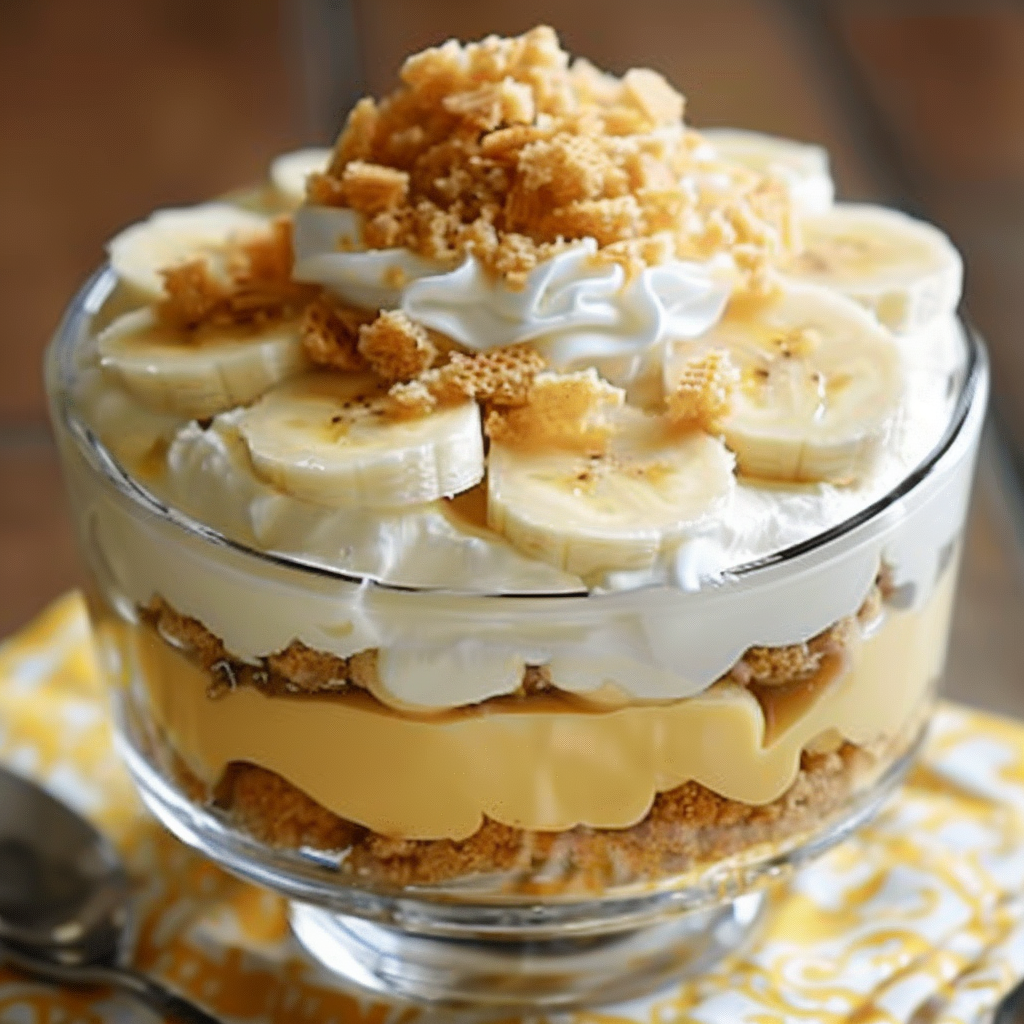
Toppings & Garnishes
-
Fresh banana slices should be added just before the final topping to prevent browning. To slow oxidation, brush slices with lemon juice or arrange them just under the whipped topping layer.
-
A final layer of whipped topping seals in the bananas and adds an airy, creamy finish.
-
Crushed vanilla wafers on top add texture and visual appeal.
Find even more ideas for delicious garnishes and presentation in this Pinterest search for Cool Whip desserts, where you’ll find examples of whipped topping layered with fruits, nuts, or drizzled sauces.
With a thoughtful approach to each component, you can transform simple pantry staples into a dessert that’s not only easy to assemble but also visually stunning and full of nostalgic flavor.
Step-by-Step Instructions for the Perfect No Bake Banana Pudding Lush
Making no bake banana pudding lush is as easy as it is rewarding. By layering thoughtfully and using quality ingredients, you can create a creamy, dreamy dessert that holds together beautifully and tastes like something from a bakery. Follow these detailed steps to get picture-perfect layers and balanced flavor every time.
1. Prepare the Crust
-
In a mixing bowl, combine 1½ cups of crushed vanilla wafers with ½ cup of melted unsalted butter.
-
Mix until the crumbs are fully coated and resemble wet sand.
-
Press the mixture firmly into the bottom of a 9×9 inch baking dish, ensuring an even layer.
-
Place the dish in the refrigerator for at least 15 minutes to allow the crust to set.
To learn more about how cookie crusts create a stable base in no bake desserts, check out this article on graham cracker crusts. Although you’re using vanilla wafers, the principles are similar.
2. Make the Cream Cheese Layer
-
In a separate bowl, beat 8 oz of softened cream cheese with 1 cup of powdered sugar until the mixture is smooth and lump-free.
-
Gently fold in 1 cup of whipped topping (like Cool Whip) until fully incorporated.
-
Spread this layer evenly over the chilled crust using a spatula, smoothing it out to the edges.
For inspiration on how this layer can be customized or used in other variations, see trending layered dessert ideas to elevate your presentation.
3. Prepare the Banana Pudding Layer
-
In a clean bowl, whisk 1 package (3.4 oz) of instant banana pudding mix with 1½ cups of cold milk for about 2 minutes until thickened.
-
Fold in 1 cup of whipped topping to lighten the texture.
-
Gently spread this layer over the cream cheese layer, being careful not to mix the two.
Understanding the science of instant pudding helps ensure it sets properly. Learn how it works in this pudding article that covers thickening agents and preparation methods.
4. Add Fresh Bananas and Top It Off
-
Slice 2 ripe bananas and arrange them evenly across the pudding layer.
-
Spread 1 more cup of whipped topping over the bananas to seal them in and prevent browning.
-
Finish by sprinkling crushed vanilla wafers on top for texture and garnish.
To prevent the bananas from turning brown too quickly, lightly coat the slices with lemon juice before layering or keep them just under the whipped topping. More tips on banana storage and freshness can be found in the banana (fruit) article.
5. Chill Before Serving
-
Cover the dessert with plastic wrap or a lid and refrigerate for at least 4 hours, or preferably overnight.
-
Chilling allows the layers to firm up and the flavors to meld beautifully.
-
Slice and serve chilled for the best texture and flavor.
This method can also be adapted to serve in jars or cups for individual portions — great for parties or events. For creative serving presentations and summer-ready visuals, browse no bake dessert inspiration.
This step-by-step process guarantees that your banana pudding lush will be easy to make, look beautiful, and impress everyone who takes a bite.
Common Mistakes to Avoid in No Bake Layered Desserts
Even with simple ingredients and no oven involved, a no bake banana pudding lush can go wrong without attention to detail. Here are the most common mistakes to watch for, along with tips on how to avoid them to ensure a perfect result every time.
-
Overmixing the pudding: When preparing instant banana pudding, it’s crucial to whisk for just about two minutes. Overmixing can cause the pudding to break down or become too thick, making it difficult to spread. Refer to this pudding guide for how instant pudding sets.
-
Under-chilling the dessert: One of the biggest issues is trying to serve the lush too soon. This dessert needs at least four hours in the refrigerator to set properly. If cut too early, the layers may collapse or slide apart, making for a messy presentation. For best results, chill overnight.
-
A soggy crust: Using too much butter or not chilling the crust long enough can result in a soggy base. The crust should be moist enough to hold together, but not greasy. Also, make sure to pack the crumbs firmly into the dish so they set into a solid layer.
-
Oxidized bananas: Nothing ruins a dessert’s appeal faster than browned banana slices. To slow oxidation, slice bananas just before adding them and place them under the top whipped layer. A light coating of lemon juice can also help. For more about banana preservation, check this banana article.
-
Skipping the layering order: The lush depends on strategic layering — crust, cream cheese, pudding, bananas, topping — to create structure. Altering the order can lead to soggy or uneven results. This layering method also ensures each bite delivers the intended texture contrast.
If you’re looking for visual examples of how well-executed lush desserts should look, explore Cool Whip dessert ideas for inspiration and presentation tips. With a few simple precautions, your banana pudding lush will come out creamy, structured, and visually impressive every single time.
Creative Variations on Banana Pudding Lush
Once you’ve mastered the basic no bake banana pudding lush, you can start exploring creative variations to suit your tastes or seasonal themes. These twists add exciting flavors and textures, making the dessert even more versatile for different occasions.
Chocolate Banana Pudding Lush
-
Replace the vanilla crust with crushed chocolate wafers or Oreos.
-
Alternate layers of chocolate pudding and banana pudding for a rich flavor contrast.
-
Drizzle melted chocolate or chocolate syrup between layers for added indulgence.
Peanut Butter Twist
-
Add 2–3 tablespoons of peanut butter to the cream cheese layer before folding in the whipped topping.
-
Top with crushed peanuts or peanut butter chips for a crunchy finish.
-
Pair this with a graham cracker crust for a nutty base, inspired by easy party desserts.
Healthier Version
-
Use Greek yogurt in place of cream cheese for added protein and a lighter texture.
-
Choose sugar-free pudding and low-fat whipped topping to reduce calories.
-
Layer in sliced strawberries or blueberries for a fresh twist.
Tropical Version
-
Mix crushed pineapple into the cream cheese layer.
-
Add a sprinkle of toasted coconut flakes on top.
-
Use a coconut-flavored whipped topping to enhance the island flavor profile.
You’ll find many of these creative spins featured in banana pudding recipes, which show how simple variations can turn this classic into a new experience. The layered format is forgiving and easy to modify — just remember to balance moisture and texture so the dessert stays structurally sound.
How to Build Layered Desserts Like a Pro (Using Instant Pudding)
Creating bakery-style layered desserts at home doesn’t require professional skills—just a few essential tips and techniques. Whether you’re working with banana pudding lush or other flavors, these strategies will elevate your no-bake desserts.
Understand Instant Pudding Behavior
-
Instant pudding sets through starch-based thickeners that activate when mixed with cold milk.
-
It begins to firm up within minutes, so time your layering accordingly.
-
Avoid adding too much liquid—stick to the measurements to maintain consistency. Read more in this pudding guide to understand how it works.
Layering Order Matters
-
Always begin with a firm crust, followed by a structured cream cheese layer.
-
Then add the pudding and top it off with fruit or whipped topping.
-
This order creates a stable structure that can be sliced and served cleanly.
Use the Right Tools
-
Use a spatula or the back of a spoon to spread each layer evenly.
-
For fancier presentation, pipe the whipped topping using a piping bag with a decorative tip.
-
To make individual servings, layer the ingredients into glass jars or cups for a portable, mess-free option.
Add Stabilizers (Optional)
-
To keep whipped topping firm in warm conditions, add unflavored gelatin to it.
-
This is especially helpful for outdoor parties or events where refrigeration may be limited.
For visual techniques and presentation ideas, check out layered dessert inspiration that showcase how pro-looking results are achieved with simple tools.
Mastering these techniques ensures that your banana pudding lush will look polished, slice neatly, and wow your guests every time.
Storage and Make-Ahead Tips
One of the best things about no bake banana pudding lush is how well it stores and travels. With the right techniques, you can make it ahead of time and keep it fresh and appealing.
Refrigeration
-
Cover tightly with plastic wrap or a lid and refrigerate for up to 3 days.
-
The layers will remain intact, and the flavor continues to develop.
Prevent Banana Browning
-
Layer bananas beneath the whipped topping to reduce exposure to air.
-
Use lemon juice lightly brushed on banana slices to slow oxidation. More on this in the banana (fruit) article.
Can You Freeze It?
-
Freezing is not recommended. The pudding and whipped topping can separate or become watery when thawed.
-
However, the crust and cream cheese layer can be prepped and frozen separately, then thawed before adding the pudding and bananas.
Best Containers for Storage
-
Use a glass baking dish with a lid for easy storage and serving.
-
For individual portions, use mason jars or sealable plastic containers to make them portable and lunchbox-friendly.
For ideas on how to serve and store lush desserts beautifully, explore no bake dessert ideas to find inspiration from home bakers and food stylists.
Serving Ideas & Presentation Tips
Presentation plays a huge role in how your dessert is received. With layered desserts like banana pudding lush, you have a variety of options to make it eye-catching and inviting.
Serve in Individual Jars or Cups
-
Ideal for parties, picnics, or dessert tables.
-
Use clear containers to showcase each layer.
-
Top each jar with a banana slice and a vanilla wafer for presentation.
Garnish Creatively
-
Add crushed nuts, shaved chocolate, or toasted coconut for texture.
-
Drizzle with caramel or chocolate sauce just before serving.
Make a Dessert Bar
-
Let guests build their own layers using pudding, cookies, bananas, and toppings.
-
Offer variations like chocolate chips, strawberries, or whipped cream in bowls.
Elegant Plating
-
Cut clean squares from the pan using a sharp knife dipped in warm water.
-
Wipe the knife between each cut for a clean edge.
-
Serve with a mint sprig or edible flower for a formal touch.
Looking for more ways to impress? Explore easy party desserts for setups and serving arrangements that elevate your presentation.
FAQs: People Also Ask
Can you use homemade pudding instead of instant?
Yes, but make sure it’s completely cooled and thickened before layering. Instant pudding is preferred for speed and consistency, but homemade versions can offer richer flavor.
How do you keep bananas from turning brown in banana pudding?
Slice bananas right before layering, coat them lightly with lemon juice, and layer them under whipped topping to block air exposure.
Can I make banana pudding lush a day ahead?
Yes! It actually tastes better after chilling overnight. Just store it covered in the fridge, and add garnishes before serving.
What’s the difference between banana cream pie and banana pudding lush?
Banana cream pie uses a single pastry crust and is typically baked. Banana pudding lush is no bake and has multiple layers with whipped topping, cookies, and pudding.
What are the best cookies for banana pudding desserts?
Classic vanilla wafers are traditional, but graham crackers, shortbread, or even Oreos can be used depending on the flavor profile. See more ideas in Cool Whip desserts for pairings.
No Bake Banana Pudding Lush How To Build Layered Desserts With Instant Pudding
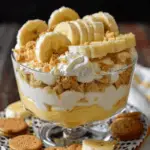
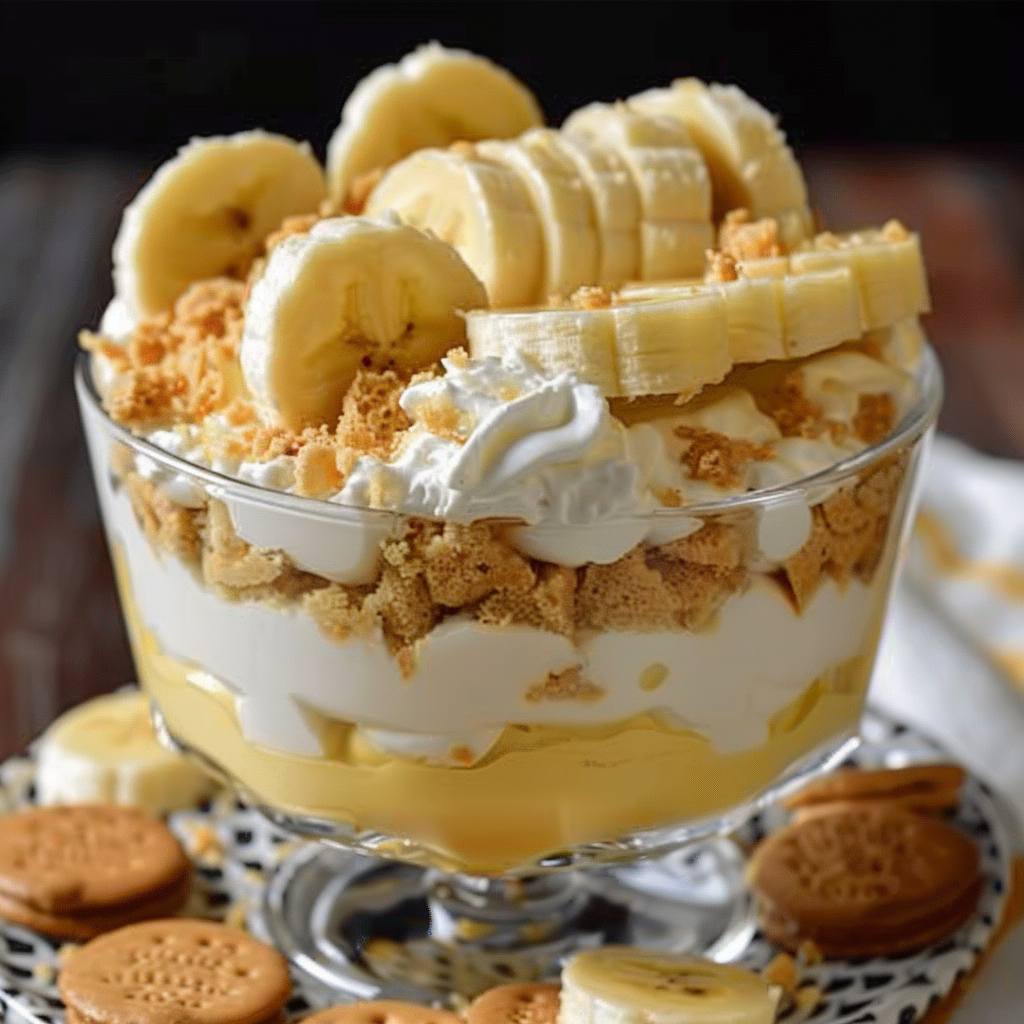
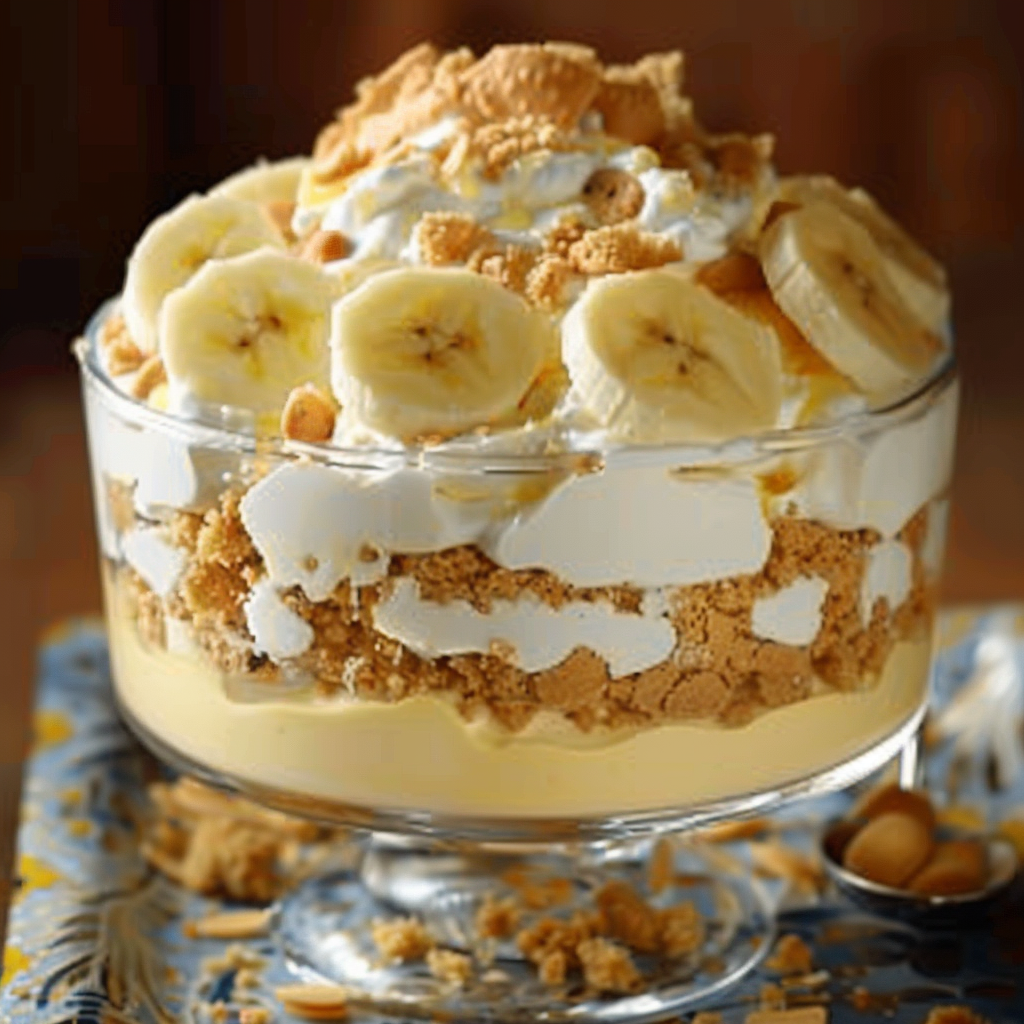
This no bake banana pudding lush is the ultimate crowd-pleaser, combining layers of crushed vanilla wafers, creamy sweetened cream cheese, fluffy whipped topping, and instant banana pudding. Topped with fresh bananas and a final sprinkle of cookie crumbs, it’s the perfect dessert for summer parties, potlucks, or quick weeknight treats. Easy to prepare and even easier to love, this silky, no-fuss dessert looks impressive and tastes even better.
- Author: Clara
Ingredients
For the crust:
- 1 ½ cups crushed vanilla wafers
- ½ cup unsalted butter, melted
For the cream cheese layer:
- 8 oz cream cheese, softened
- 1 cup powdered sugar
- 1 cup whipped topping (like Cool Whip)
For the banana pudding layer:
- 1 package (3.4 oz) instant banana pudding mix
- 1 ½ cups cold milk
- 1 cup whipped topping
For the topping:
- 2 bananas, sliced
- 1 cup whipped topping
- Crushed vanilla wafers (for garnish)
Instructions
Mix crushed vanilla wafers and melted butter in a bowl until combined.
Press the mixture into the bottom of a 9×9 inch baking dish to form the crust. Chill in the fridge while preparing the next layers.
In a bowl, beat the softened cream cheese and powdered sugar until smooth.
Fold in the whipped topping until well combined, then spread the cream cheese layer over the crust.
In another bowl, whisk together the banana pudding mix and cold milk for about 2 minutes until thickened.
Fold in the whipped topping, then spread the pudding layer over the cream cheese layer.
Top with sliced bananas, then spread the final layer of whipped topping over everything.
Sprinkle crushed vanilla wafers on top for garnish.
Refrigerate for at least 4 hours or until set. Serve chilled.
Notes
-
Chill for at least 4 hours to ensure layers are set before slicing.
-
For best texture, use full-fat cream cheese and whole milk.
-
Add lemon juice to banana slices to prevent browning.
-
Make up to 24 hours in advance and store covered in the refrigerator.
-
Customize the crust with chocolate wafers or graham crackers for a twist.
-
This dessert is best served cold with a fresh topping of bananas just before serving.