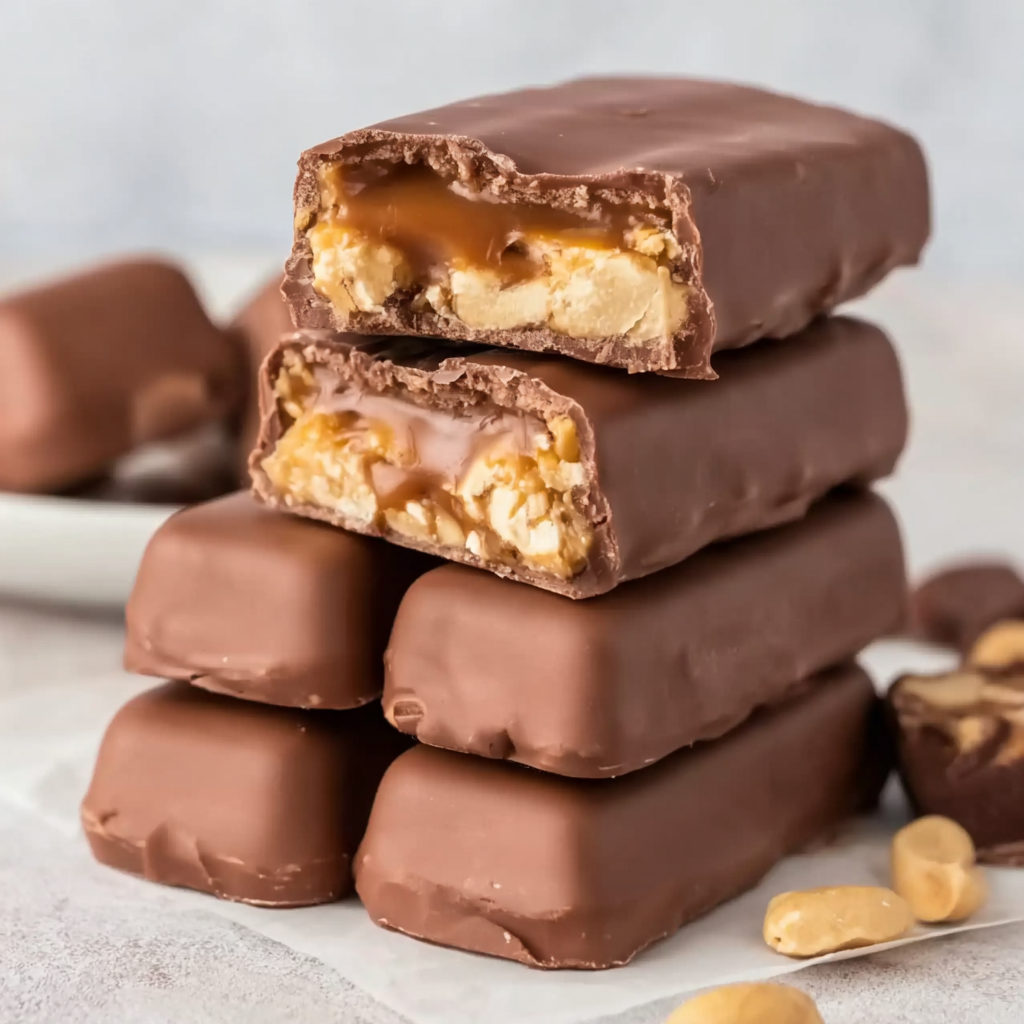
There is something especially satisfying about making a favorite candy-inspired treat at home, especially when the result feels even more generous, fresh, and comforting than anything from a store package. These Incredible Homemade Snickers Bars are perfect for bake sales, holiday dessert trays, birthday parties, weekend movie nights, or those moments when you simply want a rich, chocolatey treat to share with people you love. With layers of smooth chocolate, chewy caramel, fluffy nougat, and crunchy peanuts, every bite feels like a little celebration.
This recipe is inspired by the classic candy bar flavors so many people grew up loving, but with a homemade touch that makes it feel extra special. The first time I made these bars, the goal was simple: create a dessert that captured the magic of a chocolate caramel peanut bar while making it thicker, softer, and even more irresistible.
Why You’ll Love These Homemade Snickers Bars
These chocolate caramel peanut dessert bars check every box for a crowd-pleasing homemade sweet. They have that familiar combination of milk chocolate, caramel, and peanuts, but the layered structure turns them into a bakery-style treat that looks impressive on any dessert table.
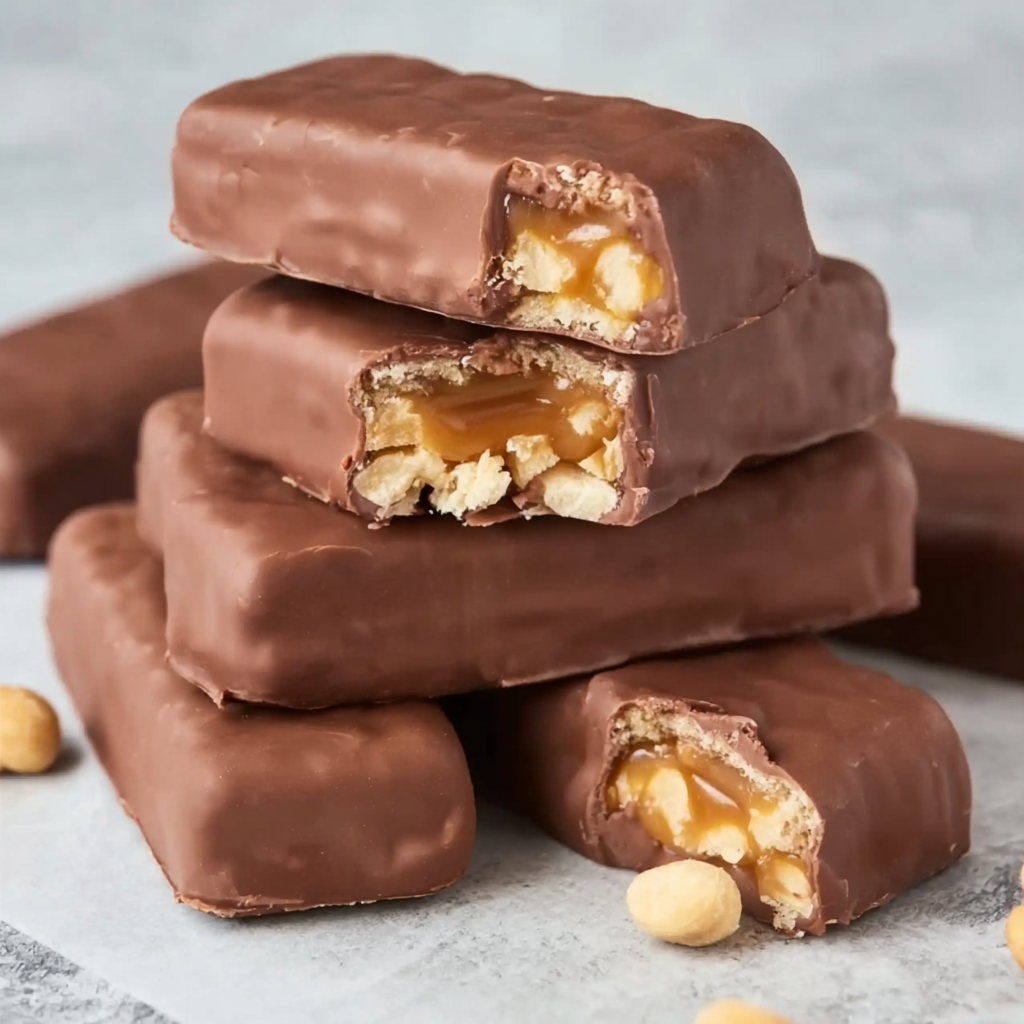
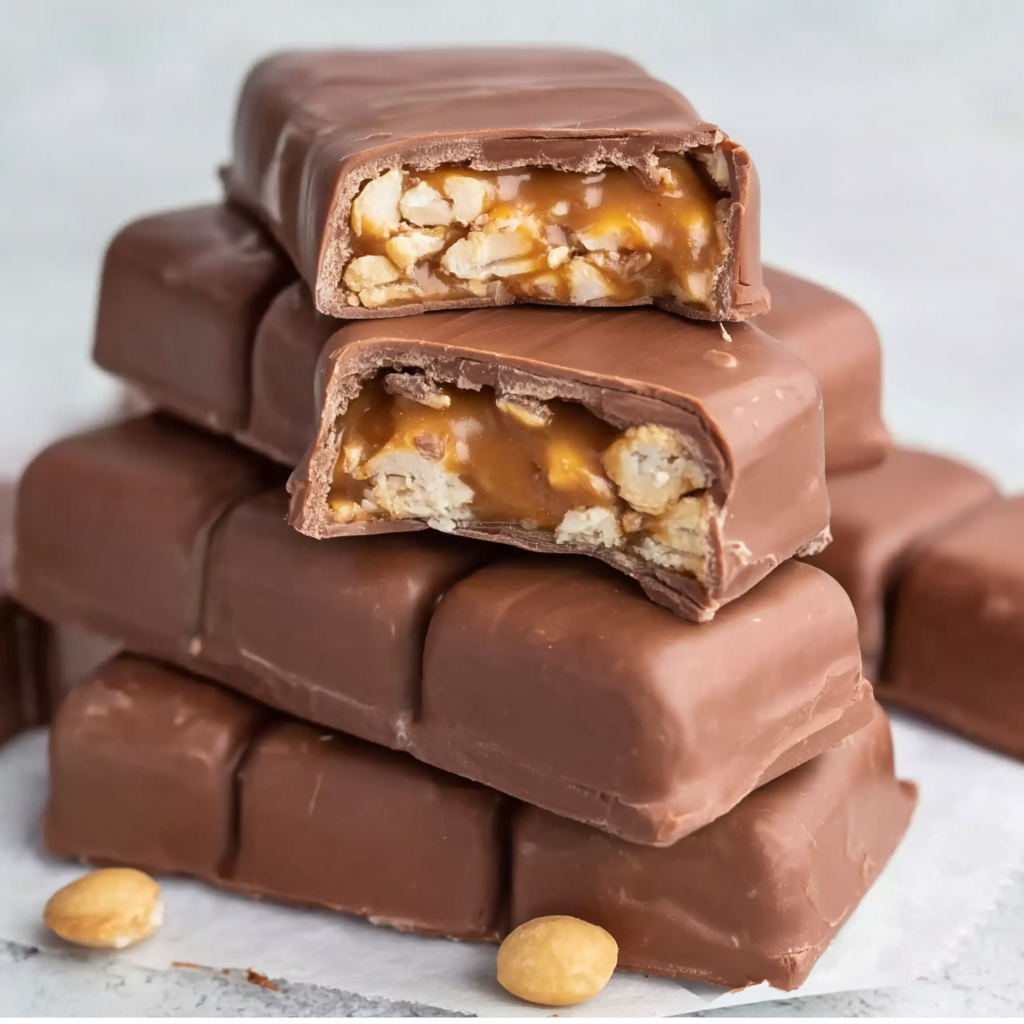
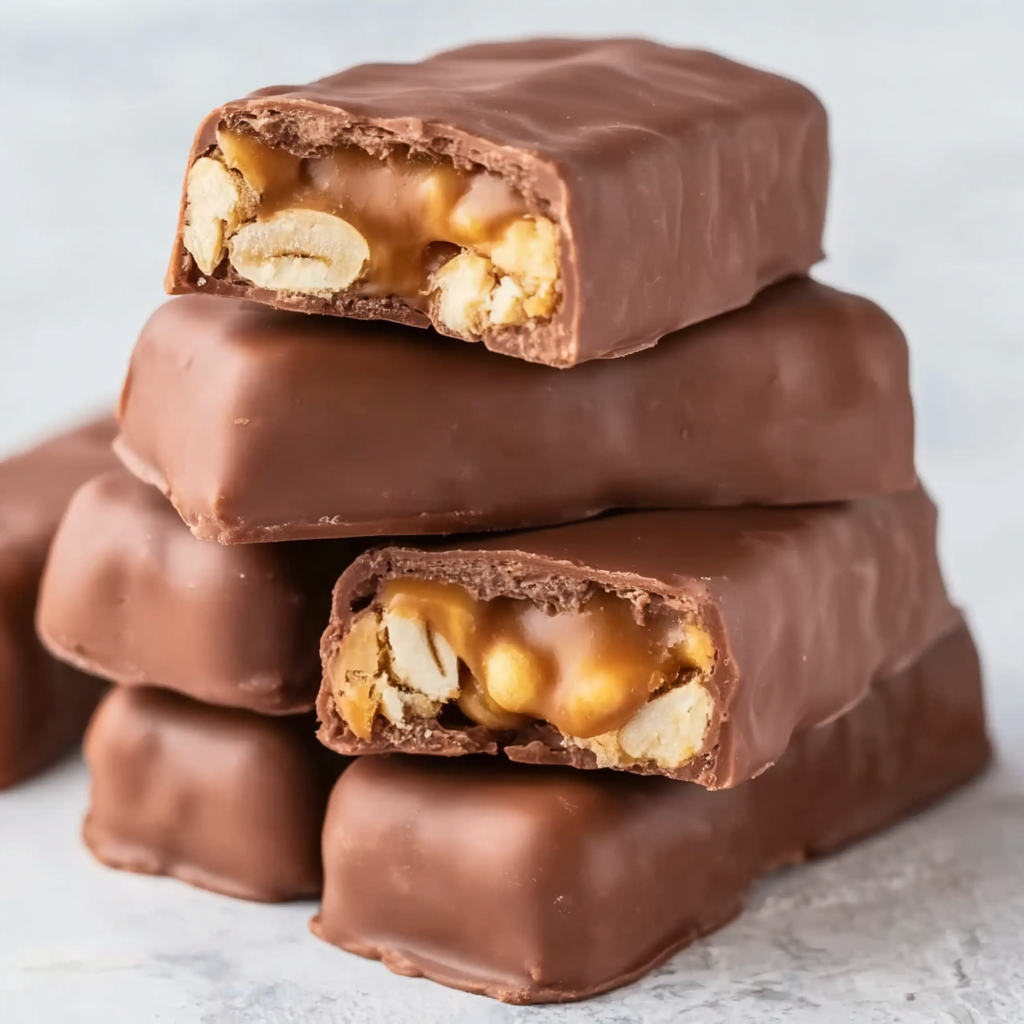
What makes this recipe so appealing is the contrast in textures. The chocolate layers are smooth and rich, the nougat center is soft and slightly fluffy, the caramel is gooey and buttery, and the peanuts add a delicious crunch with just the right salty balance. Together, these layers create a homemade bar that tastes indulgent without being overly complicated to prepare.
Another reason these bars stand out is that they can be made ahead. Once chilled and sliced, they store beautifully in the refrigerator, making them a practical dessert for parties, gifting, and special gatherings. They also slice into neat squares or rectangles, so they are ideal when you need a dessert that is easy to serve.
What Makes These Bars So Incredible
Many homemade candy bar recipes focus only on chocolate and caramel, but the real magic here is the layered approach. Each component plays an important role:
The base chocolate layer gives the bars structure and a rich start.
The nougat layer brings softness and that signature candy-bar feel.
The caramel-peanut layer adds chewiness and crunch.
The top chocolate layer seals everything together with a glossy finish.
The result is a dessert bar that tastes familiar yet more luxurious. Because you are making it at home, you can use good-quality ingredients, make the layers thick and generous, and chill the bars to the exact texture you like best.
Ingredients You’ll Need
Here is everything you need to make these Incredible Homemade Snickers Bars.
For the bottom chocolate layer:
-
2 cups milk chocolate chips
-
1/4 cup creamy peanut butter
For the nougat layer:
-
1/4 cup unsalted butter
-
1 cup granulated sugar
-
1/4 cup evaporated milk
-
1 1/2 cups marshmallow creme
-
1/4 cup creamy peanut butter
-
1 teaspoon vanilla extract
-
1 1/2 cups salted peanuts, roughly chopped
For the caramel layer:
-
14 ounces soft caramel candies, unwrapped
-
1/4 cup heavy cream
For the top chocolate layer:
-
2 cups milk chocolate chips
-
1/4 cup creamy peanut butter
Ingredient Notes for Best Results
Milk chocolate chips give these bars the classic candy-bar flavor. If you prefer a slightly deeper chocolate taste, you can replace part of the milk chocolate with semi-sweet chocolate chips, but using mostly milk chocolate keeps the flavor closest to the inspiration.
Creamy peanut butter helps the chocolate layers melt smoothly and also enriches the nougat. Choose a standard creamy peanut butter rather than a natural separated one, since it gives the most stable texture.
Marshmallow creme is key for creating that soft nougat layer without making the process difficult. It adds sweetness, body, and the light chew that makes these bars memorable.
Soft caramel candies are a convenient shortcut that still produces a luscious caramel center. When melted with heavy cream, they become smooth and spreadable.
Salted peanuts are important because they balance the sweetness of the chocolate and caramel. Roughly chopping them helps distribute crunch evenly through the filling.
Kitchen Tools That Help
You do not need any fancy equipment for this recipe, which is part of why it is so approachable. A 9×13-inch baking dish, parchment paper, saucepan, microwave-safe bowls, spatula, and sharp knife are enough. Lining the pan with parchment paper makes lifting and slicing the bars much easier, so do not skip that step.
How to Make Incredible Homemade Snickers Bars
1. Prepare the Pan
Line a 9×13-inch baking dish with parchment paper, leaving some overhang on the sides so you can lift the bars out easily later. Lightly grease the parchment if desired for extra insurance.
2. Make the Bottom Chocolate Layer
In a microwave-safe bowl, combine 2 cups milk chocolate chips and 1/4 cup creamy peanut butter. Microwave in 20-second intervals, stirring each time, until smooth and fully melted. Spread the mixture evenly over the bottom of the prepared pan. Place the pan in the refrigerator or freezer for a few minutes until the layer firms up.
This step creates a sturdy foundation for the rest of the layers, so take a moment to spread it evenly into the corners.
3. Prepare the Nougat Layer
In a medium saucepan over medium heat, melt 1/4 cup unsalted butter. Stir in 1 cup granulated sugar and 1/4 cup evaporated milk. Bring the mixture to a gentle boil and cook for about 5 minutes, stirring often.
Remove the saucepan from the heat and stir in 1 1/2 cups marshmallow creme, 1/4 cup creamy peanut butter, and 1 teaspoon vanilla extract until smooth. Fold in 1 1/2 cups roughly chopped salted peanuts.
Spread the nougat mixture over the chilled chocolate layer. Use an offset spatula or the back of a spoon to smooth it into an even layer.
4. Add the Caramel Layer
In a microwave-safe bowl or saucepan, combine 14 ounces soft caramel candies and 1/4 cup heavy cream. Heat gently, stirring often, until the caramel is completely melted and smooth.
Pour the caramel over the nougat layer and spread evenly. Because the caramel is thick, work carefully and gently so the nougat stays in place.
5. Finish with the Top Chocolate Layer
In another microwave-safe bowl, melt the remaining 2 cups milk chocolate chips with 1/4 cup creamy peanut butter in short intervals, stirring until smooth.
Pour the chocolate over the caramel layer and spread it evenly to cover the top completely.
6. Chill and Slice
Refrigerate the bars for at least 2 to 3 hours, or until fully set. Once firm, lift the bars out using the parchment paper overhang and place them on a cutting board. Use a sharp knife to cut them into bars or squares.
For the cleanest slices, let the bars sit at room temperature for 5 to 10 minutes before cutting, and wipe the knife clean between slices.
Tips for Perfect Chocolate Caramel Peanut Dessert Bars
Use parchment paper
This makes the entire recipe easier from start to finish. It helps with removal, slicing, and cleanup.
Do not rush the chilling
Each layer benefits from a little time to firm up. This keeps the bars neat and helps preserve the distinct layers.
Chop the peanuts just enough
You want texture, not dust. A rough chop gives the bars crunch while keeping the filling easy to spread.
Melt chocolate gently
Chocolate can seize or scorch if overheated. Use short microwave bursts or low stovetop heat and stir often.
Slice when slightly softened
Very cold bars can crack when cut. A brief rest at room temperature helps you get cleaner edges.
Flavor Variations to Try
One of the best things about homemade dessert bars is how easy they are to customize. You can keep the classic version or make small changes depending on what your family likes best.
For a more intense chocolate finish, use half milk chocolate chips and half semi-sweet chocolate chips in the top layer. This creates a slightly less sweet bite and a richer finish.
If you enjoy extra peanut flavor, stir an additional 2 tablespoons chopped peanuts into the caramel layer before spreading. This adds more crunch and makes the bars even heartier.
For a festive dessert tray, sprinkle a tiny pinch of flaky sea salt over the top chocolate layer before chilling. This enhances the caramel and chocolate beautifully.
You can also cut the bars into mini bite-size squares for parties. Small portions are a great idea because these dessert bars are rich and satisfying.
Serving Ideas
These Incredible Homemade Snickers Bars are rich enough to be the centerpiece of a dessert plate all on their own. They pair wonderfully with a glass of cold milk, hot cocoa, or coffee for older guests. For family gatherings, they fit beautifully on holiday cookie trays, birthday dessert tables, and potluck spreads.
Because they are sturdy once chilled, they also travel well. Pack them in a single layer in a container for bake sales, picnics, or school-friendly celebrations where a homemade dessert always stands out. They look attractive cut into uniform rectangles and arranged on a platter with a little extra chopped peanuts sprinkled around for presentation.
How to Store Homemade Snickers Bars
Store the bars in an airtight container in the refrigerator for up to 1 week. Because of the chocolate and caramel layers, they hold their shape best when chilled. Place parchment paper between layers if stacking them.
For longer storage, you can freeze the bars for up to 2 months. Wrap them tightly or store them in a freezer-safe container. Thaw in the refrigerator before serving. This make-ahead option is especially helpful during holidays or when planning dessert trays in advance.
Common Mistakes to Avoid
One of the most common issues with layered dessert bars is trying to spread warm layers too aggressively. Gentle spreading is the best approach, especially over the nougat and caramel. Using an offset spatula can help keep the layers distinct.
Another mistake is overheating the caramel. Melt it slowly and stir often so it stays silky and spreadable rather than turning stiff or sticky.
Using natural peanut butter can also change the texture of the layers. For this recipe, classic creamy peanut butter gives the most dependable result.
Finally, be patient before slicing. Fully chilled bars are much easier to cut cleanly and serve beautifully.
Frequently Asked Questions
1. Can I make homemade Snickers bars ahead of time?
Yes, these bars are excellent for making ahead, which is one reason they are so useful for parties, holidays, and family gatherings. You can prepare them a day or two in advance and keep them chilled until you are ready to serve. In fact, many people find that the bars slice even better after they have had several hours to fully set in the refrigerator. If you are planning for a dessert table, making them ahead reduces stress and gives you one less thing to do on the day of your event. Just store them in an airtight container and keep them cool so the chocolate layers stay firm and glossy.
2. Can I use different chocolate for these dessert bars?
Absolutely. Milk chocolate gives the bars that classic candy-inspired taste, but you can change the flavor a little by using semi-sweet chocolate or a mixture of both. If you prefer a less sweet dessert, replacing part of the milk chocolate with semi-sweet is a smart option. You can also use chocolate melting wafers if you want an especially smooth finish. The most important thing is to melt the chocolate gently so it stays silky and easy to spread. No matter which chocolate you choose, pairing it with peanut butter helps create a softer bite and a more balanced flavor.
3. Why are my layers sliding or mixing together?
This usually happens when one layer is too warm or the layer underneath has not had enough time to firm up. To keep your homemade Snickers bars looking neat, chill the base chocolate layer before adding the nougat, and let the nougat settle a bit before spreading on the caramel. When adding each layer, spread slowly and carefully rather than pressing too hard. Thick layers naturally shift if handled roughly, especially when they are warm. It also helps to use a spatula that can glide gently across the surface. A little patience between steps makes a big difference in the final look and texture of the bars.
4. Can I freeze chocolate caramel peanut dessert bars?
Yes, these bars freeze very well, which makes them ideal for advance baking. Once the bars are fully chilled and sliced, place them in a freezer-safe container with parchment paper between layers to prevent sticking. They can be frozen for up to 2 months. When you are ready to enjoy them, transfer the bars to the refrigerator to thaw gradually. This helps preserve the texture of the chocolate and caramel better than leaving them on the counter right away. Freezing is especially helpful during busy seasons when you want to prepare homemade desserts early without sacrificing freshness or flavor.
Final Thoughts
These Incredible Homemade Snickers Bars are the kind of dessert that instantly earns a place in your repeat-recipe collection. They are rich, layered, nostalgic, and deeply satisfying, yet they also feel special enough for celebrations and sharing. There is a real joy in taking familiar flavors like chocolate, caramel, peanuts, and nougat and turning them into a homemade dessert that tastes even more generous and comforting than the original inspiration.
What makes this recipe truly worth making is the balance it offers. It looks impressive, but the method is straightforward. It feels indulgent, but it can be prepared ahead and sliced into portions that work for parties, gifts, or family desserts. It is the sort of treat that draws people back for a second piece, then prompts someone to ask for the recipe before the tray is empty.
These bars are also a reminder that homemade desserts have a way of creating moments. They get packed into lunchbox surprises, served on holiday platters, shared across kitchen tables, and wrapped up for neighbors and friends. Even though they are inspired by a classic candy bar, they become something more personal when made in your own kitchen.
Whether you are preparing them for a birthday, a celebration, or simply because you want a truly unforgettable sweet treat, these chocolate caramel peanut dessert bars deliver every time. Keep this recipe handy for the moments when only a rich, crowd-pleasing dessert will do. Once you make them and taste those perfect layers together, you will understand exactly why they deserve the name incredible.


