Roasting Cauliflower
Roasted cauliflower has emerged as a must-have dish in modern kitchens—not just as a healthy alternative, but as a flavor-packed culinary staple. Its popularity stems from its ability to transform from bland and soft to crispy, golden perfection when exposed to high heat. This transformation enhances not just texture, but also deepens the flavor, creating a side dish or snack that’s both nutritious and satisfying.
Cauliflower, a cruciferous vegetable from the Brassicaceae family, is prized for its versatility. It contains high levels of fiber, vitamins C and K, and is naturally low in calories, making it a top pick for health-conscious eaters. Cauliflower nutrition facts highlight its benefits for heart health and inflammation reduction, making it an ideal choice for daily meals. When roasted, it sheds its sometimes sulfurous aroma and picks up the toasty, nutty notes that make it crave-worthy.
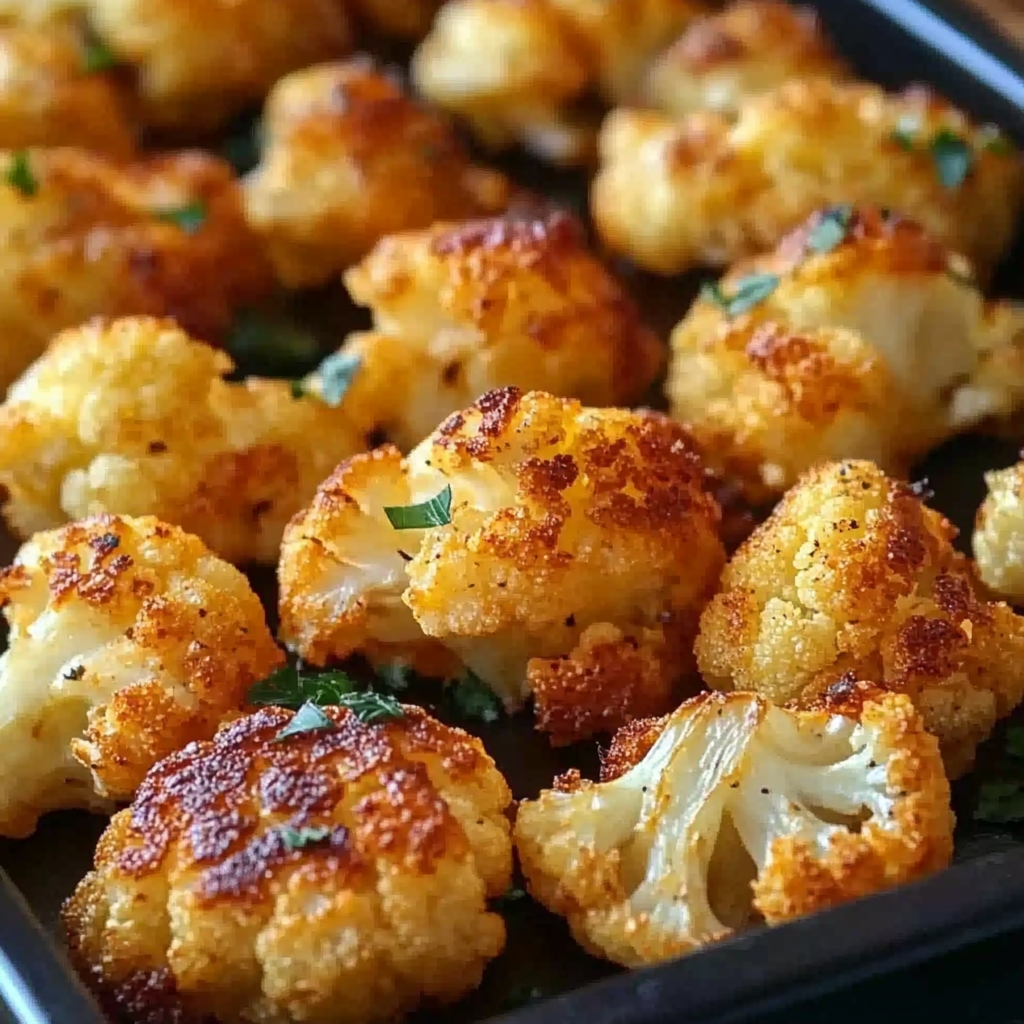
To achieve the best crunchy texture, roasting is the technique of choice. Unlike boiling or steaming, roasting triggers the Maillard reaction, a chemical process that browns the surface of food and unlocks layers of flavor. For cauliflower, this means charred edges, a tender interior, and a bold taste profile that stands on its own—or complements a wide range of seasonings. Whether you’re serving it with a zesty dip or as part of a main course, crispy roasted cauliflower is bound to become a favorite in your recipe rotation.
Roasting techniques also contribute to the overall satisfaction of the dish. High-heat cooking, particularly around 425°F (220°C), is essential for developing that signature crunch. Choosing the right oil—like olive oil—enhances both texture and nutritional value, making this a smart choice not just for taste but for wellness as well. Want some visual inspiration? Browse these roasted cauliflower ideas on Pinterest to spark creativity for your next meal.
Why Roasting Works Best for Cauliflower
Roasting is the ultimate technique for cooking cauliflower if you’re aiming for a crunchy, caramelized finish. Unlike boiling or steaming, which softens the vegetable and often leaves it waterlogged, roasting draws out moisture while concentrating flavor. This is key to achieving the crispy edges and rich, golden color that elevate cauliflower from bland to bold.
The transformation during roasting occurs thanks to a chemical process known as the Maillard reaction. When the cauliflower is exposed to high heat, natural sugars and amino acids interact, producing a distinct browned crust and complex savory taste. This reaction doesn’t happen when cauliflower is cooked with moist heat—only when it’s dry and exposed to temperatures above 300°F (149°C).
Here are several reasons why roasting is ideal for cauliflower:
-
Texture: Roasting produces a crisp exterior and tender interior—something steaming or microwaving can’t replicate.
-
Flavor: Dry heat enhances the nutty, sweet undertones of cauliflower, especially when paired with spices like paprika and cumin, both of which bring warm, earthy notes.
-
Ease of Preparation: There’s no need to pre-cook or blanch. Simply season and roast.
-
Customizable: Roasting allows easy integration of spices, oils, and toppings, including optional additions like Parmesan cheese or nutritional yeast for a vegan-friendly “cheesy” flavor.
Roasting also makes cauliflower more appealing to picky eaters or those new to plant-based foods. The visual transformation—from pale and dense to richly colored and crisp—adds to its allure. You’ll find countless crispy vegetable recipes showcasing roasted cauliflower for this very reason.
When compared to sautéing or grilling, roasting offers superior control. It’s easier to regulate temperature and cooking time, which are both crucial for achieving consistent crunchiness. As explored in the roasting technique overview, using a hot oven and a well-lined pan ensures even heat distribution, promoting uniform browning across all the florets.
Moreover, roasting retains the nutritional profile of cauliflower better than boiling. Vitamins like C and K are preserved when roasting, particularly when the cauliflower is not overcooked. This makes it a functional food that supports overall wellness while delivering unmatched texture and taste.
Whether you’re a seasoned cook or a beginner, roasting is a fail-proof way to make cauliflower the star of your table. You can even explore healthy vegetable side dishes to complement your main course and elevate your entire meal.
Selecting the Right Cauliflower
Choosing the right cauliflower is the first essential step in achieving that coveted crispy roasted texture. Not all cauliflower heads are created equal, and a few careful selections at the grocery store or farmers market can dramatically impact your results in the kitchen.
When selecting your cauliflower, keep these key factors in mind:
-
Color: Look for a creamy white head with no dark spots or discoloration. Dull or brown patches can indicate age or spoilage.
-
Firmness: The head should feel solid and tightly packed. Loose or soft florets are signs of aging.
-
Leaves: Fresh cauliflower will have crisp, green leaves hugging the base. These leaves help protect the vegetable and indicate freshness.
-
Size: While size doesn’t impact flavor, a medium to large head is ideal for even roasting and meal prep.
For those seeking organic options, both conventional and organic cauliflower offer similar flavors and textures, but organic varieties are free of synthetic pesticides. Whether organic or not, always wash the cauliflower thoroughly and dry it completely to avoid sogginess during roasting.
Some people prefer to buy pre-cut florets for convenience, but whole cauliflower is usually fresher and allows for more consistent sizing, which is crucial for even browning. If pre-cut is your only option, pat the florets dry and examine them for any signs of spoilage before roasting.
Pinterest boards such as roasted cauliflower ideas offer great visual guides on what well-prepared florets should look like before they hit the oven. For best results, opt for fresh, unblemished heads that are firm to the touch and uniform in color.
Preparing Cauliflower for Roasting
Preparation is a critical step to ensure your cauliflower turns out crispy and golden every time. Even the best oven settings and seasonings won’t help if your florets are too wet or uneven in size. Here’s how to properly prepare your cauliflower to maximize roasting success.
Step-by-Step Guide to Cutting Cauliflower
-
Remove the outer leaves and trim the stem from the base of the cauliflower.
-
Slice the head in half vertically through the stem.
-
Cut into quarters, then separate the florets using your hands or a paring knife.
-
Trim larger florets into smaller, uniform pieces—this ensures even cooking and browning.
Uniformity is crucial. If some florets are much larger than others, they may roast unevenly, leaving some soft and others burnt.
The Importance of Drying
Once your florets are cut, dry them thoroughly. Wet cauliflower won’t crisp—it’ll steam. Use these tips:
-
Pat with paper towels or a clean kitchen towel.
-
Let sit at room temperature for 10–15 minutes to air-dry if needed.
This simple but often overlooked step can make the difference between soft and crunchy.
Using the Right Bowl for Mixing
Toss your cauliflower in a large mixing bowl to allow for even distribution of spices and oil. Add the oil first, then the spices. Stir or toss until every floret is evenly coated.
Need inspiration on how your florets should look pre-oven? Check out crispy vegetable recipes for visuals of perfectly prepped cauliflower ready to roast.
Proper preparation lays the foundation for flavor and texture. Skipping any of these steps—especially drying and cutting uniformly—will result in less-than-stellar results, no matter how great your seasonings or cooking technique.
Seasoning for Maximum Flavor and Crunch
Seasoning isn’t just about taste—it’s a major player in texture, too. Using dry seasonings helps promote the crispy finish you want while locking in flavor. Here’s how to build a perfect seasoning profile for roasted cauliflower.
Go-To Dry Spice Blend
For a bold, balanced flavor, use the following mix:
-
1 tsp garlic powder
-
1 tsp paprika
-
½ tsp cumin – learn more about its benefits
-
½ tsp onion powder
-
Salt and pepper to taste
These spices bring smoky, earthy, and savory depth to the dish. Dry spices cling better to the cauliflower’s surface, enhancing both browning and crunch.
Add-Ons for Extra Flavor
-
2 tbsp grated Parmesan (optional): Adds a rich umami flavor and promotes extra crispiness when sprinkled post-roast.
-
1 tbsp lemon juice: A touch of acidity brightens the flavor profile.
-
Fresh herbs: Parsley, cilantro, or dill for garnish add color and freshness.
-
For a vegan twist, substitute Parmesan with nutritional yeast, which brings a cheesy, nutty flavor without dairy.
You can explore global variations using spices like curry powder, za’atar, or smoked paprika. The adaptability of cauliflower makes it a favorite in healthy vegetable side dishes across the globe.
Toss your cauliflower thoroughly so that every floret is evenly coated. This ensures the spices help drive caramelization during roasting and adds to the crunchy finish.
The Best Temperature and Time for Crispy Results
Roasting cauliflower at the right temperature is crucial. Too low, and your florets will steam. Too high, and they may burn before the interior cooks through. The sweet spot? 425°F (220°C).
Why 425°F Works Best
-
High enough to encourage caramelization and browning
-
Not so high that it scorches the edges before the center softens
-
Helps trigger the Maillard reaction for that golden crust
How Long to Roast
-
25–30 minutes, depending on floret size and your oven
-
Flip halfway through to ensure even browning
-
Look for crispy edges and a rich golden hue
Line your baking sheet with parchment paper or roast directly on a metal sheet for extra crispness. Avoid silicone mats, which can trap moisture and reduce crunch.
The use of olive oil not only enhances flavor but also helps the spices adhere and promotes even roasting. You’ll find plenty of inspiration for roasting times and techniques in roasted cauliflower ideas.
Once your cauliflower is browned and crispy, remove it from the oven and, while still hot, top with grated cheese or a squeeze of lemon juice to finish.
Tips for Extra Crispy Roasted Cauliflower
Achieving maximum crunch requires more than just high heat. Use the following expert strategies to take your roasted cauliflower to the next level:
-
Don’t overcrowd the pan: Use two sheets if needed. Cauliflower needs space for hot air to circulate; otherwise, it steams instead of roasts.
-
Use convection bake if available: It circulates air and speeds up the crisping process.
-
Skip the foil: Roast on parchment paper or directly on a metal sheet pan for a firmer texture.
-
Use the right oil: Extra virgin olive oil has a high enough smoke point and adds robust flavor.
Want even more crunch?
-
Finish under the broiler for 2–3 minutes, but watch closely to avoid burning.
-
Dust with Parmesan cheese or nutritional yeast at the 20-minute mark for a cheesy crust.
-
Use a light hand with oil—too much can weigh the florets down and prevent browning.
Pinterest is filled with crispy vegetable recipes that showcase these techniques visually, helping you perfect your approach.
FAQs – People Also Ask
How do you keep cauliflower from getting soggy when roasting?
Make sure the florets are completely dry before roasting. Avoid overcrowding the pan and always roast at a high temperature—preferably 425°F—to prevent steaming.
Why is my roasted cauliflower not crispy?
Common mistakes include using too much oil, roasting at too low a temperature, or overcrowding the baking sheet. Use a convection setting if possible and flip halfway through for even crisping.
Should you parboil cauliflower before roasting?
No. Parboiling adds unnecessary moisture. It’s best to roast raw, dry cauliflower to ensure a crispy result.
Is roasted cauliflower healthy?
Yes. Cauliflower is low in calories and high in vitamins. Roasting it with a small amount of olive oil retains nutrients and enhances flavor without deep frying or added sugars.
Can I make roasted cauliflower in an air fryer?
Absolutely. Use the same seasoning and roast at 400°F for 12–15 minutes, shaking the basket halfway through. The air fryer can deliver even crispier results in less time.
PrintHow to Roast Cauliflower for the Best Crunchy Texture

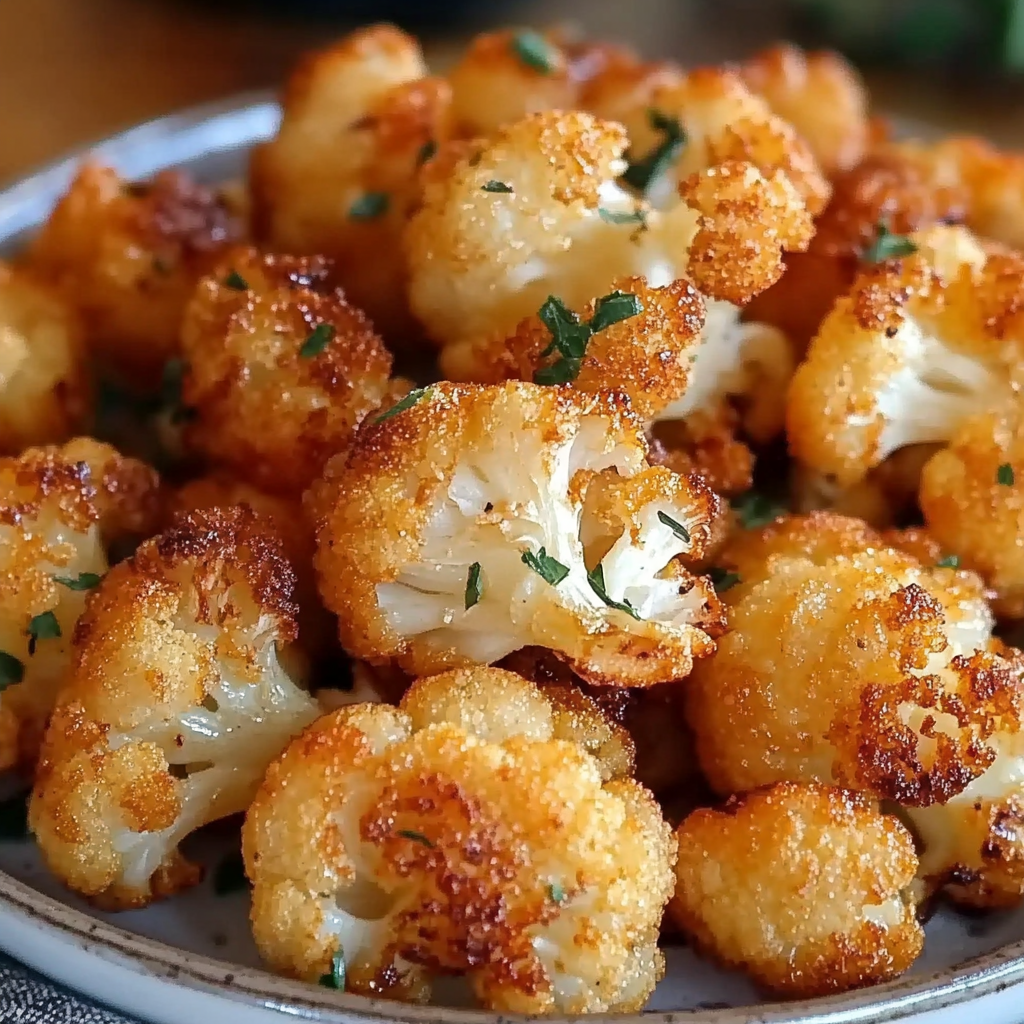
This crispy roasted cauliflower recipe is the perfect balance of flavor and texture. It features perfectly seasoned florets roasted until golden brown and irresistibly crunchy on the edges. Finished with a hint of Parmesan and fresh parsley, this dish makes a healthy, flavorful side or snack that fits any diet. Whether you’re pairing it with protein, tossing it in a salad, or enjoying it straight from the pan, this is cauliflower like you’ve never had before.
- Author: Clara
Ingredients
- 1 large head of cauliflower, cut into florets
- 3 tablespoons olive oil
- 1 teaspoon garlic powder
- 1 teaspoon paprika
- ½ teaspoon cumin
- ½ teaspoon onion powder
- Salt and pepper, to taste
- 2 tablespoons grated Parmesan cheese (optional)
- 1 tablespoon lemon juice
- 2 tablespoons chopped fresh parsley (for garnish)
Instructions
Preheat your oven to 425°F (220°C) and line a baking sheet with parchment paper.
In a large bowl, toss the cauliflower florets with olive oil, garlic powder, paprika, cumin, onion powder, salt, and pepper until evenly coated.
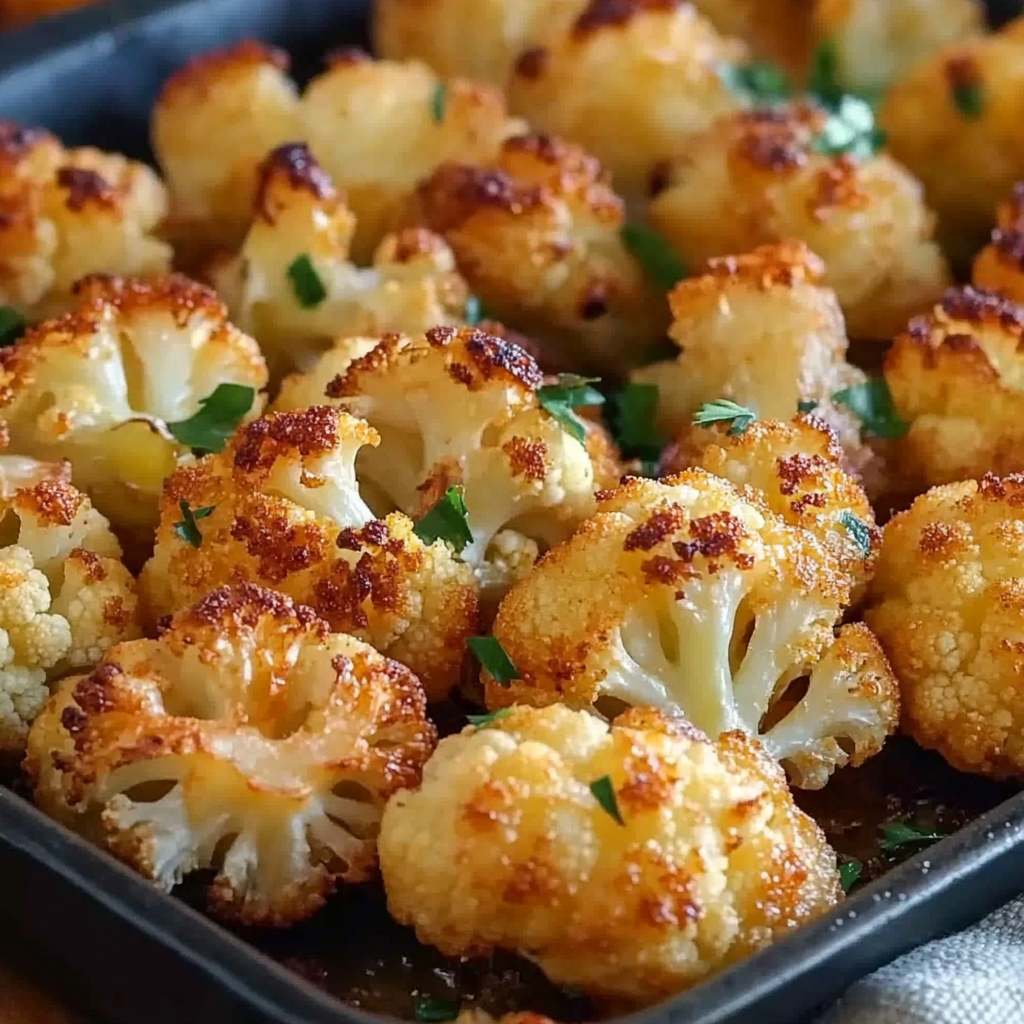
Spread the cauliflower in a single layer on the prepared baking sheet.
Roast for 25–30 minutes, flipping halfway through, until the cauliflower is golden brown and crispy on the edges.
Remove from oven and immediately sprinkle with Parmesan cheese, if using, and a squeeze of lemon juice.
Garnish with fresh parsley and serve warm.
Notes
-
Make Ahead: Prep and cut cauliflower up to 2 days in advance. Store in an airtight container in the fridge.
-
Storage: Keep leftovers in the refrigerator for up to 3 days. Reheat in the oven at 375°F for 10 minutes to regain crispness.
-
Dairy-Free/Vegan Option: Omit Parmesan and use nutritional yeast instead.
-
Add-Ons: Try adding a drizzle of tahini, sriracha, or a sprinkle of za’atar for variation.
-
Serving Ideas: Serve with dips, over rice bowls, in tacos, or as a topping for soup or pasta.