
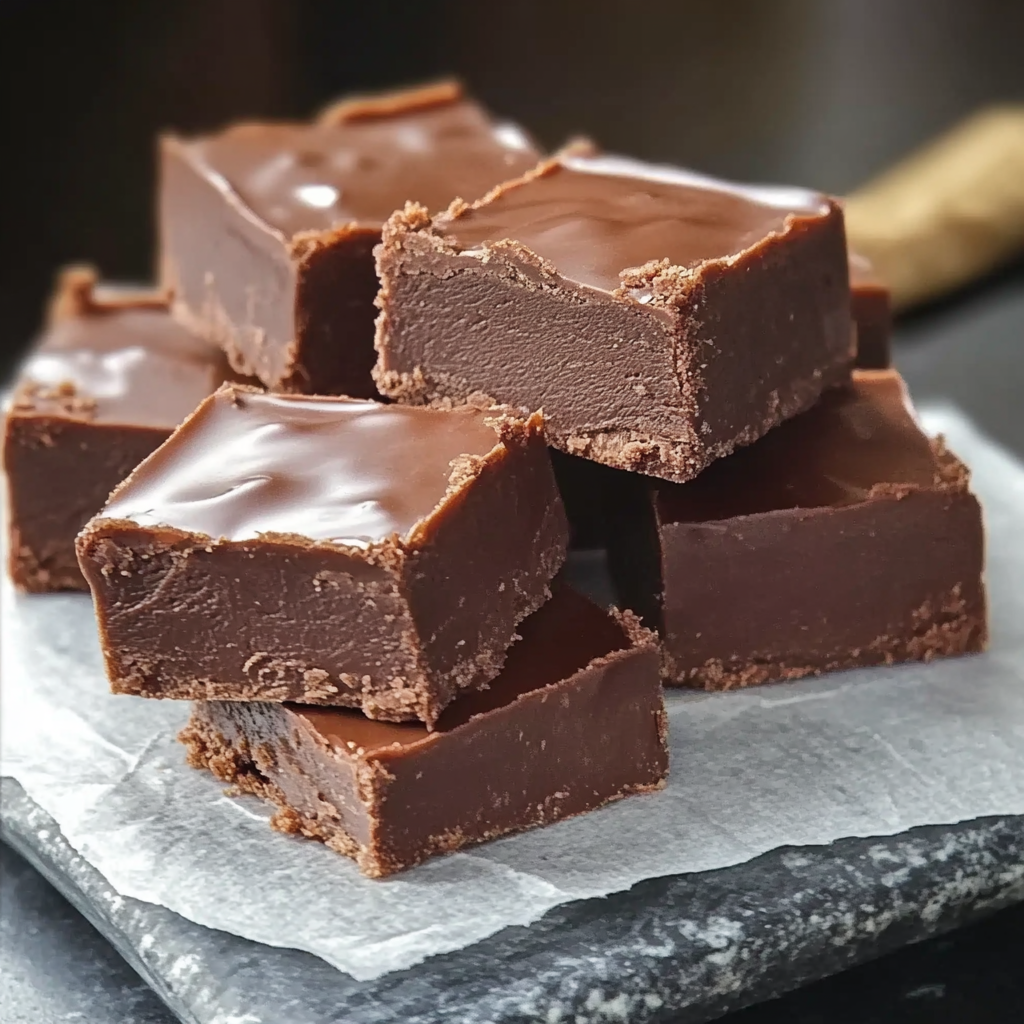
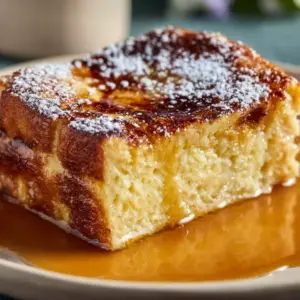
The Timeless Charm of Classic Fudge
There’s something unmistakably nostalgic about classic chocolate fudge. It’s the kind of treat that instantly transports you back to childhood holidays, family gatherings, or afternoons spent in a grandparent’s kitchen. The rich cocoa aroma, the glossy sheen just before it sets, and the satisfying snap of the first cut make it more than just a dessert—it’s a memory wrapped in sweetness.
Old-fashioned fudge stands apart from its modern, shortcut-based cousins. While today’s recipes often lean on sweetened condensed milk or microwaving for speed, traditional fudge is a lesson in precision, patience, and simplicity. The very act of making it—waiting for the soft-ball stage, resisting the urge to stir, and beating it just right—has a meditative quality that connects you to generations of candy-makers before.
This classic chocolate fudge recipe is not only easy but incredibly rewarding. Once you understand the basics of temperature control and the chemistry behind sugar crystallization, you’ll find it’s possible to make a flawless batch every time. If you’re curious about the science, the Maillard reaction plays a crucial role in flavor development, and understanding the history of chocolate adds even more depth to this culinary tradition.
Whether you’re gifting it during the holidays, adding it to a dessert table, or simply indulging a craving, this guide will show you exactly how to master old-fashioned fudge. Let’s dive into the steps, science, and secrets behind a perfect batch—every single time.
What is Old Fashioned Chocolate Fudge?
Old fashioned chocolate fudge is a traditional confectionery made from just a handful of simple ingredients: granulated sugar, cocoa powder, milk, butter, and vanilla extract. Unlike modern variations, it doesn’t rely on shortcuts like marshmallow crème or condensed milk. Instead, it embraces a more hands-on, technique-driven approach that results in a creamy texture with a slightly firm bite.
What makes this version of fudge stand out is the process. At its core, it’s all about achieving the right chemical balance and texture through careful temperature control and cooling. The critical point is reaching the soft-ball stage—a term that refers to heating the mixture to about 234°F (112°C). At this temperature, the sugar solution holds its shape but is still soft and pliable. You can learn more about this process in detail in candy making stages, where the soft-ball stage is a fundamental benchmark in confections.
Fudge’s roots date back to the late 19th century, with its popularity growing through the early 1900s in the U.S. It became a homemade favorite, especially during the holidays, because of its affordable ingredients and impressive results. Its place in traditional confectionery makes it a beloved treat that still holds its charm today.
Understanding how old-fashioned fudge differs from newer methods helps you appreciate the care that goes into its preparation. By avoiding additives and modern conveniences, this method ensures that the texture and flavor are purely derived from classic techniques, bringing you as close as possible to authentic, heritage-style candy making.
The Science Behind a No-Fail Fudge Recipe
Perfecting classic chocolate fudge isn’t just about following a recipe—it’s about understanding the science that makes it work. What separates a smooth, creamy fudge from a gritty or gooey failure often comes down to the precise management of sugar crystallization, temperature control, and cooling techniques.
Understanding the Soft-Ball Stage
One of the most crucial steps in fudge-making is reaching the soft-ball stage, where the sugar mixture hits approximately 234°F (112°C). At this stage, if you drop a bit of the syrup into cold water, it forms a soft, flexible ball that flattens when pressed. This ensures the right consistency for fudge—firm enough to hold shape, but soft enough to bite into. More about this can be explored through the candy making guide, which details various temperature stages used in traditional confections.
A quality candy thermometer is your best friend here. Without it, you’re essentially guessing—a risk that can result in fudge that’s either too soft to cut or too hard to enjoy. For visual learners or beginners, this Pinterest kitchen thermometer guide is a helpful reference to ensure accurate readings and tool selection.
Why You Shouldn’t Stir After Boiling
Once your mixture begins boiling, resist the urge to stir. Stirring during this phase can cause sugar crystals to form prematurely, resulting in a grainy texture. The goal is to allow the sugar to dissolve completely and remain dissolved as it cooks. Any disruption at this stage can break that balance, making your fudge gritty.
The Role of Cooling and Beating
After reaching the target temperature, it’s critical to let the mixture cool undisturbed to around 110°F (43°C) before beating. This slow cooling phase allows for the formation of microcrystals, which are essential for that creamy fudge texture. Start beating too soon, and your mixture may seize. Wait too long, and it may become too firm to spread. This balance is part of what makes traditional fudge so satisfying to master.
When it’s time to beat the fudge, using a wooden spoon helps maintain the ideal texture. The vigorous stirring causes the crystals to form, thicken, and lose their glossy sheen—this is when you know it’s ready to pour into your prepared pan.
Classic Fudge Ingredients: Simple Yet Essential
Despite its luxurious taste, classic chocolate fudge is built on a foundation of humble, everyday ingredients. When combined with care and precision, these simple elements transform into a rich, decadent treat. Let’s break down the role each ingredient plays in creating that perfect old-fashioned texture and flavor.
Granulated Sugar
Sugar is the structural base of all fudge. It contributes to sweetness, texture, and the essential crystallization process. The key to a smooth fudge is in controlling how sugar crystals form during the cooking and cooling phases.
-
Avoid stirring once the mixture boils to prevent early crystal formation.
-
Dissolve sugar fully before bringing it to a boil.
Cocoa Powder
Using unsweetened cocoa powder instead of melted chocolate gives the fudge a more intense, deep chocolate flavor. It also allows better control over texture and sweetness. High-quality cocoa, like Dutch-processed or natural, will yield a richer taste.
-
Explore the history of chocolate for insight into flavor development and cocoa varieties.
Whole Milk
Milk provides moisture, helps dissolve sugar, and acts as a carrier for the cocoa powder. Whole milk, with its higher fat content, ensures a creamier texture. Skim or reduced-fat versions can lead to a less rich result.
Unsalted Butter
Butter adds smoothness and a silky mouthfeel while enhancing the overall flavor. It’s crucial to use unsalted butter to control the saltiness of the final product.
-
Let the butter melt naturally after removing the fudge from heat—do not stir it in immediately.
Vanilla Extract
Vanilla adds depth and rounds out the chocolate flavor. Using pure extract instead of imitation can dramatically improve the taste. The process of vanilla production contributes complex aromatic compounds that elevate the fudge.
Pinch of Salt
Though minimal, salt enhances all other flavors, especially chocolate. It balances sweetness and sharpens the cocoa notes.
-
Sea salt or kosher salt is often preferred for its purity and subtle texture.
Tips and Variations
-
Ingredient quality matters: Use high-grade cocoa, real vanilla, and fresh dairy for the best results.
-
Optional add-ins: Chopped walnuts, dried cranberries, or mini marshmallows.
-
For gift-ready presentation, browse creative fudge presentation ideas
Equipment You’ll Need
To make classic chocolate fudge successfully, using the right tools is just as important as using the right ingredients. This traditional method involves specific steps that require both precision and consistency—two things the proper equipment makes much easier to achieve.
Here’s what you’ll need in your kitchen:
Candy Thermometer
A reliable candy thermometer is essential for achieving the correct temperature, especially the soft-ball stage. Without it, you’re guessing, and even a few degrees off can make or break the batch.
-
For an easy visual reference, check out this Pinterest kitchen thermometer guide, which outlines types, usage tips, and calibration advice.
Heavy-Bottomed Saucepan
A heavy-bottomed saucepan helps distribute heat evenly, preventing hot spots that can cause the sugar to burn. Stainless steel or copper-core pans are ideal.
Wooden Spoon
A wooden spoon is traditional and practical—it won’t conduct heat or interfere with crystallization like metal might. It’s also sturdy enough for vigorous beating.
8×8-Inch Greased Pan
This size is ideal for creating fudge that is thick enough to cut into even, firm squares. Make sure it’s well-greased or lined with parchment to allow easy removal once the fudge sets.
Optional: Cooling Rack and Spatula
A cooling rack ensures your pan is off direct surfaces, helping the fudge set evenly. A silicone spatula can assist in spreading the hot fudge into the pan quickly before it hardens.
Having the right equipment takes the guesswork out of making no-fail chocolate fudge. With these tools in hand, you’ll be set up for sweet success.
Step-by-Step Instructions: How to Make Classic Fudge
Here’s a step-by-step breakdown of how to make old fashioned fudge perfectly every time, using the classic stovetop method. Timing and temperature are key, but don’t worry—we’re covering each part thoroughly.
Step 1: Prepare the Pan
-
Grease an 8×8-inch square baking pan with butter or line it with parchment paper.
-
Set aside in a cool, dry place.
Step 2: Combine Dry Ingredients
-
In a medium saucepan, whisk together:
-
2 cups granulated sugar
-
½ cup unsweetened cocoa powder
-
Pinch of salt
-
Step 3: Add Milk and Heat
-
Pour in 1 cup of whole milk and stir until smooth.
-
Place the pan over medium heat and stir constantly until it starts to boil.
Step 4: Boil Without Stirring
-
Once boiling begins, stop stirring. This is crucial.
-
Let the mixture cook undisturbed until it reaches the soft-ball stage (234°F/112°C).
-
Refer to this candy making temperature chart if unsure.
Step 5: Add Butter and Vanilla
-
Remove the saucepan from heat.
-
Add 4 tbsp unsalted butter and 1 tsp vanilla extract, but do not stir.
-
Let the mixture cool to about 110°F (43°C).
Step 6: Beat Until Thick
-
Once cooled, beat vigorously with a wooden spoon until the mixture becomes thick and loses its gloss.
-
This process usually takes 5–10 minutes of constant stirring.
Step 7: Pour and Spread
-
Quickly pour the fudge into the prepared pan.
-
Spread evenly using a spatula.
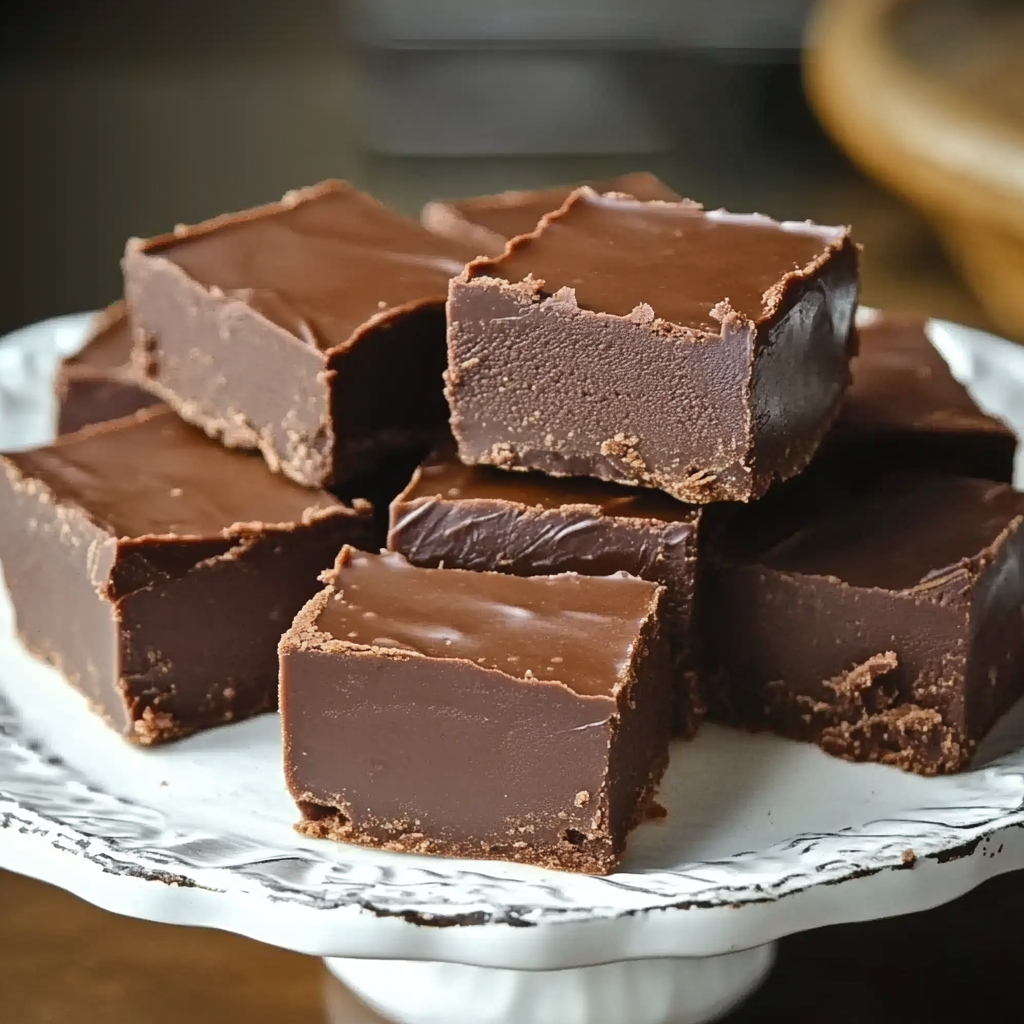
Step 8: Cool and Cut
-
Let the fudge cool completely at room temperature.
-
Once set, cut into squares and serve.
For extra flair, get inspired with these creative fudge presentation ideas that can elevate your homemade gift or dessert table.
Common Mistakes and How to Avoid Them
Even a simple fudge recipe can go wrong if you miss a small detail. Here’s how to avoid the most common fudge-making pitfalls:
Stirring After the Boil
-
Why it’s a mistake: Causes premature sugar crystallization, leading to a gritty texture.
-
Fix: Once the mixture boils, do not stir again until after cooling.
Overcooking the Mixture
-
Why it’s a mistake: If you heat beyond 234°F, the fudge will be too hard or dry.
-
Fix: Use a candy thermometer and remove from heat immediately at the soft-ball stage.
Not Cooling Properly
-
Why it’s a mistake: Beating too soon (before it reaches 110°F) can cause separation or oiliness.
-
Fix: Let it cool undisturbed before beating.
Under-Beating
-
Why it’s a mistake: Results in fudge that stays glossy and never sets.
-
Fix: Beat vigorously until the mixture thickens and loses its sheen.
Storage Mistakes
-
Store fudge in an airtight container at room temperature.
-
Avoid refrigerating unless your environment is very warm.
You can find visual examples of do’s and don’ts in this Pinterest guide to old-fashioned desserts.
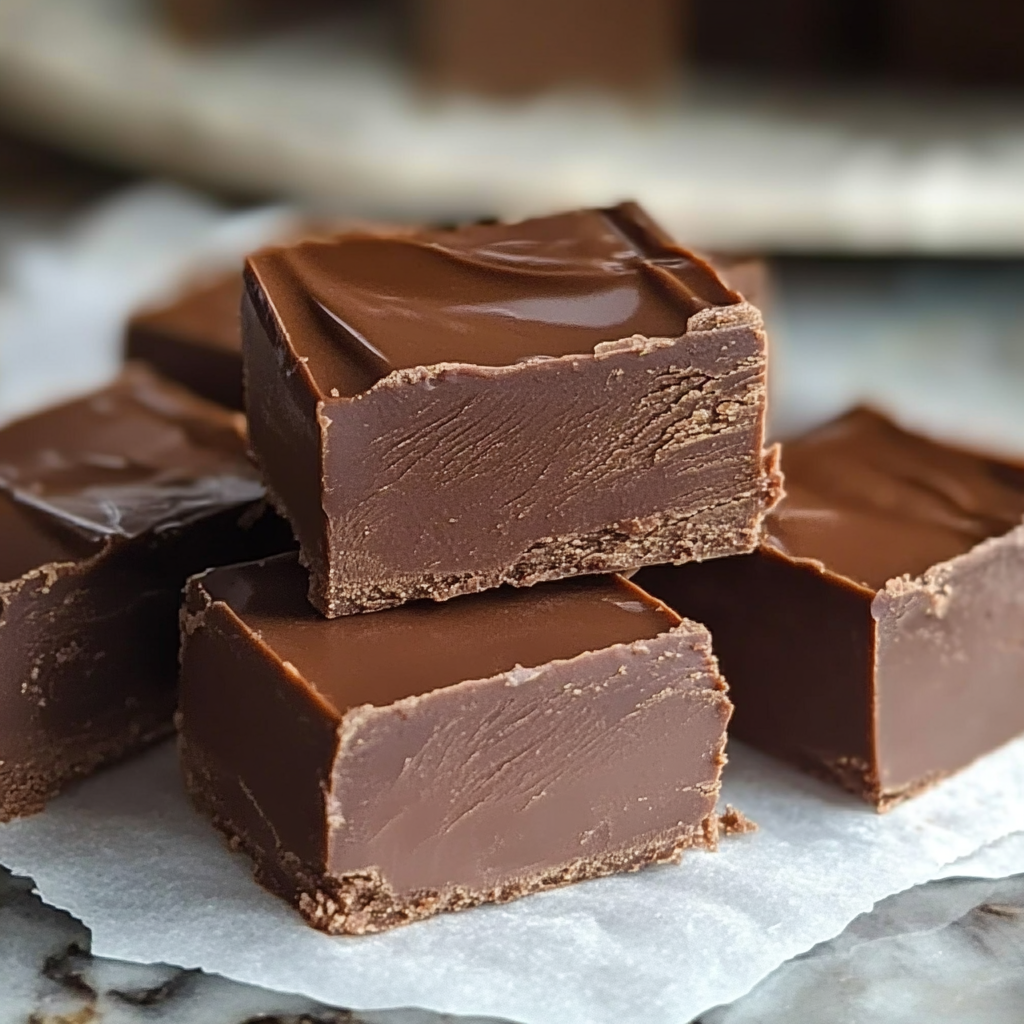
Cutting, Serving & Storing Homemade Fudge
Once your fudge is set, slicing and storing it properly ensures every bite is as good as the first.
Cutting Tips
-
Use a sharp, non-serrated knife.
-
Warm the knife slightly (run under hot water and dry) for cleaner cuts.
-
Cut in one smooth motion; avoid sawing.
Serving Ideas
-
Arrange on holiday dessert trays.
-
Package in decorative boxes as homemade gifts.
-
Pair with coffee or serve as part of a dessert board.
You can explore more holiday homemade gift inspiration for creative packaging ideas.
Storing Tips
-
Store in an airtight container lined with parchment or wax paper.
-
Keep at room temperature for up to 2 weeks.
-
Freeze in layers with parchment paper between squares for longer storage.
Fun Flavor Twists on the Classic Recipe
Want to add a little flair to your classic fudge? Here are some fun and simple ways to level it up.
Add-Ins
-
Nuts: Chopped walnuts, pecans, or almonds for crunch.
-
Dried fruit: Cranberries, raisins, or chopped dates.
-
Mini marshmallows: Stir in after beating for a rocky road version.
Flavor Enhancements
-
Peppermint extract: Swap with vanilla during the holidays.
-
Espresso powder: Adds depth to chocolate.
-
Orange zest: For a citrusy note.
Toppings
-
Flaky sea salt: Balances sweetness and adds a gourmet finish.
-
Crushed candy canes: Perfect for holiday gifting.
-
Sprinkles: Great for kids’ parties.
Use these old-fashioned dessert ideas to inspire your next variation.
FAQs
What makes fudge creamy instead of grainy?
Creaminess depends on controlling sugar crystallization. Avoid stirring once the mixture begins to boil, and beat only when it’s cooled to the correct temperature. Using a candy thermometer helps achieve precise consistency.
Why does my fudge turn out too soft or too hard?
Fudge that’s too soft may not have reached the soft-ball stage. If it’s too hard, it was overcooked. Refer to a temperature guide and always use a thermometer.
Can I make fudge without a candy thermometer?
While it’s possible using the cold-water test, it’s far less reliable. A candy thermometer removes the guesswork and is worth the small investment.
How long does homemade fudge last?
Properly stored in an airtight container, it lasts up to 2 weeks at room temperature and 3 months in the freezer.
Can I double or halve this recipe?
Yes, but make sure to use a larger or smaller pan accordingly. Be extra careful with temperature control and stirring times.
PrintHow to Perfect the Classic Chocolate Fudge Recipe Every Time
This classic chocolate fudge recipe is an easy yet rewarding way to bring timeless tradition into your kitchen. Made with just six simple ingredients, it yields smooth, rich, and creamy fudge that’s perfect for holidays, gifts, or any sweet craving. With clear step-by-step instructions, it’s designed to be no-fail, even for beginners. Mastering this recipe teaches you the foundations of traditional candy-making and brings sweet, nostalgic joy to every batch.
- Author: Clara
Ingredients
- 2 cups granulated sugar
- ½ cup cocoa powder
- 1 cup whole milk
- 4 tbsp unsalted butter
- 1 tsp vanilla extract
- Pinch of salt
Instructions
Grease an 8×8-inch square baking pan and set aside.
In a medium saucepan, combine the sugar, cocoa powder, and salt. Stir in the milk and mix until well blended.
Place the saucepan over medium heat. Bring the mixture to a boil, stirring constantly. Once it begins to boil, stop stirring and let it cook until it reaches the soft ball stage (234°F or 112°C on a candy thermometer).
Remove the saucepan from the heat. Add butter and vanilla, but do not stir. Let it cool undisturbed until the mixture reaches about 110°F (43°C).
Once cooled, beat the mixture vigorously with a wooden spoon until it thickens and loses its gloss.
Quickly pour the fudge into the prepared pan and spread evenly. Let it cool completely at room temperature.
Cut into squares and serve.
Notes
-
Use a candy thermometer for accuracy.
-
Don’t stir after boiling, or the texture will suffer.
-
Cool completely before beating—timing is key.
-
Beat until it thickens and loses gloss for the best texture.
-
Fudge stores well and makes a thoughtful, homemade gift.
-
Feel free to experiment with flavor variations and add-ins.

I just like the helpful info you provide for your articles.
I will bookmark your weblog and take a look at once more
here regularly. I’m quite certain I’ll learn many new stuff proper here!
Good luck for the following!
★★★★★