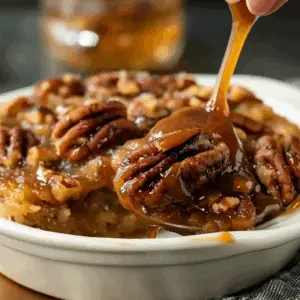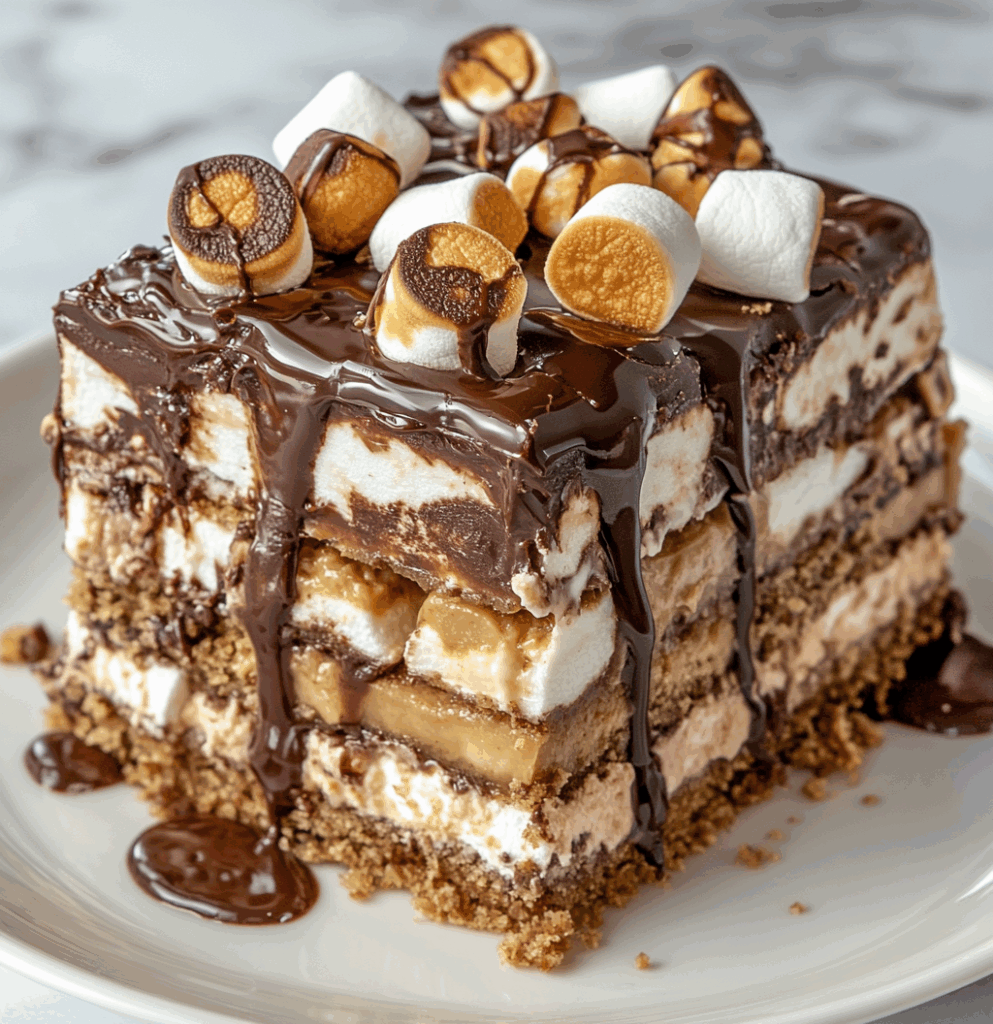
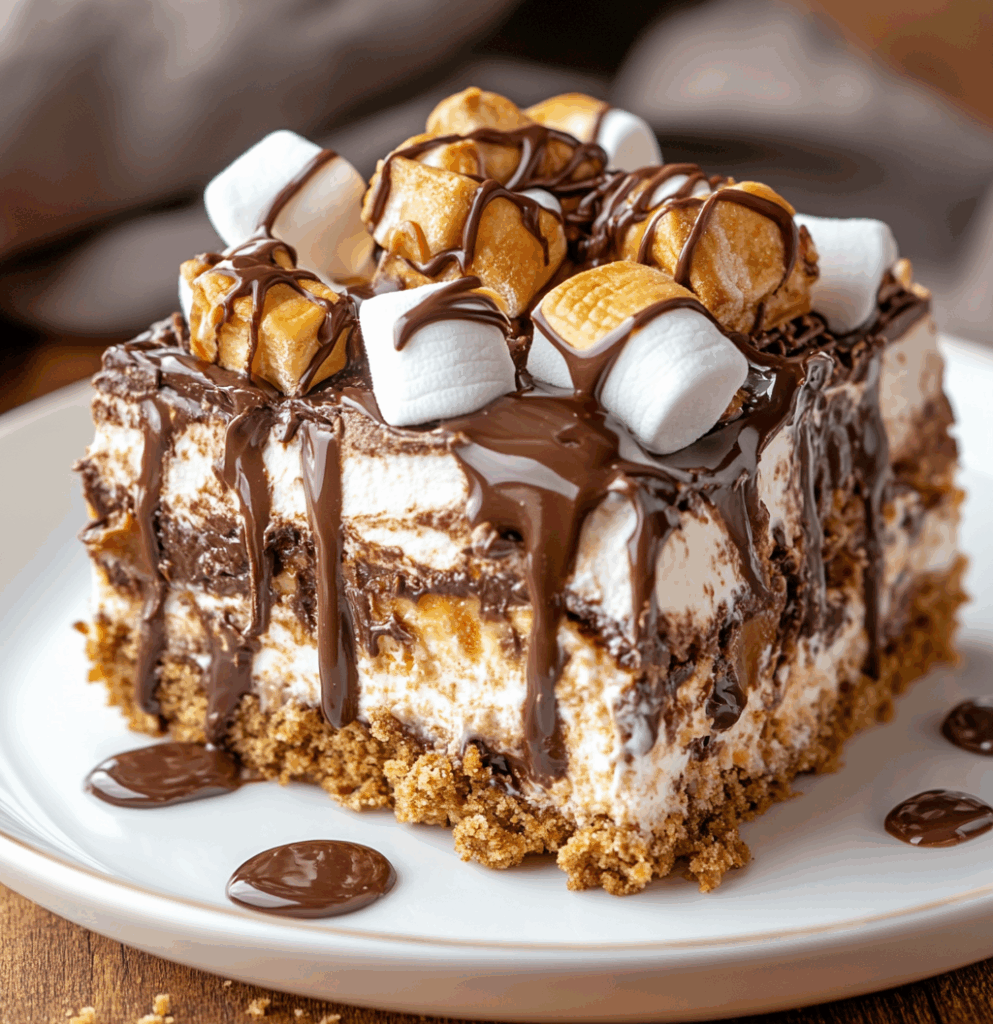
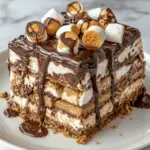
Discover the ultimate dessert solution with a peanut butter dump cake that combines convenience and indulgence. By layering a box of chocolate cake mix over creamy peanut butter and topping with melty peanut butter cups, you get a dessert that’s both simple and stunning. Perfect for birthday celebrations, potlucks, or impromptu gatherings, this dump cake requires no mixing bowls or electric beaters. As the butter melts between layers, it forms a crisp, golden crust that contrasts with a lusciously moist center. This foolproof recipe delivers crowd-pleasing results with minimal effort.
At its heart, a dump cake uses a no-mix approach to achieve layered perfection in minutes. Begin by spreading creamy peanut butter in a baking dish, then scatter the dry cake mix uniformly atop. Next, pour sweetened condensed milk over the surface and distribute thin butter slices evenly. Finally, nestle halved peanut butter cups and sprinkle chopped roasted peanuts for texture. The oven transforms these simple ingredients into a dessert with a crackly top and a melty interior. To learn more about this technique, check the classic Dump Cake page or the Cake mix entry on Wikipedia. Experiment with variations inspired by our ultimate peanut butter dump cake guide.
How Dump Cakes Work: The Science Behind the Layers
Dump cakes leverage simplicity to deliver layered textures with minimal effort. By relying on strategic ingredient placement rather than extensive mixing, each component melts and settles during baking. The contrast between the crisp top and gooey center arises from moisture migration and fat distribution. As butter interacts with dry mix and sweetened condensed milk, steam pockets form, creating a light crumb beneath a crackly surface.
Key factors include:
- Butter slicing for even melt and a golden crust
- Moistening of dry ingredients by sweetened condensed milk to create a gooey interior
- Steam generated from the cake mix base producing lift and lightness
- A thin peanut butter layer acting as a moisture barrier and flavor enhancer
For a deeper dive into the layering process, consult our comprehensive dump cake science guide.
When baking, proper distribution of fat and sugar influences browning, while a well-greased 9×13-inch pan promotes even heat transfer. Learn about recommended brands on the cake mix overview page. To discover creative variations and presentation ideas, explore our ultimate peanut butter dump cake tutorial or browse visual inspiration on Pinterest’s dessert inspiration board.
Ingredient Deep Dive
Understanding each component transforms a simple dump cake into a decadent masterpiece. Dive into the roles of chocolate cake mix, creamy peanut butter, sweetened condensed milk, unsalted butter, and peanut butter cups with chopped roasted peanuts to master texture, flavor, and ease.
Chocolate Cake Mix
Choose a high-quality chocolate cake mix for the base of your dump cake. Premium brands deliver richer cocoa flavor and finer crumb, enhancing the moist interior and crust formation. Swap to a gluten-free option when needed, and for brand inspiration, view our Gluten-free baking board or consult the Cake mix entry. For internal guidance, explore the cake mix overview.
Creamy Peanut Butter
A smooth, creamy peanut butter layer provides fat and flavor. Natural versus processed spreads differ in oil separation and salt content, which affect gooeyness and sweetness. To see more peanut butter dessert ideas, check this Pinterest collection and our dump cake variations.
Sweetened Condensed Milk
This ingredient creates the signature gooey center. As it interacts with dry mix and butter, it forms tender crumbs and sticky pockets. For details, refer to the Sweetened condensed milk article. To experiment with no-bake options, visit No-bake peanut butter treats.
Unsalted Butter
Slicing unsalted butter ensures even melting and promotes browning. Distribute thin pats across the top so that as they melt, they soak the mix uniformly. Learn more about dairy properties on the Butter (dairy) page or the ultimate peanut butter dump cake guide.
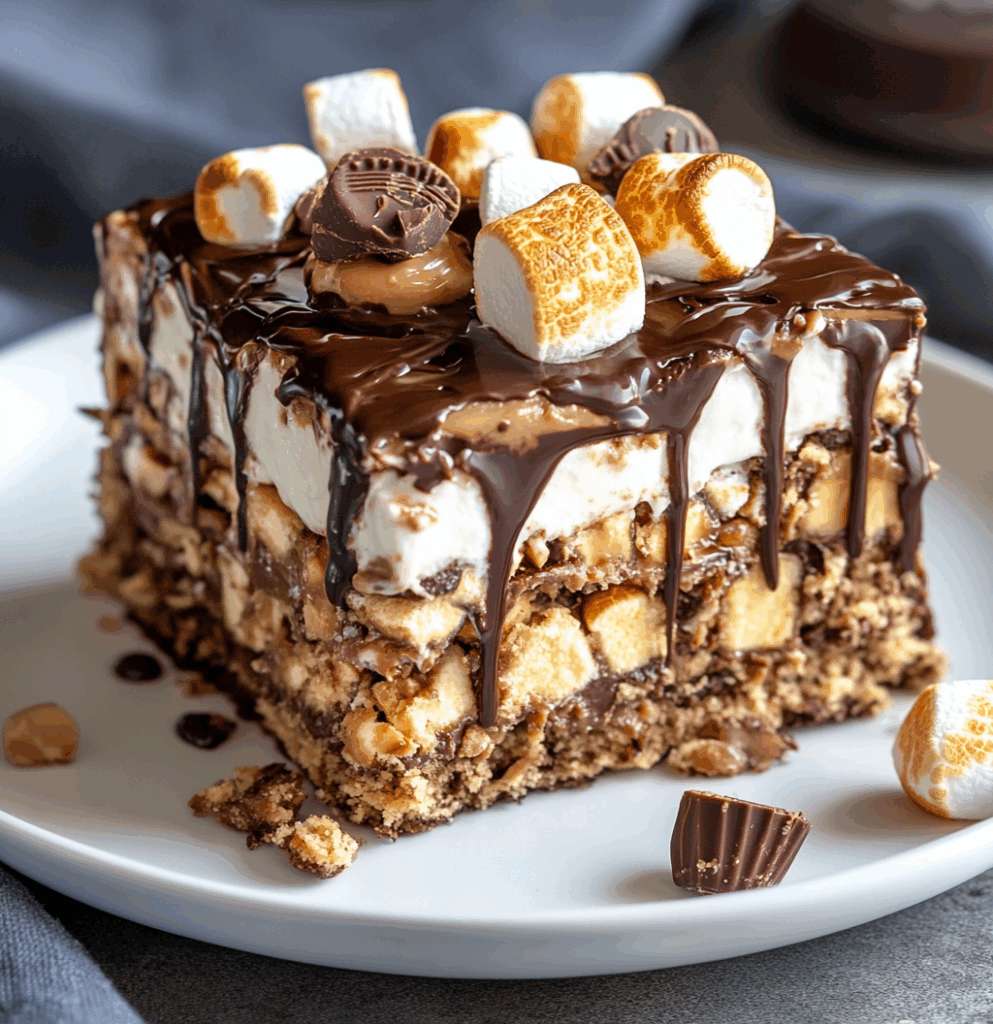
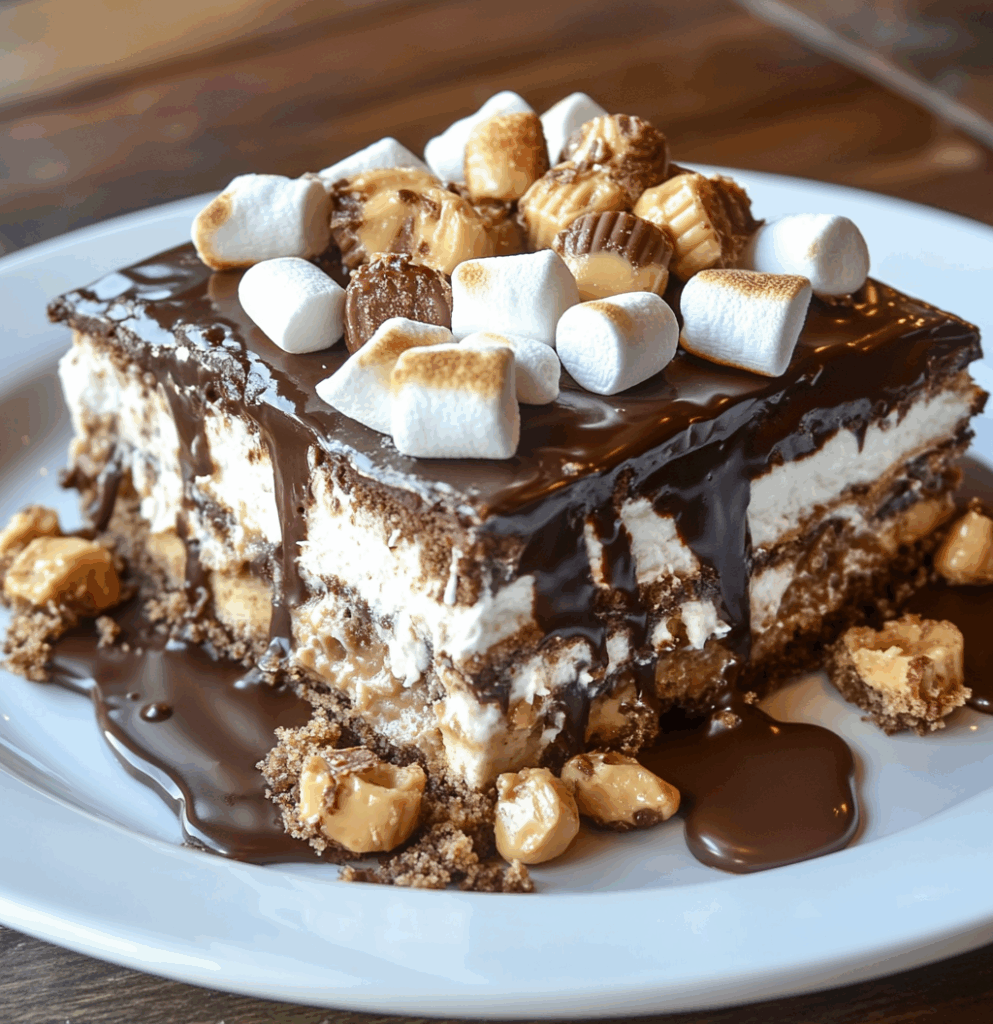
Peanut Butter Cups & Roasted Peanuts
Topping with halved peanut butter cups adds chocolate-peanut contrast while chopped roasted peanuts contribute crunch. For deeper inspiration, browse Chocolate peanut butter cupcakes and Layered dessert inspiration.
Thoughtful selection of each ingredient ensures a consistent dump cake. Understanding how peanut butter adds richness elevates every bite. Explore the Peanut butter page and review the Dump cake entry for deeper insights and tips.
Variations & Customizations
Understanding how to adapt the dump cake framework ensures everyone can enjoy this decadent treat. Whether accommodating allergies or dietary preferences, simple swaps maintain the signature peanut butter flavor while adding creative flair. These variations maintain balance between sweetness and richness, appealing to diverse palates and dietary needs.
Exploring nut-free alternatives opens possibilities for those with allergies. By replacing peanut butter with sunflower seed butter or soy-based spreads, you preserve richness without risk. Learn more about allergy-friendly strategies on our dump cake variations page and consult the Peanut butter article for comparable substitutes. Always check labels to avoid cross-contamination.
For vegan and dairy-free adaptations, select plant-based butter alternatives and swap sweetened condensed milk with coconut condensed milk. Discover additional vegan dessert inspirations on Pinterest’s No-bake peanut butter treats board and review the cake mix overview for compatible mixes. Experiment with alternative sweeteners to adjust sweetness levels.
Nut-Free Version
- Substitute creamy sunflower seed butter to mimic the smooth mouthfeel and maintain the characteristic nutty aroma throughout baking.
- Use allergy-friendly chocolate chips and ensure all ingredients are certified nut-free to prevent reaction risks at gatherings.
Vegan/Dairy-Free
- Replace unsalted butter with vegan margarine, coconut oil, or plant-based shortening for optimal spread.
- Use dairy-free sweetened condensed coconut milk for a gooey texture and tropical flavor.
Swapping Cake Mix Flavors
- Experiment with vanilla or red velvet mix for a twist.
- Select gluten-free mixes listed on the Gluten-free baking board and free of additives.
Adding Mix-Ins
- Stir in mini chocolate chips, toffee bits, or crushed pretzels for texture.
- Avoid overloading to maintain the signature crust-to-center ratio.
Gluten-Free Option
- Opt for a certified gluten-free chocolate cake mix.
- Verify all mix-ins, including peanut butter cups, are labeled gluten-free.
Let your creativity shine and craft a dessert everyone will rave about at any gathering.
Equipment & Prep Checklist
Gathering the right equipment accelerates prep and promotes even baking results. Ensure your 9×13-inch baking dish is large enough for layers to expand, and verify the oven racks are centered for uniform heat distribution. Have a sharp knife or kitchen shears ready to halve peanut butter cups efficiently. Use a metal offset spatula for spreading peanut butter without tearing the pan’s nonstick coating.
Essential items include:
- 9×13-inch glass or metal baking dish
- Offset or rubber spatula
- Sharp paring knife or kitchen shears
- Measuring cups and spoons
- Cooling rack for resting the cake
- Parchment paper or nonstick spray
- Whisk (optional)
- Timer
Step-by-Step Baking Instructions
Master the assembly in nine simple stages to achieve the ideal dump cake texture and flavor balance. Gather all ingredients and equipment before beginning to ensure a smooth process.
- Preheat & Prep Dish
Preheat your oven to 350 °F (175 °C) and grease a 9×13-inch baking dish thoroughly with nonstick spray or a thin layer of butter to prevent sticking. Ensure the oven rack is centered for even heat distribution. - Layer Peanut Butter
Spread the creamy peanut butter in an even layer across the bottom of the prepared dish, reaching each corner to create a moisture barrier beneath the cake mix. - Sprinkle Cake Mix
Evenly distribute the dry chocolate cake mix atop the peanut butter, gently shaking or using a spoon to fill gaps without compressing the powder. - Drizzle Sweetened Condensed Milk
Pour the sweetened condensed milk slowly over the surface, aiming to cover the cake mix uniformly; don’t stir or mix. This forms the gooey pockets that characterize a true dump cake. - Arrange Butter Slices
Place thin pats of unsalted butter across the cake mix in a grid pattern. Ensure each slice touches the mix so that melting occurs evenly, creating steam and golden browning. - Nestle Peanut Butter Cups
Press the halved peanut butter cups gently into the top layer, spacing them evenly to distribute chocolate-peanut pockets throughout each slice. - Add Roasted Peanuts
Sprinkle chopped roasted peanuts between peanut butter cups to add crunchy texture and enhance nutty aroma. - Bake Until Set
Transfer the dish to the preheated oven and bake for 35 to 40 minutes, or until the edges turn golden brown and the center appears just set. A toothpick inserted near the center may show moist crumbs but no wet batter. - Cool & Slice
Remove from the oven and let the dump cake rest on a cooling rack for at least ten minutes. This allows the layers to set for cleaner slicing.
These clear steps guarantee every slice features balanced crispness and gooey texture, delivering consistent results for bakers of all levels. Remember precise measurement and even layering are key to achieving that crackly top and moist center.
- Ensure ingredients are at room temperature to promote even melting and consistent bake.
- Do not open oven door during the first twenty minutes to maintain steady heat.
Serving Suggestions & Storage
Enhance every slice of your peanut butter dump cake with complementary flavors and maintain freshness for days. Serve the cake while warm to maximize gooey appeal, pairing each portion with a scoop of vanilla ice cream or a dollop of whipped cream.
- Pairing Ideas:
- Vanilla or chocolate ice cream for temperature contrast
- Fresh berries to cut through richness
- Caramel sauce for an extra layer of sweetness
- Espresso shot for an indulgent dessert pairing
- Creative Plating:
- Use square or round molds for uniform servings
- Layer mini dump cake parfaits in clear glasses with whipped cream
- Dust with powdered sugar for an elegant finish
Storage Guidelines:
To store, cover the cake tightly with plastic wrap or transfer leftovers to an airtight container. Refrigerate for up to five days, allowing layers to meld and flavors to intensify. For longer keeping, freeze individual slices by wrapping each in foil and placing them in a sealed freezer-safe bag; they freeze well for up to three months. Thaw overnight in the refrigerator or reheat frozen slices in the oven at 300 °F (150 °C) for ten minutes before serving. Always allow the cake to reach room temperature briefly after reheating to restore optimal moisture and texture.
Troubleshooting Common Issues
- Cake Too Soggy:
Ensure cake mix is spread evenly and butter slices are thin. Bake an extra 5–10 minutes if the center remains too wet. - Overbrowned Edges:
Lower oven rack one level or tent the cake loosely with foil halfway through baking to prevent excessive crusting. - Uneven Baking:
Rotate the pan 180° halfway through bake time to promote uniform heat exposure and consistent browning. - Separation of Layers:
Press ingredients gently into place; avoid stirring layers. If peanut butter slides, chill the dish for 5–10 minutes before baking to help layers adhere. - Dense Texture:
Do not compress the dry mix when layering. Lightly shake or spoon it into place to preserve air pockets.
Frequently Asked Questions
Can I use crunchy peanut butter?
Yes. Swap creamy for crunchy to add nutty texture throughout the cake. Remember to stir before spreading if oil has separated.
What if I don’t have sweetened condensed milk?
You can simmer whole milk with sugar until thickened, but condensed milk ensures consistent gooeyness.
How do I make this ahead or freezer-friendly?
Fully bake, cool, then wrap individual squares in foil and freeze. Thaw in the refrigerator overnight or reheat directly from frozen.
Can I halve the recipe?
Absolutely. Use an 8×8-inch pan and adjust bake time to 25–30 minutes, checking center doneness with a toothpick.
What candy bars work as substitutes?
Try chopped Snickers, Milky Way, or Twix for varied textures and flavors. Ensure pieces are evenly distributed for balanced results.
How to Make the Best Peanut Butter Dump Cake with Chocolate Cake Mix
This Peanut Butter Dump Cake marries the rich, nutty flavor of creamy peanut butter with the deep chocolate notes of a boxed cake mix. It’s an effortless dessert that “dumps” all the ingredients into one pan—no fuss, no mixer—then bakes into a gooey, cake-like topping over a luscious peanut buttery base. Serve it warm with a scoop of vanilla ice cream or a dollop of whipped cream for an indulgent finish.
Ingredients
- 1 (15.25 oz) box yellow cake mix
- 1 cup creamy peanut butter
- 1 (14 oz) can sweetened condensed milk
- 8 tablespoons unsalted butter, sliced
- 12 peanut butter cups, unwrapped and halved
- ½ cup chopped roasted peanuts
- Optional: powdered sugar for dusting
Instructions
- Preheat the oven to 350 °F (175 °C) and grease a 9×13-inch baking dish
- Spread the peanut butter evenly across the bottom of the prepared dish
- Sprinkle the dry cake mix evenly over the peanut butter layer
- Drizzle the sweetened condensed milk over the cake mix, trying to cover as much area as possible
- Arrange the butter slices on top, distributing them evenly so they will melt through the cake mix
- Nestle the halved peanut butter cups into the top layer, pressing down slightly
- Bake for about 35–40 minutes or until the edges are golden and the center is set
- Let the dump cake cool for at least 10 minutes before serving
- If desired, dust with powdered sugar and sprinkle with chopped peanuts before slicing
Notes
-
Peanut Butter Choice: Use a high-quality, creamy peanut butter for a smooth base. Natural peanut butter can work, but may separate—stir well before using.
-
Butter Distribution: Cutting the butter into thin pats instead of cubes helps it melt and soak into the cake mix more evenly.
-
Add-Ins: For extra texture, stir ½ cup chopped peanuts or chopped Reese’s Peanut Butter Cups into the chocolate chip layer.
-
Make-Ahead: You can assemble the dump cake up to 24 hours ahead. Cover and refrigerate; bake straight from the fridge, adding 5 extra minutes to the bake time.
-
Storage: Leftovers can be covered and stored at room temperature for up to 2 days or refrigerated for up to 5 days. Reheat in the microwave for 15–20 seconds per serving.
-
Serving Variations: Drizzle warm caramel or fudge sauce on top. A sprinkle of flaky sea salt just before serving elevates the peanut-buttery richness.