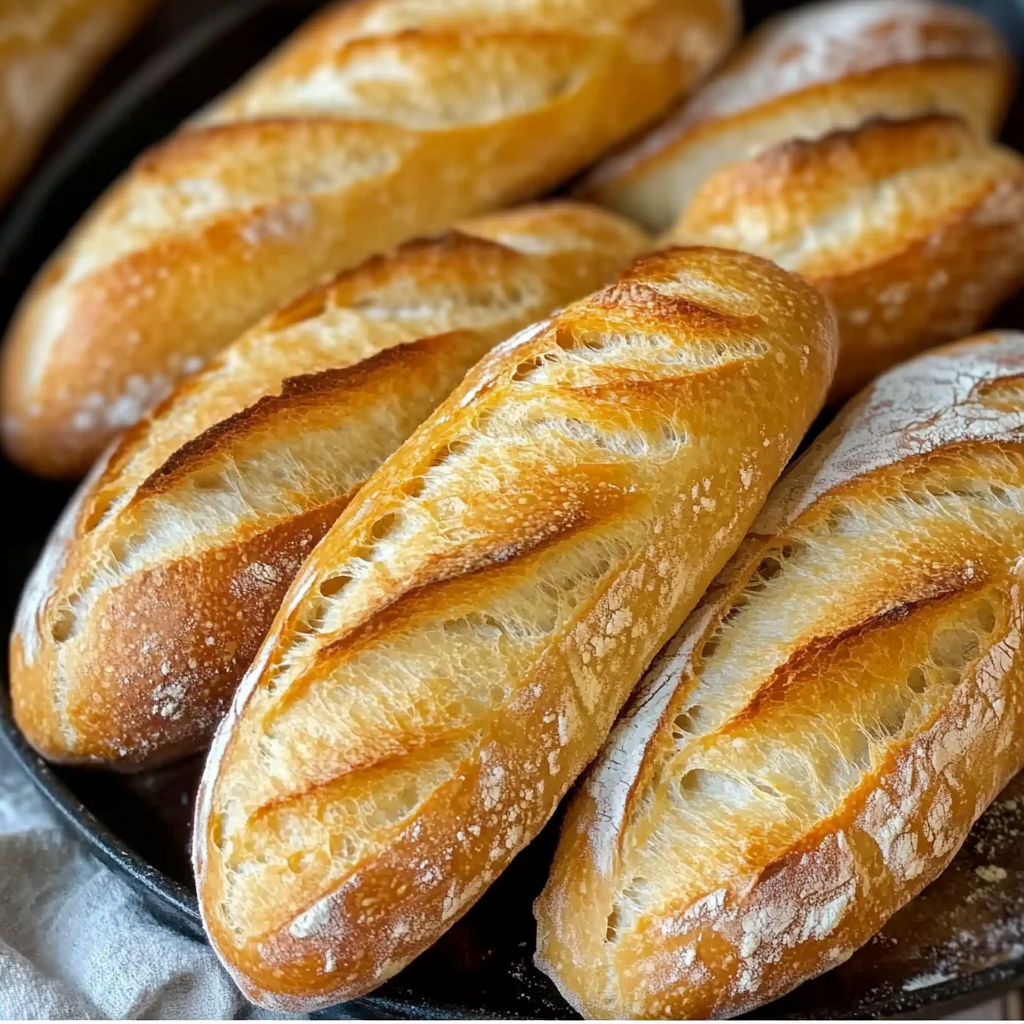
Homemade Crusty Mini Baguettes
If you’ve ever tasted a crusty mini baguette fresh out of the oven, you know the joy of biting into a crunchy, golden crust to reveal a soft, airy interior. Homemade baguettes bring that country bakery feel right into your own kitchen. The beauty of mini baguettes lies in their size: they cook faster than their full-sized counterparts while offering the same delicious texture and flavor. Whether you’re a seasoned baker or a complete beginner, creating the perfect crusty mini baguettes at home is entirely achievable.
Baking at home also allows for customization, meaning you can adjust ingredients to suit your personal preferences. By following a few straightforward steps, you can enjoy freshly baked baguettes with that coveted crunchy exterior and tender, soft inside every time. Homemade bread not only fills your kitchen with the delightful smell of fresh baking, but it also provides the satisfaction of knowing exactly what goes into each loaf.
Why Bake Mini Baguettes?
The allure of homemade crusty mini baguettes lies in their simplicity and versatility. These little baguettes are perfect for breakfast, lunch, or dinner, whether you’re enjoying them with butter, dipping them in olive oil, or turning them into a delicious sandwich. The crusty texture is ideal for pairing with soups, stews, or cheese platters. You can even customize the dough to create unique flavors, such as adding herbs or spices for an extra twist.
Additionally, making mini baguettes at home saves money, especially compared to store-bought artisanal versions that can often be expensive. Baking at home also allows you to experiment with techniques that could lead to the perfect baguette crust, something store-bought bread just can’t replicate.
For more tips on making homemade bread, including tips for shaping dough, consider checking out this guide to shaping bread dough on Pinterest. It offers helpful advice to achieve the perfect texture and shape for your baguettes.
The Joy of Freshly Baked Bread
There’s something truly special about enjoying bread fresh out of the oven. When you bake your own mini baguettes, you’re in control of the process from start to finish. The joy of pulling a hot loaf from the oven and slicing into it is unparalleled. Homemade bread often has a more complex flavor profile than store-bought versions, as the fermentation and rising process develops the dough over time.
Making mini baguettes at home can be as rewarding as it is delicious. If you’re new to bread making, the process might seem a little daunting at first, but with a few simple ingredients and a bit of practice, you’ll soon be able to produce perfect mini baguettes every time.
If you’re interested in learning more about the art of baking and bread types, take a look at this detailed entry on bread flour from Wikipedia, which explains the different types of flour used in baking.
Essential Ingredients for Perfect Crusty Mini Baguettes
When it comes to baking mini baguettes, the ingredients are simple, but each one plays an important role in creating the final texture and flavor. Here’s a breakdown of the essential ingredients:
-
3 cups all-purpose flour: The foundation of your baguette dough. *All-purpose flour
A network error occurred. Please check your connection and try again. If this issue persists please contact us through our help center at help.openai.com.
Step-by-Step Guide to Preparing the Dough
Creating the perfect dough for your mini baguettes is the foundation for achieving a great result. In this section, we’ll break down the process of preparing the dough into easy-to-follow steps.
Step 1: Preparing the Yeast Mixture
The first step is to activate your yeast, which is essential for making the dough rise. Begin by pouring 1 cup of warm water (around 110°F/45°C) into a small bowl. Add 1 tablespoon of sugar and 1 tablespoon of active dry yeast to the water. Stir gently and allow the mixture to sit for about 5 minutes. During this time, the yeast will begin to foam and bubble as it activates, which indicates that the fermentation process is underway.
If you notice that the mixture doesn’t foam or bubble after 5 minutes, it could be a sign that your yeast is no longer active. In this case, you will need to start over with fresh yeast. Proper yeast activation is crucial for achieving the airy interior that makes mini baguettes so delicious.
For more tips on yeast activation and troubleshooting common problems, check out this Wikipedia entry on yeast.
Step 2: Mixing Dry Ingredients
While the yeast mixture is activating, it’s time to prepare the dry ingredients. In a large mixing bowl, combine 3 cups of all-purpose flour and 1 teaspoon of salt. Use a whisk or spoon to mix the dry ingredients together evenly. The salt should be well-distributed throughout the flour to ensure the dough is seasoned properly.
Salt is an important ingredient because it helps control the fermentation process and balances the yeast’s activity. Without salt, the dough could over-ferment, which would affect both texture and flavor.
Step 3: Combining Wet and Dry Ingredients
Once the yeast mixture is frothy and the dry ingredients are mixed, it’s time to combine everything. Pour the activated yeast mixture into the bowl of dry ingredients, along with 1 tablespoon of olive oil. Use a wooden spoon or spatula to stir everything together until the dough starts to come together.
As you mix, you’ll notice the dough becoming sticky and starting to form into a rough ball. This is a good sign that the ingredients are beginning to bond. Continue mixing until the dough is moist but not too wet. If the dough feels too sticky, you can add a little more flour, but be careful not to overdo it, as too much flour can make the dough tough.
If you’re interested in learning more about dough mixing techniques, this guide to shaping bread dough on Pinterest offers detailed instructions on how to achieve the right consistency.
Step 4: Kneading the Dough
Once the dough begins to come together, it’s time to knead. Turn the dough out onto a lightly floured surface and begin kneading. Press the dough with the heel of your hands, fold it over, and turn it 90 degrees before repeating the process. Continue kneading for about 8 to 10 minutes until the dough becomes smooth and elastic.
Kneading is an essential step because it helps to develop the gluten in the flour, which gives the dough its structure. The more you knead, the chewier the baguette will be. If you’re unsure whether the dough has been kneaded enough, perform the “windowpane test”: take a small piece of dough and stretch it between your fingers. If it forms a thin, translucent membrane without tearing, the dough is ready.
Kneading can be a workout, but it’s crucial for the final texture of your mini baguettes. If you’re looking for a more hands-off method, you can also use a stand mixer with a dough hook attachment to knead the dough for you.
For additional guidance on kneading, you can explore this Pinterest board on kneading bread for visual tips and techniques.
The Rising Process and Tips for Success
After kneading the dough to perfection, the next crucial step in making your crusty mini baguettes is allowing the dough to rise. This is where the magic happens: the yeast ferments, causing the dough to expand and develop that soft, airy texture inside. Let’s explore the process and the key tips to ensure your dough rises properly.
Step 1: Letting the Dough Rise
Once your dough is kneaded and smooth, it’s time to let it rise. Place the dough into a lightly greased bowl, and cover it with a damp cloth or plastic wrap. The goal is to keep the dough warm and protected from drafts, as a warm environment encourages yeast activity.
Allow the dough to rise for about 1 hour, or until it has doubled in size. This is known as the first proof. The dough should feel light and airy to the touch, and you should be able to see small bubbles throughout it. If you gently press a finger into the dough, it should leave an indentation that slowly springs back.
The rising process is essential for creating the light and airy texture that makes mini baguettes so delightful. If the dough doesn’t rise as expected, it may be due to several factors, such as yeast that is too old, the water temperature being incorrect, or an environment that is too cool. Make sure your kitchen is warm enough for proper fermentation.
Step 2: Tips for a Successful Rise
To ensure a successful rise, here are a few key tips to follow:
-
Ideal Temperature: Yeast thrives in temperatures between 75°F (24°C) and 85°F (29°C). If your kitchen is cool, you can place the dough in a slightly warmer spot, such as an oven with the light on or near a heater.
-
Cover the Dough Properly: Using a damp cloth or plastic wrap helps prevent the dough from drying out during the rise. The moisture helps maintain the right environment for yeast fermentation.
-
Avoid Overproofing: While a longer rise time can create a more developed flavor, it’s important not to overproof the dough. If the dough rises too long, it can become overly airy and difficult to shape. Keep an eye on it, and don’t wait until it begins to deflate.
-
Check the Dough: If you’re unsure whether the dough is fully risen, you can perform the “poke test.” Gently press your finger into the dough. If the indentation remains, the dough is ready. If it springs back too quickly, let it rise a bit longer.
By following these tips, you’ll create the ideal conditions for your dough to rise and reach its full potential.
If you’d like to explore more about the proofing process, you can read more about proofing bread dough on Wikipedia. This article provides more insight into the science behind fermentation and proofing.
Step 3: Punching Down the Dough
Once your dough has risen to double its size, it’s time to punch it down. Gently deflate the dough by pressing your fist into the center. This removes any large air bubbles that formed during the rise. Punching down the dough also helps redistribute the yeast and allows for a more even texture in the final product.
After punching down the dough, you can proceed with dividing it into smaller portions and shaping it into mini baguettes. Be sure not to handle the dough too roughly at this stage, as it could affect the texture.
Shaping Mini Baguettes for the Perfect Look and Texture
Now that your dough has risen and been punched down, it’s time to shape it into mini baguettes. Shaping your dough properly is essential for achieving the crusty exterior and light interior that make mini baguettes so delightful. Let’s break down the process of shaping the dough and ensuring you get the perfect result.
Step 1: Dividing the Dough
After you’ve punched down the dough and it’s nice and smooth, divide it into four equal portions. Each portion will form one mini baguette. To ensure the portions are equal, you can either eyeball it or use a kitchen scale for accuracy.
The goal is to create mini baguettes that are the right size for easy handling and serving. If you make the portions too large, you’ll end up with thicker, denser loaves, which may affect the texture of the final result. If you make them too small, the baguettes might dry out during baking.
For a great reference on portioning dough evenly, take a look at this Pinterest board on shaping dough, where you can find various techniques for dividing and shaping dough.
Step 2: Rolling the Dough Into Loaves
Take each portion of dough and start rolling it into a long, thin loaf. Begin by flattening the dough slightly with your fingers, then fold the edges toward the center, and use your palms to roll the dough outward into a cylinder. Make sure the dough is rolled evenly, without any air pockets inside. The more uniform your rolls, the better the texture will be when baked.
As you roll the dough, gently pull the ends of the loaf to lengthen it to the desired mini baguette size. The length should be around 10-12 inches, depending on how large you want your mini baguettes to be. Try to make the loaves as uniform as possible to ensure even baking.
If you prefer a more rustic appearance, you can leave the ends a little uneven, but be mindful not to create any overly thick parts, which could result in uneven cooking.
Step 3: Creating Tension in the Dough
To achieve the signature crusty texture, it’s important to create some tension in the dough as you shape it. This will help the baguettes hold their shape during baking and prevent them from spreading out too much in the oven.
When rolling each portion, make sure to apply gentle, even pressure while maintaining tension. The surface of the dough should be taut but not overly tight. You can check by gently pressing down on the surface—if it springs back, it’s taut enough.
Step 4: Placing the Shaped Dough on the Baking Sheet
Once your mini baguettes are shaped, place them onto a parchment-lined baking sheet. Leave some space between each loaf so they can expand without sticking to one another during baking. If you are using a baking stone, make sure to transfer the shaped loaves onto a pizza peel or another flat surface, ready to be slid onto the stone.
At this point, you can optionally brush the tops of the mini baguettes with a little water, which will help create a crispier crust when baked. You can also leave them plain and allow the natural texture to form during baking.
For inspiration on shaping baguettes and getting tips from fellow bakers, be sure to check out this Pinterest pin on shaping baguettes.
Preheating the Oven and Baking Setup
Now that your mini baguettes are shaped and ready, it’s time to focus on the oven setup and baking process. Preheating the oven properly and preparing your baking environment is key to achieving the perfect crust and texture. Here’s how to set everything up for success.
Step 1: Preheating the Oven
Start by preheating your oven to 450°F (230°C). This high temperature is necessary to create a crispy, golden-brown crust on your mini baguettes. A properly preheated oven ensures that the loaves bake quickly and evenly, giving you that irresistible crunch on the outside and soft, airy interior.
For best results, place a baking stone or an inverted baking sheet in the oven while it preheats. This helps to create an even cooking surface, which is crucial for forming that characteristic crispiness. The stone will also absorb heat, radiating it back into the bread for an even bake. If you don’t have a baking stone, an inverted baking sheet will still work well.
For more details on how a baking stone works and its benefits, check out this article on baking stones on Wikipedia.
Step 2: Creating Steam for a Crispier Crust
One technique used in professional bakeries is to introduce steam into the oven during the first few minutes of baking. The steam helps the crust form quickly, giving it a crisp texture while allowing the bread to expand properly.
To create steam, you can place a small pan of water in the bottom of the oven while it preheats. Alternatively, you can mist the dough with water before placing it in the oven. This simple step significantly improves the texture of the crust and adds to the crispy finish that makes homemade baguettes so irresistible.
For a more professional approach, consider investing in a bread baking sprayer, which allows you to mist the dough evenly for better steam distribution. If you’re interested in learning more about steam in bread baking, you can check out this Pinterest board for various steam-related tips and techniques.
Baking Your Mini Baguettes to Perfection
With your oven preheated and steam ready to go, it’s time to bake your mini baguettes. The key to achieving a golden, crusty exterior is keeping an eye on the time and ensuring the bread is baked through without overcooking.
Step 1: Scoring the Dough
Before placing the mini baguettes into the oven, it’s important to score the tops of each loaf. Use a sharp knife or a razor blade to make a few shallow slashes across the surface of the dough. This allows the bread to expand evenly while baking, preventing it from cracking in unpredictable ways. The slashes also give the baguettes their characteristic look.
The cuts should be about ¼-inch deep and spaced evenly across the top of each baguette. If you prefer a more rustic look, you can make fewer slashes, but be mindful that the slashes help the bread bake evenly.
For more tips on scoring bread and baguettes, check out this helpful Pinterest post on scoring baguettes.
Step 2: Baking the Baguettes
Carefully transfer the baking sheet or pizza peel with the shaped baguettes into the preheated oven. Bake the mini baguettes for 20-25 minutes, or until they turn a deep golden brown and sound hollow when tapped on the bottom. If you have a thermometer, you can also check the internal temperature of the bread, which should reach about 190°F (88°C) when fully cooked.
While the baguettes are baking, keep an eye on the oven. You want to avoid burning the crust, so if you notice that the tops are browning too quickly, you can reduce the oven temperature slightly and continue baking.
Step 3: Cooling the Baguettes
Once your mini baguettes are golden and fully baked, remove them from the oven and let them cool on a wire rack for at least 10 minutes. Cooling the bread before slicing helps to set the texture and prevents the bread from becoming gummy. While it’s tempting to cut into them immediately, waiting just a few minutes will allow the crumb to stabilize, giving you the best texture.
During this time, you’ll notice the baguettes continue to crisp up as they cool, creating that satisfying crusty finish. Once cooled slightly, slice and serve your mini baguettes.
Creating a Golden Finish: The Egg Wash Technique
While not mandatory, brushing the tops of your mini baguettes with an egg wash before baking can help achieve a glossy, golden finish. The egg wash provides an extra layer of shine, making your baguettes look even more professional.
How to Apply the Egg Wash
To create an egg wash, beat one egg and add 1 tablespoon of water or milk. Brush this mixture over the tops of your shaped mini baguettes before baking. This gives the bread a shiny, rich appearance and enhances the crust during baking.
If you prefer a lighter finish, you can also use a water or milk wash, which results in a slightly softer, matte appearance. For those seeking an even more rustic look, an egg wash may be skipped entirely.
For more details on egg wash techniques and when to use them in baking, check out this Wikipedia entry on egg wash.
Cooling and Serving Your Mini Baguettes
Once your mini baguettes are out of the oven and cooled slightly, it’s time to enjoy them! The cooling process is essential to achieving the ideal texture. Freshly baked bread needs a few minutes to set properly, so avoid slicing immediately.
Step 1: Slicing the Baguettes
After letting the baguettes cool on a wire rack for about 10 minutes, it’s time to slice. For clean slices, use a serrated knife, which helps cut through the crunchy crust without squishing the soft interior. Slice your baguettes as thin or thick as you prefer, depending on how you plan to use them.
Step 2: Serving Your Mini Baguettes
Mini baguettes are incredibly versatile. Here are a few ideas for serving:
-
Pair with cheese, charcuterie, and olives for a delicious appetizer.
-
Use as a base for sandwiches, adding your favorite fillings.
-
Enjoy with soup or stew, perfect for dipping.
-
Spread with butter or olive oil for a simple, satisfying snack.
For additional serving ideas and inspiration, check out these Pinterest pins.
Troubleshooting Common Issues When Making Mini Baguettes
Even with the best intentions, sometimes things don’t go as planned when baking bread. Here are some common issues and tips for troubleshooting.
Issue 1: Dough Too Sticky or Too Dry
If your dough is too sticky or too dry, it’s usually due to the amount of flour or water. Add small amounts of flour if the dough is too sticky, or add a bit more water if it’s too dry. Keep in mind that a slightly tacky dough is easier to shape than a dough that is too dry.
Issue 2: Overproofing or Underproofing
If the dough is overproofed, it will collapse when you try to shape it or bake it. If underproofed, it will result in dense, heavy bread. Always pay attention to the rise times and use the “poke test” to ensure it’s ready for baking.
Issue 3: Uneven Crust
To prevent uneven crusts, make sure the baguettes are shaped uniformly. If one end of the baguette is thicker than the other, it will bake unevenly. Also, ensure that your oven is preheated properly and maintain a consistent temperature throughout the baking process.
For troubleshooting more baking issues, take a look at these baking tips on Pinterest.
FAQs Section
-
Can I make mini baguettes without a baking stone?
-
Yes! If you don’t have a baking stone, you can use an inverted baking sheet. It will still create a crispy crust, though a stone helps achieve a more evenly distributed heat.
-
-
Why are my mini baguettes too soft?
-
If your mini baguettes are too soft, it could be due to underbaking, or the dough might not have risen enough. Ensure that the dough is properly proofed before baking, and bake for the full 20-25 minutes until the crust is golden and crisp.
-
-
How can I store homemade mini baguettes?
-
Store your mini baguettes at room temperature in a paper bag or wrapped in a clean kitchen towel. This keeps them fresh for up to 2 days. If you need to store them for longer, consider freezing them.
-
-
Can I freeze mini baguettes?
-
Yes, mini baguettes freeze very well! After baking, let them cool completely and wrap them tightly in plastic wrap and foil. When ready to eat, simply reheat them in a hot oven for a few minutes to restore their crispy crust.
-
How to Make Perfect Crusty Mini Baguettes at Home

Learn how to bake crusty mini baguettes at home with this simple and detailed recipe. Perfect for beginners and experienced bakers alike, these mini baguettes offer a crisp, golden crust and a soft, airy interior. With just a few ingredients and a little patience, you can bring the taste of a country bakery right into your kitchen.
- Author: Clara
Ingredients
- 3 cups all-purpose flour
- 1 tbsp sugar
- 1 tbsp active dry yeast
- 1 tsp salt
- 1 cup warm water (110°F/45°C)
- 1 tbsp olive oil
- 1 egg (for egg wash, optional)
Instructions
In a small bowl, combine warm water, sugar, and yeast. Stir gently and let it sit for about 5 minutes, or until the mixture becomes frothy.
In a large mixing bowl, combine the flour and salt. Once the yeast mixture is ready, add it to the dry ingredients along with the olive oil.
Stir until the dough begins to come together. Transfer it to a lightly floured surface and knead for about 8-10 minutes, until the dough is smooth and elastic.
Place the dough in a greased bowl, cover with a damp cloth, and let it rise for about 1 hour, or until it has doubled in size.
Preheat your oven to 450°F (230°C) and place a baking stone or an inverted baking sheet in the oven to heat up.
Punch down the dough and divide it into 4 equal portions. Shape each portion into a small baguette by rolling it into a long, thin loaf.
Place the shaped loaves on a parchment-lined baking sheet. If desired, brush the tops with a beaten egg for a golden finish.
Make a few shallow slashes across the tops of the baguettes using a sharp knife or razor blade. This will help the bread expand as it bakes.
Carefully transfer the baking sheet to the preheated oven. Bake for 20-25 minutes, or until the baguettes are golden brown and sound hollow when tapped on the bottom.
Let the mini baguettes cool slightly before slicing and serving.
Enjoy the deliciously crusty, soft interior of your homemade mini baguettes!
Notes
-
Make sure to measure your ingredients accurately for the best results.
-
Adjust the dough’s consistency with small amounts of flour or water if needed.
-
The steam created during baking helps form the perfect crust. Don’t skip this step!
-
If you don’t have a baking stone, an inverted baking sheet can still yield great results.
-
These mini baguettes are perfect for sandwiches, as a side with soups, or simply enjoyed with a bit of butter.