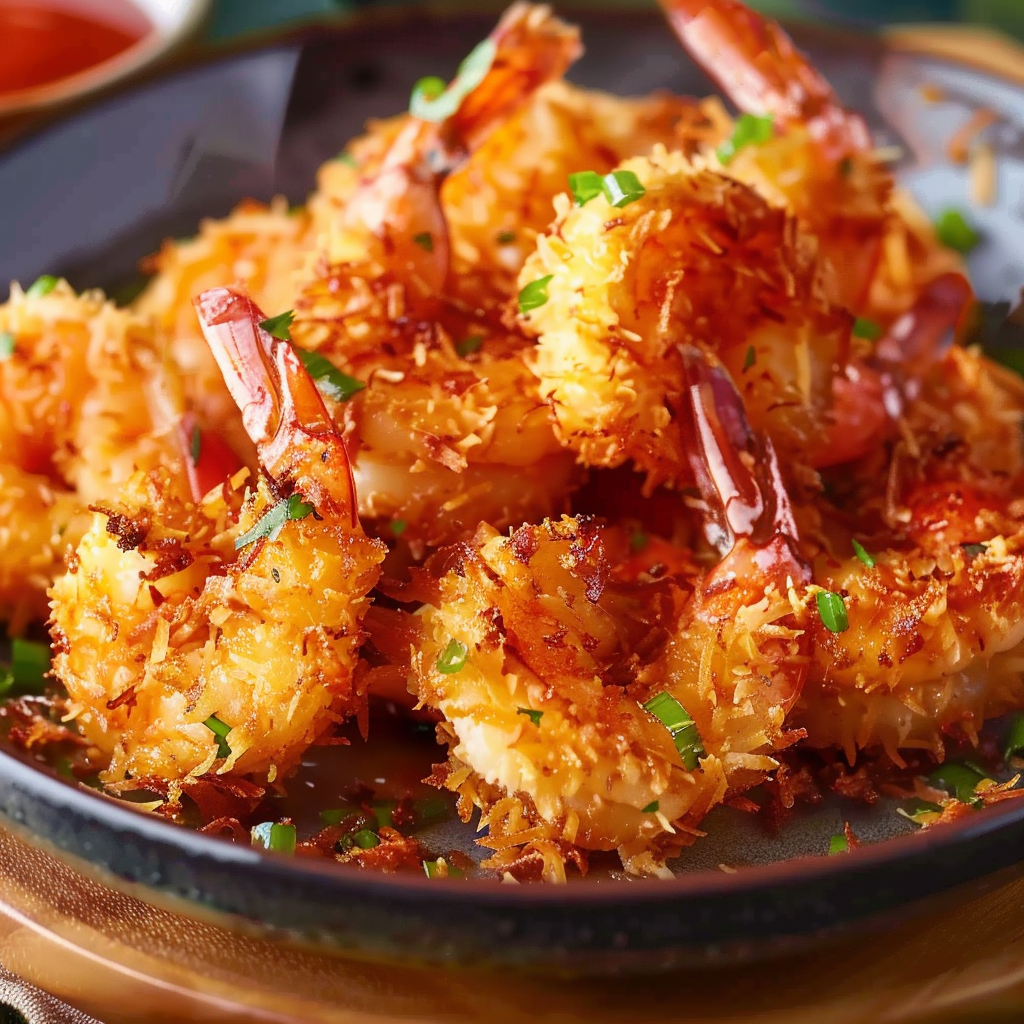
Red Lobster Coconut Shrimp is one of the most beloved appetizers across America. With its perfect blend of crispy, golden coconut coating and tender, juicy shrimp, it’s a dish that captures the essence of casual seafood dining. Fortunately, making a copycat version at home is easier than it seems—and just as delicious.
This guide shows you exactly how to make juicy shrimp Red Lobster coconut shrimp recipe at home, whether you prefer to air fry or pan fry. You’ll get all the tips you need to achieve tall crunch, even browning, and perfectly cooked shrimp inside. We’ll also explore how to batch cook, freeze, and reheat them while maintaining that signature fresh snap.
Understanding the ingredients is key to nailing the taste and texture. By using large, tail-on shrimp, high-quality panko breadcrumbs (Wikipedia), and sweetened shredded coconut, you get that iconic texture and sweet-savory flavor combo. The addition of a tangy, homemade orange marmalade dipping sauce (Wikipedia) elevates this dish even further.
Whether you’re prepping for a weeknight treat or hosting a game night, this Red Lobster coconut shrimp copycat recipe offers the perfect balance of flavor, texture, and simplicity. From ingredient substitutions to pro tips for air frying (Wikipedia) and deep frying (Wikipedia), this guide has everything you need to master one of the best coconut shrimp recipes around.
Let’s dive into what makes this restaurant-style coconut shrimp so crave-worthy.
2. What Makes Red Lobster Coconut Shrimp So Irresistible?
The allure of Red Lobster Coconut Shrimp lies in its perfect contrast of textures and balanced flavors. Each bite combines the crispiness of golden coconut crust with the succulence of plump shrimp, making it a must-have appetizer for seafood lovers. Understanding what sets it apart helps you replicate it successfully at home.
Crispy Outside, Juicy Inside
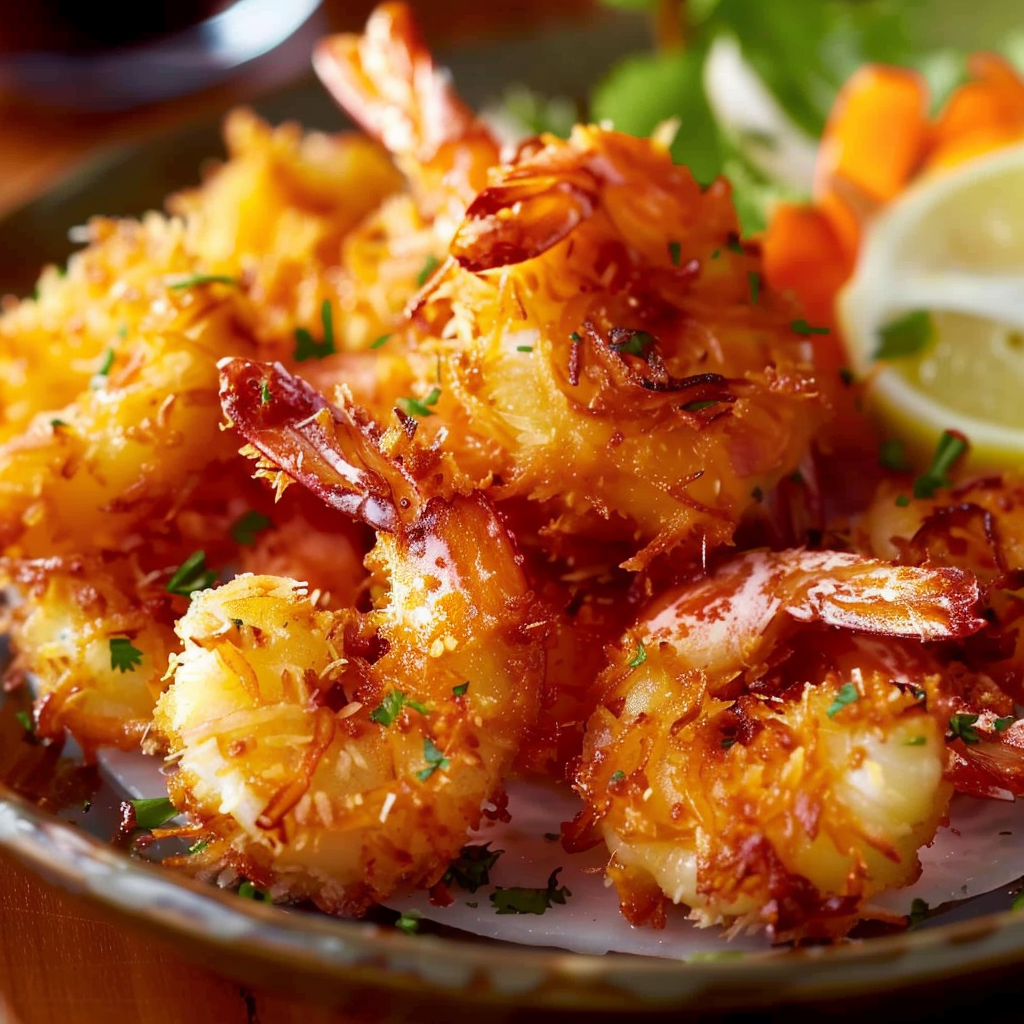
The star of the dish is the shrimp (Wikipedia) itself—typically large, tail-on, and raw, which ensures they cook evenly and stay moist inside. Pre-cooked or smaller shrimp tend to dry out or overcook quickly. The crispy texture comes from a three-step coating: seasoned flour, beaten eggs, and a mix of panko breadcrumbs and sweetened shredded coconut. This combination results in the signature crunchy bite.
Panko, a Japanese-style breadcrumb, is especially key. It creates a light, airy crust that browns evenly. According to Wikipedia, panko’s flaky texture allows for better air circulation when frying, leading to a crispier surface—a feature you’ll definitely want whether you choose to pan fry or air fry.
Sweet and Savory Flavor Combo
The coconut adds a hint of sweetness that pairs beautifully with the mild brininess of the shrimp. Meanwhile, paprika (Wikipedia) in the flour adds warmth and color, and a pinch of salt brings the flavors together. The flavor profile is further enhanced by the orange marmalade dipping sauce, which blends the sweet citrus notes with a touch of heat from horseradish (Wikipedia) and the tang of Dijon mustard.
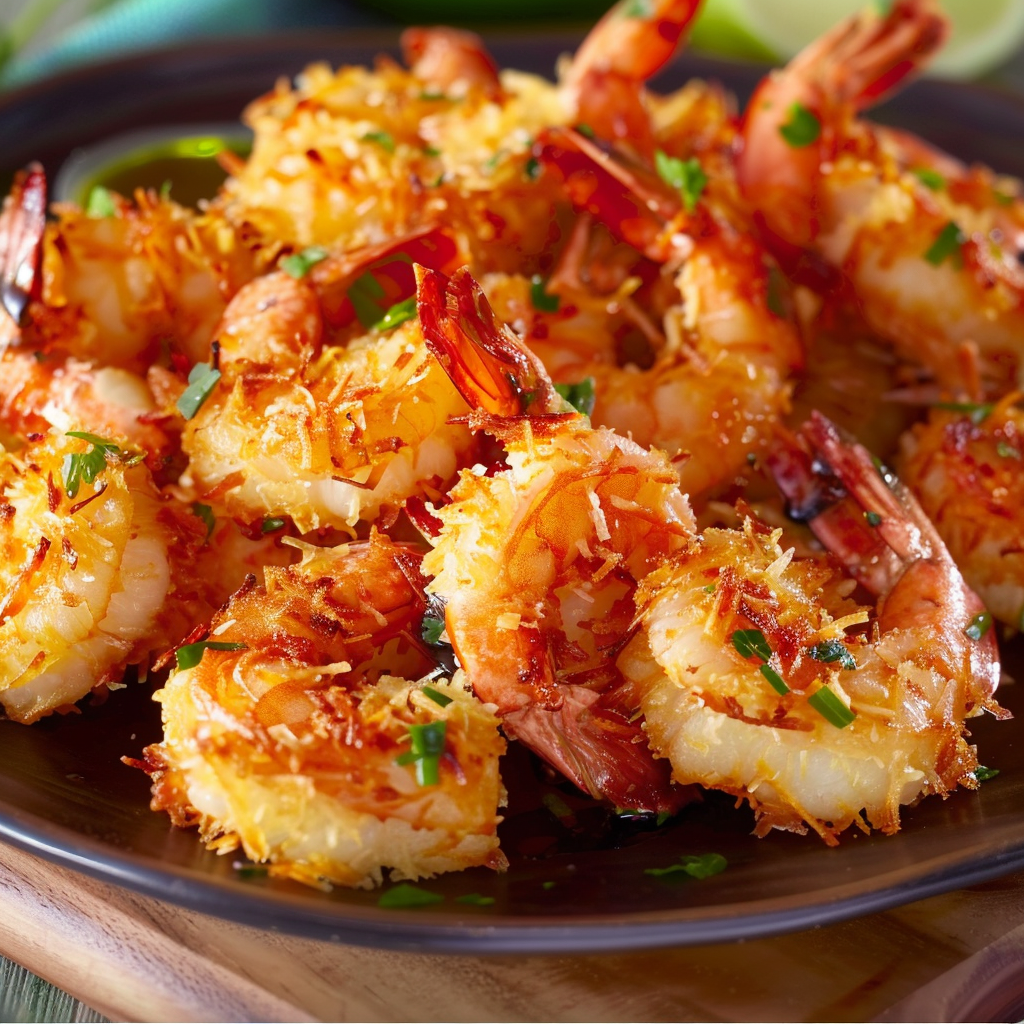
Tail-On Presentation
Another small but important detail is leaving the tails on. It’s not just for looks—it gives people something to hold onto while dipping and eating, adding to the restaurant-style presentation you’d expect from a place like Red Lobster.
Perfect Shrimp Selection
Here’s what to look for when selecting shrimp for this recipe:
-
Size: Large (21–25 count per pound) works best for even cooking
-
Raw: Avoid pre-cooked shrimp
-
Deveined & Peeled: Saves prep time
-
Tail-On: Adds visual appeal and handling ease
This simple yet thoughtful combination of ingredients and technique is what makes this dish irresistible. And the best part? With the right steps, you can recreate this crispy shrimp perfection from the comfort of your own kitchen.
Next, let’s explore the exact ingredients you’ll need and how to prep them properly for the best results.
3. Key Ingredients for Copycat Red Lobster Coconut Shrimp
To make an authentic Red Lobster coconut shrimp at home, selecting the right ingredients is crucial. Every component plays a role in delivering the signature crunch, golden color, and juicy bite that defines this popular appetizer. Here’s a breakdown of each essential ingredient and its function, along with recommended variations to customize the flavor.
Shrimp
The heart of the dish is, of course, the shrimp (Wikipedia). For the best results:
-
Use 1 lb of large shrimp (21–25 count per pound), peeled and deveined.
-
Keep tails on for better grip and presentation.
-
Choose raw shrimp to avoid overcooking.
Fresh or thawed frozen shrimp work well, but be sure to pat them completely dry before dredging to help the coating adhere and ensure a crisp finish.
Flour Mixture
The first layer in the breading process includes:
-
½ cup all-purpose flour
-
½ tsp salt
-
½ tsp paprika (Wikipedia)
This stage gives the shrimp a dry surface so the egg wash sticks better. The paprika adds subtle warmth and a hint of color, enhancing both flavor and appearance.
Egg Wash
Next, dip the floured shrimp into:
-
2 large eggs, beaten well
Eggs act as the glue between the flour and the breadcrumb-coconut layer. For added flavor, you can whisk in a splash of hot sauce or a pinch of garlic powder.
Panko and Coconut Coating
This is the most important step for achieving that tall, crunchy bite:
-
⅔ cup panko breadcrumbs (Wikipedia)
-
1 cup sweetened shredded coconut
Panko is essential for texture, while the sweetened coconut gives the dish its signature tropical flair. You can experiment with unsweetened coconut for a less sugary result or toast the coconut lightly beforehand for a deeper flavor.
Explore more ideas for coconut shrimp coatings and visual inspiration on Pinterest.
Oil for Frying
Use a neutral oil with a high smoke point:
-
Vegetable oil
-
Canola oil
-
Peanut oil (optional for added flavor)
The oil must be heated to exactly 350°F (175°C) for optimal crisping without burning the coconut.
Dipping Sauce Ingredients
A sweet and tangy dipping sauce balances out the richness of the shrimp:
You can spice things up with a pinch of chili flakes or blend in some fresh lime juice for acidity.
Optional Enhancements
To add your own twist, consider:
-
A dash of cayenne pepper for heat
-
Lime zest in the coconut mixture
-
Garlic powder or onion powder in the flour dredge
-
Substituting gluten-free flour or almond flour for a GF version
For more flavor and serving inspiration, check out shrimp-based appetizer ideas on Pinterest and unique dipping sauces here.
With these ingredients ready, you’re now set to start the coating and cooking process. Next, we’ll walk through a step-by-step method to ensure every bite is as crunchy and juicy as the original.
4. Step-by-Step: How to Make Red Lobster Coconut Shrimp at Home
Mastering Red Lobster’s coconut shrimp at home comes down to the process. This section gives you a detailed, foolproof guide to preparing and cooking juicy, golden-brown coconut shrimp using the same layering technique the restaurant uses—only better, because you can control the quality of ingredients and cooking method.
a. Prep the Shrimp
Start by rinsing the shrimp under cold water and patting them completely dry with paper towels. This is essential for getting the coating to stick and preventing oil splatter during frying. Remove shells if needed, but keep the tails on for easy dipping and a professional look. You should now have 1 lb of large, peeled, deveined, tail-on shrimp ready to go.
b. Make the Dredge Stations
Set up three shallow bowls or dishes to create an efficient breading line:
-
Bowl 1: Mix ½ cup flour, ½ tsp salt, and ½ tsp paprika. This dry coating helps absorb moisture and creates a base layer.
-
Bowl 2: Beat 2 large eggs until fully blended.
-
Bowl 3: Combine ⅔ cup panko breadcrumbs (Wikipedia) and 1 cup sweetened shredded coconut.
Having all three stages ready prevents the shrimp from sitting too long and losing moisture.
c. Coat the Shrimp
Working with one shrimp at a time:
-
Dredge in the flour mixture, shaking off excess.
-
Dip into the egg wash to fully coat.
-
Press firmly into the panko-coconut mixture, making sure each shrimp is fully covered. A firm press helps the coating stay on during frying.
Place coated shrimp on a parchment-lined tray or plate as you go. This method creates the thick, crispy coconut crust that mimics Red Lobster’s signature texture. For extra crunch, you can double-dip the shrimp—just repeat the egg and coconut steps.
d. Refrigerate Before Frying
This is a key step many skip but one that ensures a successful fry. Place the breaded shrimp in the fridge for 15–20 minutes. This chills the coating, helping it adhere better during cooking and reduces the chance of it falling off in the oil.
e. Fry the Shrimp
Heat vegetable oil or another high smoke point oil to 350°F (175°C). If you’re new to frying, using a cooking thermometer helps avoid burning the coconut. Once hot:
-
Gently lower shrimp into the oil in small batches (4–6 at a time).
-
Fry for 2–3 minutes per side or until golden brown.
-
Remove with a slotted spoon and drain on a paper towel-lined plate.
Avoid overcrowding the pan, which can lower oil temperature and result in soggy coating. If you’re looking for a lighter method, you can air fry the shrimp—we’ll cover that in the next section.
f. Make the Dipping Sauce
While the shrimp cool slightly, stir together in a small bowl:
This sauce brings the perfect balance of sweet, tangy, and spicy—ideal for pairing with the crispy coconut flavor.
Once done, serve your shrimp hot and fresh, with the dipping sauce on the side. For more creative takes on this dish, check out coconut shrimp variations on Pinterest to try new spins on the classic.
Next, we’ll compare pan frying vs. air frying to help you choose the best method for your kitchen setup and taste preferences.
5. Pan Fry vs. Air Fry: Which Method Is Better?
When making Red Lobster coconut shrimp at home, your choice of cooking method can make a big difference in texture, ease, and healthiness. While traditional pan frying delivers that classic golden crunch, air frying is a modern, lighter approach that’s just as satisfying—if done right. Here’s a breakdown of both methods to help you choose the best one for your needs.
a. Pan Fry Instructions
Pan frying is the go-to method for a rich, crispy crust that closely mimics the restaurant version. It allows for better control of browning and oil coverage, especially when using high-smoke-point oils like vegetable or canola oil.
How to pan fry:
-
Pour about ½ inch of oil into a heavy-bottomed skillet.
-
Heat the oil to 350°F (175°C). Use a thermometer or test with a breadcrumb—it should sizzle instantly.
-
Add shrimp in small batches (4–6 pieces), careful not to overcrowd the pan.
-
Fry for 2–3 minutes per side until deep golden brown and crisp.
-
Use a slotted spoon to remove shrimp and transfer to a paper towel-lined plate.
Tips for success:
-
Always pat shrimp dry before coating to reduce oil splatter.
-
Use a cast iron or stainless steel skillet for even heating.
-
Don’t flip too early—wait until the edges are browned.
Pan frying provides that signature restaurant texture, but it does use more oil and requires cleanup. For those looking to cut calories or avoid frying altogether, air frying is a great alternative.
b. Air Fryer Instructions
Air frying gives you a crispy texture without the mess or added fat of deep frying. It’s especially useful if you’re cooking for a crowd and want to batch cook without standing over a skillet.
How to air fry coconut shrimp:
-
Preheat the air fryer to 375°F (190°C).
-
Spray the air fryer basket lightly with non-stick spray or brush with oil.
-
Arrange shrimp in a single layer, spaced apart for airflow.
-
Lightly spray the tops of the shrimp with oil to aid browning.
-
Air fry for 7–8 minutes, flipping halfway through.
You can explore more air frying techniques and benefits in this detailed guide on air frying from Wikipedia.
Air frying pros:
-
Lower fat and fewer calories
-
Faster cleanup
-
Even browning with less hands-on cooking
Air frying cons:
-
May lack the deep crunch of oil-fried shrimp
-
Requires an air fryer with a large enough basket for even spacing
c. Comparison Chart
| Feature | Pan Frying | Air Frying |
|---|---|---|
| Crispiness | Deep crunch, golden brown | Light crunch, slightly less crisp |
| Health Factor | Higher fat, more oil absorbed | Lower fat, minimal oil needed |
| Cooking Time | 5–6 min per batch (more active) | 7–8 min per batch (hands-off) |
| Cleanup | More cleanup (oil, splatter) | Minimal cleanup |
| Taste Accuracy | Closest to Red Lobster style | Lighter but still flavorful |
Whether you prefer the indulgence of pan-fried shrimp or the ease of air frying, both methods deliver excellent results. For more inspiration on frying techniques, check out the general concept of deep frying and how to adapt them to different dishes.
In the next section, we’ll share tips to keep your shrimp juicy every single time, regardless of how you cook them.
6. How to Keep the Shrimp Juicy Every Time
One of the most common mistakes in homemade coconut shrimp recipes is ending up with overcooked, rubbery shrimp. The secret to truly juicy shrimp—like the ones served at Red Lobster—is a combination of ingredient prep, proper cooking temperature, and timing.
Use Large, Raw Shrimp
Start with large (21–25 count per pound) raw shrimp. Pre-cooked shrimp will become dry and chewy when cooked again. Large shrimp hold their moisture better and give you more bite after cooking.
Pat the Shrimp Dry
Before dredging, always pat shrimp dry with paper towels. This step removes excess moisture, allowing the breading to stick properly and fry evenly. It also prevents steaming inside the fryer or air fryer, which can make shrimp soggy.
Don’t Overcook
Shrimp cook very fast. You’re aiming for an internal temperature of 120–125°F (49–52°C). At this point, the shrimp will have just turned opaque and curled into a loose “C” shape. Anything tighter means it’s overdone.
-
Pan Frying: 2–3 minutes per side
-
Air Frying: 7–8 minutes total, flipping halfway
Refrigerate Before Cooking
Letting the breaded shrimp rest in the fridge for 15–20 minutes helps the coating set. This not only reduces the chance of the crust falling off but also prevents the shrimp from cooking too quickly and drying out.
Cook in Batches
Avoid overcrowding the pan or air fryer. If shrimp are too close together, they’ll steam instead of crisp, leading to soggy texture and uneven doneness.
Use a Thermometer
Whether frying or air frying, monitor your oil or appliance temperature. Inconsistent heat can lead to either burnt crusts or undercooked interiors. A kitchen thermometer is one of the best tools to ensure juicy, evenly cooked shrimp.
Following these tips ensures that every batch of Red Lobster-style coconut shrimp comes out perfectly juicy on the inside and crispy on the outside—exactly how it should be.
7. Make-Ahead, Freezing & Reheating Instructions
Homemade coconut shrimp doesn’t have to be a one-time meal. You can prepare them in advance, freeze them, and even reheat them without losing texture. Here’s how to make this Red Lobster copycat recipe work for your schedule.
a. How to Freeze Before Cooking
Freezing shrimp after breading but before frying is ideal. This preserves both flavor and texture.
-
Prepare the shrimp through the breading stage.
-
Lay them in a single layer on a parchment-lined baking sheet.
-
Freeze for 1–2 hours, or until firm.
-
Transfer to a zip-top freezer bag or airtight container.
-
Label and store for up to 2 months.
When ready to cook, do not thaw—fry or air fry straight from frozen, adding 1–2 minutes to cook time.
b. Reheating Instructions
Already-cooked shrimp can be reheated while keeping the crust crisp and the shrimp moist.
-
Oven: Preheat to 400°F (204°C). Place shrimp on a wire rack over a baking sheet. Heat for 10–12 minutes.
-
Air Fryer: Set to 375°F (190°C). Air fry for 6–8 minutes, flipping once.
Avoid microwaving—it causes the breading to become soggy and the shrimp rubbery.
c. Batch Cooking Tips
If you’re making a large batch for a party or meal prep:
-
Double the dredging ingredients.
-
Prepare shrimp in advance and refrigerate for up to 24 hours before cooking.
-
Make the dipping sauce and refrigerate in an airtight jar for up to 1 week.
For creative serving ideas or themed appetizer platters, explore shrimp appetizer recipes on Pinterest.
This flexibility makes coconut shrimp not only a party favorite but also a meal prep champion that can be stored and enjoyed later without sacrificing crunch or flavor.
8. Creative Variations of Coconut Shrimp
Once you’ve mastered the classic Red Lobster coconut shrimp, it’s easy to branch out into flavorful variations. These fun twists let you experiment with new spices, sauces, and presentations while keeping the base method the same.
Spicy Coconut Shrimp
Add ½ tsp cayenne pepper or 1 tsp hot sauce to the egg wash for a spicy kick. This version pairs well with mango habanero or sweet chili sauce.
Coconut Shrimp Tacos
Use the cooked shrimp in warm flour tortillas with shredded cabbage, avocado slices, and a lime crema or spicy mayo drizzle. A perfect fusion dish for taco night.
Gluten-Free Coconut Shrimp
Swap all-purpose flour for almond flour and use gluten-free panko. This version is just as crunchy and works well for dietary restrictions.
Pineapple Coconut Shrimp
Replace orange marmalade with pineapple preserves in the dipping sauce and add a dash of lime zest. It brings a tropical twist with extra sweetness.
Keto Coconut Shrimp
Skip sweetened coconut. Use unsweetened coconut flakes, almond flour, and egg whites. Pair with a sugar-free dipping sauce for a low-carb appetizer.
Check out even more variation ideas and plating inspiration on Pinterest.
These versions allow you to adapt the recipe to different tastes and occasions while staying true to the crispy, juicy appeal of the original.
9. What to Serve with Coconut Shrimp
Red Lobster-style coconut shrimp is incredibly versatile and pairs well with both tropical and savory sides. Whether you’re serving it as a main dish or an appetizer, the right pairing enhances the experience.
Dipping Sauces
While the orange marmalade sauce is classic, try these options for variety:
-
Sweet chili sauce
-
Spicy mango salsa
-
Pineapple-habanero dip
-
Garlic aioli or spicy mayo
Find more dipping ideas here.
Side Dishes
-
Coconut rice or jasmine rice: Complements the tropical flavor
-
Grilled pineapple slices: Adds sweetness and caramelization
-
Coleslaw: Brings a refreshing crunch
-
Tropical salad: Use mango, avocado, and lime vinaigrette
Drinks
-
Coconut mojito
-
Pineapple juice spritzer
-
Sweet iced tea
-
Tropical sangria
For more serving presentation tips, explore shrimp appetizer ideas to wow your guests with a restaurant-style platter at home.

10. Frequently Asked Questions (FAQs)
Can I use frozen shrimp for coconut shrimp?
Yes, but thaw them completely and pat them dry. Excess moisture can prevent the coating from sticking and lead to soggy results.
How do I keep the coconut from burning while frying?
Fry at 350°F and avoid overheating the oil. Watch carefully, as coconut can brown quickly. If needed, lower the heat slightly or fry in smaller batches.
What’s the best oil for frying coconut shrimp?
Use vegetable, canola, or peanut oil for their high smoke points and neutral flavor.
Is sweetened or unsweetened coconut better for this recipe?
Sweetened shredded coconut is traditional and gives the best flavor and texture. Unsweetened can be used for a lower-sugar version but may not brown as evenly.
Can I make coconut shrimp ahead of time?
Yes! You can bread the shrimp and refrigerate them for up to 24 hours or freeze them before cooking. Reheat cooked shrimp in the oven or air fryer for best results.


