The cult-favorite appeal of Raising Cane’s sauce has inspired countless home cooks to recreate the signature dip. This guide will teach you how to blend simple pantry staples into a flavor-packed sauce that rivals the original. By making your own version, you gain full control over ingredient quality and spice levels while saving money on takeout. You’ll also discover quick one-bowl hacks for crispy chicken strips, ensuring minimal cleanup without sacrificing crunch. Whether you’re hosting a casual game night or whipping up a family dinner, this recipe adapts to any occasion. In the following sections, we’ll explore the sauce’s history, dive into its key components, and provide step-by-step instructions for a perfect emulsion. Along the way, you’ll learn tips to troubleshoot common issues and creative variations to suit every palate. Ready to elevate your dipping game with a homemade twist that combines tradition, innovation, and convenience? Let’s get started.

History & Origin of Raising Cane’s Sauce
Since its launch in Baton Rouge, Louisiana, in 1996, Raising Cane’s Chicken Fingers has grown from a single drive-thru to a national sensation. Founder Todd Graves envisioned a restaurant dedicated to hand-battered chicken strips served with a signature sauce. Over time, this cult-favorite dip became synonymous with the brand and a cornerstone of its fan-driven appeal.
The development of the iconic Cane’s sauce was as deliberate as the menu itself. Early recipes were tested in local kitchens until the balance of key ingredients achieved the perfect flavor. For detailed backgrounds on mayonnaise (see mayo emulsification), ketchup (ketchup history), Worcestershire sauce (origins), and lemon juice (culinary uses), explore those pages. For hands-on inspiration, check Pinterest’s one-bowl breading hacks, chicken finger recipes, and easy sauce recipes, or dive into our internal sauce-making guide.
Key milestones include:
• 1998: Official menu rollout nationwide, sparking viral word-of-mouth.
• 2005: Introduction of the term “Cane’s sauce” in marketing materials (see emulsion in cooking).
• 2013: First online fan forums dedicated to sauce variations, inspiring countless DIY hacks with creative chicken dips.
• 2020: Rise of copycat discussions (see copycat recipes) across social media.
• Explore our internal History of Raising Cane’s Sauce for more milestones.
This foundational history informs your homemade recreation.
History & Origin of Raising Cane’s Sauce
Since its 1996 launch in Baton Rouge, Raising Cane’s Chicken Fingers has become a beloved fast-food brand known for its hand-battered chicken and signature dip. Founder Todd Graves envisioned a menu centered around quality, simplicity, and flavor. Over the years, the iconic Cane’s sauce has achieved cult status among fans craving its creamy, tangy profile.
Early recipe testing focused on ingredient balance, from the emulsion power of mayonnaise to the sweet acidity of ketchup. Detailed breakdowns on mayonnaise emulsification and ketchup history reveal why oil, eggs, and tomatoes combine flawlessly. For umami depth, creators added Worcestershire sauce origins and fresh lemon juice culinary uses, while community-driven hacks appear on Pinterest’s one-bowl breading tips and creative chicken dips. Discover related techniques in our internal sauce-making guide.
Key milestones shaped the sauce’s legend:
1998: Nationwide menu rollout sparked viral buzz on fan forums.
2005: “Cane’s sauce” term appeared in official materials, cementing brand identity.
2013: DIY copycat forums flourished with new copycat recipes and creative twists.
2020: Social media debates over subtle flavor adjustments led to modern hacks.
Explore full chronology in our internal history overview.
These events truly define its enduring legacy.
Ingredient Breakdown & Science Behind It
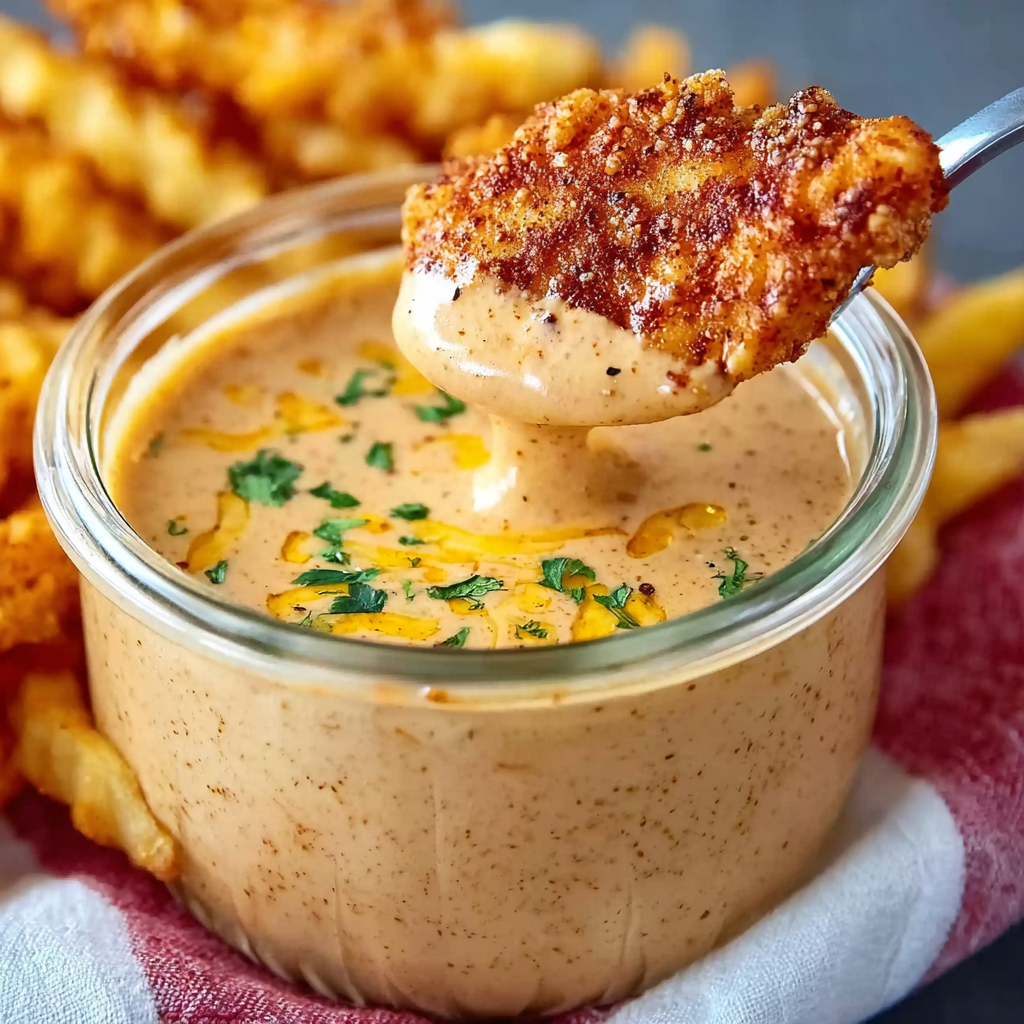
Understanding the science behind each component reveals why Cane’s sauce hits the perfect balance of creaminess, tang, and savory depth. By deconstructing the formula ingredient by ingredient, you’ll appreciate how fat, acidity, and seasoning work synergistically to create a stable emulsion that clings perfectly to chicken strips. Let’s explore these key drivers of flavor.
Mayonnaise serves as the creamy base, providing essential emulsifiers (egg yolk lecithin) and fat content for mouthfeel. Its oil-and-egg structure stabilizes the sauce when properly whisked. For a deep dive into the chemistry of emulsions, see emulsion in cooking. Ketchup contributes sweet acidity and tomato umami, balancing richness with tang. Curious home cooks often pair this sauce with chicken finger recipes for practical application.
Worcestershire sauce adds layers of umami from fermented anchovies, vinegar, and spices, intensifying the savory profile. The bright acidity of lemon juice cuts through richness, and its fresh zest elevates brightness. Learn more about lemon’s culinary versatility in our internal recipe-making guide. Dried garlic powder and ground black pepper introduce gentle heat and savory spice. For variation ideas, browse easy sauce recipes on Pinterest.
Gradual whisking of oil into egg yolk to form a stable emulsion.
Using cold ingredients to slow separation and maintain creaminess.
High-speed blending for stronger emulsification and smoother texture.
Resting the mixture in the fridge to allow flavor melding.
Adjusting thickness with a small splash of water or extra mayo.
By mastering each component’s role and following these emulsion tips, you’ll create a dip with the authentic Raising Cane’s taste at home. The interplay of fat, acid, and seasoning forms a sauce that clings perfectly to crispy chicken, delivering that signature burst of flavor in every bite. Next, we’ll walk through step-by-step assembly to ensure consistent results and troubleshoot any textural issues in your home kitchen easily.
Step-by-Step Homemade Sauce Recipe
Gather your essential equipment before starting:
Medium mixing bowl
Whisk or fork
Measuring spoons
Airtight container or jar
Begin with room-temperature ingredients to ensure a smooth emulsion:
Combine mayo and ketchup. In your mixing bowl, add 1 cup of mayonnaise and 3 tablespoons of ketchup. Whisk vigorously until the mixture is completely uniform and streak-free.
Emulsify with Worcestershire and lemon. Pour in 1 tablespoon of Worcestershire sauce and 1 teaspoon of freshly squeezed lemon juice. Continue whisking in a circular motion, scraping the sides of the bowl to fully incorporate all liquids.
Season evenly. Sprinkle in ½ teaspoon of garlic powder and ½ teaspoon of freshly ground black pepper. Stir until the spices are dispersed throughout the sauce, tasting as you go to adjust for your preferred depth of seasoning.
Rest for flavor melding. Transfer the sauce into your airtight container, seal it, and refrigerate for at least one hour. This resting period allows the flavors to harmonize and intensify, yielding that signature tangy depth.
Final whisk and serve. Before serving, give the sauce a final gentle stir. If it appears too thick, whisk in a teaspoon of cold water; if too thin, add a small dollop of mayonnaise and mix until you reach the perfect creamy consistency.
Troubleshooting Tips
Sauce too thin? Add extra mayonnaise in teaspoon increments and whisk until it thickens.
Sauce too thick? Stir in a teaspoon of cold water at a time until desired flow.
Broken emulsion? In a clean bowl, whisk one egg yolk, then slowly drizzle in the broken sauce while whisking to rebind the oils and water.
By following these steps precisely and paying attention to ingredient temperatures, you’ll achieve a homemade version of Raising Cane’s sauce that clings beautifully to crispy chicken strips. Your next step is to perfect the chicken breading using the one-bowl hack, which we’ll cover in the following section.
Quick One-Bowl Breading Hack for Chicken Strips
Elevate your homemade chicken strips with a one-bowl breading hack that minimizes prep and cleanup. This breading technique ensures each strip is evenly coated for a crunchy crust. Use a large zip-top bag to combine dry mix, binder, and chicken in a single vessel for consistent coverage.
Steps:
Add 1 cup all-purpose flour, 1 tsp paprika, 1 tsp garlic powder, 1 tsp salt, and ½ tsp black pepper into a zip-top bag.
Crack two eggs into the bag, seal, and massage to mix dry ingredients with eggs.
Insert chicken strips, reseal, and shake vigorously until pieces are coated.
Rest for five minutes to allow the coating to adhere.
Heat oil to 350 °F in a skillet and fry strips for 3–4 minutes per side until golden and cooked through.
Drain on paper towels and serve with your homemade Cane’s sauce.
Tips:
Double dredge for extra crunch.
Use chilled ingredients.
Pat chicken dry to help the coating adhere.
Monitor oil temperature with a thermometer.
Explore Pinterest’s one-bowl breading hacks for variations.
This streamlined technique yields crispy chicken strips in minutes with minimal washing. Enjoy every bite. Delicious.

No-Fail Sauce Emulsion Techniques
Achieving the perfect emulsion for your Cane’s sauce hinges on ingredient temperature, mixing method, and order of addition. A stable emulsion prevents separation and ensures a creamy texture that clings to each chicken strip. By understanding these factors, you can fix or avoid common issues and produce a consistently smooth sauce every time.
Ingredient temperature: Use cold mayonnaise and chilled liquids to slow separation.
Whisk vs. blender vs. immersion blender:
Whisk: Offers control and aeration for a light texture.
Countertop blender: Creates a faster, ultra-smooth emulsion.
Immersion blender: Combines the speed of a blender with minimal cleanup.
Order of addition:
Whisk mayo alone to loosen its structure.
Add ketchup and mayonnaise emulsification agents (egg yolk lecithin) if needed.
Slowly stream in Worcestershire sauce and lemon juice while whisking or blending.
Incorporate dry seasonings last to prevent clumping.
Resting and adjustment: After mixing, refrigerate for at least one hour to allow flavors to meld. If the sauce appears too thin, whisk in additional mayonnaise in teaspoon increments. If too thick, add cold water one teaspoon at a time.
Fixing a broken emulsion: In a clean bowl, begin with an egg yolk, then very slowly whisk in the separated sauce until it rebinds.
Mastering these techniques guarantees a reliably creamy, stable Cane’s sauce that elevates your homemade feast.
Creative Sauce Variations & Twists
Inject new life into your homemade Cane’s sauce with simple additions that cater to every palate. For a spicy kick, stir in sriracha or cayenne pepper. An herbaceous riff comes from finely chopped chives, dill, or parsley mixed in just before serving. To explore smoky undertones, add smoked paprika or chipotle powder to taste.
Vegetarian and vegan friends can enjoy a plant-based version by substituting egg-free easy sauce recipes for vegan mayonnaise alternatives and using tomato paste in place of ketchup for richer color. For a tangier profile, swap fresh lime juice for lemon.
Experiment with texture by folding in minced pickles or finely diced roasted red pepper. Whichever twist you choose, maintain the base emulsion ratio—1 cup mayonnaise to 3 tablespoons ketchup—to preserve the signature balance of creaminess and tang.
Pairing Suggestions & Serving Ideas
While chicken strips remain the classic companion for Cane’s sauce, this versatile dip elevates many dishes:
Fries & wedges: Sweet potato or seasoned potato fries
Seafood: Crispy shrimp or fish sticks
Vegetables: Roasted broccoli, cauliflower, or air-fried zucchini
Sandwiches & wraps: Slather on burgers, wraps, or grilled cheese
For a crowd-pleasing spread, assemble a dipping board with assorted veggies, breadsticks, and multiple sauces—ranch, honey mustard, and Cane’s sauce at center stage. Store leftover sauce in an airtight container for up to five days in the fridge, or freeze in ice cube trays for single-serve portions.

FAQs
Q: Can I use light mayonnaise?
A: Yes; flavor and thickness may vary slightly.
Q: How long does the sauce last?
A: Store in an airtight container and use within 5–7 days.
Q: Can I scale the recipe?
A: Multiply ingredients linearly and whisk thoroughly for consistent texture.
Q: What’s the best way to re-emulsify a broken sauce?
A: Whisk a fresh egg yolk, then slowly incorporate the broken sauce until it binds.
Q: Can I substitute vinegar for lemon juice?
A: White wine or apple cider vinegar works, but start with half the quantity.