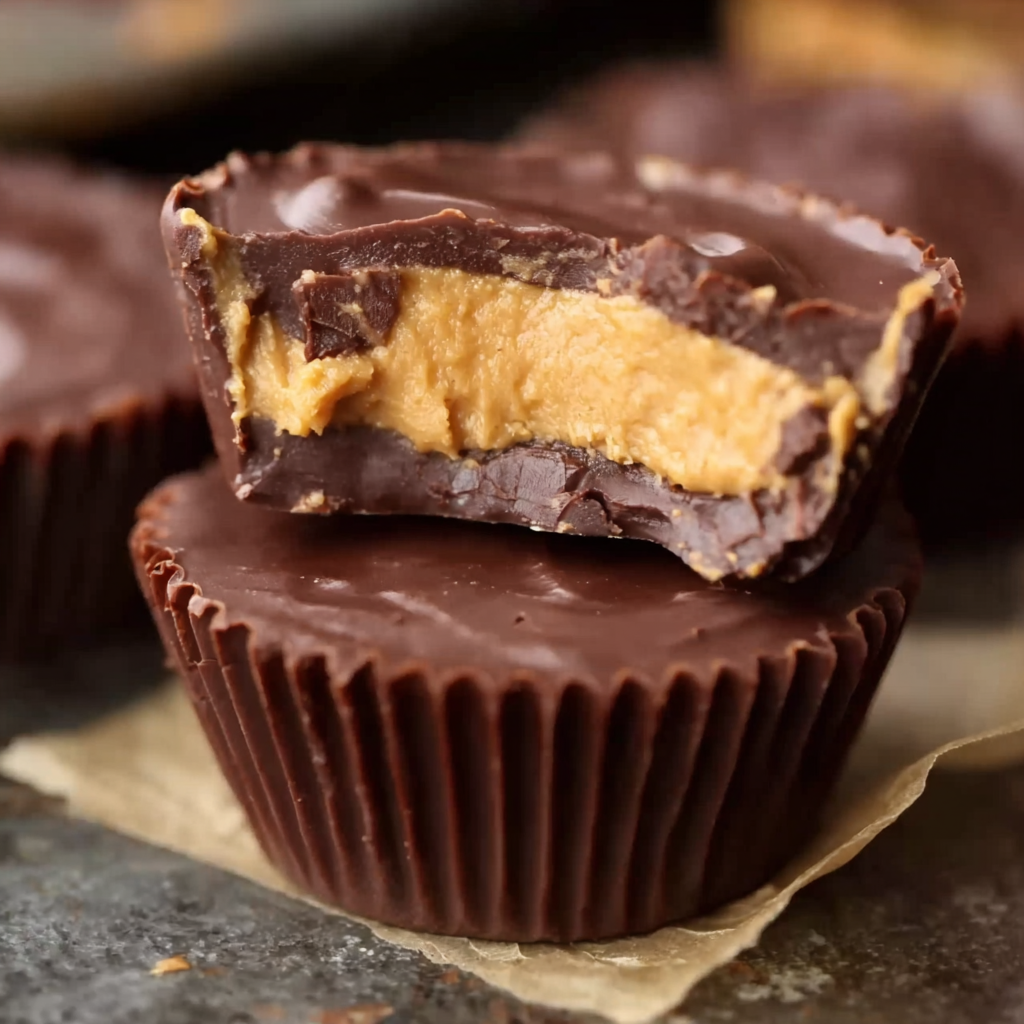
Why You’ll Love These Peanut Butter Cups
These homemade peanut butter cups stand out because they balance rich chocolate with smooth, creamy filling in every bite. As an easy no-bake dessert, they save time, reduce mess, and eliminate stress, making them ideal for beginners, busy families, and anyone craving dependable, homemade candy success every single time consistently.
The appeal reflects classic confectionery traditions https://en.wikipedia.org/wiki/Confectionery and the history of peanut butter https://en.wikipedia.org/wiki/Peanut_butter, while honoring chocolate https://en.wikipedia.org/wiki/Chocolate and butter https://en.wikipedia.org/wiki/Butter, with creative inspiration from Pinterest https://www.pinterest.com/search/pins/?q=easy%20homemade%20candy ideas for bakers who love no-bake desserts, giftable sweets, simple techniques, reliable results, modern flavors, seasonal treats, and crowd-pleasing homemade candy projects everywhere.
They are versatile and customizable, fitting no-bake dessert lifestyles https://en.wikipedia.org/wiki/No-bake_cake and pairing well with peanut butter dessert ideas https://www.pinterest.com/search/pins/?q=peanut%20butter%20desserts, holiday dessert gift ideas https://www.pinterest.com/search/pins/?q=holiday%20dessert%20gifts, DIY chocolate candy recipes https://www.pinterest.com/search/pins/?q=diy%20chocolate%20candy%20recipes, and vegan chocolate treats https://www.pinterest.com/search/pins/?q=vegan%20chocolate%20treats for parties, celebrations, thoughtful gifting, seasonal menus, creative kitchens, beginner cooks, and confident home candy makers.
Ingredients You’ll Need
Creating homemade peanut butter cups starts with just a handful of pantry staples. This simple ingredient list is one of the reasons this treat is so popular—each component plays a key role in building that irresistible balance between creamy, salty peanut butter and rich, smooth chocolate.
Basic Ingredients
To get started, you’ll need the following:
-
2 cups semi-sweet or milk chocolate chips – These are the base and top layers of your cups. For a richer taste, opt for dark chocolate or high-quality brands.
-
1 cup creamy peanut butter – Smooth peanut butter creates that melt-in-your-mouth center. This is the heart of every bite. You can learn more about how peanut butter is made here.
-
1/4 cup powdered sugar – This sweetens and firms up the peanut butter filling so it holds its shape.
-
2 tablespoons softened butter – Adds richness and helps bind the filling together. Discover more about the role of butter in desserts here.
-
1/2 teaspoon vanilla extract – Enhances the flavor and brings warmth to the filling.
-
Pinch of salt – Balances out the sweetness and elevates the peanut butter’s natural flavor.
-
Mini cupcake liners – Essential for shaping the cups and making removal easy.
The simplicity of this list makes the recipe approachable, even for beginners. If you’re looking for other easy homemade candy ideas, check out creative options on Pinterest to expand your no-bake dessert collection.
Optional Add-ins or Swaps
Want to make the recipe your own? Here are some easy tweaks:
-
Crunchy peanut butter – Adds texture and a nutty crunch to every bite.
-
Dark chocolate or white chocolate chips – Experiment with layers or mix and match for added depth.
-
Coconut oil – Add 1–2 teaspoons when melting chocolate for a glossier finish and smoother texture.
-
Nut-free alternatives – Use sunflower seed butter for a school-safe option or cashew/almond butter for a milder nut flavor. These variations align well with vegan chocolate treats.
These small adjustments let you align the recipe with personal preferences or dietary needs. Pair your custom cups with DIY chocolate candy recipes here for a homemade candy box or holiday gift platter.
This ingredient list supports everything from quick weeknight treats to impressive gifts and holiday dessert gift ideas here, making your kitchen feel like a chocolate shop with very little effort.
Tools and Equipment
You don’t need a professional kitchen setup to make these homemade peanut butter cups. In fact, one of the most appealing aspects of this recipe is how minimal the equipment requirements are. Whether you’re making these treats for a party, holiday, or late-night craving, everything you need is likely already in your kitchen.
Here’s what you’ll need:
-
Mini muffin tin – Essential for shaping each cup. It helps the chocolate layers set perfectly and hold their structure. You can use a silicone or metal pan.
-
Mini cupcake liners – These make it easy to pop out the finished candy without sticking, while also giving a polished look for gifting.
-
Microwave-safe bowl or double boiler – Needed to melt the chocolate smoothly. A microwave is faster, but a double boiler offers more control to avoid scorching.
-
Mixing bowls – One for melting chocolate and one for mixing the peanut butter filling.
-
Spoon or small spatula – For layering chocolate and peanut butter evenly.
Optional but helpful tools include:
-
Cookie scoop or melon baller – For more consistent portioning of the peanut butter filling.
-
Rubber spatula – Ideal for scraping out every last bit of chocolate or filling from the bowl.
This setup keeps the process simple, clean, and efficient—perfect for beginners or anyone looking to create easy no-bake candy at home. If you’re interested in even more fun treats like these, explore peanut butter dessert ideas for additional inspiration.
Step-by-Step Instructions
Step 1 – Prep the Tin and Melt Chocolate
Start by lining your mini muffin tin with cupcake liners. This keeps the cups from sticking and makes cleanup easier. In a microwave-safe bowl or using a double boiler, melt 1 cup of chocolate chips until smooth. Stir every 20–30 seconds in the microwave to prevent burning.
Spoon about 1 teaspoon of melted chocolate into the bottom of each liner. Gently use the back of the spoon to push some of the chocolate slightly up the sides. This forms the base and sides of the cup.
Step 2 – Freeze Chocolate Base
Place the tray in the freezer for about 10 minutes, or until the chocolate layer is firm to the touch. This ensures that the peanut butter layer won’t sink through the bottom.
Step 3 – Make the Peanut Butter Filling
In a separate bowl, mix together:
-
1 cup creamy peanut butter
-
1/4 cup powdered sugar
-
2 tablespoons softened butter
-
1/2 teaspoon vanilla extract
-
Pinch of salt
Stir until the mixture is smooth, thick, and creamy. The filling should be firm enough to shape but soft enough to press easily. This combo brings the perfect sweet and salty contrast that makes each bite irresistible.
Step 4 – Add Filling to Cups
Remove the muffin tin from the freezer. Scoop about 1 teaspoon of the peanut butter filling into each chocolate shell. Flatten it gently with your spoon or fingers, making sure it doesn’t touch the sides—this ensures the top layer of chocolate will seal the cup completely.
For gifting or special occasions, you can browse more DIY chocolate candy recipes here to add variety to your dessert box.
Step 5 – Add Final Chocolate Layer
Melt the remaining 1 cup of chocolate chips and spoon it over the peanut butter layer, covering it entirely. Tap the tray lightly on the counter to smooth the tops and eliminate air bubbles.
Step 6 – Chill to Set
Place the tray back in the freezer or fridge until fully set, about 20–30 minutes. Once firm, remove the cups from the liners and enjoy!
For a more professional appearance or texture, explore other easy homemade candy tips from Pinterest here.
No-Bake Candy: What Makes This Recipe Foolproof?
This recipe is one of the best examples of no-bake dessert success. Unlike traditional candy-making that may require thermometers, precise temperatures, or advanced techniques, these homemade peanut butter cups are straightforward, quick, and stress-free.
What makes it foolproof:
-
No candy thermometer needed – No need to worry about hitting hard crack or soft ball stages.
-
Microwave-friendly – Melt chocolate in minutes without fuss.
-
Fast chilling – Skip long waits; you can enjoy your treat in under an hour.
-
Flexible ingredients – Minor substitutions won’t ruin the recipe.
If you’re searching for a holiday dessert gift idea or something easy to involve kids in the kitchen, this treat checks all the boxes. More inspiration can be found in holiday dessert gift ideas.
For new bakers or anyone short on time, this recipe proves that candy-making doesn’t have to be complicated. The reward is just as rich and satisfying as more advanced treats—without the stress.
Recipe Variations You’ll Want to Try
Once you’ve mastered the base recipe, you can have fun customizing these cups with your favorite twists. These variations make the recipe even more versatile and exciting for different tastes and occasions.
Chocolate Variations
-
Dark chocolate – Boosts the richness and adds depth.
-
White chocolate – Sweet and creamy, a fun contrast to the peanut butter.
-
Layered chocolate – Combine dark and white chocolate for a marble effect.
Flavor Twists
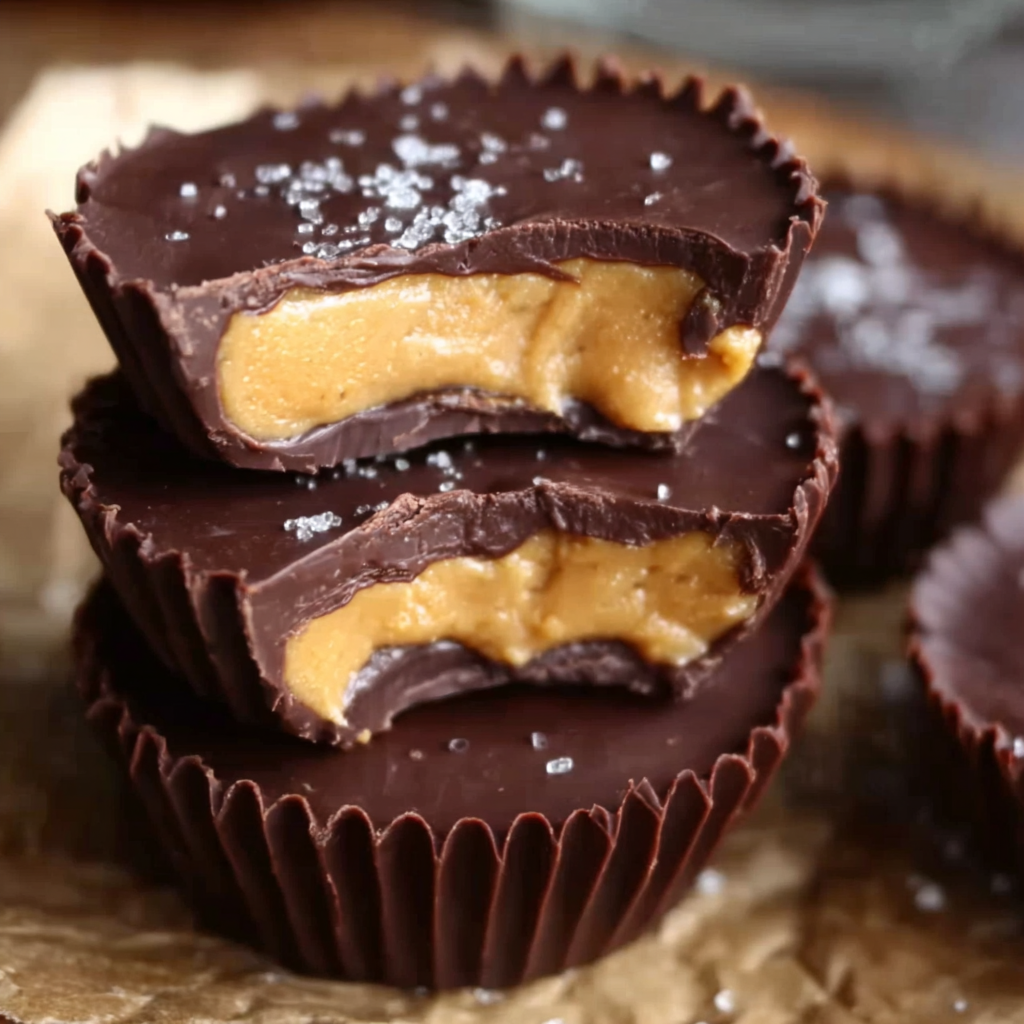
-
Sea salt sprinkle – Adds texture and enhances the sweet/salty combo.
-
Caramel drizzle – Use store-bought or homemade caramel for extra indulgence.
-
Crushed pretzels or cookies – Add on top before the final chill for crunch.
Nut-Free Options
-
Sunflower seed butter – Ideal for allergies and school-friendly treats.
-
Almond or cashew butter – Milder flavors with a creamy finish.
Explore more vegan chocolate treats for added variety and diet-friendly options here.
These swaps and add-ons can help transform this one recipe into a full collection of peanut butter dessert ideas perfect for any occasion or celebration.
How to Store Homemade Peanut Butter Cups
Proper storage keeps your homemade peanut butter cups fresh, firm, and delicious for days—or even weeks.
Here’s how to store them correctly:
-
Refrigerator – Store in an airtight container in the fridge for up to 2 weeks. This keeps the chocolate firm and prevents melting.
-
Freezer – For long-term storage, freeze in layers with parchment paper in between. They’ll keep for up to 3 months.
-
Room temperature – Not recommended in warm or humid environments, as the chocolate may melt or develop a white coating (chocolate bloom).
If you’re preparing ahead for gifting or holiday events, freezing is the most efficient method. Just thaw slightly before serving for the best texture.
Pair these with other treats from DIY chocolate candy recipes here to build a diverse dessert box that lasts.
Tips for the Best Peanut Butter Cups
While this recipe is very forgiving, these tips will help ensure every batch turns out perfectly:
-
Use quality chocolate – The better the chocolate, the smoother the melt and richer the taste.
-
Don’t skip chilling – Freezing between layers helps keep them clean and separate.
-
Don’t overfill – Avoid pushing peanut butter all the way to the edges so the top chocolate can seal in the filling.
-
Tap the tray – A gentle tap flattens the top chocolate layer for a professional look.
-
Slightly soften the peanut butter mixture – A few seconds in the microwave (if it’s too firm) can make layering easier.
Need more giftable inspiration? Browse holiday dessert gift ideas for packaging tips and presentation themes.
With a few mindful steps, you’ll be serving peanut butter cups that look and taste like they came from a chocolate shop.
Perfect for Gifting or Holidays
These homemade peanut butter cups are not only delicious but also thoughtful and beautiful gifts. They work great for every holiday—from Valentine’s Day to Christmas—and fit seamlessly into any dessert box or party spread.
Ideas for presenting them:
-
Decorative wrappers – Choose seasonal colors or patterns to match the occasion.
-
Gift boxes or tins – Add tissue or parchment paper for a polished finish.
-
Pair with other homemade treats – Include them in a set with cookies or truffles.
These ideas tie into DIY chocolate candy recipes and make these cups a standout feature of any homemade gift basket. More inspiration is available in peanut butter dessert ideas.
Gifting homemade treats is a personal, creative gesture—and with minimal effort, these peanut butter cups can deliver a whole lot of love.
Homemade vs Store-Bought: A Sweet Comparison
Why make homemade peanut butter cups when you can buy them? The answer is simple: control, quality, and customization.
-
Better ingredients – You choose the chocolate, nut butter, and sweetness.
-
No preservatives – Just pure flavor, no additives.
-
Personal touches – From flavors to toppings, you get to make it your own.
Homemade versions often taste fresher and richer. Plus, making them yourself is a fun activity that turns dessert into an experience—whether solo, with kids, or as a party project.
If you’re comparing options or making a dessert platter, combining your cups with ideas from Pinterest’s chocolate candy board can create a bakery-worthy presentation right at home.
FAQs: People Also Ask
Are homemade peanut butter cups healthier?
Yes. You control the sugar, type of chocolate, and nut butter. They’re free from preservatives and can be adjusted to suit dietary needs like gluten-free or low-sugar diets.
Can I use natural peanut butter?
Yes, but stir well before using. Natural peanut butter can be oily or runny, so you may need to add more powdered sugar to firm up the filling.
Why is my chocolate separating?
This happens if the chocolate is overheated or chilled too quickly. Use a gentle heat (microwave in intervals or a double boiler) and make sure layers are cool before adding the next.
Can I double the recipe?
Absolutely. Just use multiple mini muffin trays or make the cups in batches.
Can I make these vegan or dairy-free?
Yes! Use vegan chocolate chips and a plant-based butter substitute. Natural peanut butter works great, and coconut oil can help the chocolate set smoothly.


