Why We Crave That Classic Nutter Butter Taste
Few desserts tap into our childhood nostalgia quite like the classic Nutter Butter cookie. With its signature peanut shape, soft crunch, and smooth, sweet filling, this treat has earned a place in American cookie history. But what if you could recreate that Nutter Butter flavor at home—with fresher ingredients and a richer, more decadent peanut butter taste?
Homemade peanut butter cookies offer more than just a budget-friendly snack—they’re a customizable canvas for buttery textures and nutty depth. Whether you’re baking for a holiday tray, a lunchbox surprise, or your own craving, getting that Nutter Butter taste is entirely possible with the right blend of ingredients and technique.
Unlike many store-bought cookies that rely on preservatives, artificial flavorings, and excess sugar, this recipe uses real butter, creamy peanut butter, and brown sugar to mimic and even elevate the original flavor. Learn more about the key differences between commercial cookies and homemade ones by exploring the history of peanut butter and its use in desserts.
To get started, it’s helpful to understand how specific components contribute to that nostalgic flavor. For example, the balance between granulated sugar and brown sugar affects both the cookie’s texture and its ability to crisp around the edges. If you’re curious about how different sugars impact baking, check out this explanation on types of sugar used in baking.
As we explore the recipe, techniques, and expert tips, you’ll learn how to bake cookies that hit all the right notes: buttery, sweet, slightly salty, and utterly irresistible.
What Makes a Peanut Butter Cookie Taste Like a Nutter Butter?
Recreating that iconic Nutter Butter flavor isn’t just about using peanut butter—it’s about layering taste and texture in a way that mimics the original cookie’s signature experience. What sets these cookies apart is their rich blend of butter, brown sugar, and creamy peanut butter, plus the subtle saltiness that balances every bite.
At the heart of the flavor is the peanut butter itself. Using a commercial, creamy peanut butter like Jif or Skippy—not the natural, oily varieties—provides the smooth texture and sweet-salty depth needed. These types of peanut butter are stabilized with sugar and emulsifiers, which help your cookie dough maintain the correct consistency during baking.
Equally important is the use of brown sugar. Its molasses content adds a mild caramel flavor and chewiness to the cookie, complementing the nutty notes. Combined with white sugar, it gives the dough the structure to crisp at the edges while staying soft in the center. If you want to dive deeper into how baking soda and baking powder work in cookies, the baking soda vs baking powder guide explains how these leavening agents contribute to cookie lift and texture.
Another defining element of the original Nutter Butter is the creamy peanut butter filling. This isn’t just a frosting—it’s a whipped, velvety spread that mimics the softness and slight saltiness of the sandwich cookie’s core. For bakers looking to master texture and flavor, using high-fat butter and sifting the powdered sugar ensures that your filling is both smooth and spreadable. Learn more about the science behind butter’s performance in baking by exploring butterfat and its baking role.
For visual inspiration and presentation ideas, browse Pinterest’s collection of vintage cookie recipes to see how bakers are putting their own twist on this nostalgic favorite.
Ingredient Breakdown: Flavor and Texture Science
Each ingredient in a homemade peanut butter cookie plays a specific role, both in taste and structure. To replicate that classic Nutter Butter-style flavor and feel, it’s essential to understand how these components work together.
-
Unsalted Butter (1 cup, softened)
Butter provides richness and helps create the tender, melt-in-your-mouth texture. Using unsalted butter allows you to control the cookie’s salt content more precisely. The fat content in butter is also responsible for that slightly crisp edge. For more on how butter influences cookie texture, see the breakdown on butterfat in baking. -
Creamy Peanut Butter (1 cup for dough, ½ cup for filling)
This is the star ingredient. Commercial creamy peanut butter ensures the right consistency and a balanced sweet-salty flavor. Natural peanut butters, though healthier, often separate and can result in crumbly dough. When preparing the filling, using the same brand of peanut butter as the dough keeps the flavor uniform. -
Granulated Sugar (1 cup)
This gives structure to the cookie and contributes to that signature snap around the edges. It’s also what helps the dough caramelize during baking, creating a golden-brown color. For those curious about sugar’s role in baking, read more on types of sugar. -
Brown Sugar (1 cup, packed)
The molasses in brown sugar adds moisture and a soft chew to the center of the cookie. This complements the crunch from the white sugar and gives the cookie depth. -
Eggs (2 large)
Eggs bind everything together. The yolks add richness, while the whites contribute to structure. Without them, the dough would fall apart, especially when forming sandwiches. -
All-Purpose Flour (2½ cups)
Flour gives cookies their body. Too little flour, and the cookies spread too much. Too much, and they become dry. All-purpose flour is ideal due to its medium protein content. Learn more about flour types here. -
Baking Soda (1½ teaspoons) & Baking Powder (1 teaspoon)
These help the cookies rise slightly and prevent them from becoming too dense. Baking soda also enhances browning for that classic cookie color and crispness. For an in-depth explanation, revisit baking powder vs baking soda. -
Salt (½ teaspoon)
A small amount of salt enhances the sweetness and balances the peanut butter’s nutty flavor. It also prevents the cookie from tasting flat. -
Granulated Sugar (for rolling)
Rolling each dough ball in sugar adds a sweet crust and helps achieve the golden-brown edges that define the Nutter Butter-style cookie. -
Filling Ingredients:
-
Peanut Butter (½ cup)
Acts as the flavor base. -
Butter (¼ cup, softened)
Adds creaminess and structure. -
Powdered Sugar (1½ cups)
Sweetens and thickens. -
Milk (1–2 tablespoons)
Adjusts consistency; start with one and add more as needed for a smooth spread.
-
These ingredients, when measured and mixed precisely, result in cookies that hit every mark: sweet, salty, creamy, crisp, and chewy. You can browse Pinterest’s peanut butter dessert ideas for inspiration on how to creatively use these ingredients in other formats.
How to Make Homemade Nutter Butter-Style Cookies – Step by Step
Creating homemade Nutter Butter-style cookies involves more than just mixing ingredients—it’s about following careful steps to achieve the perfect texture, shape, and flavor balance. Below is a detailed, step-by-step guide that ensures crispy edges, soft centers, and that nostalgic peanut butter taste.
1. Preheat and Prep
-
Preheat your oven to 375°F (190°C).
-
Line your baking sheets with parchment paper to prevent sticking and ensure even baking.
2. Cream the Butters and Sugars
-
In a large mixing bowl, beat 1 cup of softened unsalted butter with 1 cup of creamy peanut butter until smooth.
-
Add 1 cup granulated sugar and 1 cup packed brown sugar, and cream until the mixture is light and fluffy.
-
This step introduces air into the dough, contributing to the cookies’ soft interior.
3. Incorporate the Eggs
-
Add 2 large eggs, one at a time, mixing thoroughly after each addition.
-
Eggs help bind the dough and give structure to the cookies as they bake.
4. Mix the Dry Ingredients Separately
-
In a medium bowl, whisk together:
-
2½ cups all-purpose flour
-
1½ teaspoons baking soda
-
1 teaspoon baking powder
-
½ teaspoon salt
-
-
This combination ensures the cookies rise slightly and maintain their shape.
5. Combine Wet and Dry Mixtures
-
Gradually add the dry ingredients to the wet mixture.
-
Mix on low until fully incorporated. The dough should be slightly thick but soft.
-
Avoid overmixing—doing so can lead to tough cookies. If you’re interested in mastering cookie technique, check out these cookie baking tips on Pinterest.
6. Shape and Coat the Dough
-
Scoop out 1-inch balls of dough. Roll each ball in granulated sugar to coat.
-
Place on the prepared baking sheet, spacing them about 2 inches apart.
7. Flatten with a Fork
-
Use a fork to gently press each ball down, creating the classic crisscross pattern.
-
This flattens the dough for even baking and adds visual texture.
8. Bake to Perfection
-
Bake in the preheated oven for 8–10 minutes, or until the edges turn golden brown.
-
Do not overbake—cookies will continue to set as they cool. For visual inspiration on perfectly baked peanut butter cookies, explore these Pinterest holiday cookie tray ideas.
9. Cool Completely
-
Let the cookies cool on the baking sheet for 5 minutes.
-
Transfer to a wire rack and cool completely before adding the filling. This step is crucial for avoiding melted or runny filling.
Once you’ve completed these steps, your cookies are ready to be transformed into sandwich-style treats with the creamy peanut butter filling. This base recipe is flexible, reliable, and offers reproducible results for anyone aiming to recreate a bakery-style peanut butter cookie at home.

How to Make the Creamy Peanut Butter Filling (Frosting-Like)
The secret to replicating the Nutter Butter cookie’s signature cream center lies in a light, whipped filling that’s not too sweet, but rich enough to balance the crisp cookie shell. This simple recipe uses just a few pantry staples to create a soft, spreadable texture that holds its shape when sandwiched between two cookies.
1. Cream the Peanut Butter and Butter
-
In a medium bowl, use a hand mixer or stand mixer to beat ½ cup creamy peanut butter with ¼ cup unsalted butter (softened).
-
Beat on medium speed until the mixture is smooth, fluffy, and well combined. This base forms the rich, nutty backbone of the filling.
2. Add Powdered Sugar Gradually
-
Add 1½ cups of powdered sugar in small increments.
-
Beat at low speed after each addition to prevent sugar clouds.
-
As the sugar incorporates, the mixture will thicken and resemble a soft frosting.
3. Adjust Texture with Milk
-
Add 1 tablespoon of milk and mix.
-
If the filling is too thick, add another tablespoon—just enough to achieve a spreadable consistency.
-
You want it soft but not runny. A good test: it should hold its shape when spread but still yield to pressure when sandwiched.
Optional Flavor Enhancer:
-
Add a drop of vanilla extract for extra depth. This isn’t part of the original Nutter Butter recipe, but it complements the peanut butter profile beautifully.
If you’re making a large batch or preparing the filling ahead of time, it can be stored in an airtight container in the fridge for up to 5 days. Just let it soften at room temperature before spreading.
You can also explore how other bakers style and pipe peanut butter fillings in sandwich cookies on Pinterest’s vintage cookie recipes board.
Assembling the Cookie Sandwiches
Now that your cookies have cooled and the filling is perfectly creamy, it’s time to assemble your Nutter Butter-style peanut butter sandwich cookies.
1. Pair the Cookies
-
Match cookies in pairs based on size and shape. A uniform sandwich gives a more professional look and balanced bite.
2. Spread the Filling
-
Using a butter knife, offset spatula, or piping bag, spread about 1 tablespoon of filling on the flat side of one cookie.
-
Avoid overfilling—just enough to reach the edges without oozing out.
3. Press Gently
-
Top with a second cookie and gently press until the filling just starts to peek out.
-
Don’t squeeze too hard or the cookie may crack.
4. Optional Chill Time
-
Place assembled cookies in the fridge for 10–15 minutes to help the filling set.
-
This also makes them easier to stack or package.
Sandwiched cookies can be stored in an airtight container at room temperature for 2–3 days, or refrigerated for longer freshness.
For decorative ideas—like dipping half in chocolate or sprinkling with crushed peanuts—check out Pinterest’s cookie baking tips.
Expert Tips for Perfect Nutter Butter Copycats Every Time
Crafting the ideal peanut butter sandwich cookie takes more than just following the recipe. These expert-level tips ensure consistent, bakery-quality results every time.
-
Use room temperature ingredients
Cold butter or eggs can cause uneven mixing and inconsistent texture. -
Choose the right peanut butter
Avoid natural peanut butters that separate. For best flavor and structure, use Skippy or Jif. These ensure smooth mixing and Nutter Butter-like flavor. -
Weigh your flour
If you’re not using a kitchen scale, spoon flour into your measuring cup and level it off to avoid a dense dough. -
Roll and chill the dough (optional)
For even more defined cookies, chill your dough balls for 10 minutes before baking. -
Watch baking time carefully
Bake until just golden at the edges. Overbaking dries the cookies, reducing that soft, chewy center that defines a perfect peanut butter cookie. -
Store filled cookies separately when possible
If stacking, use wax paper between layers to avoid sticking.
Looking for more clever baking hacks? Check out this curated Pinterest board on cookie baking tips.
Flavor Variations to Try
Once you’ve mastered the base recipe, it’s fun to customize your homemade peanut butter cookies with creative twists:
-
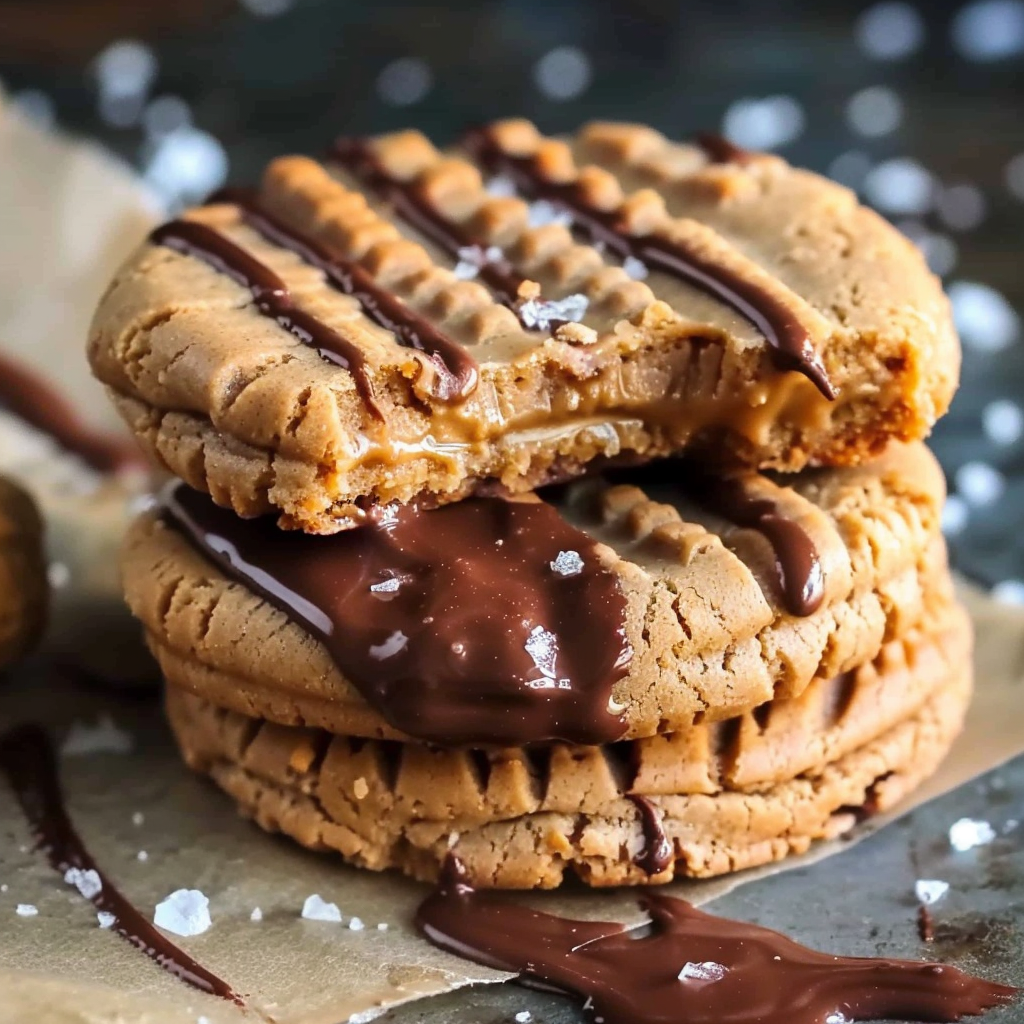
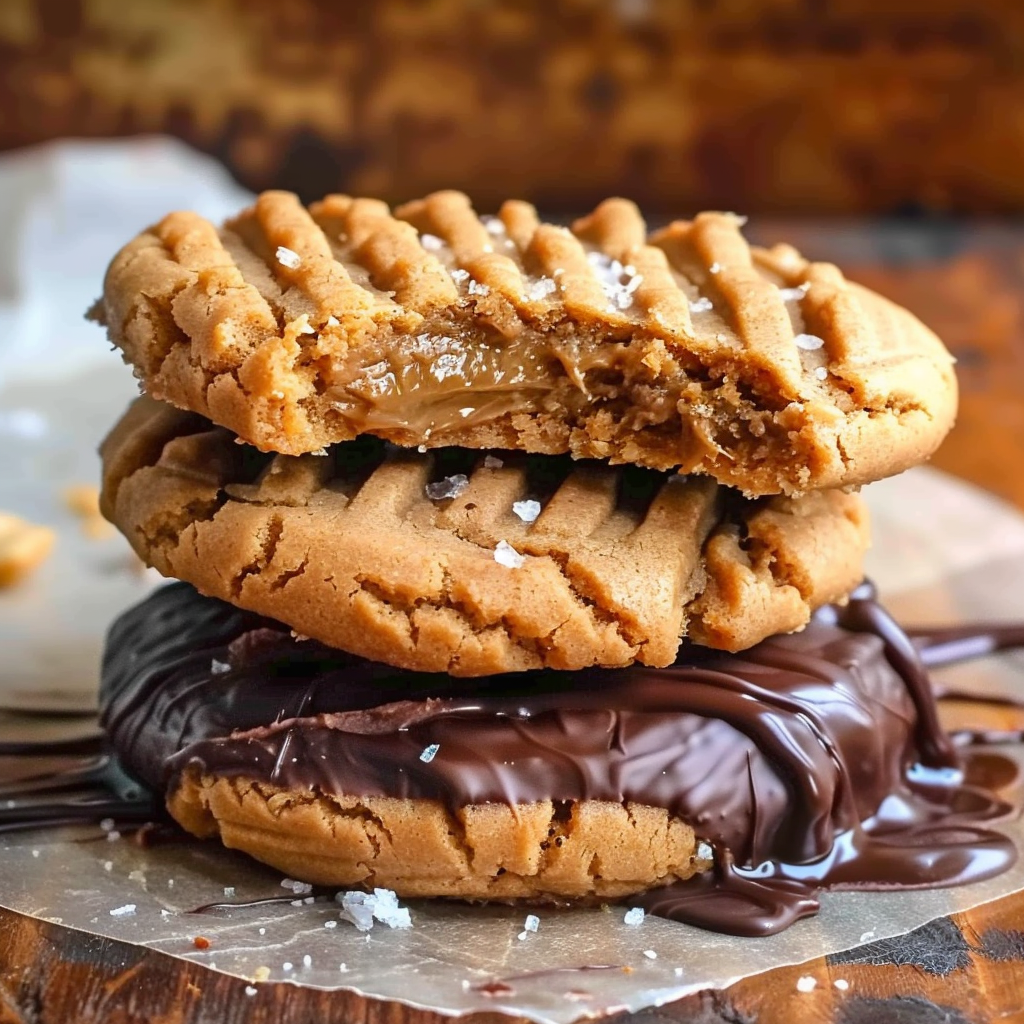
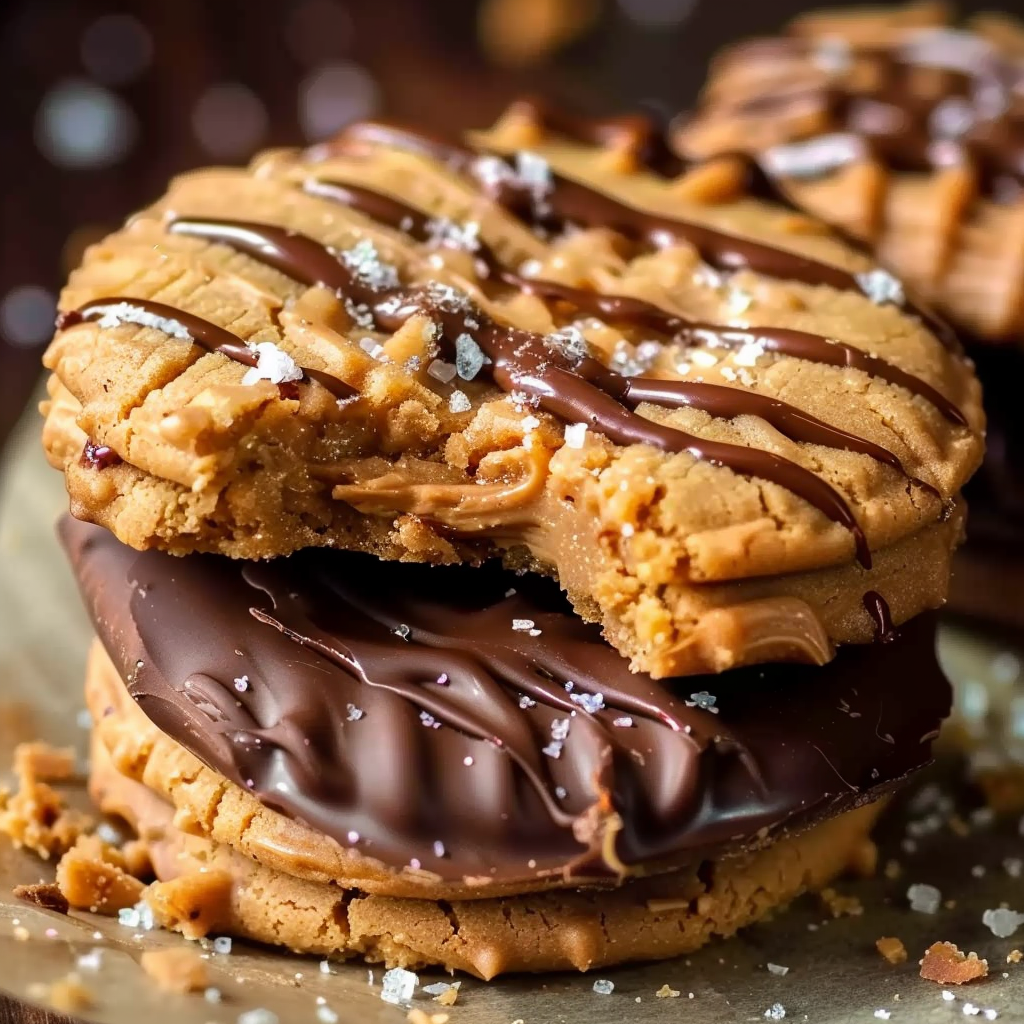
Chocolate-dipped sandwiches
Dip one half of the assembled cookie in melted dark or milk chocolate and let it set for a bakery-style finish. -
Crunchy peanut butter version
Swap creamy for crunchy peanut butter in the dough for added texture. -
Cinnamon-spiced dough
Add ½ teaspoon of ground cinnamon to the dry ingredients for a warm flavor note. -
Mini Nutter Butters
Use a small cookie scoop to create bite-sized versions—great for lunchboxes or party trays. -
Add chopped peanuts
Mix ¼ cup of finely chopped salted peanuts into the dough for a more rustic, nutty flavor.
You’ll find even more delicious peanut butter dessert ideas on Pinterest’s dessert collection.
How to Store and Freeze for Later
Homemade cookies don’t last long when they taste this good, but proper storage will help preserve their flavor and texture.
Short-term storage:
-
Keep fully assembled cookies in an airtight container at room temperature for 2–3 days.
-
For slightly longer shelf life, refrigerate them.
Freezing options:
-
Unfilled cookies: Let them cool completely, then store in a zip-top bag or freezer-safe container for up to 2 months.
-
Filled sandwiches: Wrap each in plastic wrap and freeze in layers with parchment between.
Thawing tips:
-
Let frozen cookies sit at room temperature for 15–20 minutes before serving.
-
To crisp up slightly, pop them in a 300°F oven for 2–3 minutes.
Storing them right ensures they maintain that soft bite and buttery richness.
FAQs: People Also Ask
What makes Nutter Butter cookies taste so good?
The signature taste comes from sweetened peanut butter, brown sugar, and a touch of salt—all layered in a soft-crisp texture that melts in your mouth.
Can I use natural peanut butter in cookies?
Technically yes, but natural peanut butter often separates and results in oily or crumbly cookies. Stick to creamy commercial brands for best results.
Why do my peanut butter cookies crumble?
Crumbly cookies usually come from too much flour or not enough fat. Always measure flour correctly and use softened butter.
Can I make these gluten-free?
Yes, substitute all-purpose flour with a 1:1 gluten-free baking blend. Results may be slightly softer, but still delicious.
Do Nutter Butters have real peanut butter?
Yes, but it’s sweetened and processed with stabilizers. Homemade versions often use higher-quality peanut butter with fewer additives.
What’s the difference between butter cookies and peanut butter cookies?
Butter cookies rely heavily on butter for flavor and texture, while peanut butter cookies include nut butter for a deeper, saltier, more complex profile.
For even more classic cookie inspiration, visit Pinterest’s vintage cookie recipes or brush up on peanut butter’s food science.
PrintHomemade Peanut Butter Cookies How to Get That Nutter Butter Taste
Whip up buttery, melt-in-your-mouth peanut butter cookies that deliver the nostalgic taste of classic Nutter Butters—with better ingredients and fuller flavor. These cookies feature crisp edges, soft centers, and a creamy peanut butter filling that sandwiches them into irresistible homemade treats. Perfect for holiday cookie trays, everyday snacking, or as thoughtful food gifts, this reliable recipe is ideal for peanut butter lovers who want consistent results every time.
- Author: Clara
Ingredients
- 1 cup unsalted butter, softened
- 1 cup creamy peanut butter
- 1 cup granulated sugar
- 1 cup packed brown sugar
- 2 large eggs
- 2 ½ cups all-purpose flour
- 1 ½ teaspoons baking soda
- 1 teaspoon baking powder
- ½ teaspoon salt
- Additional granulated sugar for rolling
Filling:
- ½ cup creamy peanut butter
- ¼ cup unsalted butter, softened
- 1 ½ cups powdered sugar
- 1–2 tablespoons milk
Instructions
Preheat oven to 375°F (190°C) and line baking sheets with parchment paper.
In a large bowl, cream together butter, peanut butter, granulated sugar, and brown sugar until light and fluffy.
Add eggs one at a time, mixing well after each addition.
In a separate bowl, whisk together flour, baking soda, baking powder, and salt. Gradually add dry ingredients to the peanut butter mixture and mix until combined.
Scoop dough and roll into 1-inch balls. Roll each ball in granulated sugar and place on the prepared baking sheet. Flatten each ball slightly with a fork, making a crisscross pattern.
Bake for 8–10 minutes or until edges are lightly golden. Let cool on the baking sheet for 5 minutes, then transfer to a wire rack to cool completely.
To make the filling, beat together peanut butter and butter until smooth. Add powdered sugar and 1 tablespoon of milk, mixing until creamy. Add more milk as needed to reach a spreadable consistency.
Spread filling on the bottom of one cookie and sandwich with another cookie. Repeat with remaining cookies.
Notes
-
Use creamy peanut butter (like Jif or Skippy) for best flavor and texture. Avoid natural or oily brands.
-
Chill the dough before baking if your kitchen is warm—it helps prevent spreading.
-
For a more authentic Nutter Butter appearance, shape dough into small ovals before flattening with a fork.
-
Filling can be made ahead and stored in the fridge for up to 5 days. Let it soften before spreading.
-
Cookies taste even better the next day, once the flavors have melded.
-
Want to dress them up? Drizzle with melted chocolate or dip in chopped nuts after assembling.