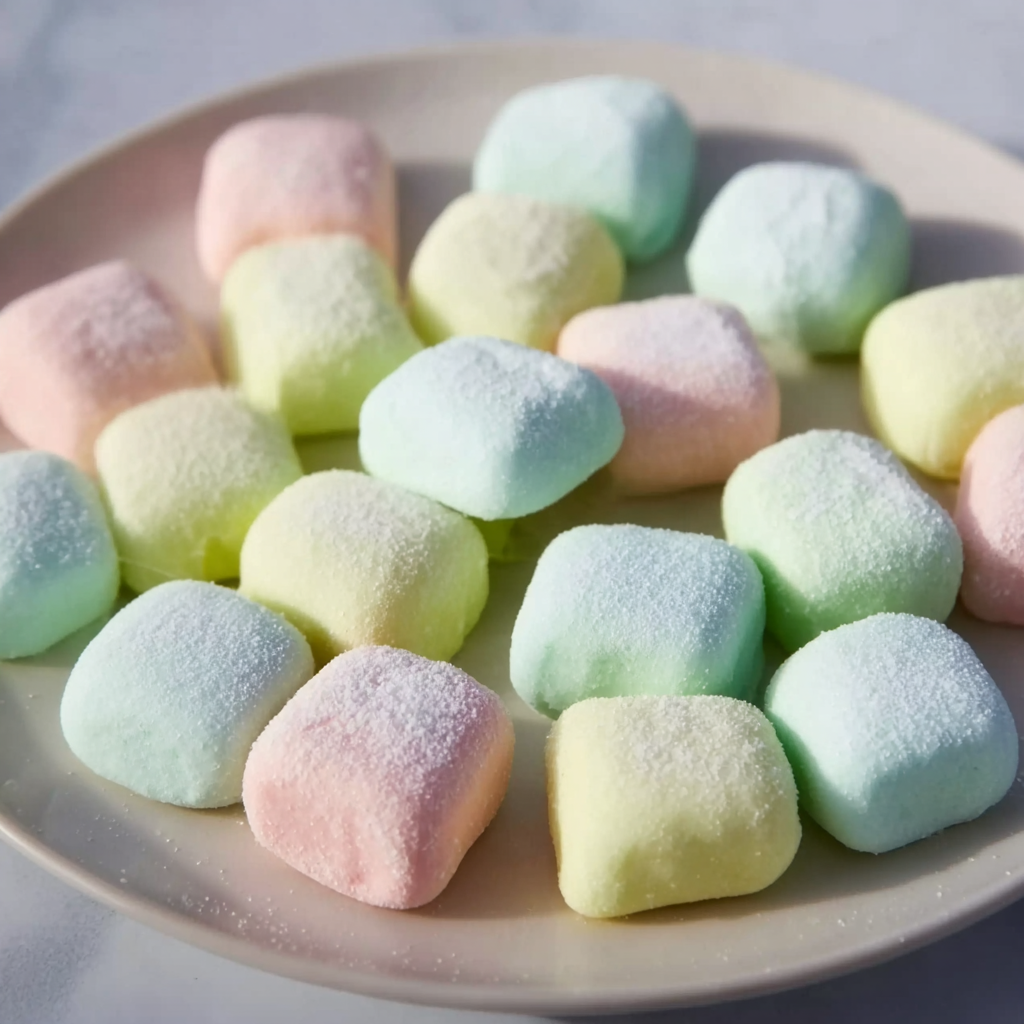
There’s something undeniably nostalgic about a bowl of pastel butter mints set out on a dessert table. Whether it’s a spring wedding, a baby shower, a holiday gathering, or simply a cozy afternoon in the kitchen, these sweet little candies bring a touch of charm to any occasion. Soft, creamy, and delicately flavored, butter mints melt in your mouth with a refreshing hint of peppermint that feels both comforting and celebratory.
This recipe was inspired by the classic homemade candies many families prepared for special events. Often shaped by hand and tinted in soft colors, butter mints became a symbol of hospitality and tradition. Making them at home not only recreates that timeless flavor but also adds a personal touch that store-bought candies simply cannot match.
Why You’ll Love These Homemade Butter Mints
Butter mints are the perfect combination of simple ingredients and elegant results. They require no baking, no complicated techniques, and no special equipment. Yet the finished candy looks beautiful and tastes luxurious.
Here’s why this easy butter mint recipe stands out:
Smooth, creamy texture that melts in your mouth
Perfect balance of sweetness and refreshing mint flavor
Ideal for weddings, holidays, showers, and parties
Easy to customize with colors and shapes
Made with pantry-friendly ingredients
If you’ve ever searched for an easy homemade mint candy recipe, this is the one you’ll come back to again and again.
What Are Butter Mints?
Butter mints are small, soft candies made primarily from butter, powdered sugar, and peppermint extract. Unlike hard mints, these are creamy and tender, dissolving quickly when eaten. They are often shaped into small pillows, twists, or pressed with decorative molds.
Traditionally, butter mints are pastel-colored and served at celebrations. Their delicate texture and light flavor make them a wonderful after-dinner treat or a sweet addition to dessert tables.
Ingredients for Butter Mints
One of the best things about this recipe is how simple the ingredient list is. Each component plays an important role in achieving the signature creamy consistency and balanced flavor.
Here’s what you’ll need:
½ cup (113 grams) unsalted butter, softened to room temperature
4 cups (480 grams) powdered sugar, sifted
1 tablespoon heavy cream (15 ml)
½ teaspoon pure peppermint extract
⅛ teaspoon fine salt
Gel food coloring (optional)
Ingredient Notes
Unsalted Butter
Using unsalted butter allows you to control the flavor. Make sure it is fully softened so it blends smoothly with the powdered sugar.
Powdered Sugar
Also known as confectioners’ sugar, powdered sugar gives butter mints their smooth texture. Sifting prevents lumps and ensures a creamy finish.
Heavy Cream
Just a small amount adds richness and helps bind the mixture together without making it too sticky.
Peppermint Extract
Use pure peppermint extract for the best flavor. A little goes a long way, so measure carefully.
Salt
A tiny pinch balances the sweetness and enhances the overall flavor.
Step-by-Step Instructions for Perfect Butter Mints
Making homemade butter mints is simple and rewarding. Follow these steps carefully for the best results.
1. Cream the Butter
In a large mixing bowl, beat ½ cup (113 grams) softened unsalted butter using a hand mixer or stand mixer on medium speed until smooth and creamy, about 2–3 minutes.
2. Add Flavor and Cream
Mix in:
1 tablespoon (15 ml) heavy cream
½ teaspoon peppermint extract
⅛ teaspoon fine salt
Beat until fully incorporated.
3. Incorporate the Powdered Sugar
Gradually add 4 cups (480 grams) sifted powdered sugar, one cup at a time, mixing on low speed to prevent a sugar cloud. Continue mixing until a soft, pliable dough forms.
If the mixture feels too sticky, add 1–2 tablespoons additional powdered sugar. If it feels too dry, add a few drops of cream.
4. Add Color (Optional)
Divide the dough into portions if you want multiple colors. Add a small amount of gel food coloring and knead until evenly distributed. Gel coloring works best because it won’t thin the dough.
5. Shape the Mints
You can shape butter mints in several ways:
Roll into small ropes and cut into pillow shapes
Roll into small balls and flatten slightly with a fork
Press into candy molds for decorative shapes
Twist into small spirals
Place shaped mints onto a parchment-lined baking sheet.
6. Let Them Set
Allow the butter mints to air-dry at room temperature for 12–24 hours. This creates a slight outer firmness while keeping the inside soft and creamy.
Once set, store in an airtight container.
Tips for the Creamiest Butter Mints
Use Room Temperature Ingredients
Cold butter won’t blend smoothly, resulting in a lumpy texture.
Don’t Overdo the Extract
Peppermint extract is potent. Start with ½ teaspoon and adjust only slightly if needed.
Keep Surfaces Lightly Sugared
If the dough sticks while shaping, lightly dust your work surface with powdered sugar.
Allow Proper Drying Time
Patience ensures the perfect soft-center texture with a delicate outer layer.
Creative Variations
This easy butter mint recipe is incredibly versatile.
Flavor Variations
Substitute peppermint extract with vanilla extract (½ teaspoon)
Try almond extract (¼ teaspoon) for a nutty twist
Add a few drops of lemon extract for a citrus version
Color Themes
Pastel pink and green for spring celebrations
White for winter holidays
Soft blue or lavender for baby showers
Decorative Ideas
Press with vintage candy molds
Dust lightly with edible shimmer powder
Package in clear gift bags with ribbon
These small changes make butter mints perfect for any season or celebration.
How to Store Butter Mints
Proper storage ensures they stay fresh and creamy.
Store in an airtight container at room temperature for up to 2 weeks.
Separate layers with parchment paper to prevent sticking.
Avoid humid environments, as moisture can soften the outer layer too much.
You can also freeze butter mints in an airtight container for up to 2 months. Allow them to come to room temperature before serving.
Serving Ideas
Butter mints are more than just candy; they’re part of the presentation.
Arrange in small decorative bowls on dessert tables
Add to holiday cookie trays
Package as party favors
Include in gift boxes with other homemade treats
Their elegant look makes them ideal for special gatherings.
Frequently Asked Questions
1. Why are my butter mints too soft or sticky?
If your butter mints feel too soft, the most common reason is too much moisture or not enough powdered sugar. Humidity can also affect the texture. If the dough is sticky while shaping, gradually knead in 1 tablespoon of powdered sugar at a time until it becomes firm yet pliable. Be careful not to add too much, as this can make the mints dry or crumbly.
Another possibility is that the butter was overly soft or slightly melted. The butter should be at room temperature but not greasy. If your kitchen is very warm, consider chilling the dough for 15–20 minutes before shaping.
After shaping, proper air-drying is essential. If the mints have not been left out long enough, they will remain overly soft. Allow at least 12 hours of drying time for the ideal texture.
2. Can I make butter mints ahead of time?
Yes, butter mints are an excellent make-ahead candy. In fact, preparing them a day or two before your event is ideal because it gives them time to set properly.
Once dried, store them in an airtight container at room temperature. They will stay fresh for up to two weeks when stored correctly. If you’re planning for a larger event, you can freeze them for up to two months. Place parchment between layers and store in a freezer-safe container.
When ready to serve, simply let them sit at room temperature for about 30 minutes. This makes them perfect for weddings, showers, and holiday celebrations where advance preparation is helpful.
3. Can I use different extracts besides peppermint?
Absolutely. While classic butter mints use peppermint extract, you can experiment with other flavors. Vanilla extract creates a sweet cream candy, while almond extract adds a subtle nutty flavor. Citrus extracts like lemon or orange provide a bright, refreshing twist.
When substituting extracts, start with smaller amounts. For stronger flavors like almond, use about ¼ teaspoon instead of ½ teaspoon. You can always add a drop more if needed.
Flavor experimentation makes this recipe adaptable to any theme or season. Just be sure the extract you use is food-grade and concentrated for baking and candy-making.
4. Why do my butter mints taste too strong or too weak?
Flavor balance depends on precise measurement. Peppermint extract is highly concentrated, so even an extra drop can significantly intensify the flavor. Always measure carefully using standard measuring spoons.
If the flavor is too strong, you can knead in additional powdered sugar to dilute it slightly. If it tastes too weak, add only one or two additional drops of extract and knead thoroughly before tasting again.
Keep in mind that the flavor can mellow slightly after drying. It’s better to aim for a mild mint taste initially rather than an overpowering one.
Final Thoughts
Butter mints are proof that the simplest recipes often bring the most joy. With just a handful of ingredients and minimal effort, you can create a candy that feels both nostalgic and elegant. Their creamy texture and refreshing mint flavor make them universally appealing, whether served at a formal event or enjoyed casually with family.
What makes this recipe especially special is its flexibility. You can shape, color, and flavor the mints to suit any occasion. From soft pastels for spring gatherings to classic white for winter holidays, they adapt beautifully to your creative vision. They are also a wonderful introduction to homemade candy-making because they require no baking or specialized equipment.
Beyond their appearance and taste, butter mints carry a sense of tradition. They remind us of dessert tables at celebrations, thoughtful handmade gifts, and the joy of preparing something sweet from scratch. Sharing homemade treats creates connection, and these little candies are perfect for that purpose.
If you’ve never made butter mints before, this is your invitation to try. Once you experience how easy and rewarding they are, you may find yourself making them for every celebration. And each time you do, you’ll be adding a small but meaningful touch of sweetness to the moment.