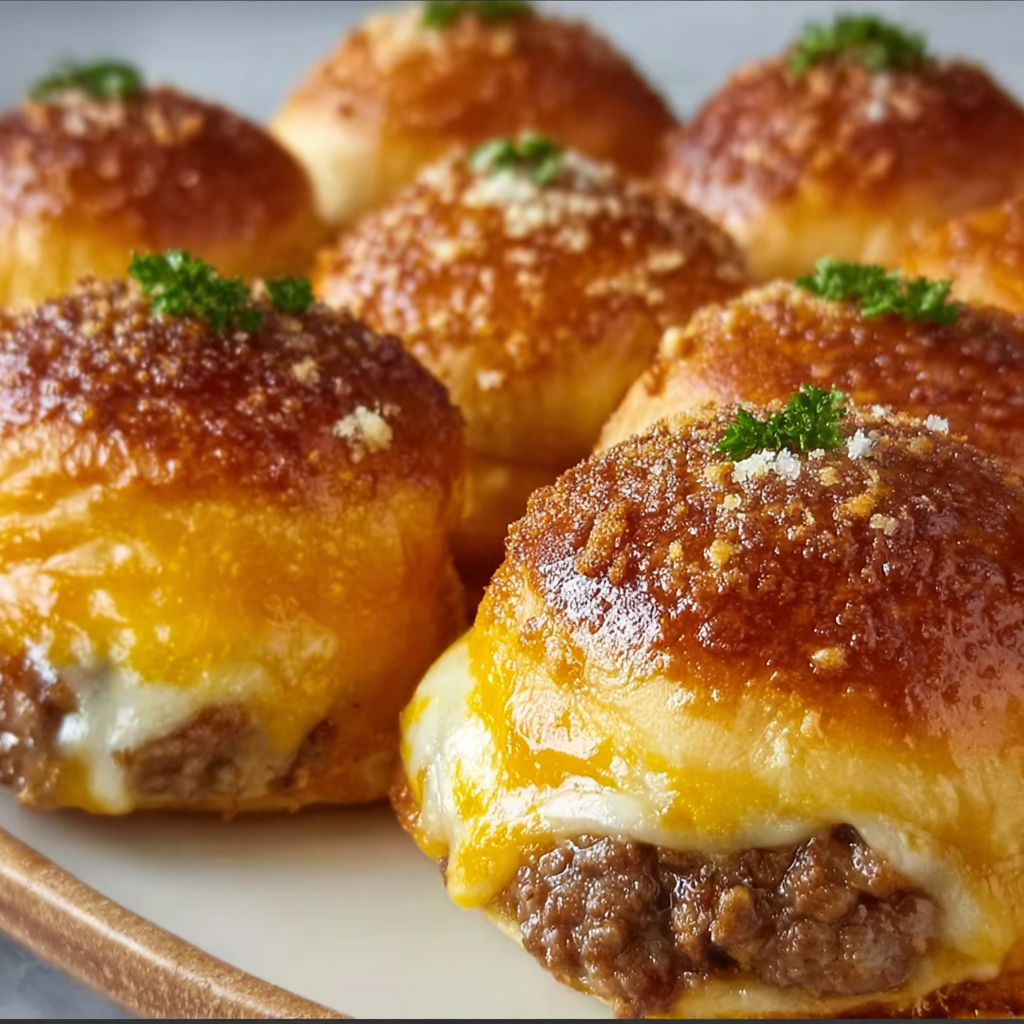
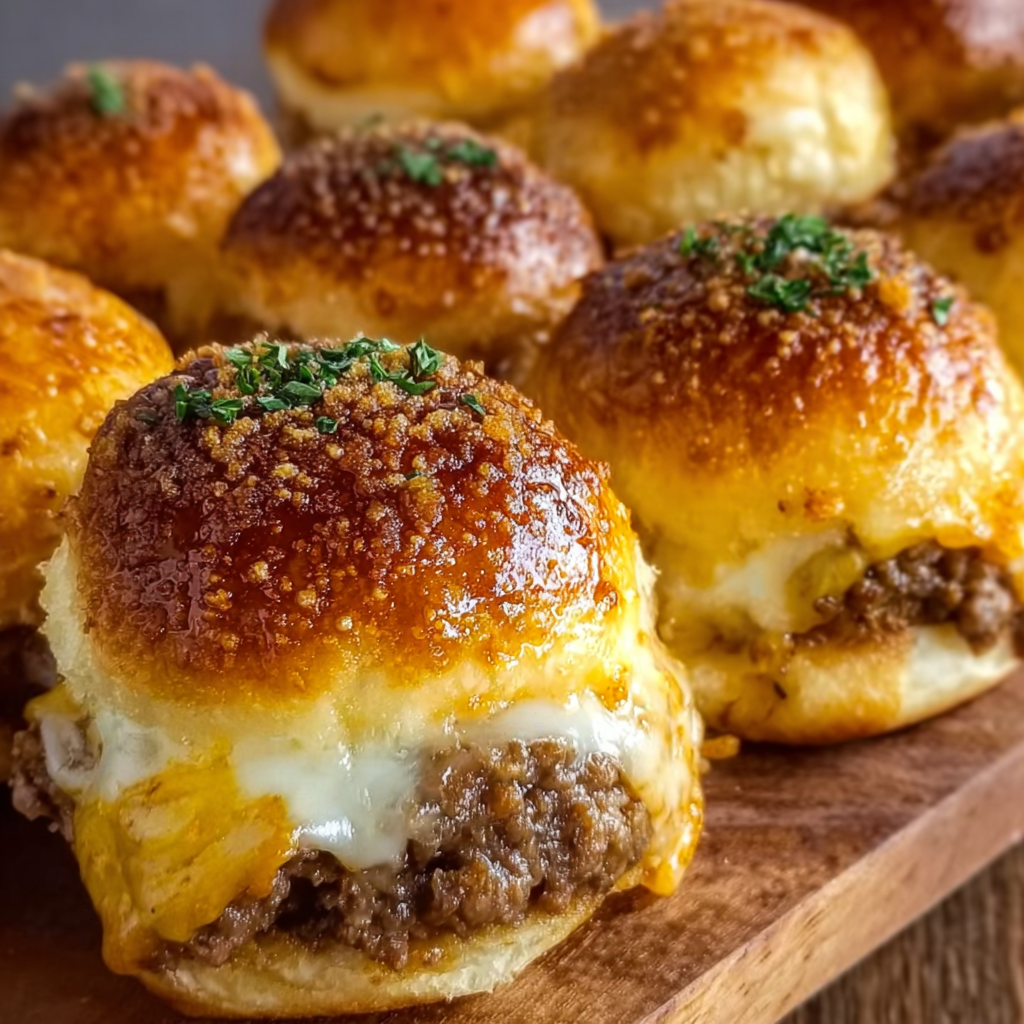
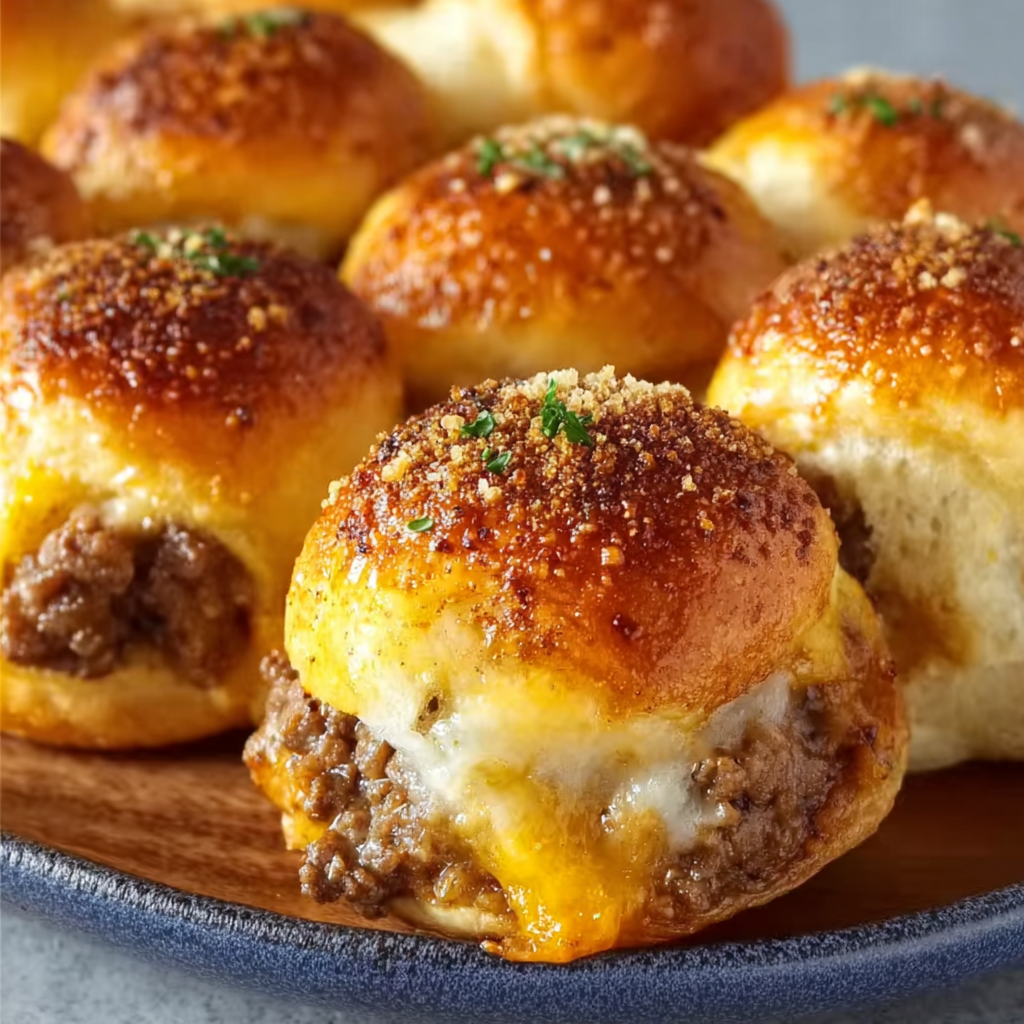
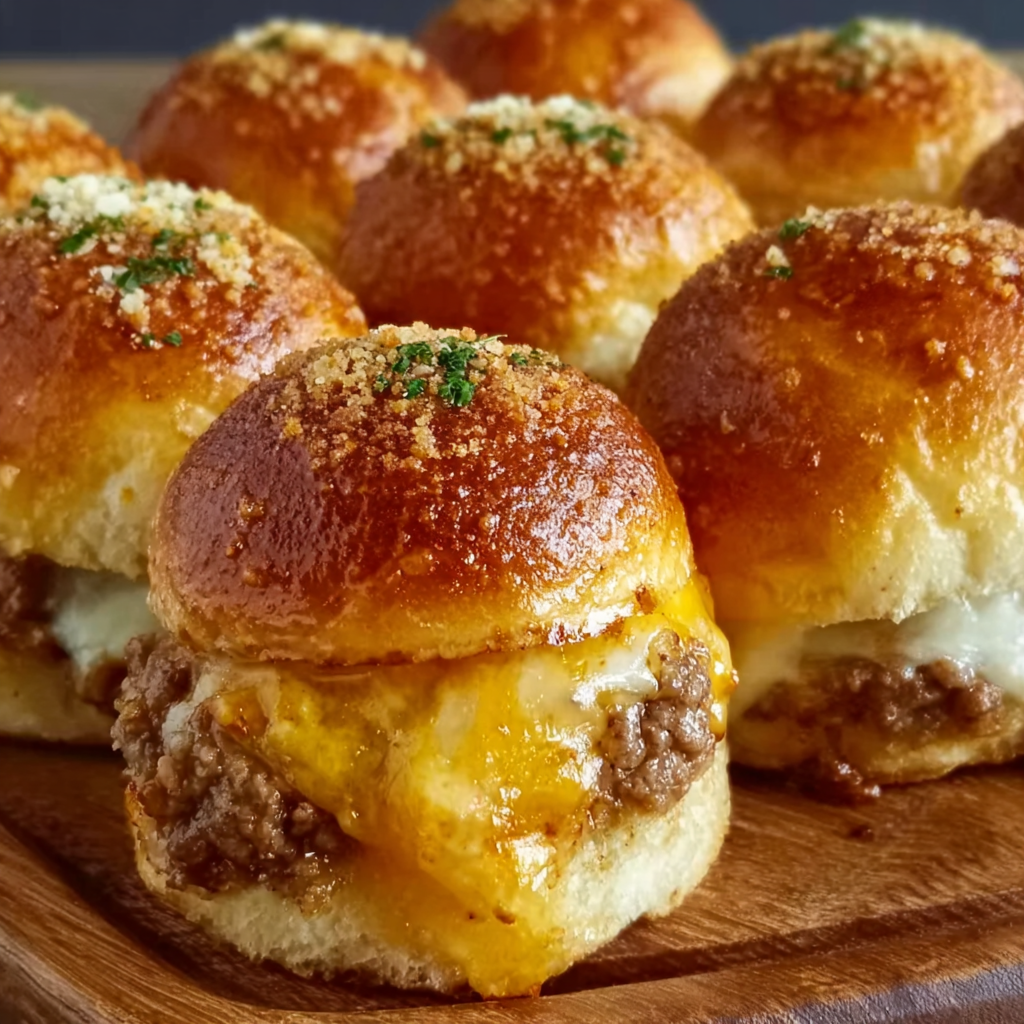
When it comes to game day snacks or crowd-pleasing appetizers, few things beat the bold flavor and fun format of Garlic Parmesan Cheeseburger Bombs. These bite-sized creations are packed with seasoned beef, melted cheese, and wrapped in fluffy, golden biscuit dough brushed with a rich garlic butter topping. Not only are they easy to serve, but their delicious aroma and oozy center make them an instant hit at any gathering.
What sets these cheeseburger bombs apart is their fusion of two classic favorites—cheeseburgers and garlic bread. While sliders or stuffed buns might be more common, this version delivers the ultimate crispy, buttery bite in a compact, poppable form. They’re perfect for casual get-togethers, potlucks, and especially sporting events where finger foods are the MVP.
These cheesy snacks aren’t just popular for their flavor—they’re also incredibly customizable and easy to prepare. As appetizers go, they land somewhere between a stuffed roll and a mini burger, making them an irresistible addition to any party spread. Their versatility even makes them ideal for family dinners. You’ll find that with just a few pantry staples, you can create a dish that rivals your favorite restaurant bites. Interested in exploring similar cheesy recipes? Check out this Pinterest board on creative cheeseburger bombs for even more ideas.
As you continue reading, you’ll discover how to make the perfect Garlic Parmesan Cheeseburger Bombs, the best tips and variations, how to store them, and answers to the most frequently asked questions. You’ll also find ways to pair them with other dishes and explore different flavor profiles using the base recipe. Whether you’re a beginner or a seasoned home cook, this guide will walk you through everything you need to know.
II. What Are Garlic Parmesan Cheeseburger Bombs?
Garlic Parmesan Cheeseburger Bombs are handheld, baked snacks filled with juicy ground beef, melted cheddar cheese, and often diced onions, all wrapped in fluffy biscuit dough. What truly elevates them is the buttery garlic-Parmesan topping that adds a rich, savory finish after baking. These flavorful bombs are usually served warm and are perfect for game day, parties, or even casual family dinners.
Unlike traditional cheeseburgers, which require buns, toppings, and utensils, cheeseburger bombs are compact and portable. This makes them ideal for events where guests want to grab snacks without sitting down for a full meal. They’re essentially a mashup between a cheeseburger and a garlic knot—a perfect combination of flavor and texture. The garlic and Parmesan crust offers a crispy, golden exterior while the inside stays warm, soft, and cheesy.
The term “bombs” in the name refers to how they’re shaped: little dough balls that explode with flavor when bitten into. Because of their bite-sized nature, they’re often seen on Pinterest boards for party finger food or as part of easy appetizer spreads. Think of them as a cross between stuffed bread rolls and mini cheeseburgers, but even easier to handle—and a lot more fun to eat.
In addition to their snackability, these cheeseburger bombs can be customized in endless ways. You can swap out the protein, play with cheese combinations, or even make them spicy with jalapeños. For those who are interested in the history of the core components, you can learn more about the origins of the cheeseburger and its role in American cuisine. Similarly, understanding the different types of Parmesan cheese can help you choose the right texture and flavor for your topping.
Because of their versatility and comfort-food appeal, Garlic Parmesan Cheeseburger Bombs have become a go-to snack for food bloggers, home cooks, and Pinterest users looking for that perfect mix of indulgence and convenience.
III. Ingredients Breakdown
Creating the perfect Garlic Parmesan Cheeseburger Bombs starts with simple, accessible ingredients. Understanding each component is key to maximizing flavor and getting the texture just right. Here’s a breakdown of everything you’ll need and why it matters.
A. For the Filling
-
Ground Beef (1 lb): Use 80/20 ground beef for the best balance of flavor and juiciness. Leaner beef can work but may result in a drier filling.
-
Onion (1 small, finely chopped): Adds a sweet and savory layer to the beef mixture. Make sure to chop finely so it cooks quickly and distributes evenly.
-
Garlic Powder (1 tsp): Enhances the beef with a subtle, savory depth that complements the garlic butter topping.
-
Salt and Pepper (to taste): Season generously to bring out the flavors of the beef and cheese.
-
Shredded Cheddar Cheese (1 cup): Cheddar melts beautifully and adds a sharp, creamy richness. You can experiment with other cheeses like pepper jack or mozzarella for variety.
B. For the Dough
-
Refrigerated Biscuit Dough (1 can, 8 biscuits): A convenient base that bakes into golden, fluffy pockets. Pillsbury is a common brand, but any flaky biscuit dough works. You could also substitute with pizza dough or crescent rolls for a different texture.
C. For the Topping
-
Butter (3 tbsp, melted): Forms the base of the garlic butter coating that crisps up during baking and adds moisture.
-
Minced Garlic (2 cloves): Provides bold garlic flavor that soaks into the dough as it bakes.
-
Grated Parmesan Cheese (2 tbsp): Creates a golden, savory crust that adds texture and sharp flavor. Learn more about the varieties of Parmesan to find your favorite.
-
Chopped Parsley (1 tbsp, optional): A pop of color and freshness that balances the richness of the butter and cheese.
These ingredients are easy to find and can be prepped quickly, making this recipe a go-to for last-minute gatherings. If you’re looking for more inspiration on combining simple ingredients into crowd-pleasers, check out this Pinterest board of easy appetizers for a crowd.
IV. Step-by-Step Instructions
1. Cook the Filling
-
In a skillet over medium heat, cook the ground beef and chopped onion until the beef is browned and onions are soft. Drain any excess fat.
-
Add garlic powder, salt, and pepper. Stir in shredded cheddar cheese until melted and well combined. Remove from heat and allow to cool slightly.
2. Prepare the Dough
-
Open the can of biscuit dough and separate into 8 rounds.
-
Flatten each biscuit into a 4-inch circle using your fingers or a rolling pin. Be gentle to avoid tearing.
3. Assemble the Bombs
-
Spoon 2 tablespoons of the beef and cheese mixture into the center of each dough circle.
-
Fold the edges over the filling and pinch to seal completely.
-
Roll gently into a ball and place seam-side down on a parchment-lined baking sheet.
4. Make the Garlic Butter Topping
-
In a small bowl, mix melted butter with minced garlic and grated Parmesan.
-
Brush the tops of each bomb with the mixture. This adds a buttery, cheesy crust as they bake.
5. Bake and Finish
-
Bake in a preheated oven at 375°F (190°C) for 12–15 minutes or until golden brown on top.
-
Once out of the oven, brush with more garlic butter and sprinkle with parsley if desired.
For more baking tips and techniques that can help you get perfect results, visit the Wikipedia guide on baking. This method ensures your cheeseburger bombs are crisp on the outside and melty on the inside, just the way they should be.
V. Cooking Tips and Variations
Getting creative with your cheeseburger bombs is half the fun. Here are some expert tips and easy variations to help you customize this recipe to your taste.
Tips for Success
-
Don’t Overfill: Adding too much beef or cheese can make it hard to seal the dough, leading to leaks.
-
Chill the Filling: Let the cooked filling cool for a few minutes before assembling. This helps prevent the dough from becoming soggy.
-
Use Fresh Garlic: For maximum flavor in the topping, use freshly minced garlic instead of powder.
Delicious Variations
-
Different Cheeses: Swap cheddar with mozzarella, pepper jack, or American cheese for a gooier or spicier twist.
-
Spicy Bombs: Add diced jalapeños or hot sauce to the beef mixture.
-
Bacon Cheeseburger Bombs: Mix in cooked bacon bits for added crunch and flavor.
-
Pickle Lovers’ Version: Add a few chopped dill pickles into the filling for a tangy contrast.
To explore more mouthwatering ideas, take a look at this Pinterest board for game day snack recipes. You’ll find plenty of inspiration for tweaking your bombs for every occasion.
VI. Storage and Reheating Tips
Garlic Parmesan Cheeseburger Bombs can be made in advance and stored easily, making them ideal for meal prep or party planning.
Storing
-
Refrigerator: Store in an airtight container for up to 4 days.
-
Freezer: Place cooled bombs in a zip-top freezer bag. They can be frozen for up to 2 months.
Reheating
-
Oven: Reheat at 350°F (175°C) for 8–10 minutes. This keeps the outside crispy.
-
Microwave: Heat on a microwave-safe plate for 30–45 seconds. The dough may soften but will still be tasty.
For long-term storage or reheating ideas, check out tips on homemade garlic butter, which can be kept frozen and used again when serving leftovers.
VII. Serving Ideas and Pairings
These cheeseburger bombs are great on their own, but pairing them with dips or sides can make them even better.
Dipping Sauces
-
Ranch dressing
-
Spicy ketchup
-
Cheese sauce
-
Garlic aioli
-
Honey mustard
Side Dishes
-
Classic french fries or sweet potato fries
-
Coleslaw for a crunchy contrast
-
Pickle spears for a tangy bite
-
Side salad for a lighter touch
For more appetizer ideas, visit this Pinterest collection of finger foods for parties, which includes everything from dips to sliders.
VIII. Make-Ahead and Meal Prep Instructions
You can easily prepare these in advance to make serving even easier.
Before Baking
-
Assemble the bombs, cover tightly with plastic wrap, and refrigerate for up to 24 hours before baking.
Freezing Before Baking
-
Freeze assembled but unbaked bombs on a tray until firm. Transfer to a freezer bag. When ready to bake, brush with garlic butter and bake from frozen, adding 5–7 minutes to the cook time.
After Baking
-
Cooked bombs can be stored and reheated later. For best texture, use an oven or toaster oven.
This flexibility makes them a great addition to any appetizer table, especially when you’re preparing multiple dishes in advance.
IX. Nutrition and Dietary Adjustments
These bombs are indulgent, but you can make smart tweaks to adjust them to your dietary needs.
Estimated Nutrition (per bomb)
-
Calories: ~210
-
Protein: 9g
-
Carbs: 16g
-
Fat: 13g
Lighter Options
-
Use lean ground turkey instead of beef.
-
Try low-fat cheese or use less cheese.
-
Opt for whole wheat biscuit dough if available.
Gluten-Free Adjustments
-
Use gluten-free biscuit dough.
-
Make a homemade dough using gluten-free flour blends.
Keto-Friendly Version
-
Use fathead dough (mozzarella and almond flour-based).
-
Skip the onions or use a small amount to reduce carbs.
If you’re looking for tips on how to make garlic-based dishes healthier, explore the benefits of garlic and how it can be used creatively in cooking.
X. Why Garlic Parmesan Cheeseburger Bombs Are Perfect for Game Day
When planning a game day menu, you want foods that are easy to eat, full of flavor, and require minimal cleanup. These bombs check every box.
-
They’re bite-sized, which makes them easy to serve and eat while watching the game.
-
Their cheesy, beefy filling satisfies hunger without the mess of a full burger.
-
You don’t need utensils or plates—just grab and go.
It’s no wonder these cheesy appetizers regularly appear on game day snack boards.
XI. Common Mistakes to Avoid
Even simple recipes can go wrong without a few tips. Avoid these common pitfalls:
-
Overstuffing the dough: Makes sealing difficult and causes leakage.
-
Underbaking: Leads to doughy centers. Always bake until golden.
-
Skipping the garlic butter: This step adds flavor and crispness.
For a more visual guide, check out similar recipes on Pinterest and note how different chefs prepare and seal their bombs.
XII. FAQs – Based on Google’s People Also Ask
Can I make cheeseburger bombs ahead of time?
Yes! You can fully assemble them and refrigerate or freeze before baking. See the make-ahead section above for full instructions.
Can I use pizza dough instead of biscuit dough?
Absolutely. Pizza dough will give a more chewy texture compared to the flakiness of biscuit dough. It’s a great option if you prefer a less buttery base.
What cheese is best for cheeseburger bombs?
Cheddar is classic, but mozzarella melts better. For spicy versions, pepper jack or a cheddar blend adds extra flavor.
Can I air-fry cheeseburger bombs instead of baking?
Yes! Air fry at 350°F (175°C) for about 8–10 minutes. Make sure to brush with garlic butter before and after for the best flavor.
How do I keep the filling from leaking out?
Don’t overfill, and ensure the edges are tightly pinched. Place bombs seam-side down on the baking sheet and use parchment paper to prevent sticking.


