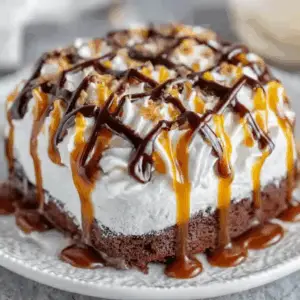
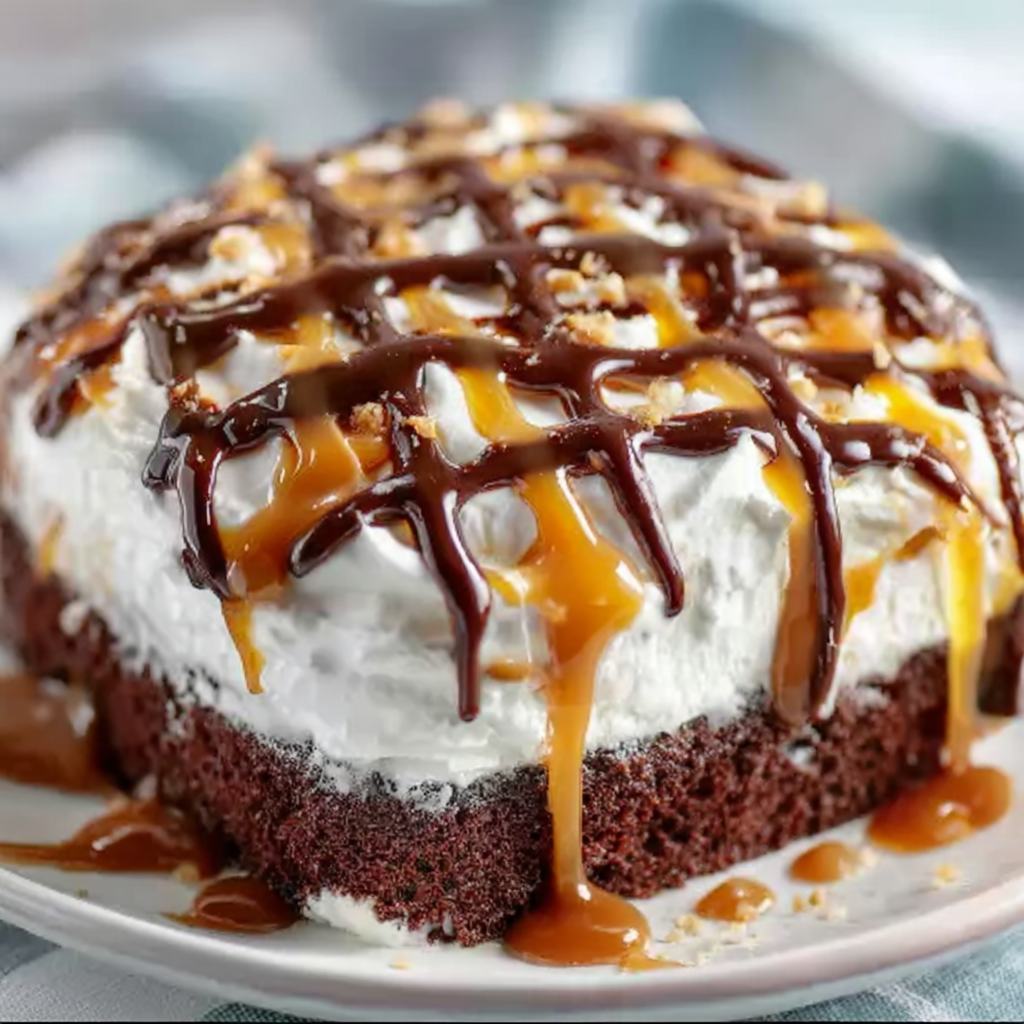
Nothing transforms a simple box mix into a show-stopping dessert quite like the Snickers Candy Poke Cake. This indulgent twist on a classic treats family gatherings and celebrations with layers of moist chocolate cake, rich velvety caramel, gooey sweetened condensed milk, and chunks of iconic Snickers candy.
The original poke cake dates back decades and became a nostalgic favorite thanks to its unique soak-and-infuse method. Dive into the history of the poke cake to appreciate its humble origins. This version begins with a tender chocolate cake base, infused with sweetened condensed milk and drizzled with smooth caramel sauce. A fluffy layer of whipped cream and a sprinkle of crunchy peanuts complete the creamy, crunchy experience. The crowning jewel is generous pieces of Snickers candy bar, creating a dessert that dazzles.
In this comprehensive guide you’ll master every step from a detailed Ingredient Deep-Dive covering cake mix, caramel, and toppings, to an organized Equipment & Prep Checklist that streamlines assembly. Follow our step-by-step Baking & Poking walkthrough for perfect holes and even infusion. Finally, draw inspiration from a dynamic Snickers poke cake inspiration board, creative poke cake decoration ideas, and stunning caramel whipped cream cake pins to elevate presentation and enjoyment.
2. Understanding the Poke Cake Phenomenon
From mid-century home kitchens to modern celebrations, poke cakes have become a beloved classic. Bakers first embraced the simple yet genius method of creating cake “pores” to trap sweet liquids. This technique produces unparalleled moisture and ensures each bite delivers robust flavor infusion, elevating a humble boxed cake to gourmet delight.
Today, understanding the origins of these treats reveals their adaptability. According to the history of the poke cake, home cooks experimented with condensed milk and syrups in cake holes during the 1950s. Our detailed Ingredient Deep-Dive explores how components like sweetened condensed milk and caramel sauce work together to maximize taste.
Beyond basic moisture, the Snickers twist infuses candy bar elements directly into the cake matrix. Learn more in our Step-by-Step Baking & Poking section. These textural contrasts satisfy craving for creamy, crunchy elements. For visual presentation, browse the Snickers poke cake inspiration board to see creative decoration examples.
3. Ingredient Deep-Dive
A precise look at each component ensures your Snickers Candy Poke Cake achieves the ideal balance of moisture, sweetness, and texture. By understanding roles of individual components, you can customize flavors, troubleshoot potential issues, and elevate a simple dessert to gourmet bliss. Experiment with a premium cocoa-enhanced mix for richer flavor and finer crumb texture that soaks evenly yet remains elevated.
Key pantry essentials lay the foundation for success. The recommended chocolate cake mix offers reliable crumb and structure, while sweetened condensed milk delivers luscious creaminess and sweetness. For additional guidance see our Ingredient Deep-Dive section and the history of the poke cake to appreciate how each part interacts. Consult the wiki entries to understand sugar chemistry and its impact on cake structure.
Additional topping elements transform texture and presentation. Choose a smooth caramel sauce that complements without overpowering, and opt for freshly whipped heavy cream (check tips in our Equipment & Prep Checklist to stabilize peaks). Stabilizing agents like cream of tartar can help maintain peak integrity under warmer conditions. These layers, combined with chopped Snickers, create a memorable mouthfeel.
- Chocolate Cake Mix: box mix simplifies prep and guarantees consistent crust and rise.
- Sweetened Condensed Milk: infuses pockets of intense sweetness.
- Caramel Sauce: drizzle thickness affects absorption and flavor balance.
- Chopped Snickers Bars: distribute peanut, nougat, and chocolate bits uniformly.
- Heavy Whipping Cream & Powdered Sugar: whipped to stiff peaks for stable topping; add vanilla extract for depth.
- Roasted Salted Peanuts: finishing crunch and salty contrast.
4. Equipment & Prep Checklist
Before assembling your Snickers Candy Poke Cake, ensure you have the right tools and proper setup. Gather a 9×13-inch baking pan, wooden spoon or skewer for poking, mixing bowls, and an electric mixer with whisk attachment, and a digital timer. Grease the pan thoroughly to prevent sticking and line it with parchment.
Following our Ingredient Deep-Dive and Step-by-Step Baking & Poking, set up a clean workspace. Keep your chilled caramel sauce and whipped cream ingredients nearby to streamline assembly. Ensure all tools are dry and within reach to maintain workflow efficiency and carefully verify pan dimensions.
5. Step-by-Step Baking & Poking
Your journey to pore-perfected, flavor-infused cake hinges on precise baking and poking steps. Follow this guide to achieve uniform moisture and rich texture in every slice.
Preheating & Pan Prep
- Position a rack in the oven center and preheat to 350 °F (175 °C).
- Grease a 9×13-inch pan with nonstick spray, then line the bottom with parchment.
- Brush softened butter along edges for effortless removal and to preserve the tender crumb.
- Confirm pan dimensions and tool placement via our Equipment & Prep Checklist.
Mixing & Baking
- In a large bowl, whisk together cake mix, eggs, oil, and water as directed.
- For extra chocolate intensity, swap half the water for brewed coffee—this deepens flavor without altering consistency.
- Mix until just combined; overmixing tightens gluten and ruins crumb structure.
- Gently pour batter into the pan, tapping to release air pockets.
- Bake 22–25 minutes or until a toothpick shows moist crumbs. Rotate midway for even heat distribution.
- Let cool ten minutes before poking to prevent collapse from trapped steam.
Common pitfalls:
- Overgreasing edges can cause cake shrinkage.
- Underbaking leads to sagging centers.
- Insufficient cooling reduces penetration of sweet liquids.
Poking Technique
- Use a wooden spoon handle or chopstick to create 30–40 holes, spaced about one inch apart.
- Press two-thirds down—enough to avoid breaking the pan.
- Form a grid pattern for consistent liquid channels.
- These conduits allow sweetened condensed milk and caramel sauce to saturate evenly, maximizing flavor penetration.
- For guidance on infusion ratios, revisit our Ingredient Deep-Dive.
With these steps executed precisely, your cake will boast an even network of infusion channels, setting the stage for decadent layers of taste and textural contrast.
6. Infusing Flavors: Condensed Milk & Caramel
Perfecting the soak-and-infuse stage guarantees every forkful bursts with sweetness and creaminess. Begin immediately after poking:
- Sweetened Condensed Milk
- Pour evenly over warm cake to ensure it seeps into all channels.
- For deeper layers of flavor, gently tilt the pan so milk pools and then absorb back.
- Tip: Warm the milk slightly (15 seconds in the microwave) to lower viscosity and improve penetration.
- Caramel Sauce
- Drizzle ½ cup of caramel in a zigzag pattern; this creates alternating layers of buttery richness.
- Use a spoon to nudge sauce toward the edges, avoiding untouched pockets.
- Refrigerate uncovered for 10 minutes to let caramel begin to set before adding candy.
This process leverages the grid of holes you crafted in Step-by-Step Baking & Poking, forming a matrix of flavor channels. The interplay between the silky condensed milk and the velvety caramel establishes a decadent base, primed for the Snickers infusion to follow.
7. Candy Injection & Chill Time
Embedding chopped Snickers pieces transforms the cake into a multi-textured marvel:
- Distribution
- Scatter chopped bars evenly, dropping pieces directly into each hole.
- Reserve a handful for surface garnish to showcase peanut and nougat flecks.
- Chill
- Cover the pan with plastic wrap and refrigerate for at least 1 hour.
- Cold setting solidifies the condensed milk and caramel, preventing run-off when sliced.
Refrigeration also tightens gluten strands, ensuring the cake holds its shape during topping. For a firmer bite, extend chill time up to 2 hours. This step readies the cake for the final whipped layering without risking sogginess.
8. Crafting the Whipped Cream Topping
A stable, fluffy crown of whipped cream balances the cake’s richness:
- Whipping Technique
- Chill the bowl and whisk attachment for 10 minutes before starting.
- Combine 1½ cups heavy cream with 3 tablespoons powdered sugar (and a splash of vanilla if desired).
- Beat on medium-high until stiff peaks form—overbeating causes separation.
- Flavor Enhancements
- Fold in 1 teaspoon of cocoa powder for a mocha twist.
- Swap half the sugar for maple syrup to introduce subtle caramel notes.
Spread uniformly with an offset spatula, or pipe rosettes around the edges for an elegant look. Reference the Equipment & Prep Checklist to ensure tools are optimally chilled.
9. Final Garnishes & Assembly
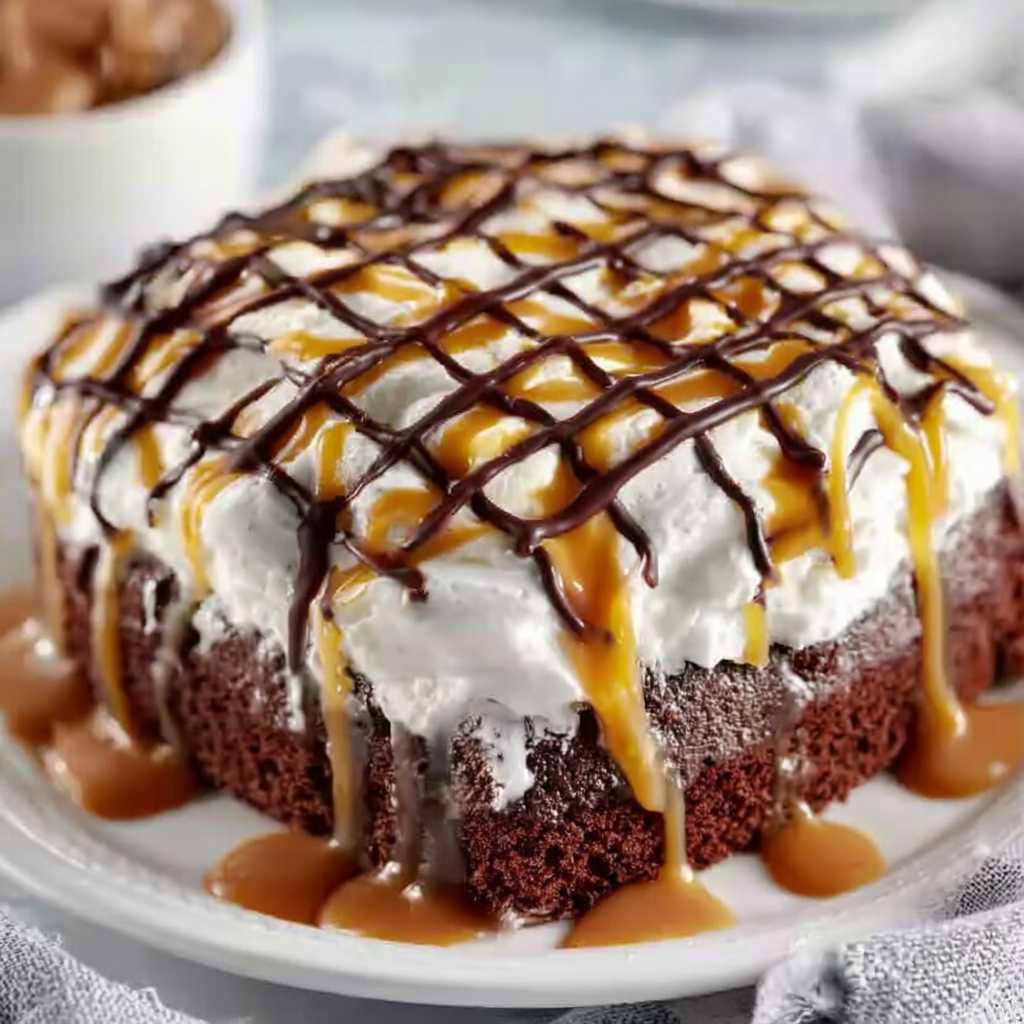
The finishing touches seal in visual appeal and texture contrast:
- Drizzles
- Warm remaining ¼ cup caramel sauce until pourable; drizzle in thin lines.
- Follow with 2 tablespoons chocolate sauce to create a marbled pattern.
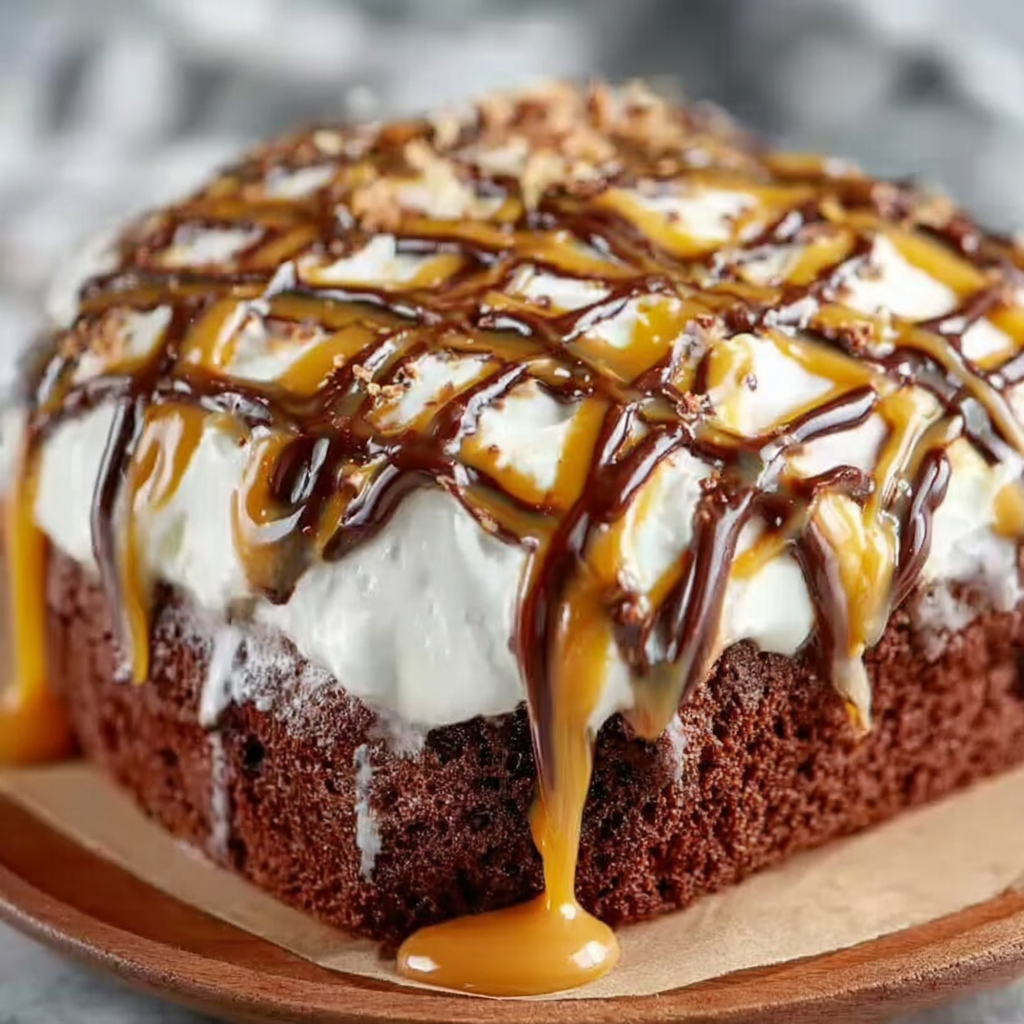
- Crunch Elements
- Sprinkle ¼ cup roasted salted peanuts for salty contrast.
- Add reserved chopped Snickers bars, pressing lightly into the cream.
Allow the cake to rest 30 minutes in the fridge to let garnishes adhere. For party-ready presentation, slice into uniform squares and serve on decorative platters.
10. Variations & Creative Twists
Transform the basic formula to suit any occasion:
- Salted Caramel Snickers Poke Cake
- Sprinkle flaky sea salt over caramel drizzles for a sweet-savory pop.
- Mini Snickers Poke Cups
- Bake batter in muffin tins; poke, fill, and chill in individual liners.
- Nut-Free Version
- Swap Snickers for nougat chips and almond-free caramel.
- Chocolate Ganache Finish
- Replace whipped cream with a pour-over ganache made from equal parts cream and dark chocolate.
Each adaptation keeps the signature moist, infused structure while introducing novel flavor profiles.
11. Troubleshooting & Pro Tips
Ensure flawless results with these expert solutions:
- Prevent Weeping Whipped Cream
- Add 1 teaspoon cornstarch when whipping to stabilize.
- Fix Split Caramel Drizzles
- Warm sauce gently in a double boiler to restore fluidity.
- Avoid Sogginess
- Limit condensed milk by 2 tablespoons if over-soaked.
- Make-Ahead Strategy
- Assemble through step 7 and refrigerate up to 24 hours; add whipped topping and garnishes just before serving.
These insights guarantee a dessert that holds its shape and textures.
12. FAQs
Can I make this cake ahead of time?
Yes—assemble through the chill after candy injection, cover tightly, and refrigerate up to 24 hours. Add whipped cream and garnishes within 2 hours of serving for peak freshness.
What’s the best way to chop the candy bars?
Use a sharp chef’s knife; freeze bars for 10 minutes beforehand to minimize stickiness and achieve clean cuts.
How do I prevent the cake from becoming too soggy?
Ensure a ten-minute cool before pouring sweetened condensed milk, and avoid over-poking to maintain structural integrity.
Can I use a homemade chocolate cake instead of box mix?
Absolutely—select a recipe yielding a tender crumb (high cocoa, low gluten), and bake in a 9×13 pan to match infusion guidelines.
How long will leftovers stay fresh?
Properly covered, portions last 3–4 days refrigerated. Let sit 10 minutes at room temperature before serving for optimal moistness.
From Box Mix to Bliss: Mastering the Snickers Candy Poke Cake
A luscious Snickers Candy Poke Cake that elevates boxed chocolate mix with layers of sweetened condensed milk, rich caramel, and chopped Snickers bars, all crowned with fluffy whipped cream, drizzled sauces, and crunchy peanuts. Perfect for birthdays, potlucks, or any celebration where a show-stopping dessert is called for.
Ingredients
- 1 box (15.25 oz/432 g) chocolate cake mix (plus ingredients called for on box: eggs, oil, water)
- 1 can (14 oz/396 g) sweetened condensed milk
- ¾ cup caramel sauce, divided
- 4 Snickers bars (1.86 oz/53 g each), chopped
- 1½ cups heavy whipping cream
- 3 tablespoons powdered sugar
- 2 tablespoons chocolate sauce (store-bought or homemade)
- ¼ cup roasted salted peanuts, chopped
Instructions
• Preheat the oven to 350 °F (175 °C). Grease a 9×13-inch baking pan and set aside.
• Prepare the chocolate cake batter according to the package instructions. Pour the batter into the prepared pan and smooth the top.
• Bake for 22–25 minutes, or until a toothpick inserted into the center comes out clean. Remove from the oven and let cool for about 10 minutes.
• Using the handle of a wooden spoon or a similarly sized tool, poke holes all over the cake (about 30–40 holes).
• Pour the sweetened condensed milk evenly over the cake, allowing it to seep into the holes.
• Drizzle ½ cup of the caramel sauce over the top, distributing it as evenly as possible.
• Sprinkle the chopped Snickers bars into the holes and over the surface of the cake.
• Let the cake cool completely to room temperature, then cover and refrigerate for at least 1 hour to set.
• In a medium bowl, whip the heavy cream with the powdered sugar until stiff peaks form. Spread the whipped cream evenly over the chilled cake.
• Drizzle the remaining ¼ cup caramel sauce and the chocolate sauce in a decorative pattern over the whipped topping.
• Scatter the chopped peanuts on top. Return the cake to the refrigerator and chill for at least another hour before serving.
Notes
-
Ingredient Swaps: Replace heavy cream with stabilized whipped topping for longer holds in warm environments.
-
Storage: Cover tightly with foil; keep refrigerated. For best texture, consume within 48 hours.
-
Scaling: Recipe halves easily for an 8×8 pan; adjust bake time to 18–20 minutes.
-
Allergy Adaptation: Use sunflower seed butter and seed-based “Snickers” for nut-free version.
-
Presentation Tip: Serve each slice with a drizzle of warmed caramel and a whole Snickers piece on top for extra flair.