Discover how to create juicy, melt-in-your-mouth baked chicken tenders that transform weeknight dinners into a healthier comfort food experience. Using a simple blend of spices and efficient cooking techniques, these tenders deliver a golden, crispy crust without deep-frying. Key takeaways include:
- A foolproof seasoning mix
- A quick sear for extra flavor
- A minimal-oil, oven-baked finish
By mastering fundamental baking techniques and understanding how to prepare your chicken evenly, you unlock perfectly cooked tenders every time. For a deep dive into the essential components, see Key Ingredients & Their Roles.
In the following sections, we’ll walk you through each step—from searing to baking—so you achieve restaurant-quality results at home. Plus, explore visual inspiration and variations on Pinterest and learn how to incorporate these tenders into meal prep plans for effortless weeknight dinners. Navigate to Step-by-Step Cooking Process to start cooking.
Later, we’ll explore ways to elevate your tenders with flavor variations like honey-mustard or spicy buffalo, detailed in Flavor Variations & Add-Ins. Discover complementary pairings in Side Dishes & Serving Suggestions, and find expert tips on storing and reheating to preserve moisture retention and maximize protein-packed leftovers. Comprehensive FAQs cover all your burning questions, ensuring confidence in every batch.
Why Baked Chicken Tenders Are the Healthier Comfort Food Choice
Choosing baked chicken tenders over fried options offers a delicious way to savor classic comfort food with less guilt. By relying on minimal oil and smart techniques, you can enjoy a crispy crust without deep-frying. Oven baking ensures even heat distribution and promotes moisture retention.
Here’s why they make the ultimate healthier comfort food:
- Lower fat content compared to deep-fried versions
- Reduced calories thanks to minimal oil usage
- Balanced nutrition: high in protein, low in simple carbs
For a detailed breakdown of each ingredient’s function, check out Key Ingredients & Their Roles. Explore the science behind choosing quality fats on Wikipedia in the olive oil benefits article, and discover related recipes on Pinterest.
Searing prior to baking not only locks in juices but also builds a flavorful crust. Learn professional tips in our baking techniques guide. For visual step-by-step inspiration, browse ideas through Pinterest. This method aligns with guidance on chicken as food to promote safe, flavorful preparation and health benefits.
Key Ingredients & Their Roles
Understanding each component’s function ensures your tenders achieve optimal flavor, texture, and moisture. These ingredients work in harmony to create that coveted golden crust and succulent interior.
Firstly, selecting the right chicken cut is crucial. Opt for uniform, boneless, skinless chicken breasts or tenders to promote even cooking and prevent dryness. Trimming excess fat and, if necessary, pounding thicker portions to an even thickness will help maintain optimal moisture retention, as detailed in our Step-by-Step Cooking Process and core baking principles. For more on safe and ethical sourcing, consult the chicken as food overview.
Next, achieving rich flavor begins with the proper balance of fats and oils. A combination of unsalted butter and olive oil provides both flavor depth and a higher smoke point. Discover the science behind using quality oils in the olive oil benefits article. Whisk these with spices like garlic powder, onion powder, and paprika—each contributing unique aromatic notes. For an expanded spice profile, refer to the paprika spice profile source.
Herbs such as thyme and oregano introduce delicate herbal nuances, while moisture-boosters like low-sodium chicken broth, fresh lemon juice, and Dijon mustard collaborate to infuse acidity and umami. Find inspiration on baked chicken tender ideas, browse healthy oven-baked meals, or integrate into meal prep chicken tenders for weeknight planning. Finally, garnish with fresh parsley as featured in homemade dipping sauces for chicken.
Meal prep friendly.
Chicken Breasts / Tenders
- Uniform thickness for even cooking
- Pounding techniques to prevent dryness
Fats & Oils: Butter vs. Olive Oil
- Butter adds richness and browning
- Olive oil increases smoke point and health benefits
Spice Blend: Garlic Powder, Onion Powder, Paprika
- Garlic powder for savory undertones
- Onion powder for depth
- Paprika for color and mild sweetness
Enjoy flavor and tender texture. Bon appétit.
Step-by-Step Cooking Process
Mastering the bake involves preparation, seasoning, searing, baking, temperature control, and resting. Follow each step to achieve golden, crispy and moist tenders.
Begin with Preparation: Preheat the oven to 350°F (175°C). Pat the chicken dry and season both sides generously with salt and freshly ground black pepper to enhance natural flavors. Ensure even thickness by trimming or lightly pounding thicker portions.
In the following phases, you’ll learn how to layer flavors and lock in juices by combining insights from Key Ingredients & Their Roles with practical lemon garlic chicken recipes techniques. This approach maintains a flavorful crust while preserving internal moisture retention. For advanced tips on searing, consult our comprehensive guide on baking techniques, and explore creative meal ideas via Pinterest.
Next, tackle Seasoning & Basting by whisking melted butter, olive oil, garlic powder, onion powder, paprika, thyme, and oregano in a bowl. Brush the mixture evenly over each tender, ensuring full coverage. This step maximizes adherence of the spice blend outlined earlier in our Key Ingredients & Their Roles, creating an aromatic base that crisps beautifully.
Proceed to Searing: Heat a large, oven-safe skillet over medium-high heat until shimmering. Place tenders in the pan without overcrowding; sear for about three minutes per side until a golden crust forms. Avoid moving the chicken to guarantee uniform browning.
After searing, prepare the Baking with Aromatics mixture by whisking together low-sodium chicken broth, lemon juice, and Dijon mustard. Pour this around—never directly over—the chicken, which preserves the crust integrity. Transfer the skillet into the preheated oven. Bake until an instant-read thermometer registers 165°F (74°C), approximately 15–18 minutes.
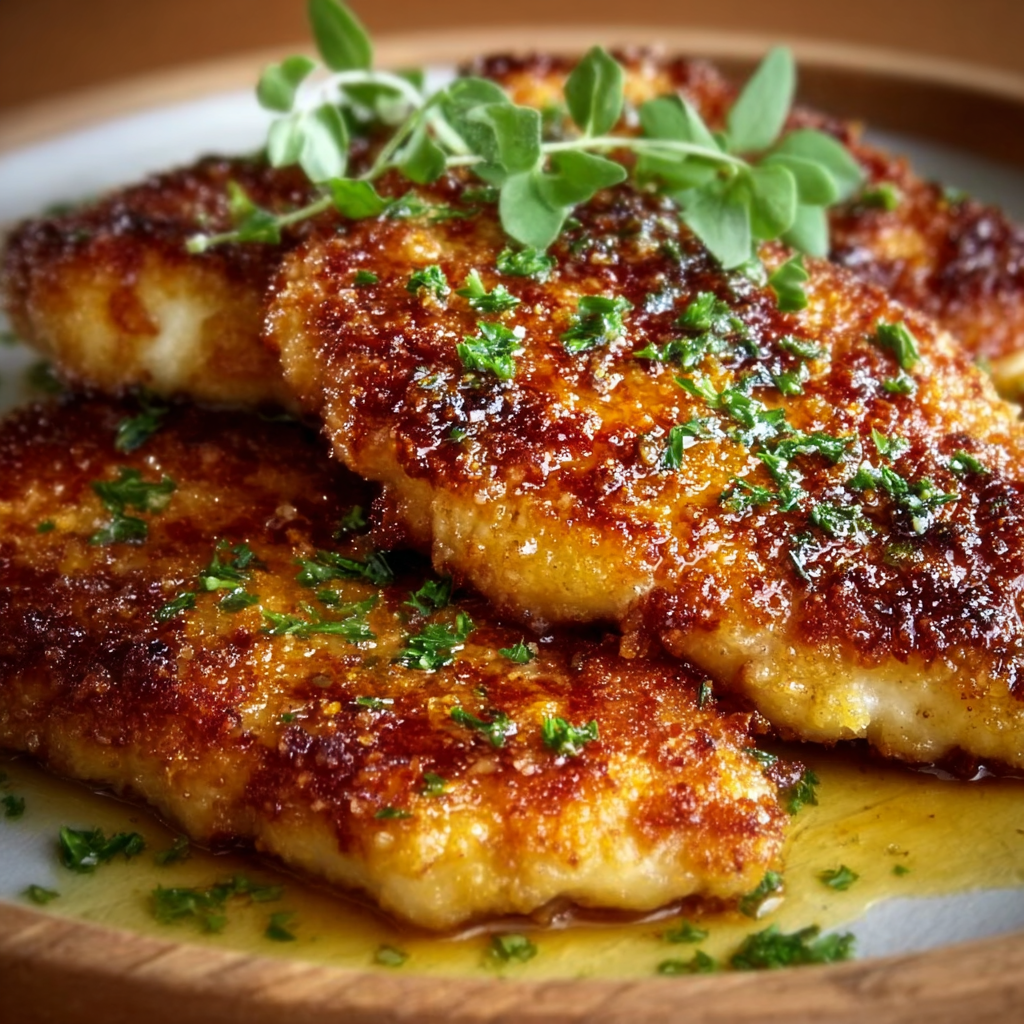
Upon reaching the target temperature, remove the skillet and allow the tenders to rest for five minutes ( Resting & Serving). This pause redistributes juices, ensuring each tender remains tender and succulent. Spoon pan juices over the chicken before garnishing with chopped parsley. With these six steps, you’ll achieve perfectly baked chicken tenders every time.
Temperature & Timing is the final checkpoint. Use an instant-read thermometer to confirm an internal temperature of 165°F (74°C) at the thickest point, ensuring safety and optimal juiciness. For smaller or larger tenders, adjust baking time by one to two minutes. Resting in the powered-off oven for one minute more can firm the crust without drying the center.
Flavor Variations & Add-Ins
Elevate your baked chicken tenders by experimenting with innovative twists that transform simple recipes into gourmet masterpieces. Whether you crave a sweet-savory balance or a spicy kick, these add-ins boost texture and flavor profiles without compromising moisture.
A honey-mustard twist combines balanced acidity and natural sweetness by swapping Dijon with a honey-rich sauce. For a fiery alternative, drizzle a homemade buffalo glaze over the tenders before baking; incorporate hot sauce, melted butter, and a pinch of paprika for an extra aroma. See our detailed spice blends in Key Ingredients & Their Roles, and explore related oven-baked meals on Pinterest for creative plating ideas.
For herb-infused crusts, mix panko breadcrumbs with finely chopped rosemary or thyme, then coat tenders prior to searing. To add umami depth, finish with a light dusting of Parmesan cheese. Discover the science behind Paprika in the paprika spice profile article, and learn about Dijon mustard benefits in Wikipedia’s Dijon mustard entry. Refer to the Step-by-Step Cooking Process to integrate these variations seamlessly into your routine.
For an extra-crispy coating, combine gluten-free breadcrumbs or crushed cornflakes with aromatic herbs and a dash of smoked paprika. This technique not only yields a satisfying crunch but also caters to gluten-sensitive diners. Try substituting regular breadcrumbs with almond flour for a low-carb crust that enhances protein-rich content. Integrate these options into your Meal Prep & Storage Tips for effortless weekly planning. Visual guides for these coatings are available on Pinterest. Experiment to find your favorite coating style.
Side Dishes & Serving Suggestions
Complement your baked chicken tenders with sides that balance flavor, texture, and nutrition. From vibrant veggies to creamy starches, these pairings ensure every meal feels complete.
Inspired by baked chicken tender ideas and healthy oven-baked meals, consider serving tenders alongside garlic-roasted green beans or honey-glazed carrots for a sweet-savory contrast. For a cozy twist, whip up creamy mashed potatoes infused with a splash of low-sodium broth and fresh herbs. Dive into lemon garlic chicken recipes for seasoning tips, and explore the science of starches in our internal Key Ingredients & Their Roles section. A side salad dressed with olive oil highlights the olive oil benefits and adds a light, crisp element.
For crunchy contrast, serve with herb-seasoned homemade dipping sauces like ranch or tzatziki, inspired by homemade dipping sauces for chicken. Incorporate acidic notes using a touch of Dijon mustard in dressings or drizzles. To deepen color and aroma, sprinkle a pinch of paprika spice profile over roasted potatoes. For culinary context, consult our overview of chicken as food and foundational baking techniques.
- Roasted Vegetables: Asparagus, Brussels sprouts, or zucchini
- Creamy Starches: Mashed potatoes or cauliflower purée
- Fresh Salads: Mixed greens with lemon vinaigrette
- Dipping Sauces: BBQ, ranch, or honey-mustard blend
These pairings elevate your meal, balancing nutrition and comfort food appeal.
Make-Ahead, Storage & Reheating Tips
Prepare make-ahead batches of baked chicken tenders to streamline weeknight meals and ensure consistently juicy results. Proper storage techniques lock in flavor, while planned reheating preserves the crispy crust. If freezing, wrap tightly to prevent freezer burn and label with date.
When planning your meal prep, portion tenders into single-serve containers and add complementary sides from our Side Dishes & Serving Suggestions for a balanced plate. Store up to four days in the fridge—refer to safe-handling guidelines on Chicken as Food for details. For creative packaging ideas, explore meal prep chicken tenders inspiration. These strategies reduce waste and simplify dinner planning.
To reheat safely without drying, follow the steps outlined in our Step-by-Step Cooking Process and consult oven reheating tips in the baking guide. Use medium heat to warm through evenly and retain that melt-in-your-mouth texture. Avoid sharp temperature spikes to prevent the crust from becoming soggy. Always monitor internal temperature.
- Divide tenders and pan juices into airtight containers
- Chill to below 40°F (4°C) within two hours of cooking
- Reheat in a 325°F (165°C) oven for 8–10 minutes
- Avoid microwaving directly on high heat
- Let rest one minute after reheating before serving
- For freezer storage: freeze for up to three months
Nutritional Breakdown
A clear view of what’s on your plate helps you balance protein, fats, and carbs while keeping calories in check. Here’s the approximate nutrition per tender (without sides):
- Calories: 180 kcal
- Protein: 24 g
- Total Fat: 8 g (3 g saturated)
- Carbohydrates: 2 g
- Sodium: 300 mg
These values assume use of unsalted butter, olive oil, and low-sodium chicken broth as detailed in Key Ingredients & Their Roles. For a lighter option, swap butter for additional olive oil and reduce salt by 20 %, trimming approximately 10 kcal per tender. Tracking macros becomes effortless when you rely on precise baking techniques and portion control.
Common Mistakes & How to Avoid Them
Avoid these pitfalls to ensure each batch of baked chicken tenders turns out perfectly:
- Overcrowding the Pan: Crowding lowers skillet temperature, preventing proper searing. Cook in batches.
- Skipping the Sear Step: Directly baking sacrifices the golden crust and rich flavor layer. Always sear first.
- Ignoring Thickness Variations: Uneven pieces lead to undercooked centers or dry edges. Pound to uniform thickness.
- Baking at Incorrect Temperature: Too high dries out; too low prolongs cooking. Maintain 350 °F (175 °C) for 15–18 minutes.

FAQs
How can I tell when chicken tenders are fully cooked without a thermometer?
Check that juices run clear when pierced at the thickest point and that the center is no longer pink. For consistency, use an instant-read thermometer.
Can I use chicken thighs instead of breasts?
Yes, thighs yield more moisture retention and richer flavor but require slightly longer baking (18–20 minutes) due to higher fat content.
What’s the best way to get extra-crispy edges?
After searing and baking, switch oven to broil for 1–2 minutes, watching closely to avoid burning while crisping the crust.
Is it possible to make this gluten-free?
Absolutely—replace panko with gluten-free breadcrumbs or crushed cornflakes. Almond flour also works for a low-carb crust.
How long will leftovers stay fresh in the fridge?
Stored in airtight containers, they remain safe for up to four days. Always chill below 40 °F (4 °C) within two hours of cooking.
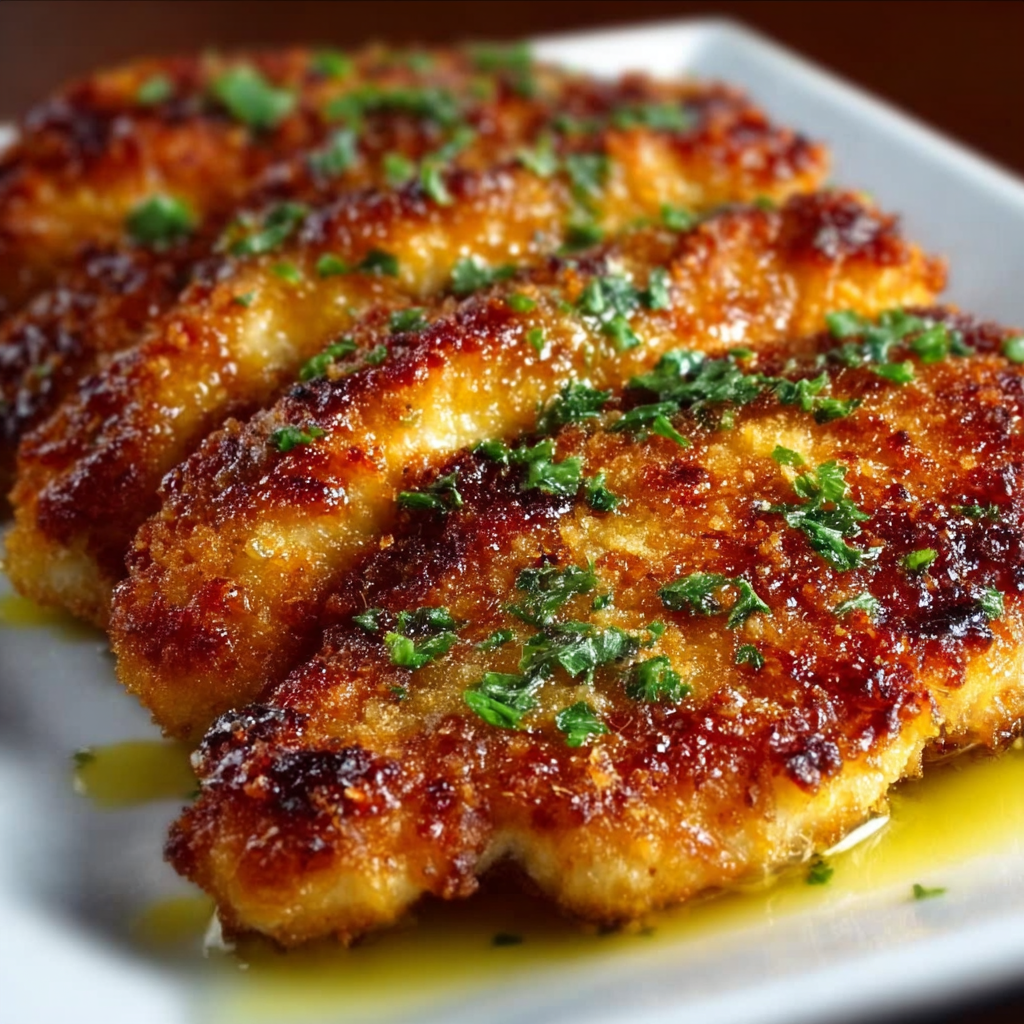
Easy Baked Chicken Breast Recipes for Juicy, Melt-In-Your-Mouth Results

Enjoy healthier oven-baked chicken tenders that deliver on flavor, texture, and simplicity. This recipe features a balanced spice blend, a quick sear for a golden crust, and an easy bake finish that locks in juices without deep-frying. Perfect for weeknight dinners, meal prep, or entertaining, these tenders pair beautifully with a variety of sides and dipping sauces.
Ingredients
- 4 boneless, skinless chicken breasts (about 6 oz / 170 g each)
- Salt and freshly ground black pepper
- 2 Tbsp unsalted butter, melted
- 2 Tbsp olive oil
- 1 tsp garlic powder
- 1 tsp onion powder
- 1 tsp paprika
- ½ tsp dried thyme
- ½ tsp dried oregano
- ½ cup low-sodium chicken broth
- 2 Tbsp freshly squeezed lemon juice
- 1 Tbsp Dijon mustard
- 1 Tbsp chopped fresh parsley (for garnish)
Instructions
– Preheat oven to 350 °F (175 °C). Pat chicken breasts dry and season both sides generously with salt and pepper.
– In a small bowl, whisk together melted butter, olive oil, garlic powder, onion powder, paprika, thyme, and oregano. Brush mixture all over the chicken.
– Heat a large oven-safe skillet over medium-high heat. When hot, add the chicken and sear without moving until golden brown, about 3 minutes per side.
– In a separate bowl, whisk together chicken broth, lemon juice, and Dijon mustard. Pour around (not over) the chicken in the skillet.
– Transfer skillet to the preheated oven and bake until an instant-read thermometer inserted into the thickest part reaches 165 °F (74 °C), about 15–18 minutes.
– Remove skillet from oven and let rest for 5 minutes. Spoon some of the pan juices over the chicken to keep it moist.
– Garnish with chopped parsley before serving.
Notes
-
For uniform cooking, trim excess fat and lightly pound thicker pieces.
-
Always sear in an oven-safe skillet to build flavor before baking.
-
Adjust spices to personal heat preferences—add cayenne for heat or swap paprika for smoked paprika for depth.
-
To reduce sodium, use reduced-sodium broth and omit added table salt if desired.
-
Let tenders rest before serving to maximize moisture retention.