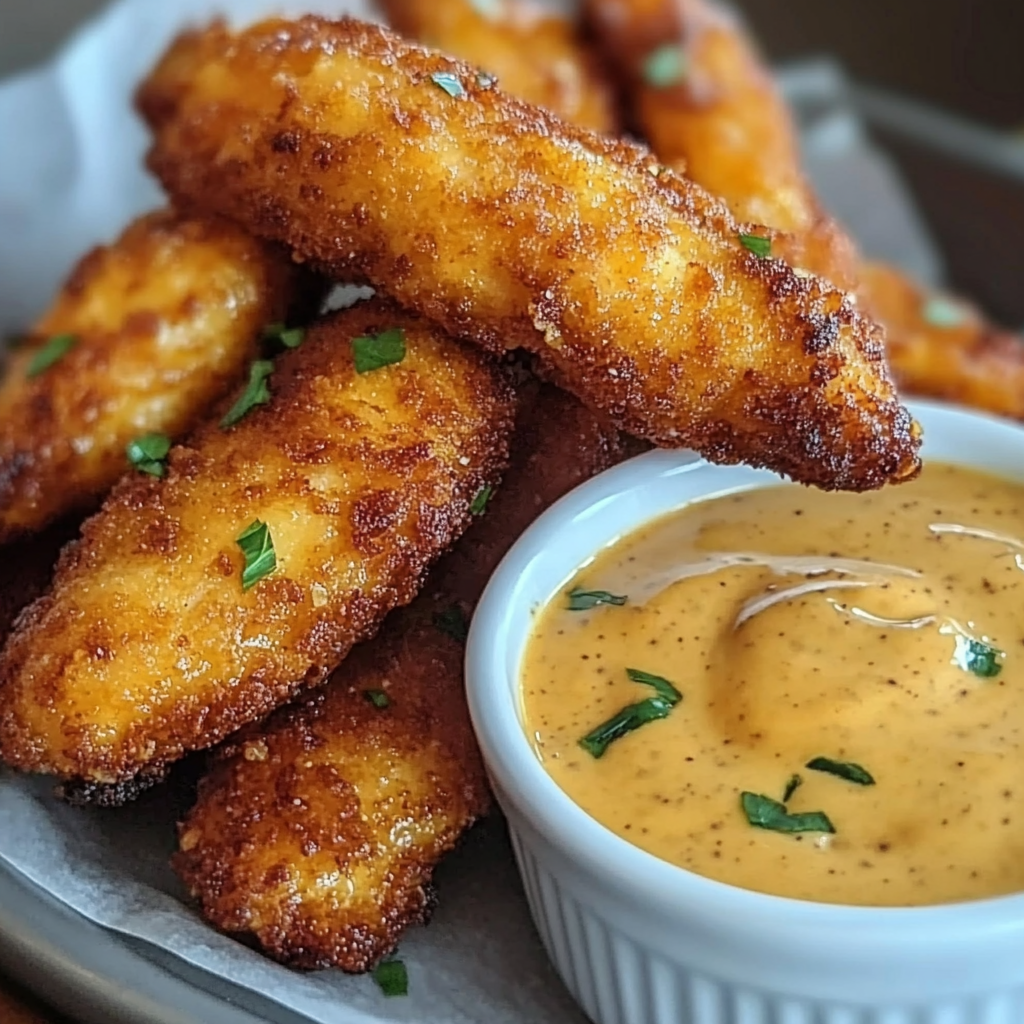
There’s nothing quite like crispy chicken tenders—golden brown on the outside, juicy and tender on the inside. Whether you’re making them for a quick dinner, a party snack, or a fun family meal, homemade chicken tenders are a game-changer. Unlike store-bought or fast-food versions, these are made with fresh ingredients, ensuring maximum flavor and crunch.
What makes these chicken tenders truly irresistible is the honey mustard dip. The combination of sweet honey, tangy Dijon mustard, and creamy mayo creates the perfect balance of flavors. This dip pairs wonderfully with the crispy coating, making every bite even more satisfying. Plus, the recipe is incredibly easy, requiring only a few simple ingredients.
For those looking to elevate their cooking skills, learning how to perfect deep-frying techniques (source) ensures restaurant-quality results at home. If you’re a fan of crunchy coatings, you might also want to explore the benefits of using panko breadcrumbs (source), which help achieve an ultra-light, crispy texture. Ready to get started? Let’s dive into this foolproof recipe for homemade crispy chicken tenders with honey mustard dip!
Why You’ll Love This Recipe
There are countless reasons to love these crispy chicken tenders, but here are the top ones that make this recipe stand out:
- Perfect Crunch & Juicy Texture – Thanks to a combination of panko breadcrumbs and Parmesan cheese, these tenders have a light, crispy coating while staying tender inside.
- Healthier Than Fast Food – When made at home, you can control the ingredients, avoiding unnecessary preservatives and excessive oil.
- Kid-Friendly & Crowd-Pleasing – Both kids and adults adore chicken tenders, making them perfect for family dinners or game-day snacks.
- Quick & Easy to Make – With just a few simple steps, you can prepare these tenders in under 30 minutes.
- Pairs with Any Dipping Sauce – While the honey mustard dip is a classic, these tenders also go great with homemade dipping sauces (source), like ranch, BBQ, or buffalo sauce.
Want to make this recipe even better? Understanding the best cuts of chicken for frying (source) ensures you’re using the most tender and flavorful pieces. Whether you’re cooking for a special occasion or just a simple meal, these homemade chicken tenders will never disappoint!

Ingredients Breakdown
For the Chicken Tenders
The key to achieving crispy, golden-brown chicken tenders lies in selecting the right ingredients. Here’s what you’ll need:
- Chicken tenders – These are naturally tender and cook quickly, but if unavailable, you can use chicken breasts cut into strips. Learn more about the best chicken cuts for frying (source).
- All-purpose flour – Forms the first layer of coating, ensuring the egg and breadcrumbs stick well.
- Eggs & milk – The eggs act as a binder, while milk helps achieve a light, even texture.
- Panko breadcrumbs – These Japanese-style breadcrumbs create an ultra-crispy coating. Want to know why panko breadcrumbs are better? Check this guide (source).
- Parmesan cheese – Adds an extra layer of flavor and crispiness.
- Garlic powder & paprika – Enhances the taste with a subtle smoky and garlicky kick.
- Salt & black pepper – Essential for seasoning and bringing out the natural flavors.
- Vegetable oil – The best frying oils include canola, vegetable, or peanut oil, as they have a high smoke point.
For the Honey Mustard Dip
- Mayonnaise – Provides a creamy base for the dip.
- Dijon mustard – Offers a bold, slightly spicy flavor. Read more about Dijon mustard and why it’s preferred over yellow mustard (source).
- Honey – Adds natural sweetness, balancing the tangy mustard. Learn about honey’s unique properties (source).
- Lemon juice – Enhances the flavor with a touch of acidity.
- Salt & black pepper – Adjust to taste for the perfect balance.
Using fresh, high-quality ingredients ensures that your crispy chicken tenders and honey mustard dip taste better
How to Make Crispy Chicken Tenders (Step-by-Step)
Step 1: Prep the Ingredients
Before you start cooking, having everything ready makes the process smoother. Gather your ingredients and set up a dredging station with three shallow bowls:
- Bowl 1: Mix all-purpose flour, garlic powder, paprika, salt, and black pepper.
- Bowl 2: Whisk together eggs and milk until well combined.
- Bowl 3: Mix panko breadcrumbs and grated Parmesan cheese for extra crispiness.
A well-organized setup ensures even coating, leading to perfectly crispy chicken tenders!
Step 2: Coat the Chicken
- Dredge each chicken tender in the flour mixture, shaking off excess.
- Dip into the egg mixture, ensuring a full coating.
- Press firmly into the panko and Parmesan mixture, making sure the breadcrumbs stick well.
This triple-coating method ensures that every piece has a thick, crunchy layer. Want more tips on deep-frying techniques? Check out this guide (source).
Step 3: Fry to Perfection
- Heat vegetable oil in a skillet over medium heat (about 350°F).
- Cook the tenders in batches, 3-4 minutes per side, until golden brown and crispy.
- Transfer to a paper towel-lined plate to drain excess oil.
Step 4: Make the Honey Mustard Dip
- In a small bowl, whisk together mayonnaise, Dijon mustard, honey, lemon juice, salt, and pepper.
- Adjust sweetness or tanginess to taste.
This creamy, tangy dip perfectly complements the crunchy tenders! For more homemade dipping sauce ideas, explore this collection (source).

Alternative Cooking Methods
Not a fan of frying? No problem! You can still achieve crispy chicken tenders using alternative methods like baking or air frying. These options are healthier and require less oil while still delivering that delicious crunch.
Baking Method
- Preheat the oven to 400°F (200°C).
- Place a wire rack on a baking sheet and spray it with cooking spray. This allows heat to circulate evenly, preventing soggy bottoms.
- Arrange the breaded chicken tenders on the rack and lightly spray them with oil to help them crisp up.
- Bake for 20-25 minutes, flipping halfway through, until golden brown and cooked through (internal temp of 165°F).
For more inspiration, check out healthy oven-baked recipes (source).
Air Fryer Method
- Preheat the air fryer to 375°F.
- Lightly spray the basket with oil and place the tenders inside in a single layer.
- Cook for 10-12 minutes, flipping halfway through, until crispy and golden.
This method is a great way to enjoy crispy air-fried chicken (source) with minimal oil and maximum crunch!
Serving Suggestions & Pairings
Crispy chicken tenders are incredibly versatile, making them perfect for various meals and occasions. Whether serving them as a snack, main dish, or party appetizer, pairing them with the right sides and dips enhances their flavor.
Best Side Dishes
- French fries – Classic choice for a fast-food-style meal.
- Coleslaw – Adds a fresh, crunchy contrast to the crispy tenders.
- Roasted vegetables – A healthier option that balances the richness of fried chicken.
- Mac and cheese – A creamy, cheesy side that pairs beautifully with crispy chicken.
Looking for more meal ideas? Check out these easy dinner inspirations (source).
Other Dipping Sauce Options
While honey mustard dip is a classic, you can switch things up with:
- Ranch dressing – Cool, creamy, and a favorite for dipping.
- BBQ sauce – Sweet and smoky flavors complement the crispy coating.
- Buffalo sauce – Adds a spicy kick for heat lovers.
These tenders also work well in sandwiches, wraps, or salads, making them a fantastic option for meal planning (source).
Storage & Reheating Tips
Making extra crispy chicken tenders is always a good idea, but knowing how to store and reheat them properly ensures they stay just as delicious the next day.
Storing Leftovers
- Refrigeration: Store cooked tenders in an airtight container in the fridge for up to 3 days.
- Freezing: Arrange tenders in a single layer on a baking sheet and freeze until solid. Then, transfer them to a freezer-safe bag for up to 3 months.
Best Ways to Reheat
Reheating correctly prevents soggy breading and keeps the tenders crispy:
- Oven Method: Preheat to 375°F, place tenders on a wire rack, and bake for 10-12 minutes until heated through.
- Air Fryer: Set to 350°F and cook for 5-6 minutes for a quick, crispy finish.
- Microwave (Least Recommended): Use short 30-second bursts, but expect a softer texture.
For a crunchier result, the oven or air fryer (source) is the best choice!
Common Mistakes & How to Avoid Them
Even the best crispy chicken tenders can turn out less than perfect if certain steps are overlooked. Here are some common mistakes and tips to ensure restaurant-quality results every time.
1. Overcrowding the Pan
- Frying too many tenders at once lowers the oil temperature, leading to greasy, soggy chicken.
- Fix: Fry in small batches, ensuring each piece has enough space.
2. Not Pressing the Coating Firmly
- If the panko breadcrumbs don’t adhere well, the crust may fall off during frying.
- Fix: Press the coating firmly onto each tender before frying.
3. Using the Wrong Oil
- Some oils burn at high temperatures, affecting flavor and texture.
- Fix: Use oils with a high smoke point, like vegetable, canola, or peanut oil (source).
4. Skipping the Seasoning
- Unseasoned tenders can taste bland.
- Fix: Always season every layer—flour, eggs, and breadcrumbs.
5. Overcooking the Chicken
- Overcooked chicken turns dry and tough.
- Fix: Use a meat thermometer to ensure the internal temperature reaches 165°F but no higher.
Following these tips guarantees perfectly crispy, flavorful chicken tenders every time!

FAQs
1. Can I use chicken breasts instead of tenders?
Yes! If you don’t have chicken tenders, slice boneless, skinless chicken breasts into strips. This gives a similar texture and taste while being just as crispy.
2. What’s the best oil for frying chicken tenders?
Use oils with a high smoke point, such as vegetable, canola, or peanut oil (source). These oils prevent burning and keep the tenders crispy.
3. Can I make this recipe gluten-free?
Absolutely! Substitute all-purpose flour with a gluten-free flour blend and use gluten-free breadcrumbs instead of panko.
4. How do I keep the coating from falling off?
Make sure to press the panko breadcrumb mixture firmly onto the chicken. Also, let the breaded tenders rest for 5-10 minutes before frying to help the coating stick.
5. Can I make these in advance?
Yes! You can bread the tenders ahead of time and store them in the fridge for up to 24 hours before frying. You can also freeze them and cook directly from frozen—just add a few extra minutes to the cooking time.
This ensures you always have crispy homemade chicken tenders ready whenever you need them!


