Bringing back the comforting flavors of the past is easier than ever with this classic and easy homemade chocolate pie recipe. There’s something timeless about a smooth, rich chocolate filling nestled in a flaky crust that instantly reminds us of simpler days. Whether you’re a baking novice or an experienced cook, this recipe will show you how to recreate an old fashioned chocolate pie that’s as memorable as it is delicious.
Old-fashioned desserts have made a major comeback as people seek comfort foods that evoke nostalgia. This best homemade chocolate pie is no exception. It’s a beloved dessert that once graced family gatherings, holiday tables, and Sunday dinners. Simple ingredients, straightforward methods, and that undeniable homemade goodness make it a must-try. The beauty of this pie is how accessible it is—no fancy equipment needed, just a whisk, a saucepan, and a bit of patience.
You’ll learn everything you need to create the perfect chocolate pie from scratch, including how to balance the rich cocoa flavor, achieve the perfect custard-like consistency, and top it off with whipped cream or meringue. To better understand the roots of this dessert, you might enjoy exploring the history of chocolate and the history of pie, which offer fascinating insights into how these treats became staples in American kitchens. For even more ideas, check out this board on classic dessert recipes.
Whether you’re bringing it to a potluck or simply treating yourself, this recipe will transport you to a time when homemade desserts were the heart of every celebration. Let’s dive into making the ultimate old fashioned chocolate pie that’s sure to become a cherished favorite in your home.

The History of Chocolate Pie
The story of chocolate pie begins in the early American kitchens where simple, hearty desserts ruled the table. Chocolate itself became more accessible to the average household during the 19th century, thanks to advances in chocolate processing. By the early 20th century, cocoa powder was a pantry staple, making it easier than ever to create rich, flavorful desserts like the old fashioned chocolate pie.
Initially, pies were savory dishes brought over by European settlers, but as sugar became more widely available, sweet pies gained popularity. Custard-based pies, like chocolate chess pie, were particularly loved because they required few ingredients and could be made quickly. As you explore the evolution of sweet desserts, learning more about the history of custard can give you deeper insight into why these simple treats were so beloved.
The classic homemade chocolate pie emerged as a comfort food during the Great Depression and post-World War II eras, offering an affordable yet indulgent dessert. Variations like the Mississippi Mud Pie took chocolate pies even further, adding richer textures and bolder flavors. To see a variety of stunning chocolate pie styles, take a look at this Pinterest Chocolate Pies board, which showcases how versatile this dessert has become.
Throughout history, the secret to a perfect classic chocolate pie remained unchanged: high-quality ingredients like butter, cocoa powder, and vanilla extract. Each plays a crucial role in achieving the depth of flavor and luxurious texture we crave in a truly homemade dessert.
Key Ingredients You’ll Need
Key Ingredients You’ll Need
Creating a truly classic and easy homemade chocolate pie starts with choosing the right ingredients. Each component plays a crucial role in delivering that nostalgic flavor and irresistible texture that define an old fashioned chocolate pie recipe made simple.
For the Filling:
-
Granulated Sugar: Provides sweetness and helps create the smooth, glossy texture essential for chocolate pies.
-
Unsweetened Cocoa Powder: For authentic flavor, use high-quality natural cocoa powder rather than Dutch-processed cocoa. Curious about the differences? Check out types of cocoa powder to learn more about how it impacts your pie’s flavor.
-
All-Purpose Flour and Cornstarch: These thickeners ensure a custard-like consistency. Flour adds body, while cornstarch offers silkiness without making the filling heavy.
-
Whole Milk: Full-fat milk is essential for achieving the creamy richness that defines this dessert. Avoid low-fat milk substitutes.
-
Egg Yolks: Vital for thickening the custard while adding depth of flavor. Proper tempering (gently heating without scrambling) is crucial for a successful filling.
-
Vanilla Extract: A small amount elevates the overall taste, tying together the cocoa and sugar perfectly. Learn more about using vanilla in desserts to see why it’s indispensable.
-
Unsalted Butter: Finishing the filling with butter adds gloss and a luxurious mouthfeel. Butter also enhances the richness of the cocoa flavor.
For the Crust:
-
9-Inch Pre-Baked Pie Crust: A sturdy, golden-brown base is critical. You can opt for a homemade crust or a quality store-bought version for ease. To learn about the heritage behind this staple, dive into the history of pie.
Optional Toppings:
-
Whipped Cream: Light and airy, it beautifully balances the richness of the filling.
-
Meringue: For a more vintage approach, topping with a cloud of meringue can turn your pie into a showstopper. Discover more about how to make meringue and its classic uses.
For a visual feast of topping ideas and pie decorations, explore homemade dessert ideas where you’ll find plenty of creative inspiration. Whether you top your pie with whipped cream peaks or a silky meringue, the right finishing touch will elevate your best homemade chocolate pie to an unforgettable level.
Step-by-Step Instructions for the Best Homemade Chocolate Pie
Making a classic and easy homemade chocolate pie is all about patience, precision, and using quality ingredients. Here’s how to do it:
1. Mix the Dry Ingredients
In a medium saucepan, whisk together the granulated sugar, unsweetened cocoa powder, flour, cornstarch, and salt until well combined. This dry mix is the foundation of your filling’s rich flavor and smooth texture.
2. Gradually Add the Milk
Slowly add the whole milk to the dry ingredients, whisking constantly to avoid lumps. Whisk until the mixture is completely smooth. Using whole milk ensures your custard will have the perfect creamy consistency, crucial for an old fashioned chocolate pie recipe made simple.
3. Cook and Thicken
Place the saucepan over medium heat. Stir constantly with a whisk or a heatproof spatula. As it heats, the mixture will begin to thicken and bubble. If you enjoy learning about classic custards, understanding what custard is helps you master the perfect thickness without overcooking.
Once bubbling, reduce the heat to low and cook for 1–2 minutes more, stirring all the time to prevent burning. Constant stirring ensures your filling remains silky.
4. Temper the Egg Yolks
In a small bowl, beat your egg yolks. Carefully spoon about ½ cup of the hot chocolate mixture into the egg yolks while whisking constantly. This step, known as tempering, prevents the eggs from scrambling.
5. Return Mixture to Saucepan
Slowly whisk the tempered egg yolks back into the saucepan. Return it to medium heat and continue stirring constantly until the mixture becomes very thick — it should hold a shape briefly when dripped from a spoon.
Explore more vintage pie variations, such as the Mississippi Mud Pie, for inspiration on creative chocolate pies.
6. Add Flavor Boosters
Remove from heat. Stir in the vanilla extract and unsalted butter until fully melted and incorporated. These ingredients add gloss and depth, essential for a best homemade chocolate pie.
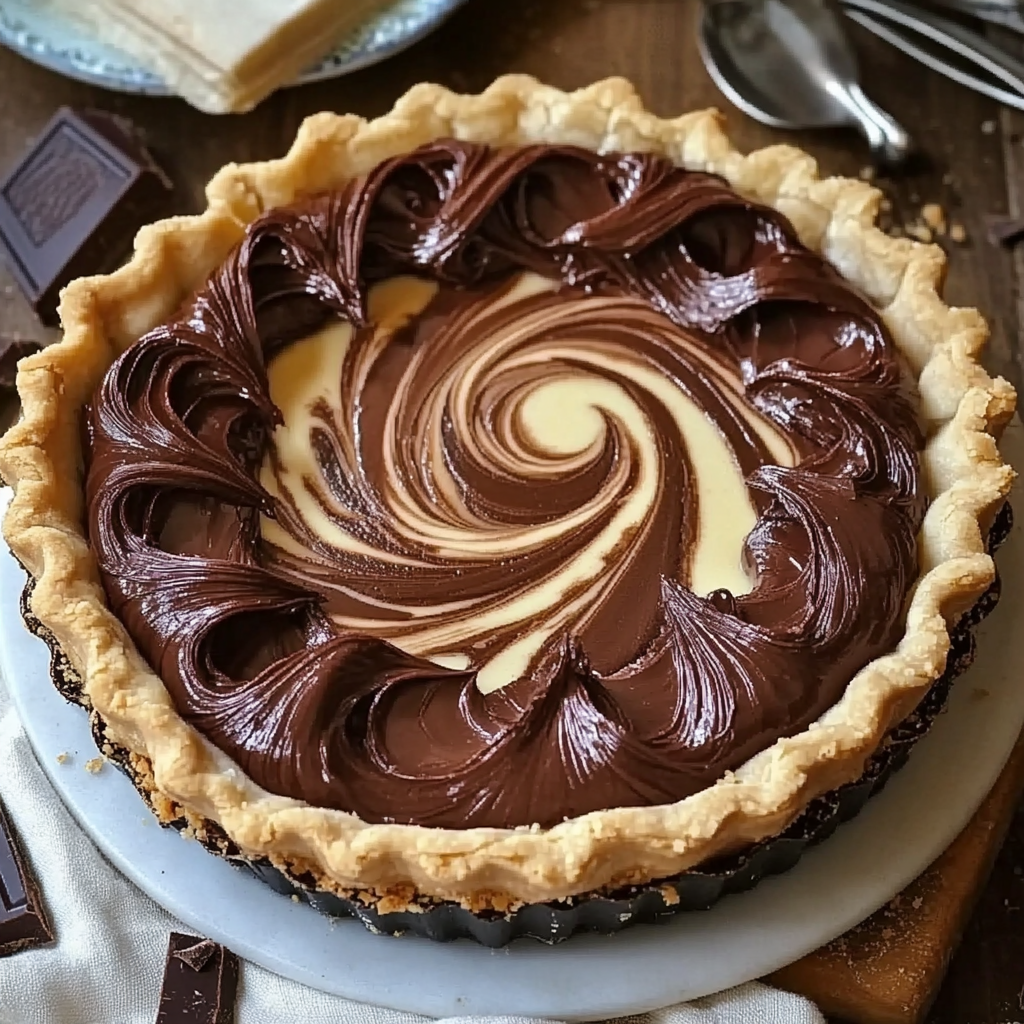
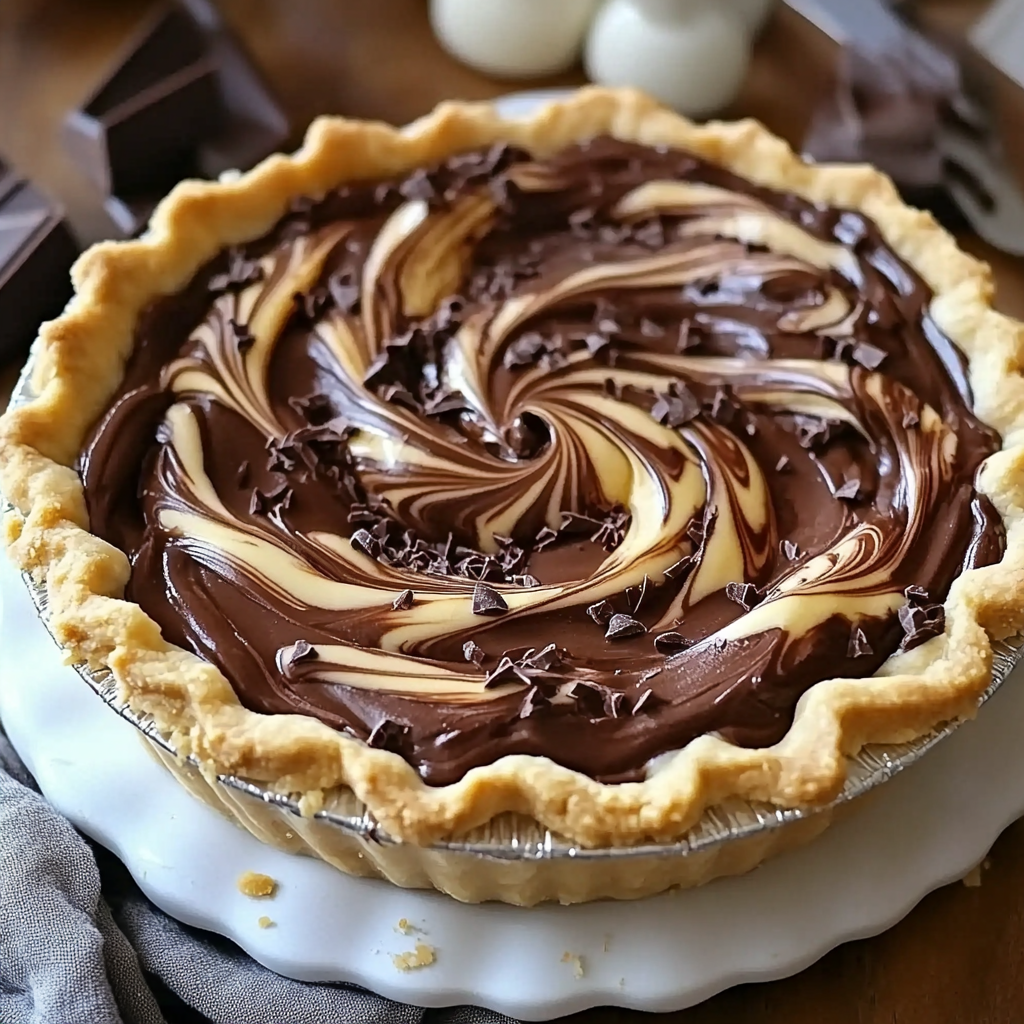
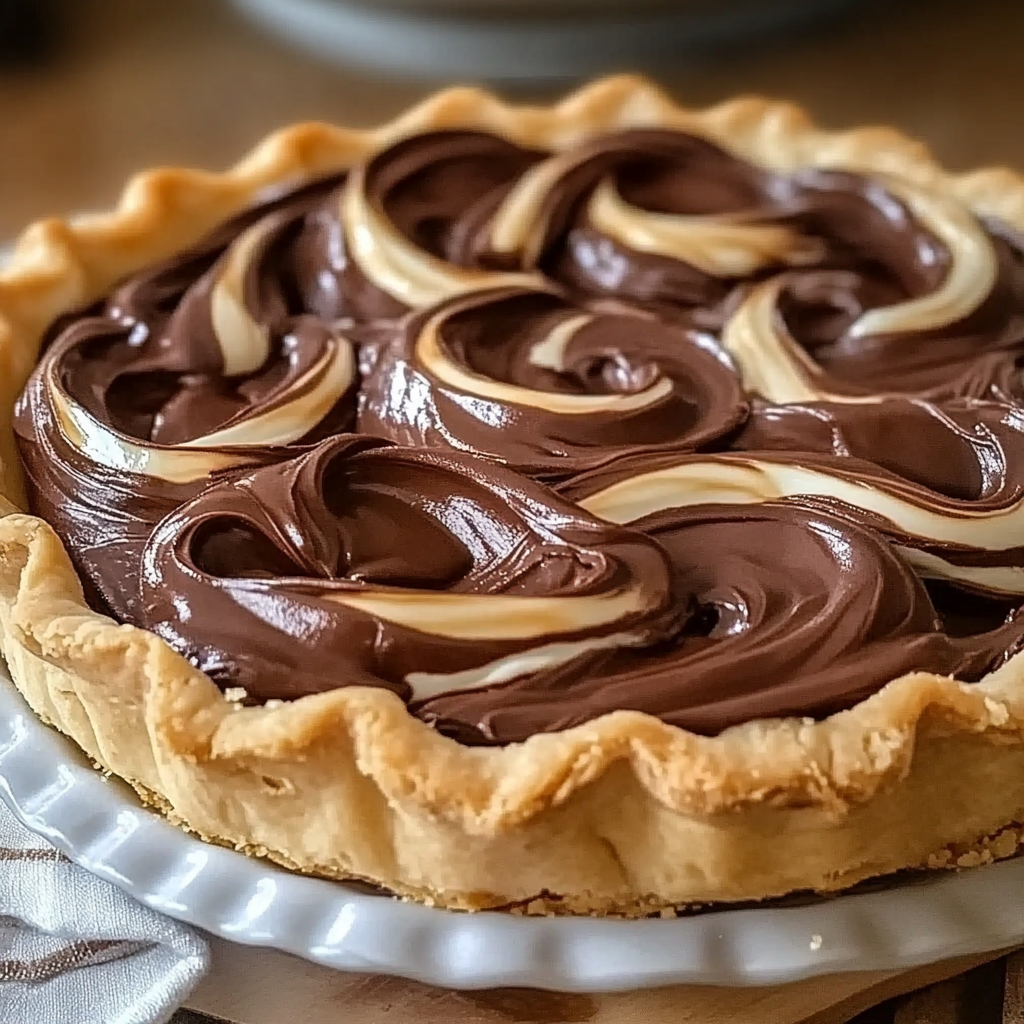
7. Assemble the Pie
Pour the hot filling into your pre-baked 9-inch pie crust. Smooth the top with a spatula to create an even surface.
If you’re searching for decorative ideas, Pinterest boards like classic dessert recipes offer beautiful examples of how to top your pie attractively.
8. Cool and Refrigerate
Let the pie cool at room temperature for about one hour. Cover loosely, then refrigerate for at least 3–4 hours until completely set. Proper chilling ensures clean, neat slices when serving.
Pro Tips for Perfect Chocolate Pie Every Time
Getting a classic chocolate pie just right involves a few small, but crucial details:
-
Whisk Constantly: Always stir when cooking the filling to avoid burning or lumps.
-
Proper Tempering: Carefully temper the egg yolks to maintain a silky texture without bits of cooked egg.
-
Quality Cocoa Powder: Choose a good brand of natural cocoa powder to maximize flavor.
-
Cooling Matters: Allow the pie to cool completely before slicing. Cutting too early will cause the filling to spill out.
-
Prevent a Skin: Place a piece of plastic wrap directly on the surface of the filling while cooling if you don’t want a skin to form.
Incorporating these techniques will ensure your old fashioned chocolate pie is smooth, rich, and bakery-quality every time.
Variations on the Classic Chocolate Pie
Want to personalize your homemade chocolate pie? Here are a few ideas:
-
Chocolate Cream Pie: After chilling, top the pie generously with sweetened whipped cream for a lighter finish.
-
Mississippi Mud Pie: Add chopped pecans and marshmallows into the filling for a decadent twist.
-
Chocolate Chess Pie: Increase the sugar slightly and omit the cornstarch for a firmer, custardy version.
-
Vegan Chocolate Pie: Use coconut milk instead of whole milk and swap egg yolks with cornstarch.
-
Mini Chocolate Pies: Make individual portions using mini pie crusts—perfect for parties.
Browse more homemade dessert ideas for extra inspiration
How to Store and Freeze Chocolate Pie
Proper storage is key to maintaining the texture and flavor of your classic chocolate pie:
-
Refrigerator: Cover loosely with plastic wrap or foil. The pie will stay fresh for up to 4 days.
-
Freezing: Slice the pie first, wrap each piece tightly in plastic wrap, then place in a freezer bag. It can be frozen for up to 2 months.
-
Thawing: Defrost slices overnight in the refrigerator. Avoid microwaving to maintain the filling’s structure.
Storing it well ensures every slice stays as delicious as the first.
Common Mistakes to Avoid
While making an easy homemade chocolate pie, avoid these common errors:
-
Overcooking the Custard: Stop cooking once the filling is thick and glossy.
-
Not Tempering Eggs Correctly: Scrambled eggs ruin the silky texture.
-
Skipping Pre-Baking: Always pre-bake the pie crust to avoid sogginess.
-
Cutting Too Soon: Let the pie chill thoroughly before slicing to avoid a messy presentation.
Following the method carefully prevents frustration and guarantees dessert success.
FAQs
Can I use a store-bought crust?
Yes! A quality store-bought crust works perfectly for this classic chocolate pie. Look for one that is pre-baked or partially baked for best results.
Can you make chocolate pie ahead of time?
Absolutely. In fact, making it a day in advance allows the flavors to meld beautifully. Just cover and refrigerate until serving.
What cocoa powder is best for chocolate pie?
Natural unsweetened cocoa powder is recommended for an old fashioned chocolate pie recipe made simple. Dutch-process cocoa can be used but will create a slightly different flavor.
Why is my chocolate pie filling runny?
This usually happens if the filling was not cooked long enough or if the pie was sliced before setting fully. Make sure to chill for at least 3–4 hours.
Can I make this pie without cornstarch?
Yes, you can substitute additional flour, but cornstarch gives a silkier finish. For a custardy feel, check what custard is and adapt accordingly.
Should I use whipped cream or meringue on top?
Both are delicious! Whipped cream offers a lighter topping, while meringue gives a dramatic, vintage look. See more on how to make meringue if you choose that route.


