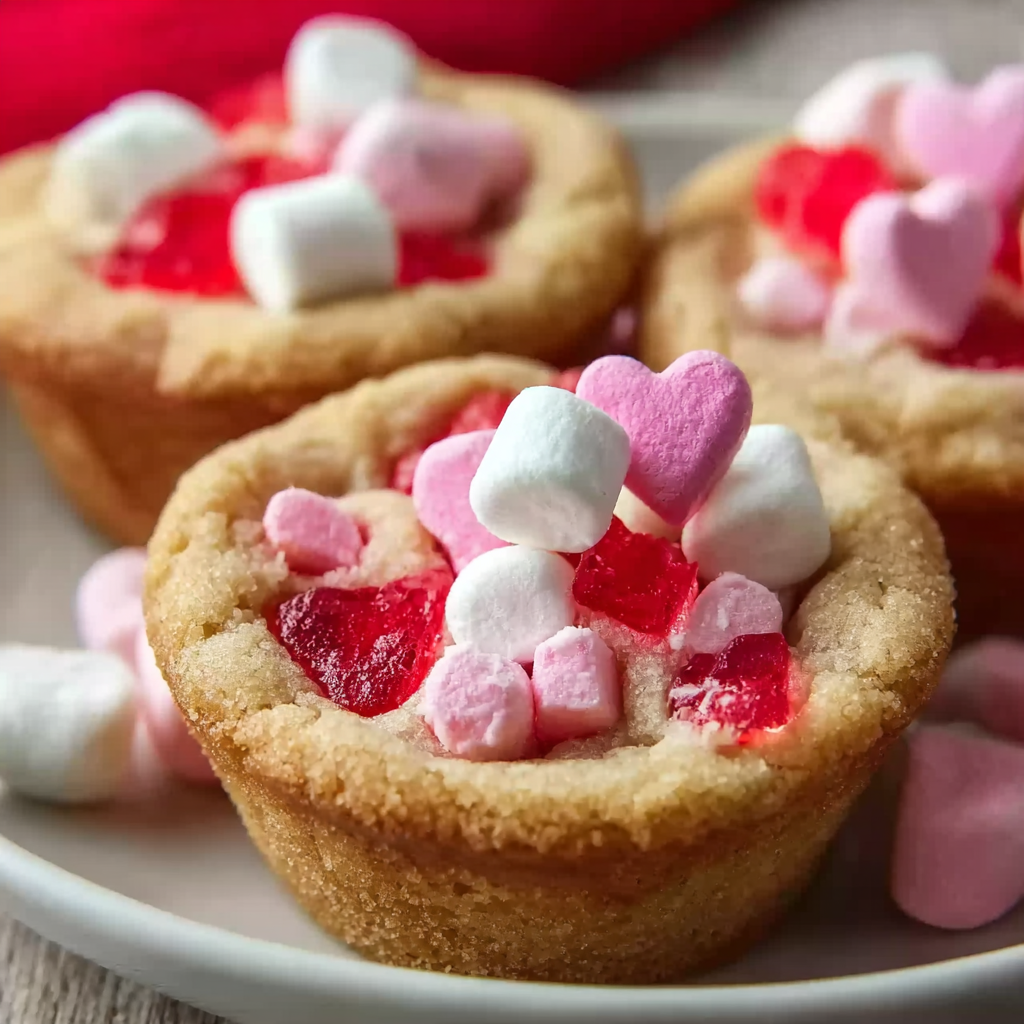
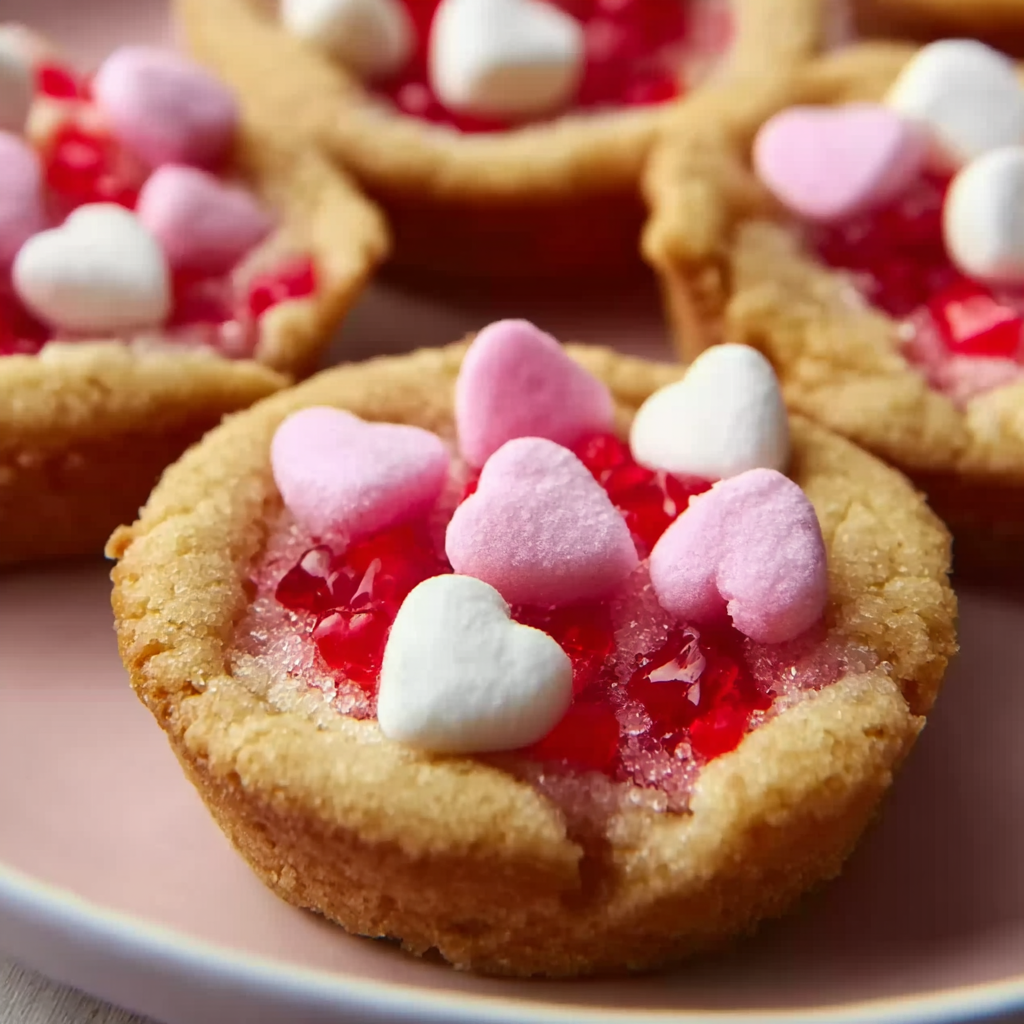
Valentine’s Day has a way of turning even the simplest treats into something magical. Whether you’re planning a cozy evening at home, packing sweet surprises for a classroom party, or setting up a festive dessert table for friends, these Valentines Day Cookie Cups are the perfect way to celebrate. Their soft, chewy edges and creamy centers make every bite feel special.
This recipe was inspired by the joy of baking heart-themed treats with family each February. Instead of traditional cookies, we began shaping them into cups and filling them with colorful frosting and festive toppings. The result? A charming, easy Valentine dessert that looks impressive but comes together with minimal effort.
Why You’ll Love These Valentines Day Cookie Cups
There’s something irresistible about handheld desserts. Cookie cups combine the nostalgic comfort of homemade cookies with the elegance of a filled dessert. Here’s why they’ll become your new Valentine’s favorite:
Easy to make – Simple ingredients and beginner-friendly steps
Festive and customizable – Decorate with pink, red, and white toppings
Perfect for sharing – Great for parties, school events, or gifting
Make-ahead friendly – Bake the cups in advance and fill later
They’re soft in the center, lightly crisp around the edges, and perfectly shaped to hold frosting, chocolate ganache, or even whipped cream.
Ingredients You’ll Need
Using pantry staples makes this recipe approachable and convenient. Here’s everything required to create these delightful cookie cups:
For the Cookie Cups:
2 1/4 cups (280 g) all-purpose flour
1 teaspoon baking soda
1/2 teaspoon salt
3/4 cup (170 g) unsalted butter, softened
3/4 cup (150 g) granulated sugar
3/4 cup (165 g) light brown sugar, packed
2 large eggs, room temperature
2 teaspoons pure vanilla extract
1 cup (180 g) semi-sweet chocolate chips
1/2 cup (90 g) red and pink candy-coated chocolates
For the Frosting Filling:
1/2 cup (115 g) unsalted butter, softened
2 cups (240 g) powdered sugar
2–3 tablespoons (30–45 ml) heavy cream or milk
1 teaspoon vanilla extract
Pink or red gel food coloring (optional)
Optional Toppings:
Heart-shaped sprinkles
Mini chocolate chips
Fresh strawberries, diced
White chocolate drizzle
Step-by-Step Instructions
1. Prepare Your Oven and Pan
Preheat your oven to 350°F (175°C). Lightly grease a standard 12-cup muffin tin or use nonstick spray to ensure easy removal.
2. Mix the Dry Ingredients
In a medium bowl, whisk together the flour, baking soda, and salt. Set aside.
3. Cream the Butter and Sugars
In a large mixing bowl, beat the softened butter, granulated sugar, and brown sugar together for 2–3 minutes until light and fluffy.
4. Add Eggs and Vanilla
Mix in the eggs one at a time, then add the vanilla extract. Beat until fully incorporated.
5. Combine Wet and Dry Ingredients
Gradually add the dry ingredients to the wet mixture, mixing until just combined. Fold in the chocolate chips and candy-coated chocolates.
6. Shape the Cookie Cups
Scoop about 2 tablespoons of dough into each muffin cavity. Press lightly to fill the bottom evenly.
Bake for 12–15 minutes or until the edges are golden brown.
7. Create the Cup Shape
Immediately after removing from the oven, use the back of a teaspoon or a small measuring spoon to press down the center of each cookie, forming a well. Let cool in the pan for 10 minutes before transferring to a wire rack.
8. Prepare the Frosting
Beat the butter until creamy. Gradually add powdered sugar, then mix in vanilla and cream until smooth. Add food coloring if desired.
9. Fill and Decorate
Once cookie cups are completely cool, pipe frosting into the centers. Top with sprinkles, chocolate drizzle, or fresh fruit for a festive Valentine’s finish.
Creative Variations
One of the best parts about Valentines Day Cookie Cups is how customizable they are. Here are a few delicious twists:
Chocolate Lovers Version
Replace 1/2 cup (60 g) of flour with 1/2 cup (50 g) cocoa powder for chocolate cookie cups.
Strawberry Cream Filling
Fold 2 tablespoons (30 g) strawberry jam into the frosting for a fruity center.
Cheesecake Style
Fill the cooled cups with sweetened cream cheese mixture (8 oz / 225 g cream cheese + 1/3 cup / 40 g powdered sugar + 1 teaspoon vanilla).
Nutty Crunch
Add 1/2 cup (60 g) chopped toasted almonds or pecans to the dough for texture.
Tips for Perfect Cookie Cups
Do not overbake. Slightly soft centers keep the cups tender.
Press immediately after baking. The cookie is easiest to shape while warm.
Cool completely before filling. Warm cups will melt the frosting.
Use a piping bag. It makes the filling look polished and bakery-worthy.
Make-Ahead and Storage
You can bake the cookie cups up to 2 days in advance. Store them unfilled in an airtight container at room temperature. Frost and decorate the day you plan to serve for the freshest look.
Filled cookie cups can be stored in the refrigerator for up to 3 days. Allow them to sit at room temperature for 20 minutes before serving.
You may also freeze the unfilled cookie cups for up to 2 months. Thaw overnight in the refrigerator before decorating.
Frequently Asked Questions
1. Can I make Valentines Day Cookie Cups ahead of time?
Yes, these cookie cups are excellent for advance preparation. You can bake the cookie bases up to two days before Valentine’s Day and store them in an airtight container at room temperature. This helps maintain their soft texture without becoming stale. If you need to prepare them even earlier, freezing is a great option. Place the cooled, unfilled cookie cups in a freezer-safe container, separating layers with parchment paper. They can be frozen for up to two months. When ready to use, allow them to thaw overnight in the refrigerator, then bring them to room temperature before filling and decorating. Frosting can also be made a day ahead and stored in the refrigerator. Simply re-whip it briefly before piping for the best texture.
2. Why did my cookie cups sink too much in the center?
It’s completely normal for cookie cups to settle slightly in the middle after baking. However, excessive sinking can happen if the dough is too soft or if there isn’t enough flour. Make sure to measure your flour correctly by spooning it into the measuring cup and leveling it off, rather than scooping directly from the bag. Another key step is pressing the center immediately after removing the pan from the oven. The cookie structure is still flexible at this stage, making it easier to form a defined well. If you wait too long, the cookie firms up and may crack when pressed. Also, avoid overmixing the dough, which can incorporate too much air and affect the structure.
3. Can I use store-bought cookie dough?
Yes, store-bought cookie dough can be used if you’re short on time. Choose a high-quality chocolate chip dough for best results. Keep in mind that different brands vary in sweetness and spread, so you may need to adjust baking time slightly. Use about 2 tablespoons of dough per muffin cavity and bake according to package directions, checking a few minutes early to prevent overbaking. Even when using pre-made dough, the step of pressing the center after baking remains essential to create the cup shape. While homemade dough provides richer flavor and better texture control, store-bought dough offers convenience without sacrificing too much quality.
4. What other fillings can I use besides frosting?
The possibilities are endless when it comes to filling these Valentine cookie cups. Chocolate ganache made with 1/2 cup (120 ml) warm heavy cream and 1 cup (170 g) chocolate chips creates a rich, glossy center. Whipped cream with fresh berries offers a lighter option. You can also fill them with vanilla pudding, lemon curd, or a sweetened cream cheese mixture. For a festive Valentine’s twist, try adding strawberry preserves under the frosting or sprinkling crushed freeze-dried strawberries on top. The key is ensuring the cookie cups are fully cooled before adding any filling to prevent melting or sogginess. Experimenting with different textures and flavors makes this dessert versatile for many occasions beyond Valentine’s Day.
Final Thoughts
Valentines Day Cookie Cups are more than just a dessert; they’re a heartfelt way to celebrate love and connection. Their charming appearance makes them ideal for gifting, party platters, or a romantic dinner finale. Each cup is like a tiny edible bouquet, filled with sweetness and creativity.
What makes this recipe truly special is its flexibility. You can tailor the flavors, colors, and decorations to match your celebration style. Whether you prefer classic chocolate chip, vibrant pink frosting, or a fruity filling, the base recipe adapts beautifully. Even young bakers can help scoop dough, press centers, and sprinkle toppings, making it a wonderful family activity.
Beyond Valentine’s Day, this cookie cup method works for birthdays, baby showers, and holiday gatherings. Simply switch the colors and decorations to fit the theme. Once you master the basic technique, the possibilities are endless.
Baking these cookie cups brings warmth to the kitchen and joy to those who receive them. There’s something timeless about sharing homemade treats, especially when they’re crafted with care. This easy festive Valentine dessert is sure to become a cherished tradition year after year.