Why You’ll Love This Recipe
On busy weeknights, simplicity and speed in the kitchen are crucial. These cheesy baked yellow squash rounds meet both requirements with ease. They deliver crisp texture, savory flavor, and a touch of indulgence without compromising nutrition. This dish is an ideal vegetable side that complements almost any main course or stands alone as a light, satisfying snack.
Whether you’re looking for a new way to enjoy yellow squash or trying to get your family to eat more vegetables, this recipe hits the mark. It uses basic pantry ingredients and comes together in under 20 minutes from start to finish, making it a reliable go-to when time is short. You don’t need fancy tools—just a baking sheet, a sharp knife, and your oven. The use of cheddar and Parmesan cheese ensures a golden, crispy finish, while a light seasoning adds depth without overpowering the natural sweetness of the squash.
Squash is often overlooked, yet it’s one of the most versatile summer vegetables available. According to Wikipedia, yellow squash belongs to the summer squash family and is known for its tender skin and mild flavor. This dish celebrates that quality by roasting it to caramelized perfection.
Looking for other healthy, easy vegetable dishes to pair with your main course? Check out this roundup of healthy vegetable side dishes on Pinterest for inspiration beyond squash.
Cheesy squash rounds are also great for:
-
Low-carb and gluten-free diets
-
Quick after-school snacks
-
Light vegetarian lunches
-
Creative additions to grain bowls or salads
And because they taste amazing fresh or reheated, they’re a smart choice for meal prep. Once you make them, you’ll understand why they’re so addictive.
Ingredients Breakdown and Substitutes
Making cheesy baked yellow squash rounds is straightforward, but knowing the role of each ingredient helps customize the recipe to your taste or dietary needs. Here’s a breakdown of the core ingredients and some smart substitutes.
-
Yellow Squash (2 medium)
Yellow squash is naturally tender, making it ideal for roasting. Aim for squash that’s firm with vibrant yellow skin. As a summer squash, it’s low in calories and high in vitamin C. Learn more about its nutritional benefits on Wikipedia. -
Olive Oil (1 tbsp)
This helps the seasoning stick and promotes browning in the oven. If you’re out of olive oil, use avocado oil or melted butter. For a health-forward option, Wikipedia’s olive oil article details its heart-friendly fats and antioxidants. -
Garlic Powder (½ tsp)
Garlic powder brings a subtle savory depth without overpowering the dish. You could substitute with onion powder or a pinch of fresh minced garlic for a stronger bite. See the full profile of garlic powder on Wikipedia. -
Salt and Pepper (to taste)
Essential for balancing flavors. Adjust depending on how salty your cheese is. -
Shredded Cheddar Cheese (½ cup)
Cheddar melts beautifully and gives that classic gooey texture. Swap in Monterey Jack or mozzarella for a milder flavor. For crispier results, use sharp cheddar, which browns more quickly. -
Grated Parmesan Cheese (¼ cup)
Parmesan enhances crispiness and adds a nutty, salty flavor. Since it browns quickly, it helps achieve that desirable crunchy top. Want to learn more about the cheese itself? Explore Parmesan cheese history on Wikipedia. -
Optional Garnish: Fresh Parsley
Adds freshness and a pop of color. Chives or basil work just as well for different herbal notes.
If you’re leaning toward a plant-based version, there are excellent vegan cheese substitutes available. Nutritional yeast also adds a cheesy flavor without dairy. For those on a keto diet, incorporating almond flour or crushed pork rinds as a base before adding cheese can boost crispiness and lower carbs.
Need visual inspiration for alternative ingredient ideas? Explore this Pinterest board for cheesy baked vegetable recipes that include swaps and serving options.
Each component in this dish works together to create something that’s more than the sum of its parts. The key is balance—between crispy and tender, savory and sweet, fresh and comforting.
How to Pick the Best Yellow Squash
Choosing the right yellow squash is essential to achieving the perfect cheesy baked rounds. Poor-quality squash can result in soggy texture, bitter flavor, or uneven cooking. With a few simple tips, you can ensure your dish starts with the best foundation possible.
1. Size Matters
Select medium-sized squash—about 6 to 8 inches long. Smaller squash tend to have more concentrated flavor and fewer seeds, while larger ones often contain excess moisture and tougher skin. Overripe squash can also have a mealy texture, which isn’t ideal for baking.
2. Check for Firmness and Color
The skin should be bright yellow and smooth, without blemishes or dark spots. Gently press near the stem to test for firmness—avoid squash that feels soft or has wrinkles, as this indicates aging or dehydration. A good squash feels heavy for its size and gives slightly under pressure without being mushy.
3. Freshness Is Key
Freshly harvested squash yields the best texture and taste. If shopping at a market, ask when the produce was picked. During summer, yellow squash is abundant, but it’s available year-round in many grocery stores. Wikipedia offers more insights on the growing season and varieties.
4. Avoid Watery Squash
Water content affects how crispy your rounds will get. Choose squash with dense flesh, which feels heavier and less spongy. After slicing, pat the rounds dry with a paper towel before seasoning to reduce excess moisture. For more tricks on how to bake vegetables like a pro, refer to this Pinterest guide that shares tips for crispy roasted produce.
5. Organic vs. Conventional
While conventional squash is fine for baking, organic squash may be preferable if you’re eating the skin, which you do in this recipe. Always wash your squash thoroughly before slicing, regardless of type.
Mastering your squash selection makes a huge difference in how the final dish turns out. The right texture, flavor, and moisture content will allow your cheese to crisp properly and enhance the natural sweetness of the vegetable. Selecting quality ingredients is the first step in elevating any simple recipe.
Step-by-Step Guide to Making Crispy Cheesy Squash Rounds
Making cheesy baked yellow squash rounds is as easy as it is rewarding. The key to success is attention to detail—how you slice, season, and bake will determine whether your rounds turn out soggy or irresistibly crispy. Follow this step-by-step process for consistently delicious results.
Step 1: Preheat and Prepare Your Baking Surface
Start by preheating your oven to 400°F (200°C). While it heats, line a baking sheet with parchment paper or lightly grease it with olive oil. Lining helps prevent sticking and encourages even browning. You can learn more about the benefits of parchment paper in cooking via Wikipedia.
Step 2: Slice the Yellow Squash Evenly
Cut the squash into ¼-inch thick rounds. Consistency in thickness is crucial to ensure all slices cook evenly. If you’re slicing by hand, take your time or use a mandoline for greater precision. Uneven slices can result in overcooked edges or underdone centers.
Step 3: Season the Squash
Place the sliced squash in a mixing bowl. Drizzle with 1 tablespoon of olive oil, then add ½ teaspoon of garlic powder, salt, and pepper to taste. Toss until all pieces are evenly coated. Proper seasoning enhances flavor while the oil helps with crisping.
If you’re experimenting with flavors, consider these variations:
-
Add smoked paprika for a smoky profile.
-
Use Italian seasoning for a Mediterranean twist.
-
Sprinkle chili flakes for a touch of heat.
For more recipe flavor inspiration, check out this Pinterest board featuring cheesy squash variations.
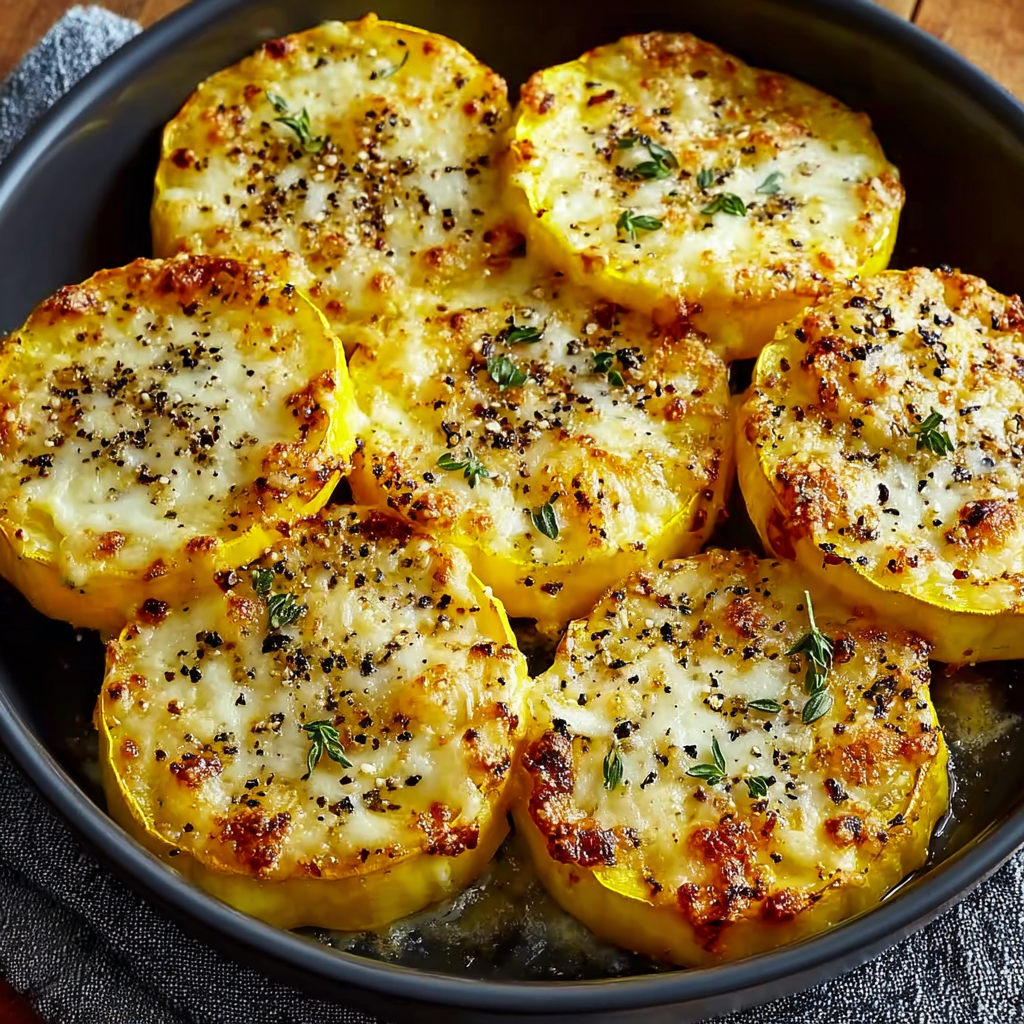
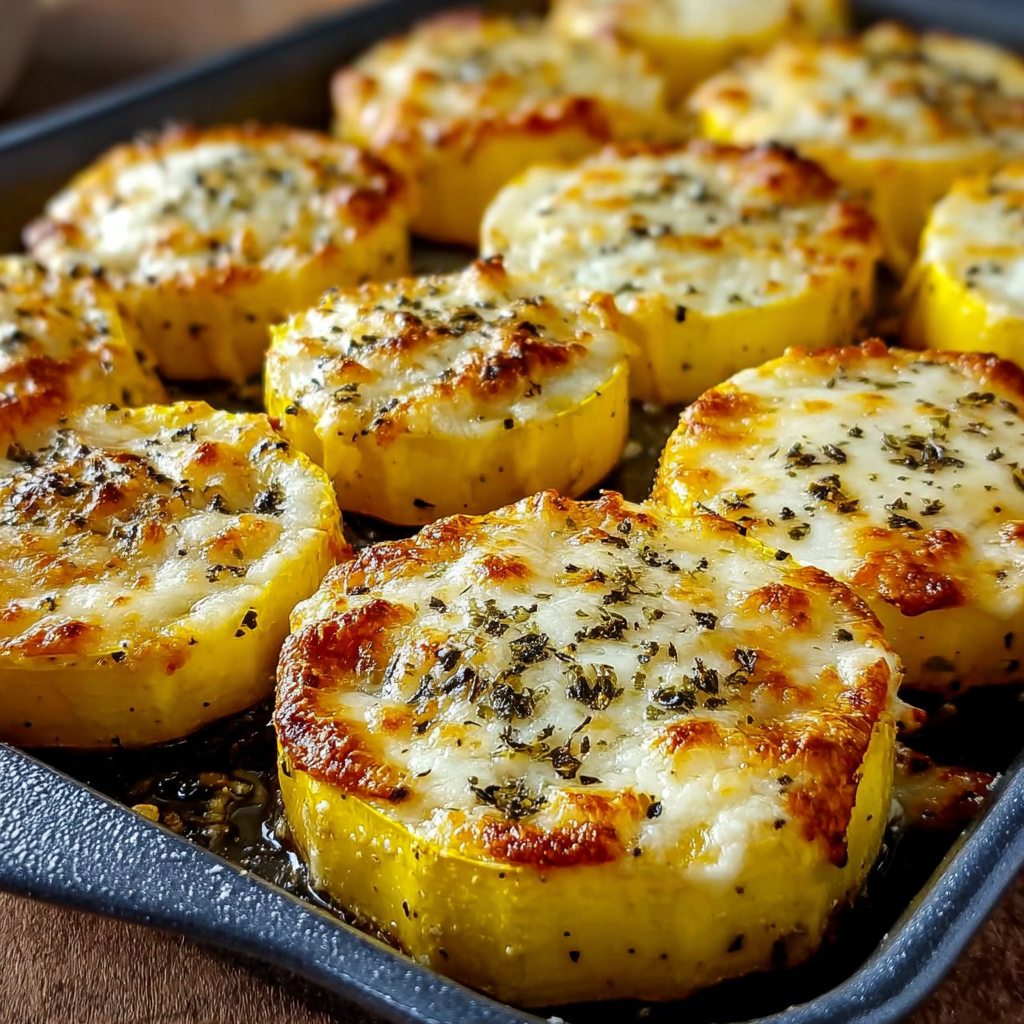
Step 4: Arrange on the Baking Sheet
Lay the squash slices in a single layer, without overlapping. This is important—crowding the pan leads to steaming instead of roasting. Give each slice enough space to allow moisture to evaporate and the cheese to crisp.
Step 5: Add the Cheese
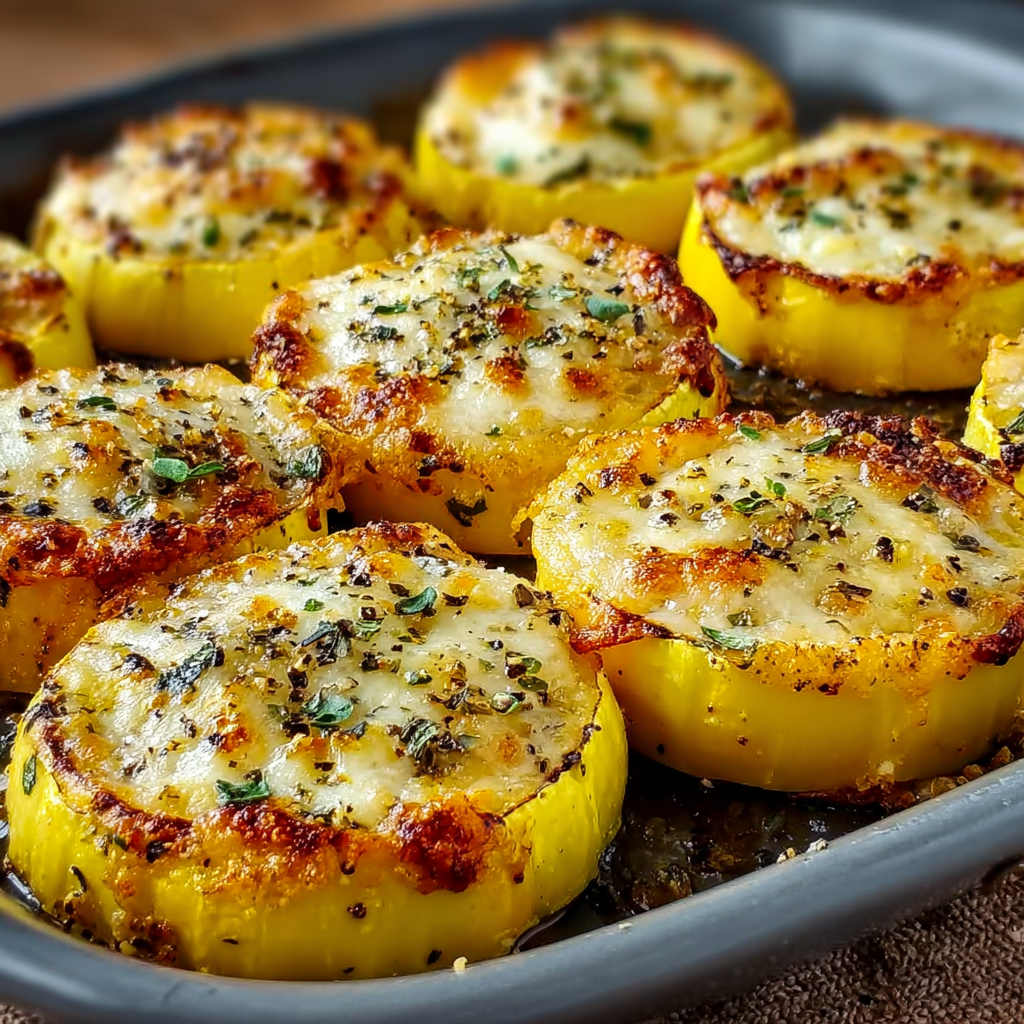
Combine ½ cup of shredded cheddar cheese and ¼ cup of grated Parmesan cheese in a bowl. Sprinkle a generous pinch of the mixture over each squash round. Parmesan is the secret to a crisp, golden finish, while cheddar provides the melty texture. For best results, shred the cheese fresh rather than using pre-shredded varieties, which often contain anti-caking agents that affect melt quality.
Step 6: Bake to Perfection
Place the tray in the preheated oven and bake for 15 to 18 minutes, or until the cheese is bubbly and golden brown. To achieve maximum crispiness, broil the rounds for the final 1–2 minutes, watching closely to avoid burning. This quick blast of high heat caramelizes the cheese and edges beautifully.
If you’re exploring different baking techniques, like air frying, many home cooks have shared tips on this Pinterest pin for baking vegetables.
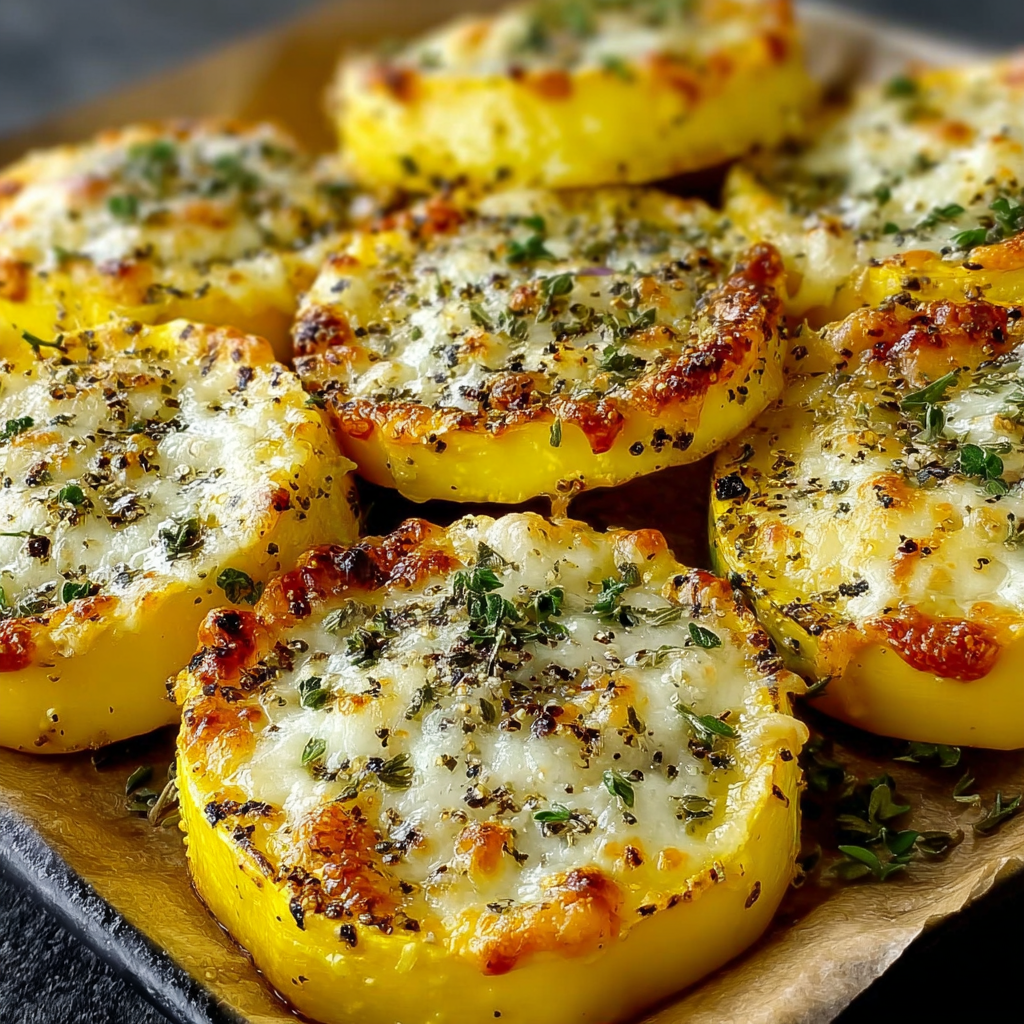
Step 7: Let Cool and Garnish
Remove from the oven and let the rounds cool for a few minutes to allow the cheese to set. If desired, sprinkle with chopped parsley for a fresh, herbal finish. Chives or basil also work well here.
Once slightly cooled, serve the squash warm. These rounds are ready to enjoy as a side, snack, or tasty topping for your favorite dishes.
How to Make Them Extra Crispy
One of the most common challenges when baking yellow squash is achieving that golden, crispy texture—especially since squash has a high moisture content. With just a few adjustments, you can take your cheesy baked squash rounds from soft and melty to crisp and caramelized.
1. Pat the Squash Dry Before Baking
After slicing, lay the squash rounds on a clean kitchen towel or paper towel. Lightly salt them and let them sit for 10–15 minutes. This draws out excess moisture. Then, blot the slices dry. Removing surface water is essential for browning and preventing sogginess. According to Wikipedia’s guide to baking sheets and parchment, excess moisture can reduce the effectiveness of dry-heat cooking methods like roasting or broiling.
2. Use Parchment Paper or a Wire Rack
Parchment paper allows even heat distribution and prevents sticking. For even better airflow, use a wire rack placed over a baking sheet so heat circulates underneath each slice. This mimics the results of air frying without needing a separate appliance.
3. Try a Broil Finish
Once your rounds have roasted for 15–18 minutes, switch your oven to broil for the final 1–2 minutes. Keep a close eye on them. This blast of direct heat melts and browns the cheese into a crispy layer and creates slightly charred edges on the squash.
4. Choose Cheese That Crisps
While cheddar is excellent for meltiness, Parmesan is what creates that signature golden crunch. Using a higher ratio of Parmesan to cheddar will improve crispiness. Pre-grated cheese often contains moisture-retaining anti-caking agents—opt for freshly grated cheese for the best results. If you’re interested in learning more, check out the Wikipedia article on Parmesan cheese.
5. Don’t Overcrowd the Pan
Leave space between each slice. Overcrowding traps steam, which softens the squash instead of crisping it. One large baking sheet or two smaller ones usually provide enough space for 2 sliced squash.
If you want visual examples of baked vegetable crisping techniques, this Pinterest collection of roasted veggie hacks is a great place to explore.
Using these tips, your cheesy squash rounds will have a perfectly crisp base and bubbling, golden topping every time.
Storage, Reheating, and Make-Ahead Tips
Once you’ve mastered the art of making crispy cheesy baked yellow squash rounds, you’ll likely want to keep leftovers—or prep a batch ahead for busy days. Luckily, this dish stores and reheats well with just a few best practices.
Storing Leftovers
-
Store fully cooled rounds in an airtight container.
-
Keep them in the refrigerator for up to 4 days.
-
For best texture, place a piece of paper towel at the bottom of the container to absorb excess moisture.
Freezing: Not Recommended
Due to the high water content in squash, freezing can cause the texture to break down. When thawed, the rounds tend to become soggy, even after reheating. If you’re prepping meals in advance, it’s better to slice and season the squash, then store it raw in the fridge for up to 24 hours.
Reheating for Crispiness
-
Reheat in a toaster oven or regular oven at 375°F for 5–7 minutes.
-
Avoid microwaving—they’ll turn limp and lose all crispiness.
-
An air fryer is another excellent option. Set it to 375°F for 3–5 minutes.
Make-Ahead Prep Options
-
Slice ahead: Slice the squash up to 24 hours in advance and store in a sealed container with a paper towel.
-
Season ahead: You can season the rounds and store them in the fridge for a few hours before baking.
-
Fully bake ahead: Bake and cool, then reheat as needed. Use the oven or air fryer for best results.
Need more ideas for easy make-ahead sides? Check out this collection of weeknight dinner sides on Pinterest to round out your meals with low-effort, high-flavor recipes.
Creative Ways to Serve Cheesy Baked Squash Rounds
Versatile and flavorful, these cheesy squash rounds can be served far beyond the role of a basic side dish. Whether you’re planning a full dinner or assembling a light lunch, they adapt easily to any mealtime scenario.
On Salads
Top a fresh green salad with cooled rounds for a warm, crispy element. They add texture and flavor, making even a simple salad more exciting.
In Grain Bowls
Add to bowls filled with quinoa, farro, or brown rice, along with roasted veggies and a protein. The cheesy squash acts like a topping and a flavor anchor.
As a Side Dish
Pair with grilled chicken, baked salmon, or pasta dishes. The savory flavor and golden crust make it an ideal match for many mains.
As a Snack or Appetizer
Serve with a dipping sauce like garlic aioli, ranch, or marinara. Stack a few rounds with fresh tomato slices and basil for mini caprese stacks.
As Squash “Nachos”
Lay the rounds on a plate and top with salsa, avocado, and black beans for a healthy take on nachos.
Want more visual ideas for presentation? Explore healthy vegetable side dish inspiration on Pinterest for beautiful serving suggestions.
Variations to Try
One of the best things about this recipe is its adaptability. You can adjust it to fit different dietary needs, spice levels, or just to switch things up.
1. Zucchini Swap
Zucchini can be used in place of yellow squash. It has a similar texture and baking time. Choose small to medium zucchini for best results.
2. Add Breadcrumbs
Sprinkle seasoned breadcrumbs on top of the cheese for extra crunch. Use panko for a lighter, crispier topping.
3. Make It Spicy
Add red pepper flakes or sliced jalapeños before baking. A dash of cayenne mixed into the cheese also brings heat.
4. Mediterranean-Inspired
Replace cheddar with crumbled feta and season with oregano. Add a squeeze of lemon juice before serving for brightness.
5. Keto-Friendly Upgrade
Sprinkle a light coating of almond flour under the cheese or use crushed pork rinds to add a breadcrumb-like texture while keeping carbs low. For more keto-friendly inspiration, browse this Pinterest board on low-carb squash recipes.
These simple changes let you reinvent the dish for different occasions while staying true to its easy, delicious roots.
Nutrition & Dietary Considerations
This recipe delivers big flavor without compromising on nutrition, making it an excellent option for those with specific dietary goals.
-
Low in Carbs: Yellow squash contains fewer carbs than starchy vegetables, making this dish suitable for low-carb and keto diets.
-
Gluten-Free: Naturally gluten-free—just confirm that the cheese and seasonings used are certified gluten-free.
-
Vegetarian: Made without meat and perfect for vegetarians.
-
Can Be Made Vegan: Use dairy-free cheese alternatives and olive oil instead of butter to make this a vegan-friendly recipe.
According to Wikipedia, olive oil adds beneficial fats, making this dish a heart-healthier option. For those watching calories, reduce cheese quantities slightly without sacrificing flavor.
FAQs Section
What is the best way to cook yellow squash?
Baking or roasting is ideal, especially when you want a crisp texture. Sautéing and grilling are also excellent options, but baking with cheese maximizes flavor and texture with minimal prep.
Can you eat the skin on yellow squash?
Yes, the skin is thin and entirely edible. In fact, it helps the rounds hold their shape while baking. No need to peel—just wash thoroughly.
How do you keep squash from getting soggy when baking?
Slice evenly, pat dry, salt lightly to draw out moisture, and give the rounds space on the baking sheet. Using Parmesan cheese, which crisps up well, also helps.
What cheeses work best for baking on squash?
Sharp cheddar for meltiness and flavor, Parmesan for crispiness. You can also try mozzarella, Monterey Jack, or vegan cheese blends for variations.
Is yellow squash low in carbs?
Yes. It’s naturally low in carbohydrates and calories, making it ideal for keto, low-carb, or calorie-conscious diets.
Can I prep baked squash rounds ahead of time?
Absolutely. You can slice and season the squash in advance or fully bake and reheat them later using the oven or air fryer to restore crispiness.
Yellow Squash Bake Guide Crispy Cheesy Baked Squash Rounds

Quick, crispy, and loaded with savory cheese, these Cheesy Baked Yellow Squash Rounds are the perfect way to elevate your veggie game. Made with just a handful of pantry staples, this recipe delivers maximum flavor with minimal effort. Whether you’re cooking for the family or preparing a solo weeknight meal, these roasted rounds make the ideal side, snack, or appetizer. With their golden, bubbling cheese and tender squash base, they’re bound to become a new favorite in your kitchen.
- Author: Clara
Ingredients
- 2 medium yellow squash, sliced into ¼-inch rounds
- 1 tbsp olive oil
- ½ tsp garlic powder
- Salt and pepper to taste
- ½ cup shredded cheddar cheese
- ¼ cup grated Parmesan cheese
- Optional: chopped fresh parsley for garnish
Instructions
Preheat your oven to 400°F (200°C) and line a baking sheet with parchment paper or lightly grease it.
In a bowl, toss the squash rounds with olive oil, garlic powder, salt, and pepper until evenly coated.
Arrange the squash slices in a single layer on the prepared baking sheet.
Sprinkle a mixture of cheddar and Parmesan cheeses evenly over the top of each squash slice.
Bake for 15 to 18 minutes, or until the squash is tender and the cheese is melted and golden.
Remove from oven and let cool slightly. Garnish with chopped parsley if desired.
Serve warm as a side dish or snack.
Notes
-
For best crispiness, don’t skip the step of drying the squash after slicing.
-
Use fresh grated cheeses for optimal melting and browning.
-
Want more crunch? Add a sprinkle of panko or almond flour before baking.
-
Don’t crowd the pan—space allows for proper roasting and prevents steaming.
-
Store leftovers in the fridge for up to 4 days and reheat in the oven or air fryer for best results.
-
Customize with Italian, spicy, or Mediterranean seasonings for variety.

Your writing is not only informative but also incredibly inspiring. You have a knack for sparking curiosity and encouraging critical thinking. Thank you for being such a positive influence!