1.Quick Old Fashioned Cherry Cobbler
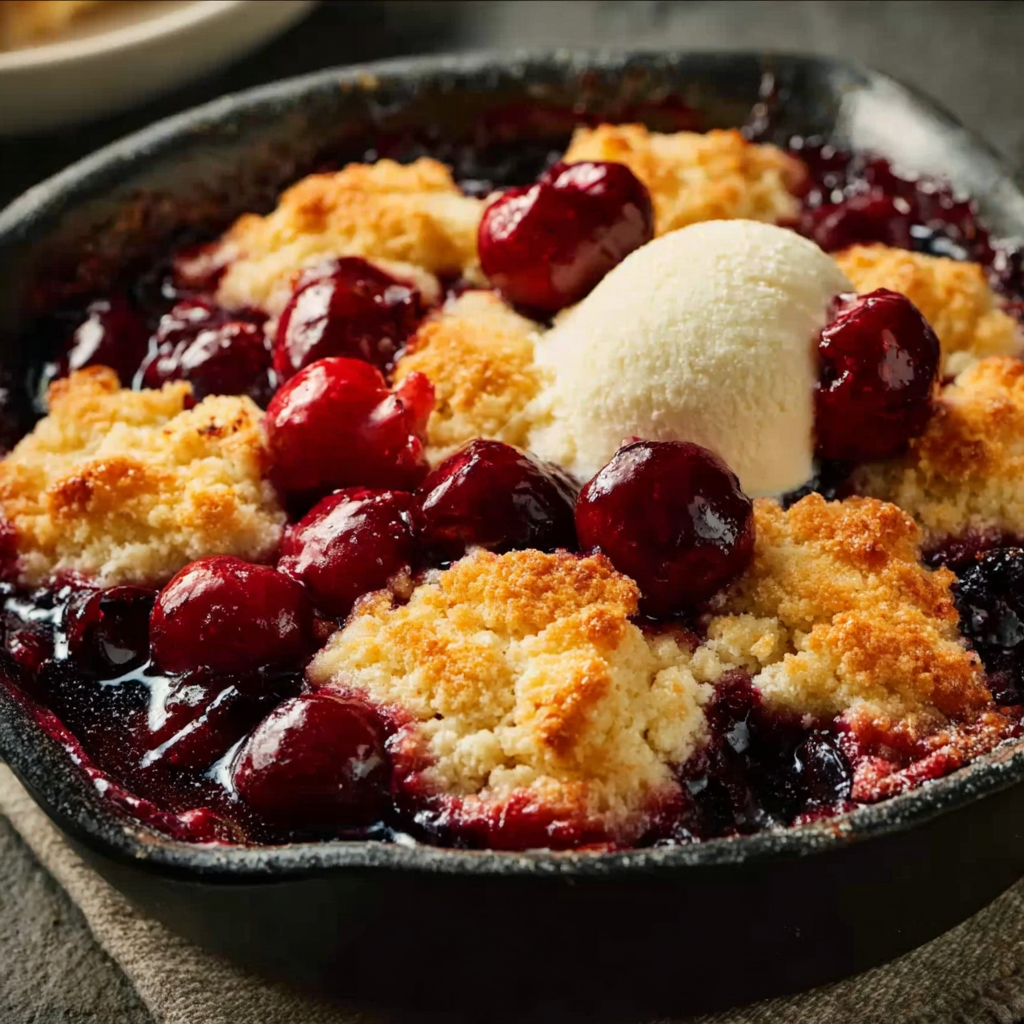
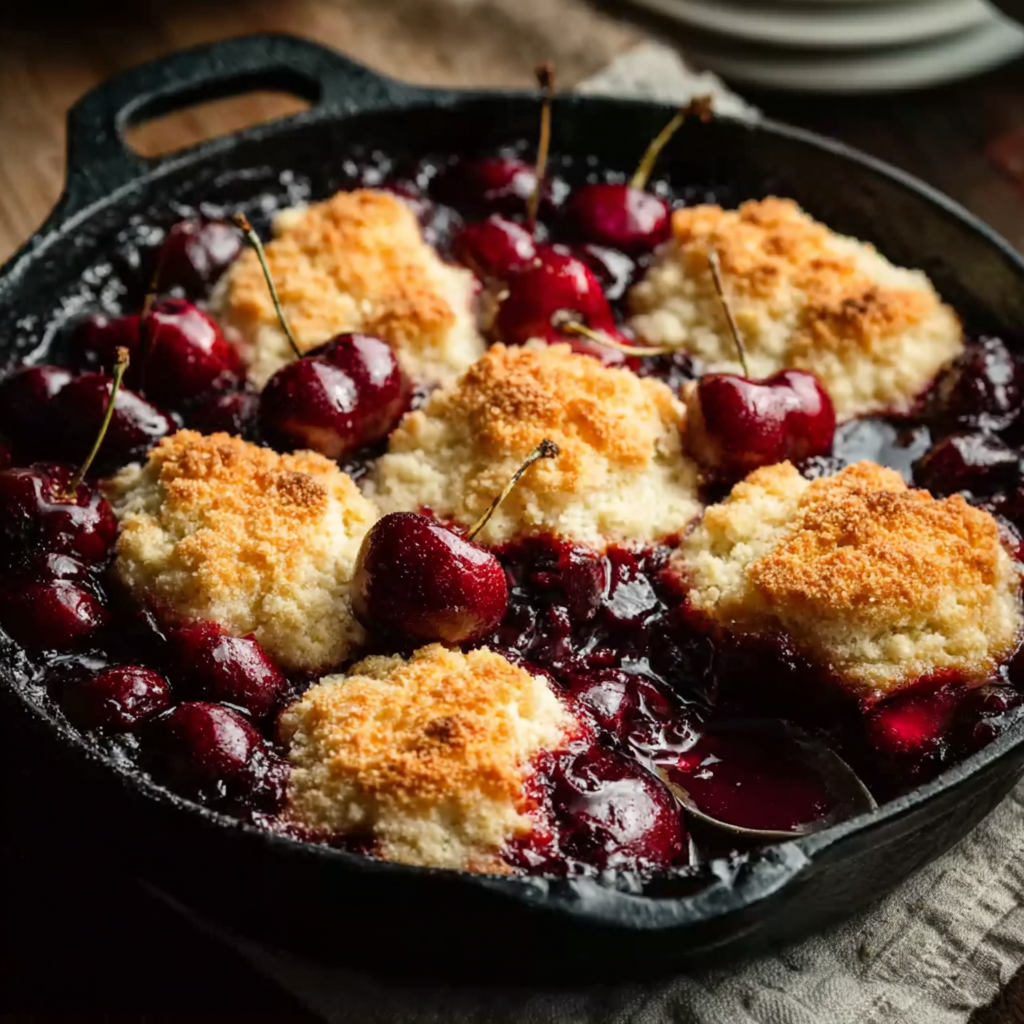
There’s something deeply comforting about a warm, old fashioned cherry cobbler. The bubbling cherry filling, golden biscuit topping, and the scent of vanilla and almond extract wafting from the oven bring instant nostalgia. But what if you could capture all that homemade flavor—fast? This quick cherry cobbler recipe delivers on both taste and time, making it perfect for last-minute cravings, weeknight desserts, or cozy gatherings.
Unlike more labor-intensive pies or crisps, cobblers are beautifully simple. Their rustic charm lies in their imperfections—a fruit base that doesn’t need perfect crusting and a topping that invites spooning rather than precision. This version respects that tradition but cuts prep time significantly. Plus, it uses pantry staples and can be made with either fresh or frozen cherries.
Cobblers have a special place in American cuisine, particularly in the colonial period when settlers adapted their pie recipes to limited cooking equipment. Over time, regional variants developed, and the cherry cobbler became a staple in homes that celebrated harvest flavors. The classic version is celebrated in many old-fashioned dessert ideas, where its warm, hearty character continues to shine.
You don’t need professional baking skills to master this dessert. What you do need is a love for fruit-forward desserts, a few essential ingredients, and about an hour from start to finish. Whether served at a casual dinner or dressed up with vanilla ice cream for guests, quick old fashioned cherry cobbler is as versatile as it is delicious.
In this guide, we’ll walk you through every step—from understanding its historical roots and gathering ingredients to achieving that perfectly golden topping. Along the way, we’ll explore useful tips, answer common questions, and suggest variations so you can customize your cobbler with ease. If you love cozy recipes, this one will soon become a go-to in your collection of quick dessert recipes, much like those featured on Pinterest’s curated boards.
2. What is a Cherry Cobbler?
A cherry cobbler is a classic American dessert known for its rich fruit base and soft, biscuit-like topping. Unlike pies, which require a rolled crust, or crisps, which include oats and streusel toppings, cobblers are characterized by a thick fruit filling and dollops of dough that bake into a golden crust. The result is a rustic, bubbling dessert that celebrates the natural sweetness and tartness of cherries.
This dessert is not only quick to prepare but also incredibly forgiving. The topping is not spread evenly but dropped by spoonfuls, allowing the cherry filling to bubble up around the edges. This creates caramelized corners and moist centers—exactly what makes old fashioned cobbler recipes so beloved.
The name “cobbler” may originate from the dessert’s appearance: the biscuit topping looks “cobbled” together, like a patchwork. This casual design adds to its charm and aligns it with other historic baked goods, such as the ones found in traditional cobbler-style foods.
Cherries—especially tart ones—are the star of this dessert. They bring brightness, acidity, and color, all of which pair beautifully with the rich topping. The addition of ingredients like almond extract (learn more here) elevates the flavor, giving the dish a subtle nutty depth that complements the fruit.
Whether you’re making it for a summer picnic, winter potluck, or a weeknight treat, cherry cobbler fits the occasion. With its simple assembly and warm, familiar flavors, it remains a timeless dessert with universal appeal.
3. The History of Cherry Cobbler in American Desserts
The origins of cherry cobbler trace back to the resourceful kitchens of early American settlers. During the colonial period, home cooks lacked the equipment and ingredients for traditional British puddings, so they adapted by baking fruit with simple doughs in open hearths. These early versions were less refined than modern cobblers, but they laid the foundation for what would become a staple of American comfort food.
As the nation expanded westward, cobbler recipes evolved regionally. In the South, they often featured peaches or blackberries, while northern states embraced cherries and apples. The cherry cobbler became particularly popular in states with abundant cherry harvests, such as Michigan and Washington. Recipes passed down through generations began to reflect local preferences—some with biscuit-style toppings, others more cake-like.
By the 19th century, cobblers were established as a uniquely American dessert. They were especially valued for their flexibility, allowing cooks to use whatever fruit was on hand, whether fresh, preserved, or dried. This versatility made cobblers a go-to dish for holidays and everyday meals alike.
Today, cherry cobbler remains a cherished recipe in many homes and is often featured in vintage cookbooks and old fashioned dessert boards. Its enduring appeal lies in its blend of simplicity and nostalgia—a dessert that doesn’t rely on fancy techniques, just quality ingredients and timeless flavor.
Beyond its place at the family table, cherry cobbler also appears in diners, potlucks, and seasonal menus across the U.S. It has become more than just a dish—it’s a connection to the past, a reminder of the way food can bring warmth, tradition, and a sense of home to any occasion.
4. Why You’ll Love This Quick Version
This quick old fashioned cherry cobbler recipe offers all the richness and nostalgia of a traditional cobbler—but in a fraction of the time. It’s designed for busy days when you want something homemade without the hassle. Whether you’re planning a spontaneous dinner or just craving something cozy, this dessert delivers on every front.
Here’s why this version stands out:
-
Time-Saving Without Compromise: Traditional cobblers often involve chilling dough or prepping crusts. This recipe skips those steps by using a simple topping mixed with boiling water, which binds quickly and bakes to a golden finish.
-
No Special Equipment Required: All you need is a saucepan, mixing bowl, and a baking dish. No pastry cutter? No problem. You can even cut in the butter with your fingers—just like they did in vintage kitchen traditions found in classic cherry desserts.
-
Made With Pantry Staples: This cobbler uses ingredients you likely already have—flour, sugar, butter, and cornstarch—along with cherries that can be fresh or frozen. If you’ve got a bag of cherries in the freezer, you’re halfway there.
-
Customizable Flavor: The optional almond extract adds a rich, aromatic depth that enhances the cherries’ natural flavor. Learn more about its use in desserts here. Not a fan? Swap it for vanilla or omit it entirely.
-
Crowd-Pleasing and Comforting: There’s a reason cherry cobbler shows up on so many cozy dessert boards like those featured here. It’s warm, homey, and universally loved.
Most importantly, this recipe keeps the spirit of the original intact. It’s rustic, flavorful, and satisfying, with a bubbly cherry filling and a perfectly textured topping. You’ll get all the comfort of an old fashioned dessert—without the wait.
5. Ingredient Breakdown & Substitutions
5.1 For the Cherry Filling
The cherry filling is the heart of this dessert, and getting it right ensures your cobbler will be juicy, flavorful, and perfectly balanced.
-
Cherries (4 cups)
You can use fresh or frozen cherries. If using frozen, thaw them and drain excess moisture to avoid a watery filling. Tart cherries offer a classic flavor, but sweet cherries can work too—just reduce the sugar slightly to adjust for sweetness. To learn more about this fruit’s varieties, visit this guide on cherries. -
Granulated Sugar (¾ cup)
The sugar sweetens the cherries and helps them break down while cooking. You can adjust slightly based on your cherries’ natural sweetness. -
Lemon Juice (1 tbsp)
Adds brightness and acidity to balance the sweetness. It also helps activate the cornstarch for thickening. -
Cornstarch (2 tbsp)
Acts as the thickening agent, turning cherry juices into a silky sauce. Alternatives include arrowroot powder or tapioca starch, if preferred. -
Almond Extract (¼ tsp, optional)
Adds a subtle nutty note that complements the fruit beautifully. It’s a traditional addition in many old fashioned cherry cobbler recipes and found in other classic desserts like those in this almond extract guide.
5.2 For the Cobbler Topping
This part is what makes the cobbler distinct—tender, buttery, and golden.
-
All-Purpose Flour (1 cup)
The base of your topping. For a gluten-free version, substitute with a 1:1 gluten-free flour blend. -
Granulated Sugar & Brown Sugar (¼ cup each)
The mix of the two sugars adds complexity. Brown sugar brings moisture and a subtle molasses flavor. -
Baking Powder (1 tsp)
Gives the topping its lift. Read more about how it functions in recipes here. -
Salt (½ tsp)
Enhances the sweetness and keeps the flavor balanced. -
Unsalted Butter (6 tbsp, cold and cubed)
Cold butter creates that flaky, biscuit-like texture. Cut it in with a pastry cutter or your fingers. -
Boiling Water (¼ cup)
Surprisingly key—this binds the topping quickly without needing extra mixing, making it ideal for a quick cobbler. -
Optional Sugar Sprinkle (1 tbsp)
Sprinkling sugar on top before baking adds a crisp finish.
This simple set of ingredients creates a cobbler that’s warm, flavorful, and satisfyingly rustic. For visual inspiration, check out biscuit cobbler topping ideas.

6. Kitchen Tools You’ll Need
Preparing this quick cherry cobbler requires only a few basic kitchen tools, making it accessible even for beginner bakers.
-
9-inch Baking Dish
A standard glass or ceramic dish works perfectly. You want something deep enough to hold the bubbling fruit and topping. -
Medium Saucepan
Used to cook the cherry filling until it thickens and starts to bubble. -
Mixing Bowls
One for the dry ingredients and one for mixing in the butter and water. -
Pastry Cutter or Fork (Optional)
Helpful for cutting butter into the flour. You can also use your hands. -
Wooden Spoon or Rubber Spatula
For stirring and layering the components. -
Measuring Cups and Spoons
Precision is important, especially for baking powder and cornstarch.
This recipe avoids specialty equipment, which keeps it simple and true to its old fashioned origins. If you appreciate easy clean-up and minimal fuss, this one’s a winner.
7. Step-by-Step Instructions
7.1 Preparing the Cherry Filling
-
In a medium saucepan over medium heat, combine 4 cups of pitted cherries (fresh or frozen), ¾ cup granulated sugar, 1 tablespoon lemon juice, and 2 tablespoons cornstarch.
-
Stir constantly until the mixture begins to bubble and thicken, about 5–7 minutes.
-
Once thickened and glossy, remove from heat and stir in ¼ teaspoon almond extract (optional).
-
Pour the cherry mixture into a greased 9-inch baking dish and spread evenly across the bottom.
Tip: If your filling thickens too much, add a tablespoon of water to loosen it slightly.
7.2 Making the Cobbler Topping
-
In a medium bowl, whisk together 1 cup all-purpose flour, ¼ cup granulated sugar, ¼ cup brown sugar, 1 teaspoon baking powder, and ½ teaspoon salt.
-
Add 6 tablespoons cold, cubed butter. Use a pastry cutter, fork, or your fingers to cut the butter into the dry ingredients until the mixture resembles coarse crumbs.
-
Pour in ¼ cup boiling water and stir just until a sticky dough forms. Don’t overmix.
Note: The boiling water helps the dough come together quickly and evenly.
7.3 Assembling & Baking
-
Drop spoonfuls of the dough over the cherry filling. Don’t worry about covering the entire surface—leave gaps to let the fruit peek through and bubble up.
-
Optional: Sprinkle 1 tablespoon granulated sugar over the dough for a crispy, caramelized finish.
-
Bake at 375°F (190°C) for 35–40 minutes, or until the topping is golden brown and the filling is bubbling around the edges.
-
Allow to cool for at least 15 minutes before serving. This helps the filling set and enhances the flavor.
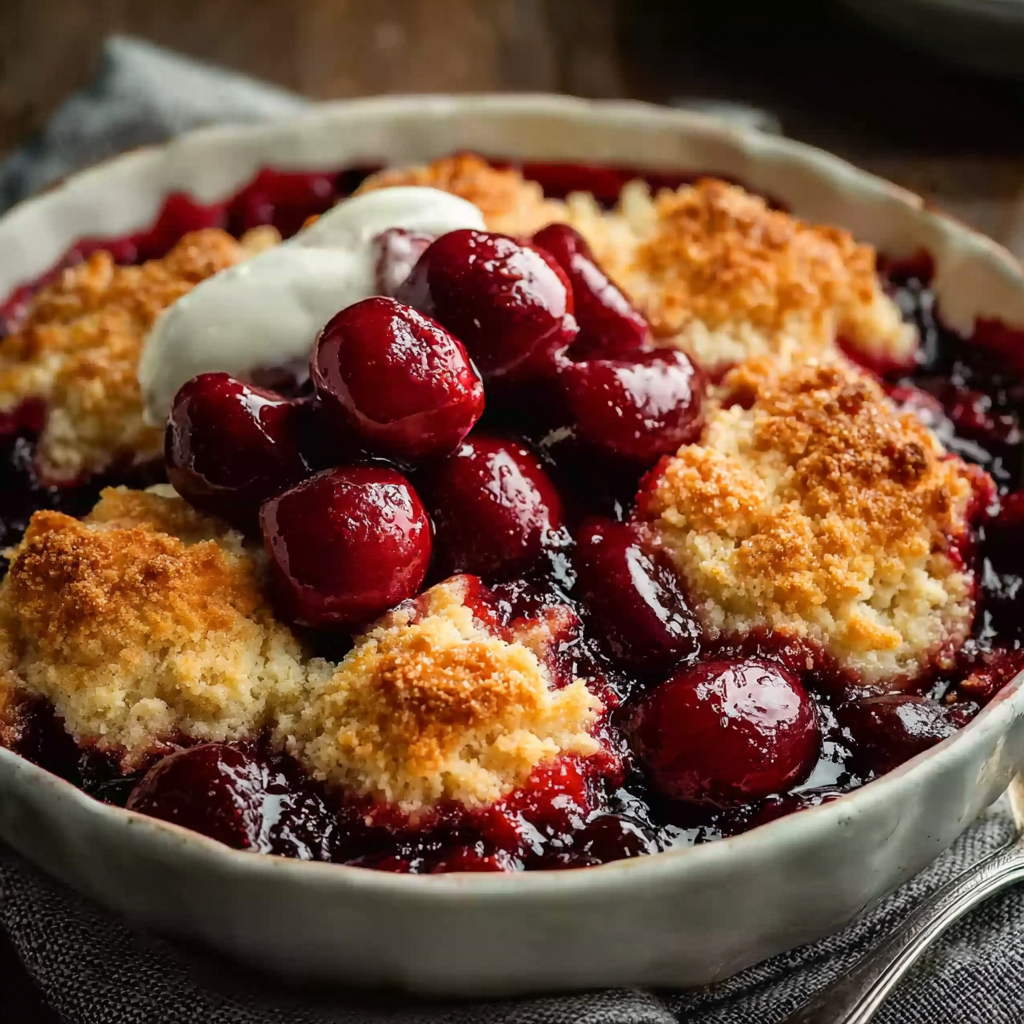
Serve warm, ideally with a scoop of vanilla ice cream or a dollop of whipped cream for a classic touch.
8. Tips for Success
-
Use Cold Butter: The key to a flaky topping is keeping the butter cold until it hits the oven.
-
Don’t Overmix: Mix the dough just until combined. Overmixing can make the topping dense instead of tender.
-
Watch for Bubbling: You’ll know it’s ready when the fruit bubbles around the edges and the top turns golden.
-
Let It Rest: Giving your cobbler 10–15 minutes to cool ensures the filling thickens and flavors meld.
These tips help replicate the textures and flavors found in the best homemade cherry cobblers, like those featured in many cozy dessert ideas.
9. Serving Suggestions
Cherry cobbler shines when served warm, but there are a few ways to elevate it even more:
-
With Vanilla Ice Cream: The contrast of hot cobbler and cold ice cream is classic for a reason.
-
Topped with Whipped Cream: A lighter alternative that pairs well with tart cherries.
-
Sprinkled with Powdered Sugar: Adds a vintage, bakery-style finish.
-
Served with Greek Yogurt: For a breakfast-style twist or lighter option.
No matter how you serve it, this dish works equally well at casual family dinners or dressed-up events.
10. Make Ahead & Storage Tips
-
Make Ahead: You can prepare the cherry filling a day in advance. Store in an airtight container in the fridge until ready to assemble.
-
Refrigeration: Store leftover cobbler in the refrigerator for up to 3 days. Reheat in the oven for best results.
-
Freezing: Freeze the baked cobbler in an airtight container for up to 2 months. Thaw overnight in the fridge and warm in the oven before serving.
-
Avoid Soggy Topping: If you plan to store it, let the cobbler cool completely before covering.
These storage tips help maintain the cobbler’s texture and keep that biscuit top from going limp—just like those found in well-preserved baking traditions.
11. Variations & Creative Twists
Give your old fashioned cherry cobbler a personal twist with these ideas:
-
Add Chopped Nuts: Walnuts or pecans add crunch and flavor.
-
Mix Fruits: Combine cherries with blueberries, raspberries, or peaches for a mixed fruit cobbler.
-
Spice It Up: Add cinnamon, nutmeg, or cardamom to the filling for a warm, spiced twist.
-
Mini Cobblers: Divide the filling and topping into ramekins for individual servings.
Whether you stick to tradition or explore new variations, this cobbler is incredibly versatile and open to creativity.
12. Common Mistakes to Avoid
-
Overcooking the Filling: Don’t let it get too thick before baking. It should be syrupy but not gel-like.
-
Using Melted Butter: This prevents the topping from fluffing up—cold butter is crucial.
-
Covering the Topping Entirely: The gaps are intentional—they let steam escape and fruit bubble through.
-
Skipping Rest Time: Cutting into the cobbler too soon results in a runny filling. Let it set.
By avoiding these common issues, you’ll consistently turn out a cobbler worthy of your favorite vintage dessert board.
13. FAQs – People Also Ask
Can I use canned cherry pie filling instead of fresh or frozen cherries?
Yes, but reduce the sugar and skip the cornstarch, as the canned filling is already sweetened and thickened.
What’s the difference between cobbler, crisp, and crumble?
A cobbler has a biscuit or cake-like topping. A crisp includes oats and often nuts, while a crumble uses a streusel topping without oats.
Can I make cherry cobbler without cornstarch?
Yes, you can substitute with all-purpose flour, arrowroot powder, or tapioca starch.
How do I know when cherry cobbler is done baking?
The topping should be golden brown, and the cherry filling should be visibly bubbling around the edges of the dish.
Can cherry cobbler be made vegan or gluten-free?
Absolutely. Use plant-based butter and a gluten-free flour blend. The rest of the recipe is already dairy- and egg-free.
Vintage Cherry Cobbler Recipe for Cozy Desserts
A Quick Old Fashioned Cherry Cobbler that’s rich, warm, and ready in under an hour. With juicy cherries simmered into a thick filling and topped with a golden, buttery biscuit-style topping, this dessert captures the essence of vintage baking without the wait. Serve it warm with vanilla ice cream or whipped cream for the ultimate cozy treat.
- Author: Clara
Ingredients
For the cherry filling:
- 4 cups fresh or frozen pitted cherries
- ¾ cup granulated sugar
- 1 tbsp lemon juice
- 2 tbsp cornstarch
- ¼ tsp almond extract (optional)
For the cobbler topping:
- 1 cup all-purpose flour
- ¼ cup granulated sugar
- ¼ cup brown sugar
- 1 tsp baking powder
- ½ tsp salt
- 6 tbsp cold unsalted butter, cut into small cubes
- ¼ cup boiling water
Optional topping:
- 1 tbsp sugar for sprinkling
Instructions
Preheat the oven to 375°F (190°C). Lightly grease a 9-inch baking dish.
In a medium saucepan over medium heat, combine cherries, sugar, lemon juice, and cornstarch. Stir and cook until the mixture thickens and becomes bubbly, about 5–7 minutes. Remove from heat and stir in almond extract, if using.
Pour the cherry mixture into the prepared baking dish and spread evenly.
In a medium bowl, whisk together flour, granulated sugar, brown sugar, baking powder, and salt. Add the cold butter and cut it in using a pastry cutter or your fingers until the mixture resembles coarse crumbs.
Stir in the boiling water until just combined to form a thick dough.
Drop spoonfuls of the topping over the cherry filling, spreading slightly but leaving some areas uncovered for the fruit to peek through.
Sprinkle the top with sugar if desired.
Bake for 35–40 minutes, or until the topping is golden brown and the cherry filling is bubbling.
Allow to cool slightly before serving. Serve warm on its own or with vanilla ice cream.
Notes
-
Use tart cherries for a more traditional flavor, or sweet cherries for a milder profile.
-
For a crispier top, sprinkle the topping with sugar before baking.
-
If you’re using frozen cherries, thaw and drain them before cooking.
-
Substitute vanilla extract for almond extract if preferred.
-
This recipe can be doubled and baked in a larger dish for gatherings.