No Bake Peanut Butter Balls
If you’re looking for the perfect homemade treat that’s both quick to make and irresistibly delicious, no bake peanut butter balls are your answer. These bite-sized desserts deliver rich peanut butter flavor, a smooth texture, and a glossy chocolate coating—all without ever turning on the oven. Whether you know them as easy chocolate buckeyes or just peanut butter truffles, they’ve become a staple in American kitchens, especially around the holidays.
Ideal for Christmas cookie trays, freezer desserts, or edible gift boxes, these no bake peanut butter balls are not only simple but endlessly adaptable. Their creamy centers and snappy chocolate shell make them resemble candy-store confections. They’re a hit at parties and family gatherings because they combine nostalgic flavors with modern convenience. Plus, their ability to stay fresh for weeks in the freezer means you can always have dessert on hand.
The origin of these treats is rooted in the Midwest, particularly Ohio, where the Buckeye candy—a nearly identical version—is named after the nut from the Ohio Buckeye tree. While traditional Buckeyes leave a small circle of peanut butter exposed to mimic the look of the nut, the fully coated version is equally popular and arguably easier to store. According to Wikipedia’s Buckeye candy entry, these treats gained popularity in the 1960s and have remained a Christmas classic ever since. Today, they’re a beloved no-bake alternative to cookies and bars.
In fact, Pinterest is full of creative presentation ideas for holiday treat boxes, from festive packaging to colorful drizzles. One particularly helpful Pinterest board on DIY cookie gift boxes shows exactly how these treats can be styled for gifting. Whether you’re preparing them for personal indulgence or packaging them up for others, this simple dessert earns its place in any holiday dessert lineup.
What Are No Bake Peanut Butter Balls (aka Buckeyes)?
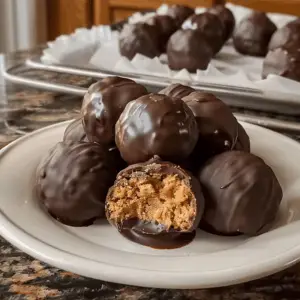
No bake peanut butter balls, often referred to as Buckeyes, are classic confections made with a creamy peanut butter filling and dipped in a smooth chocolate coating. They’re called Buckeyes when a small circle of peanut butter is intentionally left exposed on the top to mimic the nut of the Ohio Buckeye tree. This clever resemblance is what gives them their signature name and regional fame. According to Wikipedia’s page on Buckeye candy, these treats are especially popular in Ohio and the Midwest, where they’re a staple of family gatherings and holiday cookie trays.
Despite their roots in tradition, today’s peanut butter balls come in all kinds of variations. Some are dipped entirely in chocolate for a clean, uniform appearance, while others stick with the classic Buckeye look. They’re commonly seen on dessert buffets, included in edible gift boxes, or even featured on holiday dessert tables like those on Pinterest, styled alongside cookies, bark, and truffles.
Here’s what sets no bake peanut butter balls apart:
-
No baking required – The dough sets by chilling, not cooking.
-
Few simple ingredients – Most recipes call for peanut butter, butter, vanilla, powdered sugar, and chocolate.
-
Highly customizable – From coatings to fillings, there are countless twists to the base recipe.
-
Great texture contrast – The creamy peanut butter center contrasts perfectly with the firm chocolate shell.
The key to their popularity is the balance of sweet and salty, along with the convenience of preparation. With just a handful of pantry staples and no oven, anyone can whip up a batch in under an hour. For those interested in food science, understanding how fats like shortening affect the texture of melted chocolate is also helpful. You can learn more about the role of shortening in confections on Wikipedia.
Whether you’re recreating a childhood favorite or discovering them for the first time, these treats are a simple, satisfying addition to your holiday dessert rotation.
Ingredients Breakdown and Substitutes
The simplicity of no bake peanut butter balls is part of their charm, but each ingredient plays an essential role in achieving the perfect texture, structure, and flavor. Let’s break down the traditional components and explore substitutes for dietary needs or pantry gaps.
Core Ingredients and Their Roles
-
Creamy Peanut Butter (1½ cups)
The base of the recipe, it gives the mixture its nutty flavor and creamy texture. For best results, use a no-stir commercial brand like Jif or Skippy. Natural peanut butters can separate and result in oily or crumbly dough, but if you’re set on using one, chill the mixture longer to firm it up. -
Unsalted Butter (½ cup, softened)
Adds richness and helps bind the ingredients. Room temperature butter blends more easily with peanut butter for a smoother filling. This is also what gives the center its soft, candy-like bite. -
Vanilla Extract (1 tsp)
Enhances sweetness and adds depth. It’s a subtle but essential flavor booster. Make sure to use pure vanilla extract, not imitation, for the best results. -
Powdered Sugar (3½ to 4 cups)
Sweetens and stiffens the dough. Gradually added, it allows you to control the consistency of the mixture. The goal is a firm but rollable texture that won’t stick to your hands. -
Semi-Sweet Chocolate Chips (2 cups)
Used for coating, semi-sweet balances the sweetness of the peanut butter. Feel free to substitute with milk chocolate for a creamier finish or dark chocolate for a richer, less sweet version. -
Shortening or Coconut Oil (2 tbsp)
This ensures the chocolate melts smoothly and creates a shiny finish once set. The choice between the two depends on flavor preference: shortening is neutral, while coconut oil adds a slight coconut note. Learn more about the role of coconut oil in baking and how it affects texture and finish.
Ingredient Swaps and Dietary Alternatives
-
Nut-Free Option: Swap peanut butter with sunflower seed butter or Wowbutter for a school-safe or allergy-friendly version. Keep in mind that textures may vary, so adjust powdered sugar as needed.
-
Vegan Version: Use dairy-free butter (like Earth Balance) and dark chocolate chips that contain no milk solids. Also ensure your shortening or coconut oil is vegan-friendly.
-
Keto-Friendly Modification: Replace powdered sugar with a keto-approved sweetener like powdered erythritol. Choose sugar-free chocolate chips and check that your peanut butter doesn’t contain added sugar.
-
Flavor Enhancers: Add a pinch of sea salt to the dough to heighten the sweet-salty contrast, or stir in a handful of mini chocolate chips or chopped nuts for extra texture.
Pinterest is full of creative ingredient twists. One Pinterest pin on Buckeye candy variations shows how home bakers are incorporating Oreos, pretzels, and even cookie butter into their recipes.
Finally, for those curious about the science behind sugar in confections, the Wikipedia article on powdered sugar explains how particle size affects texture in recipes like this one.
Mastering the right balance of these ingredients is key to perfecting your easy chocolate buckeyes, whether you’re going classic or experimenting with new flavors.
Step-by-Step Instructions (With Tips)
Making no bake peanut butter balls is a straightforward process, but a few smart techniques can elevate your results from good to irresistible. Below is a detailed, foolproof guide to help you make these easy chocolate buckeyes with bakery-level quality and efficiency.
1. Mix the Filling
-
In a large bowl, combine 1½ cups of creamy peanut butter, ½ cup of softened unsalted butter, and 1 teaspoon of vanilla extract.
-
Use a hand mixer or stand mixer to blend until the mixture is completely smooth and well incorporated. The texture should resemble thick frosting at this stage.
Pro Tip: If your butter isn’t soft enough, it won’t blend smoothly. Let it sit at room temperature for about 30 minutes before mixing. Avoid melting it, as this will make the dough greasy and difficult to roll.
2. Incorporate the Powdered Sugar
-
Gradually add 3½ to 4 cups of powdered sugar, one cup at a time. Mix well after each addition until a stiff dough forms. You’re aiming for a consistency that’s firm but pliable—not sticky, not dry.
-
If the dough is too sticky, add more powdered sugar, one tablespoon at a time. If it’s crumbly, add a spoonful of peanut butter.
Note: Depending on your peanut butter brand (natural vs conventional), the required sugar amount may vary. Read more about this in the Wikipedia article on powdered sugar, which explains how different sugar textures affect recipes.
3. Shape the Balls
-
Scoop out about a tablespoon of dough and roll it into smooth 1-inch balls using your hands. Place them on a baking sheet lined with parchment paper.
-
Continue until all dough is used, spacing the balls evenly on the tray.
Pro Tip: Use a cookie scoop for uniform size. This helps with even coating later and looks more professional for gift boxes or party platters.
4. Chill the Balls
-
Place the tray in the refrigerator for 30 minutes, or until the balls are firm enough to handle without losing shape.
Optional Hack: If you’re short on time, pop them into the freezer for 10–15 minutes instead. However, don’t freeze too long or the chocolate may crack when dipped.
5. Melt the Chocolate Coating
-
In a microwave-safe bowl, combine 2 cups of semi-sweet chocolate chips with 2 tablespoons of shortening or coconut oil.
-
Microwave in 30-second intervals, stirring after each, until smooth and fully melted.
-
Stir well after each cycle to avoid overheating. Overheating chocolate can cause it to seize or thicken. Learn more about the science of chocolate tempering, which can help your coating set with a perfect shine.
Tip: Coconut oil adds a slight tropical flavor, while shortening keeps the chocolate neutral. If you prefer more shine, a 1:10 oil-to-chocolate ratio works well.
6. Dip the Balls in Chocolate
-
Using a fork or dipping tool, lower each peanut butter ball into the melted chocolate. Gently tap off the excess and place it back on the parchment-lined tray.
-
For traditional Buckeyes, leave the top center of the ball undipped. For a fully coated version, roll the ball completely in chocolate.
-
Pinterest offers great visual inspiration—check out holiday treat presentation ideas for ways to make them look festive and gift-ready.
7. Let the Chocolate Set
-
Once all balls are dipped, return the tray to the fridge for at least 30 minutes, or until the chocolate has hardened completely.
Optional Decoration: While the chocolate is still soft, sprinkle sea salt, crushed candy canes, or colored sugar for a seasonal touch. You can find more ideas on Pinterest dessert decoration boards.
8. Store Properly
-
Once set, transfer the peanut butter balls to an airtight container. Use parchment paper between layers to prevent sticking.
-
They’ll last for 2 weeks in the fridge or up to 3 months in the freezer—making them ideal for batch prepping holiday desserts.
With these step-by-step tips and techniques, your no bake peanut butter balls will have that glossy finish, smooth texture, and nostalgic flavor that make them a seasonal favorite and freezer staple.
Texture, Flavor & Appearance: What to Expect
The beauty of no bake peanut butter balls lies in the combination of smooth texture, rich flavor, and visually appealing presentation. Each bite offers a balance of sweet and salty, creamy and crunchy, simple yet indulgent. Here’s what you can expect in terms of their sensory appeal:
-
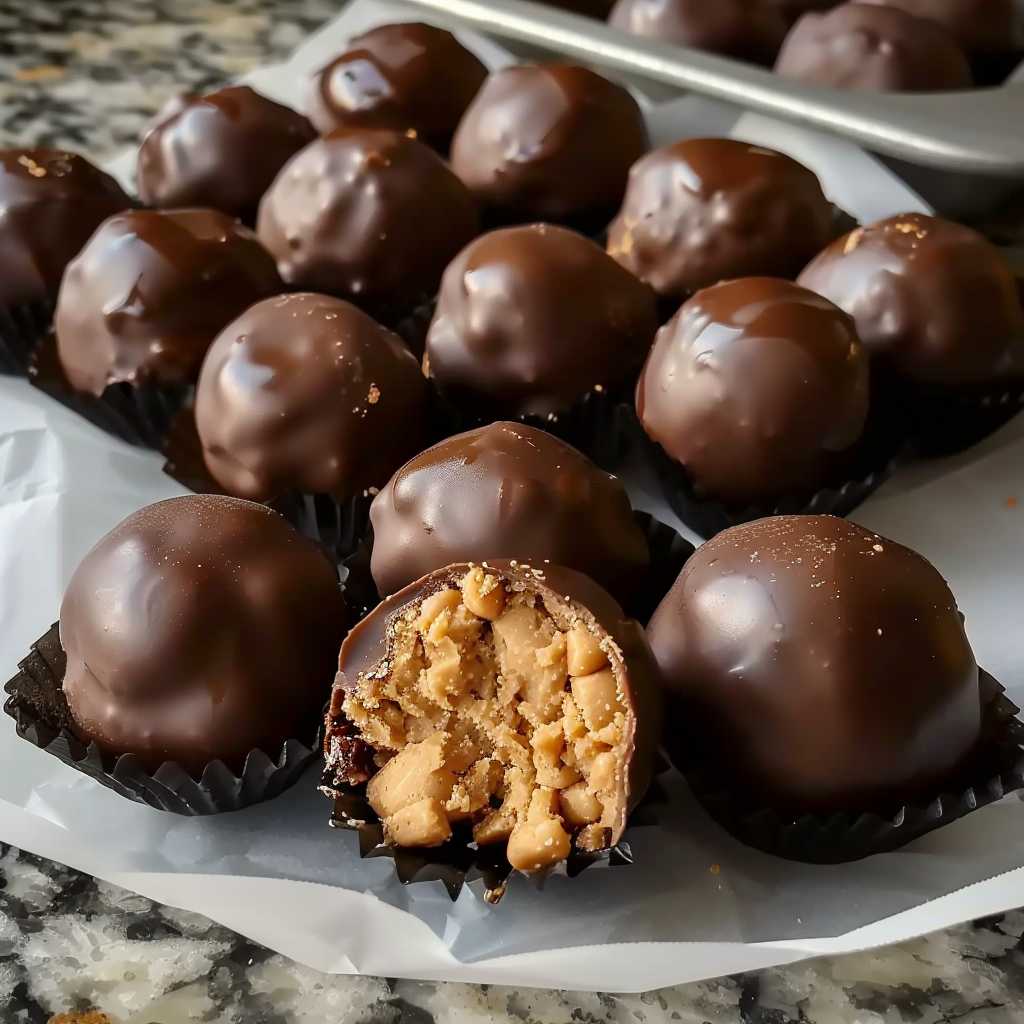
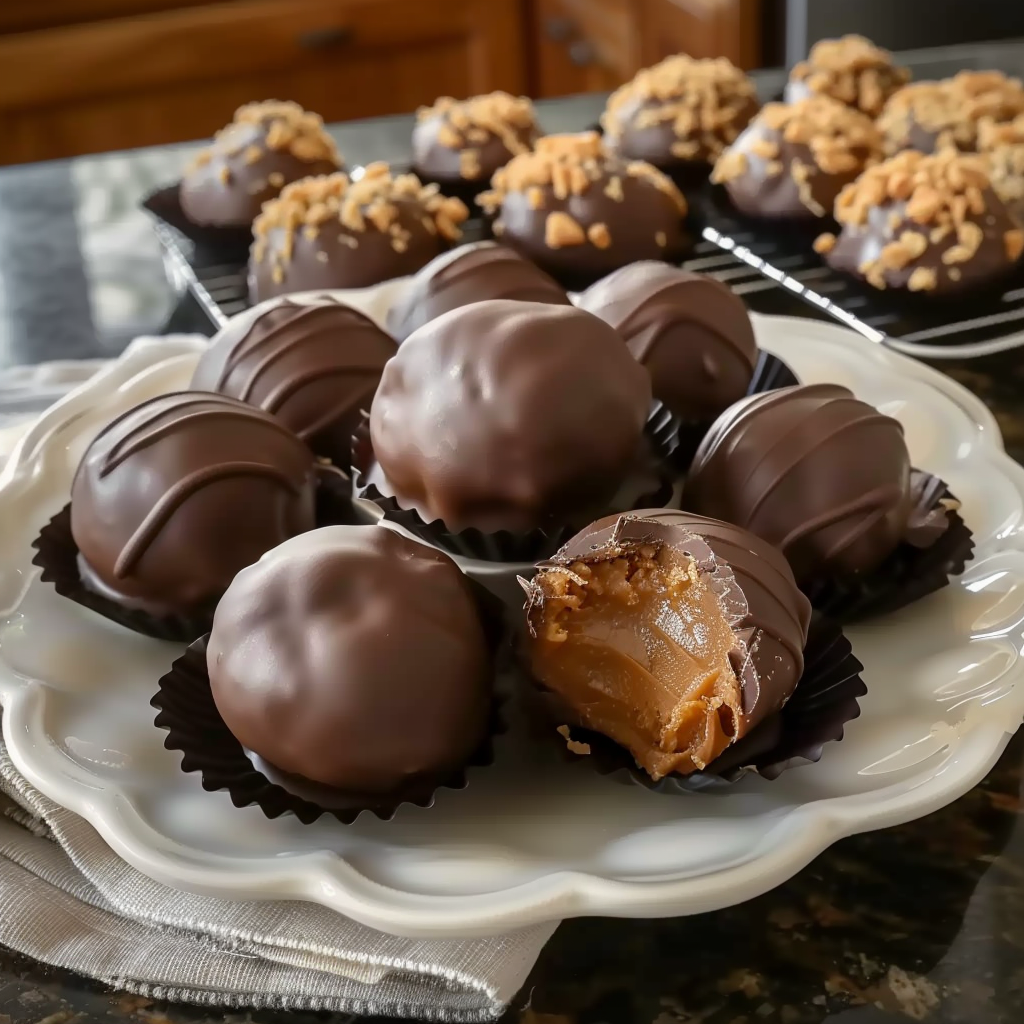
Texture: The inside is soft and creamy, similar to the center of a peanut butter cup. Once chilled, it firms up but still melts in your mouth. The outer chocolate shell adds a slight crunch, offering contrast with each bite.
-
Flavor: These treats are perfectly sweet with a strong peanut butter flavor complemented by semi-sweet chocolate. A touch of vanilla rounds out the flavor, giving it a homemade candy-shop quality.
-
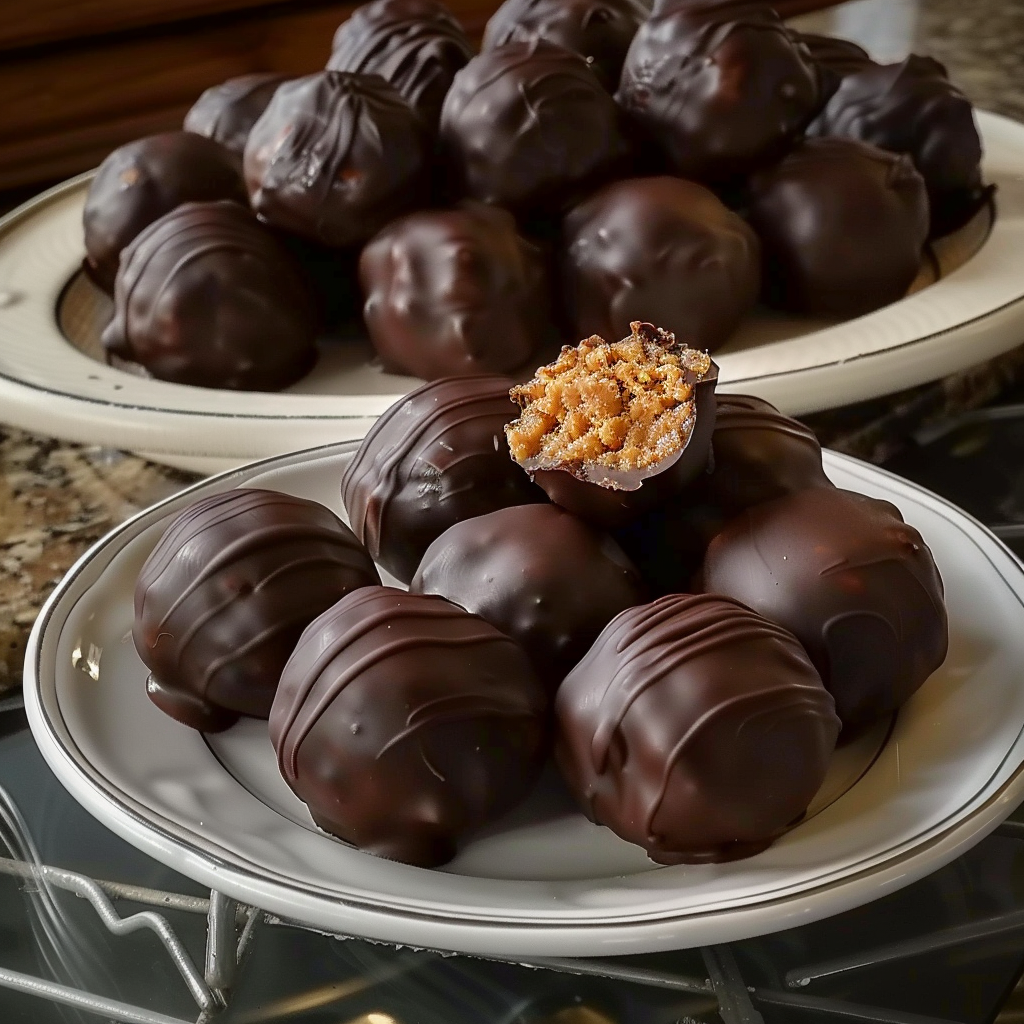
Appearance: Fully coated peanut butter balls have a sleek, glossy finish—especially if coconut oil or shortening is added to the melted chocolate. Traditional Buckeye versions leave a circle of peanut butter visible on top, giving them a distinctive two-tone look. Learn more about the history behind the Buckeye candy to appreciate their visual significance.
Want to make them more festive? Roll them in colored sugar, drizzle with white chocolate, or top with sprinkles. Pinterest is full of ideas; DIY treat presentations can inspire you to take these from everyday snack to party showstopper. Whether you’re making them for gifts or gatherings, they’ll look and taste like they came from a professional bakery.
Freezer-Friendly Dessert: How to Store & Freeze
One of the most appealing aspects of no bake peanut butter balls is their freezer-friendliness. They hold up incredibly well in cold storage, making them ideal for holiday prepping, gift-giving, or those inevitable late-night cravings.
To refrigerate:
-
Place the peanut butter balls in a single layer in an airtight container.
-
Use parchment paper between layers to prevent sticking.
-
Store in the fridge for up to 2 weeks.
To freeze:
-
Arrange in a freezer-safe container with parchment between layers.
-
Freeze for up to 3 months.
-
Thaw at room temperature for about 10–15 minutes before serving.
Quick Tips:
-
Don’t thaw in the microwave—this may cause the chocolate to melt or sweat.
-
If you’re serving them at a party, take them out just before guests arrive to preserve that firm bite.
-
For gifting, pack directly from frozen into treat bags or boxes for best appearance.
Storing properly ensures they maintain their creamy center and crisp shell. Want to elevate your gift packaging? Pinterest has excellent cookie gift box ideas that work beautifully with these bite-sized treats.
Serving Ideas & Presentation Tips
No bake peanut butter balls may be simple to make, but they can look truly elegant with a few presentation tricks. Whether you’re gifting them or setting up a holiday dessert table, here are some creative ways to serve and style them.
-
Gift Boxes: Package them in mini cupcake liners inside a festive box or tin. Use wax paper to separate layers and prevent smudging.
-
Holiday Platters: Arrange them with cookies, fudge, or chocolate bark for a colorful holiday dessert spread. For ideas, explore holiday dessert table designs for creative inspiration.
-
Custom Toppings:
-
Crushed candy canes for a peppermint twist
-
Flaky sea salt for a gourmet touch
-
Colored sugar or edible glitter for a festive sparkle
-
-
Dessert Charcuterie Boards: Include them alongside fruits, nuts, and other mini desserts for a modern holiday snack display.
Serving these treats beautifully enhances the experience and makes them feel special—perfect for cookie exchanges, party favors, or holiday open houses.
Holiday Twist: Christmas Peanut Butter Balls
With just a few tweaks, you can turn your classic no bake peanut butter balls into a festive Christmas dessert. Perfect for seasonal cookie trays, gift baskets, or holiday parties, these variations keep the base recipe intact while adding a holiday flair.
Festive Variations to Try:
-
Use colored candy melts (red, green, or white) instead of chocolate chips for a colorful coating.
-
Drizzle white chocolate over semi-sweet dipped balls for a “snowy” effect.
-
Top with crushed peppermint candies for a minty finish.
-
Roll in holiday sprinkles before the chocolate sets.
Pinterest is full of Christmas treat ideas that make your homemade desserts look store-bought. Add matching ribbon or custom tags for a polished presentation.
Pairing Ideas:
-
Add them to a Christmas cookie platter with gingerbread, sugar cookies, and shortbread.
-
Include in edible gift boxes with mini brownies and chocolate bark.
-
Serve with hot cocoa or spiced cider for cozy winter vibes.
These small details make them a standout Christmas candy, loved by kids and adults alike.
Peanut Butter Ball Variations to Try
While the traditional version is perfect as-is, experimenting with new ingredients and coatings can keep things exciting. Here are several fun and easy variations that stay true to the original concept but offer fresh twists.
-
Crunchy Peanut Butter: Adds texture and nutty depth.
-
Oreo Peanut Butter Balls: Mix crushed Oreos into the peanut butter dough for cookies-and-cream flavor.
-
White Chocolate Coating: Use melted white chocolate for a sweeter, softer shell.
-
Nutella or Cookie Butter Filling: Swap some or all of the peanut butter for these spreads for a rich, unique flavor.
-
Rice Krispie Crunch: Mix in crushed Rice Krispies or graham crackers for added texture.
For more creative inspiration, check out this Pinterest board of Buckeye candy recipes featuring everything from pretzel additions to peanut butter-stuffed brownies.
These adaptations are great for using what you have on hand or tailoring to specific tastes or dietary needs.
Common Mistakes & How to Fix Them
Making no bake peanut butter balls is easy, but a few common mistakes can affect their texture or appearance. Here’s how to troubleshoot the most frequent issues:
-
Dough Too Sticky
-
Problem: Can’t roll into balls without it sticking to your hands.
-
Fix: Add more powdered sugar, 1 tablespoon at a time, until the dough firms up.
-
-
Chocolate Too Thick
-
Problem: Hard to dip or doesn’t coat evenly.
-
Fix: Add a bit more shortening or coconut oil to thin it out and make dipping smoother.
-
-
Chocolate Cracks After Setting
-
Problem: Chocolate shell breaks after refrigeration.
-
Fix: Let the balls warm slightly before dipping, and avoid sudden temperature changes.
-
-
Chocolate Doesn’t Set
-
Problem: Coating stays soft or tacky.
-
Fix: Chill dipped balls in the fridge immediately for 30–45 minutes to set properly. Use tips from chocolate tempering guides to avoid bloom or stickiness.
-
Avoiding these pitfalls ensures your final product is smooth, stable, and absolutely delicious.
FAQs: People Also Ask
Why are they called Buckeyes?
They resemble the nut of the Ohio Buckeye tree, with a peanut butter center and partially coated chocolate shell that mimics the nut’s look.
Do you need to refrigerate peanut butter balls?
Yes, refrigeration helps them maintain shape and keeps the chocolate firm. They last up to two weeks in the fridge.
Can you freeze no bake peanut butter balls?
Absolutely. They’re freezer-friendly for up to three months. Use parchment between layers and thaw at room temp.
How do you keep chocolate from cracking?
Avoid freezing before dipping, and let balls reach a slightly cooler room temp. Use melted chocolate with added coconut oil or shortening for a flexible shell.
What’s the best peanut butter to use?
Use creamy, no-stir brands like Jif or Skippy. Natural peanut butter can cause separation and make the dough oily or crumbly.
Can I make them vegan?
Yes. Use vegan butter, dairy-free chocolate, and plant-based peanut butter. Check labels to ensure no milk solids are in your chocolate chips.
Are these safe for nut-free schools?
Only if made with peanut-free alternatives like Wowbutter or sunflower seed butter. Always check labels and school allergy policies.
The Best No Bake Peanut Butter Balls Easy Chocolate Buckeyes

These no bake peanut butter balls (aka easy chocolate buckeyes) are rich, creamy, and coated in smooth chocolate—perfect for holidays, gift-giving, or anytime indulgence. Made with simple pantry ingredients and no oven required, they’re ready in under an hour and freeze beautifully. With just the right blend of sweet and salty, soft and crisp, they’re a nostalgic treat that’s incredibly easy to customize. Whether served on a Christmas platter or tucked into festive gift boxes, they’re always a crowd favorite.
- Author: Clara
Ingredients
- 1 ½ cups creamy peanut butter
- ½ cup unsalted butter, softened
- 1 tsp vanilla extract
- 3 ½ to 4 cups powdered sugar
- 2 cups semi-sweet chocolate chips
- 2 tbsp shortening or coconut oil (for smoother melting)
Instructions
- In a large mixing bowl, combine peanut butter, softened butter, and vanilla extract. Mix until smooth and well combined.
- Gradually add powdered sugar, one cup at a time, mixing after each addition until a thick, slightly crumbly dough forms. The mixture should be firm enough to roll into balls.
- Roll the mixture into 1-inch balls and place them on a parchment-lined baking sheet.
- Chill the peanut butter balls in the refrigerator for about 30 minutes, or until firm.
- In a microwave-safe bowl, melt the chocolate chips and shortening (or coconut oil) in 30-second intervals, stirring after each, until smooth.
- Dip each peanut butter ball into the melted chocolate using a fork or dipping tool. Tap off excess chocolate and place back on the parchment-lined baking sheet.
- Once all are coated, refrigerate again until the chocolate is fully set.
- Store in an airtight container in the fridge or freezer.
Notes
-
Use creamy, no-stir peanut butter for the best texture. Avoid natural varieties that separate.
-
Add powdered sugar gradually to achieve a rollable dough—not too sticky or too dry.
-
Chill the dough before dipping to help it hold shape in the melted chocolate.
-
For shiny, smooth chocolate coating, melt with shortening or coconut oil.
-
Store in an airtight container in the fridge for up to 2 weeks or freeze for up to 3 months.
-
Make them festive with sprinkles, drizzle, crushed peppermint, or colored chocolate coatings.