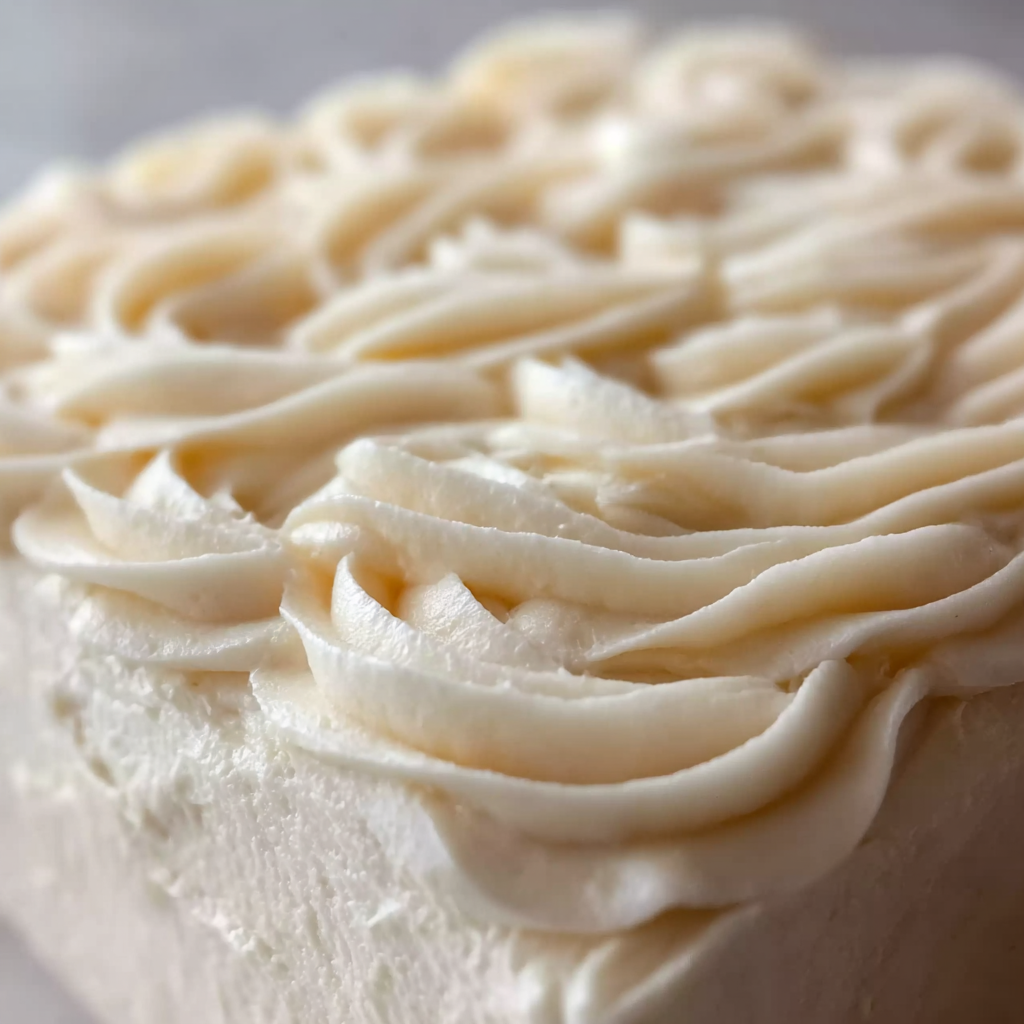
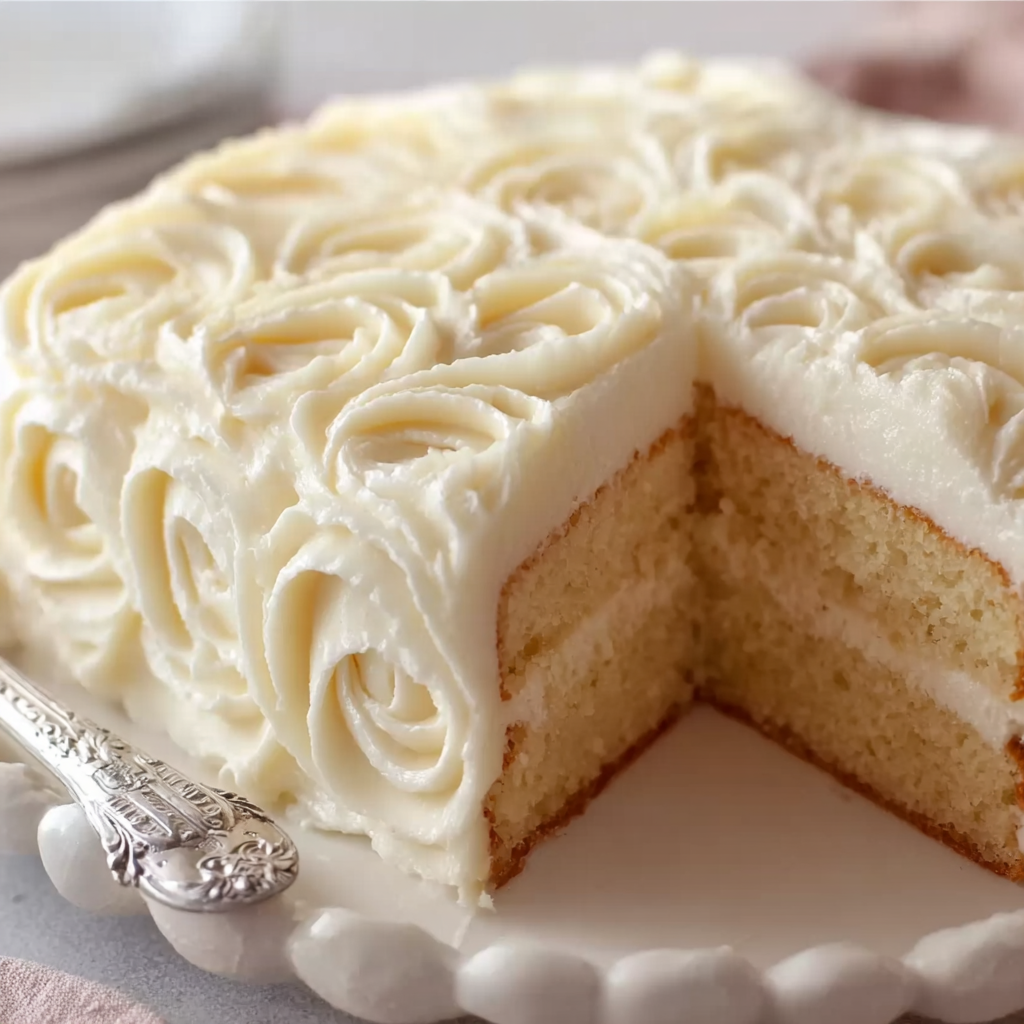
If you’ve been searching for the perfect vanilla frosting that’s both fluffy and foolproof, this is the one. With a silky texture and just the right amount of sweetness, this frosting elevates any dessert—from cupcakes and cookies to multi-layer cakes. What sets it apart isn’t just its dreamy consistency but the simple technique behind it. Unlike overly sweet American buttercreams, this recipe relies on a cooked flour and milk base that whips into an ultra-smooth, balanced frosting with just a handful of ingredients.
Not only does it come together in minutes, but it also delivers consistent results every time. That’s why this recipe has become a staple for bakers who crave something versatile yet unique. If you’ve ever been frustrated by gritty frosting or overpowering sweetness, this will be a game-changer. This method is similar to traditional ermine frosting—a technique with roots in classic baking, where flour is cooked with milk to create a thick base before whipping it with butter and sugar. Learn more about how roux in cooking works on Wikipedia.
One of the reasons this frosting stands out is the balance of structure and flavor. The milk and flour mixture forms a smooth, pudding-like base that integrates seamlessly with whipped butter and sugar, creating a texture that’s ideal for both spreading and piping. For those new to the technique of creaming butter and sugar, this guide from Wikipedia explains why this process is so critical for volume and texture in baking. You can also explore some inspiring cake decorating ideas on Pinterest to see how beautifully this frosting can be used.
Why This Vanilla Frosting Is the Best
This vanilla frosting recipe stands apart because it solves common frosting frustrations: too sweet, too grainy, too soft, or just plain bland. It strikes the ideal balance—light, fluffy, and not overly sweet, yet stable enough to hold its shape for piping and decorating. The secret lies in the flour and milk paste, which replaces the powdered sugar overload found in traditional American buttercream with a more refined, custard-like base.
This method is often called boiled milk frosting or ermine frosting, though it doesn’t involve any boiling—just gentle cooking until thickened. When paired with the right amount of creamed butter and granulated sugar, it creates a texture so smooth it’s almost like whipped cream with structure. What you get is a frosting that’s spoon-licking good, but also beautifully pipeable.
Compared to other frostings, like cream cheese frosting or Swiss meringue buttercream, this version offers unmatched ease and reliability. Cream cheese frosting often lacks stability at room temperature, while meringue-based recipes can be time-consuming and temperamental. Here, you’re working with just five ingredients, all common pantry staples, which makes this frosting not only delicious but incredibly accessible for home bakers.
If you’re interested in understanding more about the science behind butter in baking, check out this detailed explanation on Wikipedia. Butter provides flavor, richness, and a firm texture when chilled—perfect for frosting that needs to hold up on cakes or cupcakes.
For visual inspiration, head to Pinterest’s homemade vanilla frosting boards where you can see how other bakers have used this same style of frosting to create elegant, rustic, or playful dessert designs. Whether you want a swoopy, rustic look or precise piped borders, this foolproof frosting delivers every time.
Ingredients Overview
Each ingredient in this vanilla frosting plays a key role in achieving its signature texture and flavor. Though the ingredient list is short, understanding how each works will help ensure consistent results every time.
• Unsalted Butter
The foundation of this frosting. Butter adds rich flavor, creaminess, and structure. Using unsalted butter allows you to control the overall salt content in the frosting. Make sure it’s softened to room temperature for the smoothest consistency when whipped.
• Granulated Sugar
Unlike powdered sugar used in most buttercreams, this frosting uses granulated sugar, which dissolves during the long creaming process. This results in a less cloying sweetness and a more refined texture. The key is to whip long enough for the sugar to fully integrate with the butter.
• Whole Milk
Whole milk adds both moisture and fat, which contribute to the frosting’s smooth, velvety mouthfeel. Lower-fat milks can lead to a thinner base, so stick with whole milk for best results. Learn more about the different types of milk used in baking on Wikipedia.
• All-Purpose Flour
This may seem unusual in frosting, but it’s the key to thickening the milk into a smooth paste. The paste creates body in the frosting without the need for extra sugar. Think of it as the silent hero in this recipe—crucial but undetectable in taste. For more on how flour is used this way, explore the concept of roux in cooking.
• Vanilla Extract
A high-quality vanilla extract enhances the overall flavor, making this frosting taste anything but plain. Use pure extract if possible, and avoid artificial flavors. The depth and warmth from real vanilla take this recipe from basic to bakery-quality. Check out the history and uses of vanilla extract on Wikipedia.
If you’re planning to frost cupcakes, you’ll find beautiful cupcake frosting ideas on Pinterest that show how versatile this frosting is in design and presentation: Pinterest cupcake frosting ideas.
Step-by-Step Instructions with Tips
Mastering this frosting is easy when you follow the steps closely. Here’s a detailed breakdown to ensure a foolproof finish every time.
Step 1: Cook the Flour and Milk Paste
-
In a small saucepan, whisk together 1 cup of whole milk and 5 tablespoons of all-purpose flour over medium heat.
-
Keep whisking constantly to avoid lumps.
-
After a few minutes, the mixture will thicken into a smooth, pudding-like paste.
-
Remove it from heat and let it cool completely to room temperature. You can speed this up by spreading it on a plate and placing it in the fridge for a few minutes—but don’t let it get cold or watery.
Step 2: Cream the Butter and Sugar
-
While the paste is cooling, beat 1 cup of unsalted butter and 1 cup of granulated sugar in a large mixing bowl.
-
Use a stand mixer or hand mixer on high speed for several minutes—up to 8 minutes.
-
The mixture should become very light, fluffy, and pale in color. This is essential for dissolving the sugar and creating that airy texture. If you’re new to this, learn more about the creaming method and why it matters.
Step 3: Combine and Whip Until Fluffy
-
Add the fully cooled flour/milk paste to the whipped butter and sugar.
-
Add 2 teaspoons of vanilla extract.
-
Beat on high speed again for 5 to 8 minutes until the frosting becomes smooth, thick, and fluffy. It should hold peaks and have a silky consistency.
For additional guidance and presentation ideas, see examples of easy frosting techniques on Pinterest.
Frosting Texture, Flavor, and Appearance
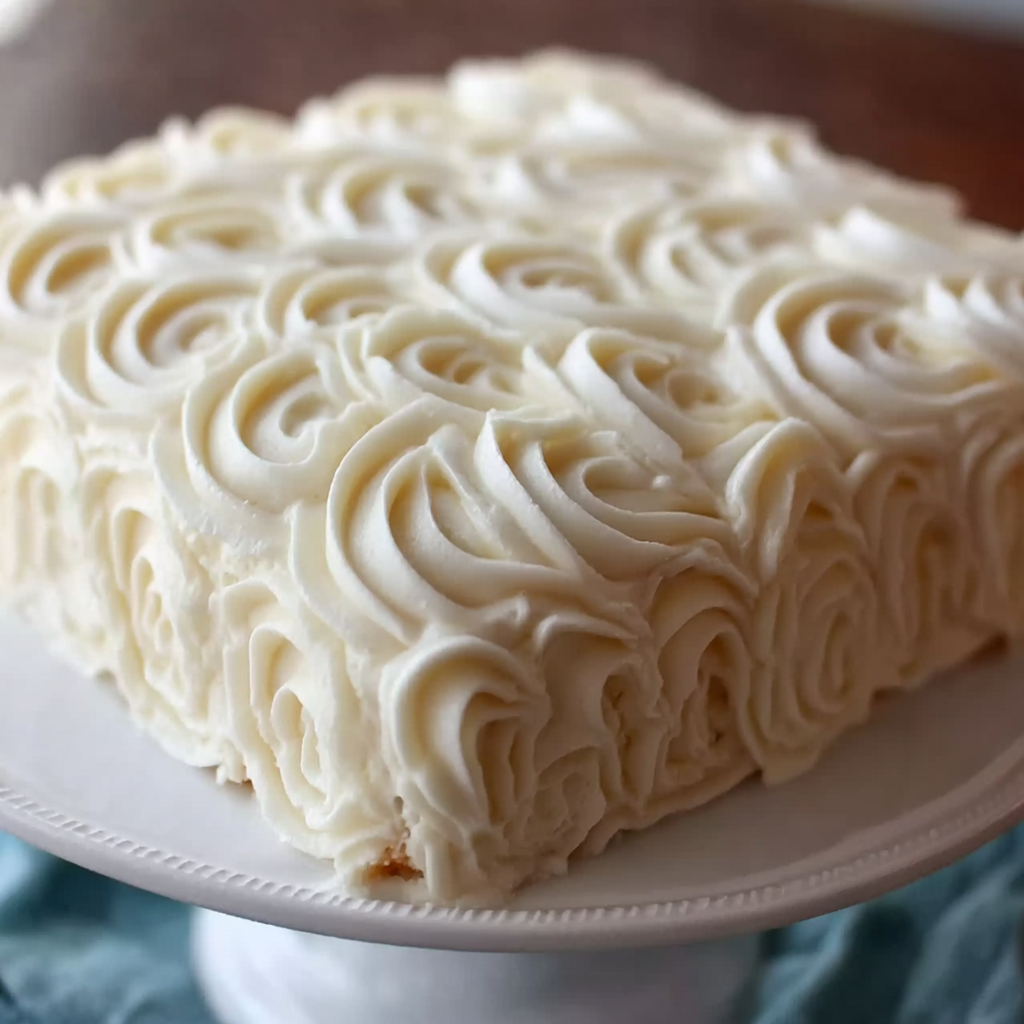
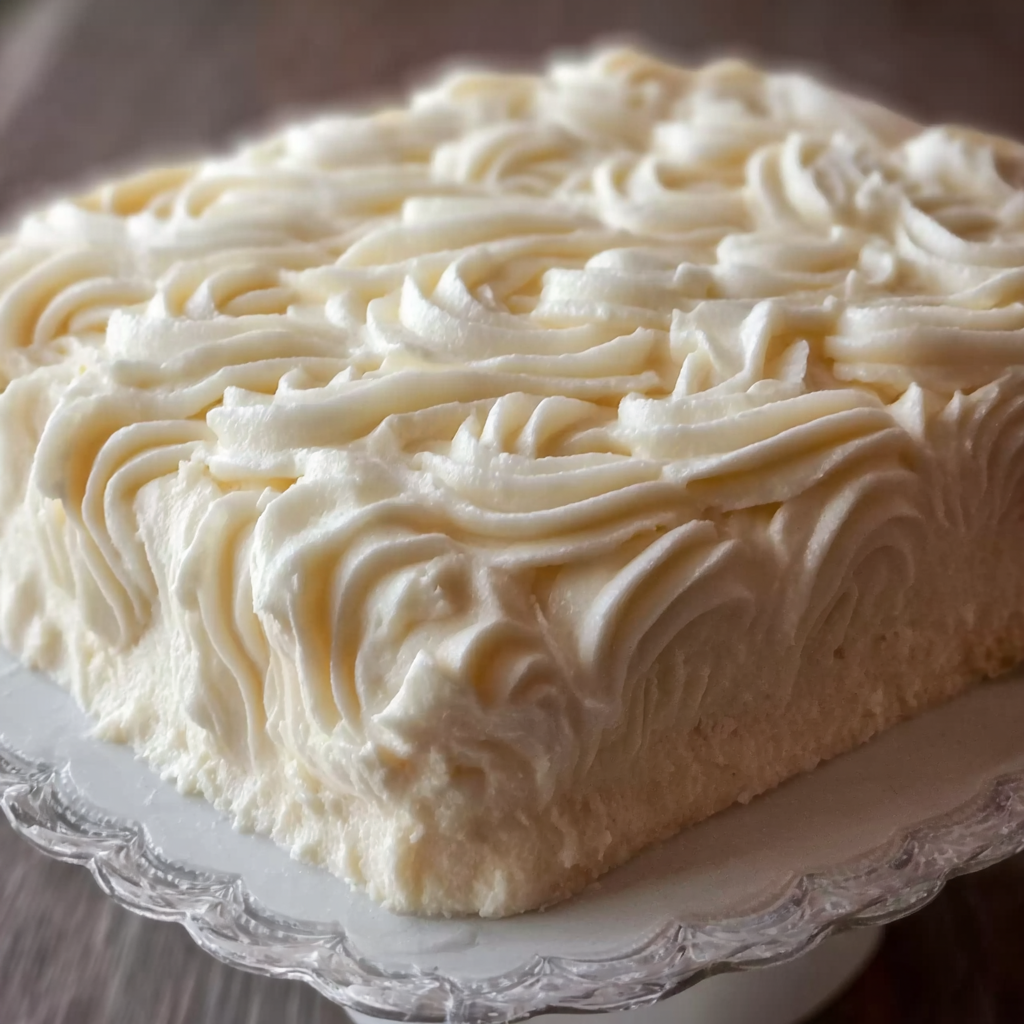
This frosting is unlike any other. It’s incredibly smooth and creamy, yet light and fluffy thanks to the cooked paste base. The long whipping process also ensures the sugar dissolves completely, leaving no gritty texture. The result is a frosting that feels like whipped cream but holds its shape like a buttercream.
The flavor is perfectly balanced: sweet but not overwhelming, with a warm vanilla undertone. Because it’s not overly rich, it complements everything from delicate sponge cakes to rich chocolate layers. In appearance, it’s bright white, making it a great base for coloring. Use gel-based food colorings for best results.
If you’re curious about the general types of icing used in baking, this Wikipedia entry on frosting covers the basics and shows where this one fits in.
How to Use This Frosting
This fluffy vanilla frosting is incredibly versatile and works beautifully across a wide range of baked goods:
-
Layer Cakes: It’s sturdy enough to stack between layers without oozing or slipping.
-
Cupcakes: Piping this frosting onto cupcakes gives a bakery-style finish. Check out Pinterest cupcake frosting ideas for inspiration.
-
Cookies: Spread a thin layer onto sugar cookies for a smooth finish.
-
Sheet Cakes: Its smooth texture makes it easy to apply with a spatula for even coverage.
You can also pair it with fruit fillings, chocolate drizzles, or colorful sprinkles to customize the flavor and appearance.
Flavor Variations
One of the best things about this frosting is how easily it adapts to new flavors. Here are some delicious variations:
-
Chocolate: Add 1/2 cup of unsweetened cocoa powder or 3 oz of melted and cooled dark chocolate during the final whipping stage.
-
Strawberry: Fold in 2–3 tablespoons of freeze-dried strawberry powder for a vibrant color and real fruit flavor.
-
Almond: Replace 1 teaspoon of the vanilla extract with almond extract for a nutty twist.
-
Maple: Swap out the vanilla extract with 2 teaspoons of real maple syrup.
-
Citrus: Add the zest of 1 lemon or orange and a few drops of juice to brighten the flavor.
You can find great visual inspiration for these versions on Pinterest frosting boards.
How to Store and Freeze
Proper storage ensures your frosting stays fresh and maintains its texture:
-
Refrigerator: Store in an airtight container for up to 5 days. Let it come to room temperature and rewhip before using.
-
Freezer: Freeze for up to 1 month. Thaw overnight in the fridge, then bring to room temp and whip again until fluffy.
-
Room Temperature: Can sit out for a few hours while decorating, but avoid keeping it out too long in warm conditions.
Avoid microwaving to soften, as it can break the emulsion and cause the frosting to separate.
Troubleshooting Common Problems
Even with a foolproof method, small mistakes can happen. Here’s how to fix them:
-
Grainy texture: This happens when the sugar hasn’t fully dissolved. Make sure to whip the butter and sugar for the full time needed.
-
Too soft: Likely caused by the flour/milk paste being too warm. Let it cool completely before adding.
-
Curdled appearance: Don’t panic—just keep whipping. It often comes together with time.
-
Separated after chilling: Let it come back to room temperature, then rewhip until smooth.
If you want more ideas for decorating your baked goods with this frosting, browse these cake decorating inspiration boards on Pinterest.
FAQs (Frequently Asked Questions)
Can I use powdered sugar instead of granulated sugar?
Not in this recipe. Powdered sugar changes the texture and makes it overly sweet. The long whipping time allows granulated sugar to dissolve fully for a smoother finish.
Why does this frosting use flour? Is it safe to eat?
Yes, it’s safe. The flour is cooked with milk into a thick paste, which is both safe and essential for achieving the signature fluffy texture.
Can I make this frosting dairy-free or vegan?
Yes, but you’ll need quality substitutes like vegan butter and unsweetened plant milk. Be sure they can hold up to whipping and heating. Texture may vary.
Can I pipe with this frosting?
Absolutely. This frosting holds its shape well and is ideal for both piping and spreading. Use a large tip for the best results.
How long can this frosting sit out at room temperature?
It’s safe for several hours (up to 6) but should be refrigerated if not used immediately, especially in warm conditions.
Does this frosting crust like buttercream?
No. This frosting stays soft and doesn’t form a crust, which is ideal for a smooth finish but not ideal if you need a crusted surface for decorating techniques like stenciling.
The Best Frosting Ever – Fluffy, Creamy & Foolproof Every Time
This perfect vanilla frosting is creamy, fluffy, and surprisingly light. With just five ingredients and an easy method, it delivers a smooth texture and balanced sweetness every time. It’s ideal for cakes, cupcakes, and cookies—and best of all, it’s not overly sweet or heavy. If you’re looking for a frosting that spreads like silk and pipes beautifully, this recipe is the one.
- Author: Clara
Ingredients
- 1 cup unsalted butter, softened
- 1 cup granulated sugar
- 1 cup whole milk
- 5 tablespoons all-purpose flour
- 2 teaspoons vanilla extract
Instructions
In a small saucepan, whisk together the flour and milk over medium heat until it thickens into a smooth paste. This should resemble a thick pudding. Remove from heat and let it cool completely to room temperature.
While the flour mixture is cooling, beat the softened butter and granulated sugar together in a large bowl until light and fluffy. This may take several minutes.
Once the flour mixture is completely cool, add it to the butter and sugar mixture.
Add the vanilla extract and beat everything together on high speed until the frosting becomes fluffy and smooth. This can take several more minutes of whipping.
Use immediately to frost cakes, cupcakes, or cookies, or refrigerate until ready to use. Bring to room temperature before spreading if chilled.
Notes
-
Ensure the milk and flour paste is completely cool before combining with the butter and sugar.
-
For best texture, whip each stage thoroughly. Don’t rush the process.
-
Use high-quality vanilla extract for optimal flavor.
-
If you want to color the frosting, use gel-based food coloring for best results without changing the consistency.
-
Always bring chilled frosting to room temperature before using and rewhip for best texture.