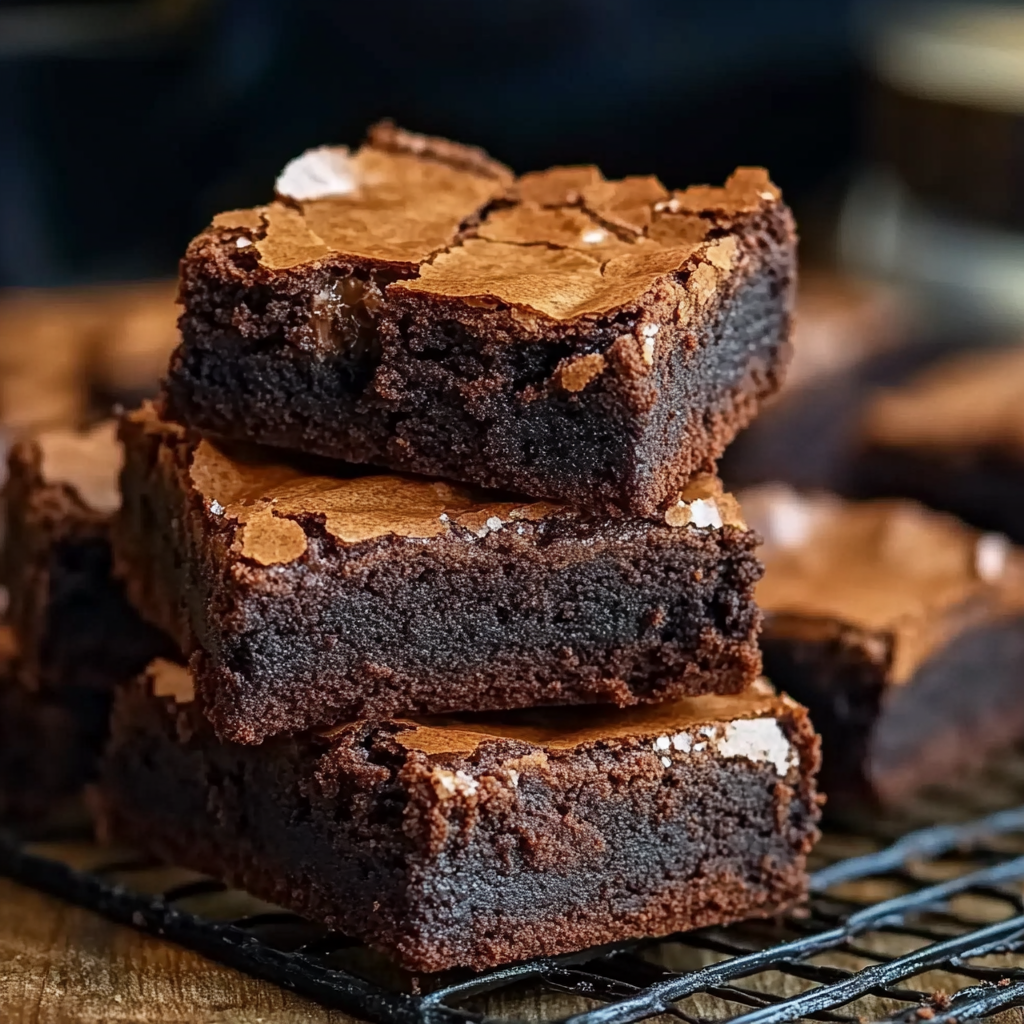
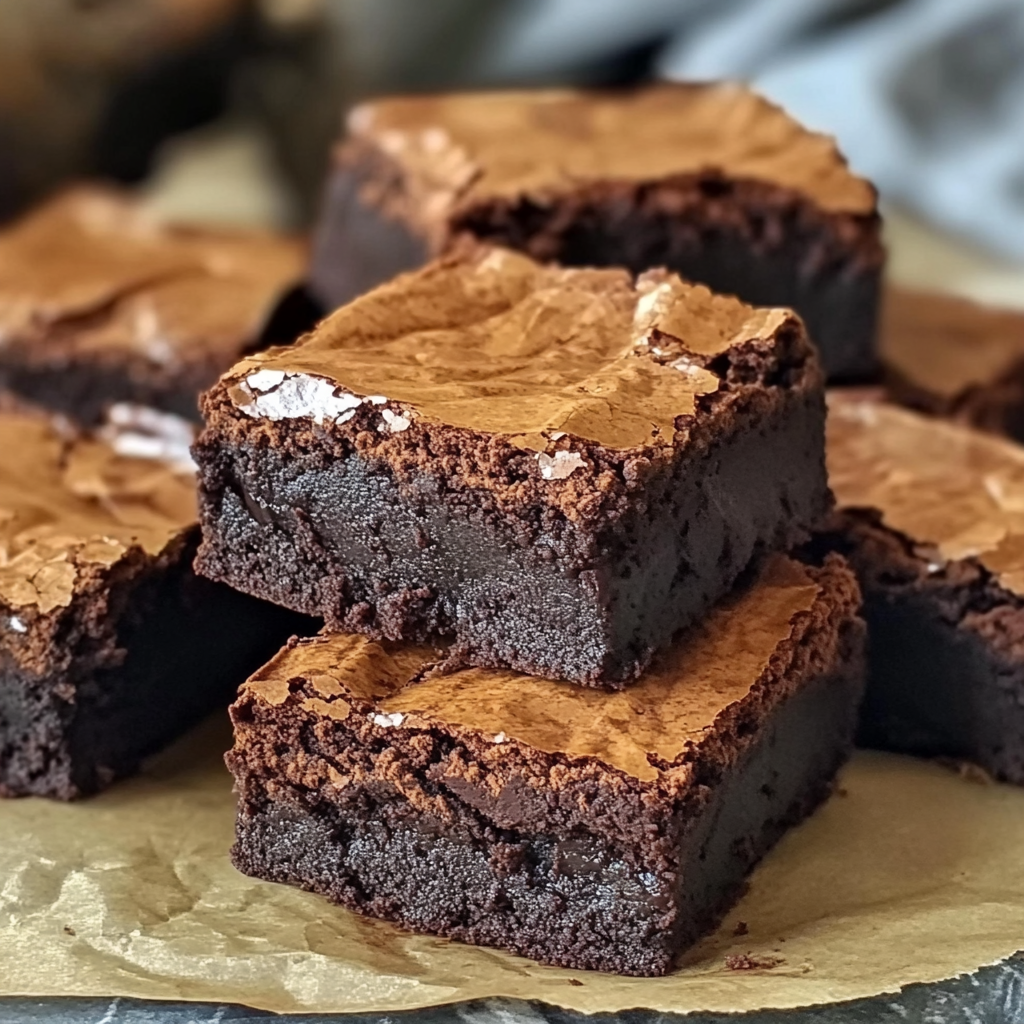
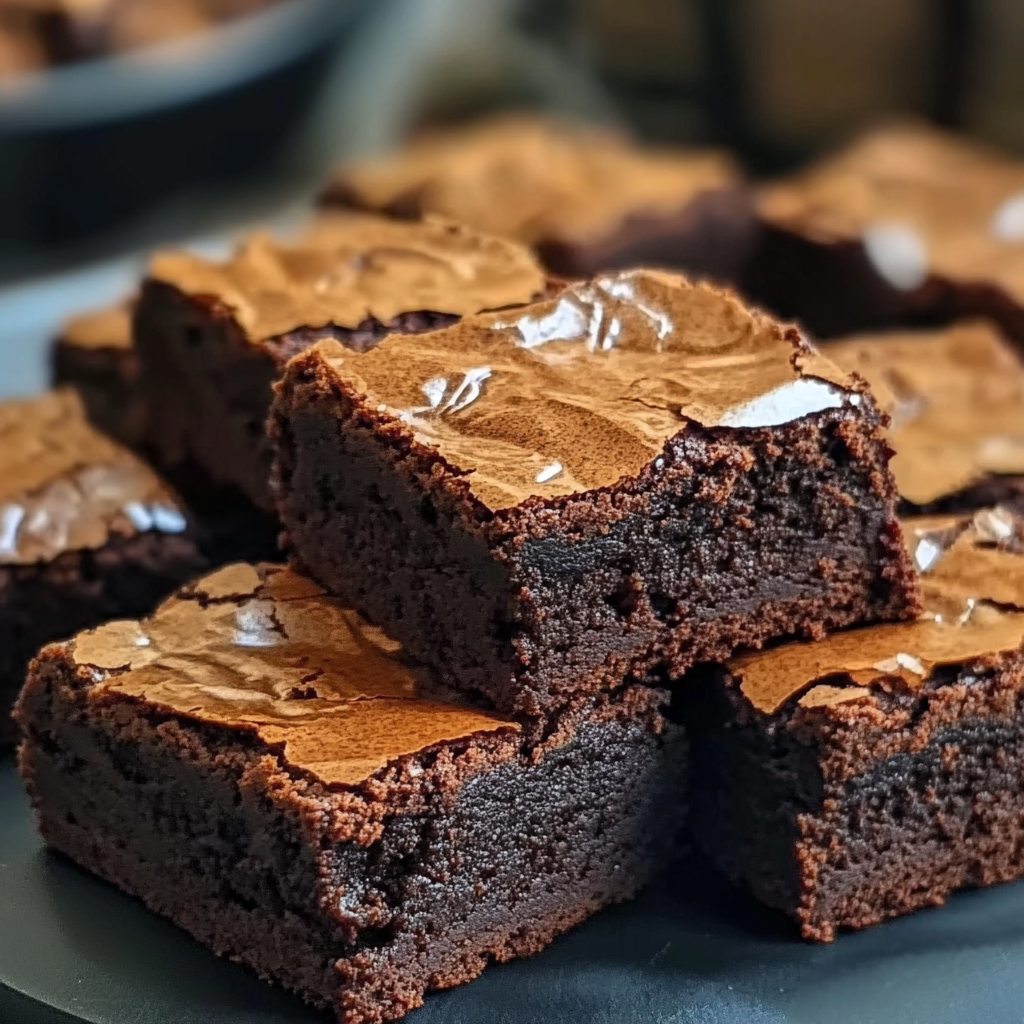
When autumn rolls around, there’s no shortage of seasonal treats that capture the essence of fall. From pumpkin spice lattes to warm apple crisps, this time of year is all about comforting flavors. But have you ever considered combining the rich decadence of chocolate brownies with the earthy sweetness of pumpkin puree? Enter pumpkin brownies—a dessert that blends two beloved flavors into a single indulgent treat.
These marbled delights are not only visually stunning but also a perfect dessert for fall gatherings, Halloween parties, or even as a sweet addition to your Thanksgiving table. The combination of unsweetened cocoa powder and warm pumpkin pie spice creates a balance that satisfies both chocolate lovers and pumpkin spice enthusiasts alike.
What makes pumpkin brownies even better is their simplicity. With a few pantry staples like all-purpose flour and vanilla extract, and a single bowl for each layer, you can whip up these layered beauties in under an hour. If you’re looking for a way to elevate your fall baking game, these brownies are the perfect solution.
Whether you’re an experienced baker or just starting out, you’ll find this easy pumpkin brownie recipe not only approachable but also endlessly customizable. By the end of this guide, you’ll have a new go-to dessert that’s sure to impress your family and friends. So, grab your apron, and let’s get started!
The Perfect Brownie Base: Ingredients & Role of Each
To create the ideal pumpkin brownies, you need a solid foundation: the brownie base. This layer is rich, fudgy, and provides the perfect contrast to the light, spiced pumpkin topping. Let’s take a closer look at the ingredients and their roles in building this decadent base.
Ingredients for the Brownie Layer
- Unsalted Butter: Melted butter adds richness and moisture, giving the brownies their soft, fudgy texture. Using unsalted butter also allows you to control the salt content in the recipe. Learn more about the science of baking with butter in this Wikipedia article on butter.
- Granulated Sugar: Sugar not only sweetens the brownies but also affects their structure by contributing to the soft, chewy texture.
- Eggs: Acting as a binder, eggs add structure to the brownies. They also help create a smooth, shiny top layer that is characteristic of classic brownies.
- All-Purpose Flour: This ingredient provides the structure and stability necessary for the brownies to hold their shape.
- Unsweetened Cocoa Powder: The star of the brownie layer, cocoa powder brings in that deep chocolate flavor. For a more intense taste, consider using Dutch-processed cocoa powder, which has a richer flavor profile. Learn more about cocoa powder in this Wikipedia entry.
- Salt: A small amount of salt enhances the sweetness of the sugar and deepens the chocolate flavor.
- Vanilla Extract: This adds warmth and depth to the overall flavor, complementing both the chocolate and the pumpkin layers.
The Importance of High-Quality Ingredients
Using high-quality ingredients is key to achieving the best results. For instance, opt for pure vanilla extract instead of artificial flavoring, as it enhances the richness of the brownie batter. Similarly, investing in premium cocoa powder can elevate the chocolatey depth of the brownies.
If you’re in a pinch and need substitutions, here are a few suggestions:
- Replace unsalted butter with coconut oil for a dairy-free version.
- Use brown sugar instead of granulated sugar for a hint of caramel-like sweetness.
- Swap all-purpose flour with a gluten-free flour blend to make the recipe gluten-free.
By understanding the role of each ingredient, you can tailor this recipe to fit your taste preferences or dietary needs. Up next, we’ll dive into the step-by-step process of preparing the brownie batter.
Preparing the Brownie Batter: Step-by-Step Instructions
Creating the brownie layer is a straightforward process, but achieving that perfect fudgy texture requires some attention to detail. Follow these steps carefully, and you’ll have a rich, chocolatey base ready to complement the pumpkin layer.
Step 1: Combine the Wet Ingredients
- Melt the Butter: Start by melting 1 cup of unsalted butter. Let it cool slightly to prevent the eggs from curdling when added.
- Mix Butter and Sugar: In a large mixing bowl, whisk together the melted butter and 2 cups of granulated sugar until the mixture is smooth and slightly thickened. This step helps dissolve the sugar and sets the foundation for a glossy top on your brownies.
- Add Eggs One at a Time: Crack in 4 large eggs, one at a time, mixing well after each addition. This ensures the batter is smooth and well-emulsified.
- Stir in Vanilla Extract: Finally, add 1 teaspoon of vanilla extract. This enhances the flavor of the cocoa powder and rounds out the richness of the brownies.
Pro Tip: For an extra layer of flavor, consider browning the butter before mixing it with sugar. This adds a nutty, caramelized aroma to your brownies.
Step 2: Incorporate the Dry Ingredients
- Sift the Dry Ingredients: In a separate bowl, sift together 1 cup of all-purpose flour, ¾ cup of unsweetened cocoa powder, and ½ teaspoon of salt. Sifting helps prevent lumps and ensures even distribution of the ingredients.
- Fold Dry into Wet: Gradually fold the dry ingredients into the wet mixture using a spatula. Be careful not to overmix, as this can lead to dense, tough brownies. Stop mixing as soon as you see no streaks of flour.
Why Folding Matters: Overmixing activates the gluten in the flour, which can result in a less tender texture. Folding gently keeps the batter airy and light.
Step 3: Check the Consistency
Your brownie batter should be thick, smooth, and glossy. If it seems too dry, add a tablespoon of milk or water to loosen it slightly. The consistency is key for spreading the batter evenly in the pan later.
Bonus Tip: Enhance the Flavor
For a richer chocolate taste, stir in a handful of chocolate chips or chunks into the batter at this stage. You can also experiment by adding a pinch of espresso powder to deepen the chocolate flavor—without making the brownies taste like coffee.
By mastering these steps, you’re well on your way to creating a perfectly fudgy brownie base. Next, we’ll explore the pumpkin layer, the element that truly makes this dessert stand out.
The Pumpkin Layer: Why It’s the Star of the Show
The pumpkin layer is what transforms these brownies from an ordinary chocolate treat into a standout fall dessert. Its creamy texture and warm spices provide a perfect contrast to the rich, chocolatey brownie base. Let’s take a closer look at what makes this layer the true star of the show.
Ingredients for the Pumpkin Layer
- Pumpkin Puree: The hero of the layer, pumpkin puree not only adds flavor but also keeps the layer moist and smooth. Make sure to use pure pumpkin puree, not pumpkin pie filling, as the latter is pre-sweetened and spiced. If you’re unsure about the difference, this Pinterest guide can help clarify.
- Granulated Sugar: The sugar sweetens the pumpkin mixture just enough to complement the brownie layer without overpowering it.
- Egg: A single egg acts as a binder, giving the pumpkin layer structure while maintaining a custard-like consistency.
- Pumpkin Pie Spice: This spice blend is the essence of fall, combining cinnamon, nutmeg, ginger, and cloves for a warm, aromatic flavor. You can learn more about its history and uses in this Wikipedia article.
The Role of Pumpkin in Baking
Pumpkin is not just about flavor; it also adds moisture and richness to baked goods. Its natural creaminess eliminates the need for heavy cream or other fats, making the pumpkin layer lighter yet indulgent. Additionally, pumpkin is a nutrient-rich ingredient packed with vitamins A and C, making these brownies a (slightly) healthier dessert option.
Choosing the Right Pumpkin Puree
Not all pumpkin purees are created equal. For the best results:
- Use canned pumpkin puree labeled “100% pure pumpkin.”
- If you prefer homemade, roast fresh pumpkin and blend it into a smooth puree. Check out this Pinterest guide for tips on making your own puree.
- Avoid pumpkin pie filling, as it contains added sugar and spices that can throw off the balance of your recipe.
Balancing the Flavor
The key to a perfect pumpkin layer is achieving the right balance between the sweetness of the sugar and the warmth of the spices. If you love bold flavors, consider adding a pinch of extra nutmeg or cloves to amplify the pumpkin pie spice. On the other hand, if you prefer a milder flavor, reduce the spice blend slightly.
Up next, we’ll dive into how to mix and prepare this layer for the perfect marbled effect in your brownies.
Creating the Pumpkin Batter: Smooth & Spiced
The pumpkin batter is quick and simple to prepare but requires attention to detail to ensure it blends smoothly and bakes evenly with the brownie layer. Follow these steps to create a creamy, spiced pumpkin layer that perfectly complements the rich chocolate base.
Step 1: Combine the Ingredients
- Start with the Pumpkin Puree: In a medium-sized mixing bowl, add 1 cup of pumpkin puree. Make sure the puree is smooth and free from lumps. If using homemade pumpkin puree, strain it to remove excess liquid for a better texture.
- Add the Sugar: Stir in ⅓ cup of granulated sugar. Mix well until the sugar is fully incorporated, creating a slightly glossy appearance in the mixture.
- Mix in the Egg: Crack 1 large egg into the bowl and whisk until the mixture is creamy and smooth. The egg is crucial for binding the ingredients and creating a cohesive batter.
- Incorporate the Spice: Add 1 teaspoon of pumpkin pie spice and stir until evenly distributed. The spice blend enhances the flavor of the pumpkin while infusing the batter with warm, autumnal notes.
Step 2: Check the Consistency
Your pumpkin batter should be silky and easy to spread. If it appears too thick, you can thin it slightly with a tablespoon of milk. However, avoid adding too much liquid, as this may cause the layer to bake unevenly.
Tips for the Perfect Pumpkin Batter
- Avoid Overmixing: Stir the ingredients just until combined to prevent the batter from becoming too dense.
- Taste Test the Spice Level: Before assembling the layers, taste a small amount of the batter to ensure the spice level is to your liking. Adjust by adding a pinch of extra cinnamon or nutmeg if needed.
- Keep Ingredients at Room Temperature: Using room-temperature ingredients, especially the egg, ensures that the batter mixes evenly without curdling.
A Quick Note on Variations
For a creative twist, you can customize the pumpkin layer by:
- Adding a splash of vanilla extract for extra warmth.
- Mixing in a handful of chopped pecans or walnuts for added texture.
- Swirling in a dollop of cream cheese for a tangy contrast to the pumpkin.
With your pumpkin batter ready to go, the next step is assembling the layers and creating the stunning marbled effect that makes these brownies truly show-stopping.
Layering & Swirling: The Art of Marbling Brownies
Creating the marbled effect in pumpkin brownies is not only fun but also the key to making this dessert visually appealing. The combination of rich chocolate and vibrant pumpkin swirls makes for a dessert that’s as delightful to look at as it is to eat. Follow these steps to layer and swirl your batter like a pro.
Step 1: Prepare the Baking Pan
- Grease the Pan: Use butter or nonstick spray to grease a 9×13-inch baking pan thoroughly. This prevents the brownies from sticking and ensures easy removal.
- Optional: Line with Parchment Paper: For even easier cleanup and perfect edges, line the pan with parchment paper, leaving some overhang on the sides. This allows you to lift the brownies out of the pan once they’ve cooled.
Step 2: Layer the Brownie and Pumpkin Batters
- First Brownie Layer: Pour half of the brownie batter into the prepared pan. Use a spatula to spread it evenly into all corners of the pan. The thickness of this layer creates a sturdy base for the pumpkin batter.
- Add the Pumpkin Layer: Spoon the pumpkin batter over the brownie layer in large dollops. Use the back of a spoon or an offset spatula to spread it out evenly. Don’t worry if it doesn’t cover the brownie layer completely—this adds to the marbled effect.
- Top with Remaining Brownie Batter: Drop the remaining brownie batter on top of the pumpkin layer in small dollops, leaving some of the pumpkin visible.
Step 3: Create the Marbled Effect
- Swirl the Batters: Using a butter knife or a skewer, gently swirl the brownie and pumpkin layers together. To do this, drag the knife in an “S” or circular motion through the batter, creating a marbled design. Be careful not to over-swirl, as this can blend the layers too much and obscure the distinct colors.
- Smooth the Top (Optional): If you prefer a cleaner look, you can gently tap the pan on the counter to even out the surface of the batter.
Tips for Perfect Swirls
- Start Small: When swirling, begin with light motions and build up as needed. Overdoing it can mix the batters together too much, losing the marbled effect.
- Keep It Random: Avoid making symmetrical patterns—random swirls create a more organic and eye-catching design.
- Add Toppings (Optional): If you want to take your brownies to the next level, sprinkle chocolate chips, chopped nuts, or a dusting of pumpkin pie spice over the surface before baking.
Visual Appeal and Presentation
The marbled swirls not only look beautiful but also allow the flavors of both layers to shine in every bite. When baked, the pumpkin layer will set into a soft, custard-like texture, while the brownie base remains rich and fudgy, creating a delightful contrast.
With the brownies now ready for the oven, the next step is to bake them to perfection. Let’s move on to baking tips and tricks for achieving the ideal texture and flavor.
Baking to Perfection: Tips for Texture & Timing
Now that your pumpkin brownies are assembled, the final step is to bake them to perfection. Proper baking ensures the brownie layer stays fudgy while the pumpkin layer sets into a creamy, custard-like consistency. Follow these tips for flawless results.
Step 1: Preheat the Oven
- Set the Temperature: Preheat your oven to 350°F (175°C). Ensuring the oven is fully heated before baking is crucial for even cooking.
- Position the Rack: Place the oven rack in the center position. This allows for balanced heat distribution, preventing the bottom from overcooking or the top from underbaking.
Step 2: Bake the Brownies
- Bake Time: Place the pan in the oven and bake for 40–45 minutes. Keep an eye on the brownies during the last 5 minutes of baking to avoid overcooking.
- Check for Doneness: Insert a toothpick into the center of the brownies. If it comes out with a few moist crumbs, they’re done. If it comes out covered in wet batter, bake for a few more minutes and check again.
- Pro Tip: Remember that brownies continue to set as they cool, so don’t wait for the toothpick to come out completely clean—that would result in dry brownies.
Step 3: Cooling the Brownies
- Cool in the Pan: Once baked, remove the brownies from the oven and let them cool in the pan for at least 30 minutes. This allows the layers to firm up and makes slicing easier.
- Transfer to a Cutting Board: If you used parchment paper, lift the brownies out of the pan using the overhanging edges. Place them on a cutting board to cool completely.
Troubleshooting Common Baking Issues
- Brownies Too Dry: This usually happens if the brownies are overbaked. Always err on the side of underbaking and let the residual heat finish the job.
- Pumpkin Layer Too Runny: If the pumpkin layer isn’t setting, ensure you’ve measured your pumpkin puree accurately and haven’t added extra liquid to the batter. Baking for an extra 5–10 minutes can also help.
- Uneven Layers: If the layers don’t look even, it’s likely due to uneven spreading during assembly. Next time, take extra care to spread each layer evenly with an offset spatula.
The Key to Perfect Texture
The hallmark of great pumpkin brownies is the texture contrast between the layers. The brownie base should be rich and fudgy, while the pumpkin layer is smooth and creamy. Achieving this requires a balance of proper layering, accurate bake time, and adequate cooling.
Up next, we’ll explore some serving suggestions and creative twists to elevate your pumpkin brownies even further.
Serving Suggestions & Creative Twists
Now that your pumpkin brownies are baked and cooled, it’s time to serve them and explore ways to customize the recipe for your preferences. Whether you’re keeping it classic or adding creative twists, these serving ideas and variations will make your pumpkin brownies unforgettable.
How to Serve Pumpkin Brownies
- Cut Cleanly: Use a sharp knife to slice the brownies into squares or rectangles. For extra clean edges, wipe the knife with a damp cloth between each cut.
- Serve Warm or at Room Temperature: If you prefer warm brownies, reheat them briefly in the microwave for 10–15 seconds. This enhances the flavors of the chocolate and pumpkin.
- Pair with Toppings:
- Add a dollop of whipped cream or a drizzle of caramel sauce for a luxurious finish.
- Serve with a scoop of vanilla or cinnamon ice cream for a classic pairing.
- Dust the top with powdered sugar or a pinch of pumpkin pie spice for a simple garnish.
Creative Variations
Looking to take your pumpkin brownies to the next level? Here are a few creative twists to try:
- Add Chocolate Chips: Stir in dark or white chocolate chips to the brownie batter for bursts of melty chocolate in every bite.
- Include Nuts: Fold chopped walnuts, pecans, or almonds into either the brownie layer or the pumpkin layer for added crunch.
- Swirl in Cream Cheese: Combine softened cream cheese with a little sugar and vanilla extract, then swirl it into the pumpkin layer for a tangy flavor boost.
- Spice It Up: If you love bold flavors, add a pinch of cayenne pepper or espresso powder to the brownie batter to enhance the chocolate flavor and add depth.
Storing and Freezing Brownies
- Storage: Keep the brownies in an airtight container at room temperature for up to 3 days. If you prefer a firmer texture, store them in the refrigerator for up to a week.
- Freezing: To freeze, wrap individual brownie squares in plastic wrap and place them in a freezer-safe bag. They’ll stay fresh for up to 3 months. Thaw at room temperature or warm in the microwave before serving.
Why Customization Matters
The beauty of pumpkin brownies lies in their versatility. Whether you keep them simple or experiment with flavors and textures, this dessert can be adapted to suit any occasion or personal taste. These creative options ensure that your brownies will always stand out, whether you’re serving them at a family dinner, a holiday gathering, or simply indulging on your own.
Next, we’ll answer some common questions about pumpkin brownies in our FAQ section

FAQs: Common Questions About Pumpkin Brownies
To help you perfect your pumpkin brownies and troubleshoot any issues, here are answers to some frequently asked questions about this delicious dessert.
1. Can I Use Fresh Pumpkin Instead of Canned Pumpkin Puree?
Yes, you can use fresh pumpkin puree! To make your own, roast a small pumpkin, scoop out the flesh, and blend it until smooth. However, homemade puree tends to have more moisture than canned puree, so make sure to strain it in a cheesecloth or fine mesh strainer before using it in the recipe. For step-by-step instructions, check out this Pinterest guide on how to make pumpkin puree.
2. How Do I Prevent Brownies From Being Too Dense or Dry?
The key to fudgy, moist brownies lies in the mixing and baking process:
- Avoid overmixing the batter, especially after adding the flour.
- Check for doneness early by inserting a toothpick into the center. Look for a few moist crumbs instead of waiting for the toothpick to come out completely clean.
- Make sure to use the correct ratio of wet to dry ingredients, as listed in the recipe.
3. What’s the Difference Between Pumpkin Puree and Pumpkin Pie Filling?
Pumpkin puree is 100% pure pumpkin with no added sugar or spices. In contrast, pumpkin pie filling is pre-seasoned and sweetened, which can alter the taste and texture of your recipe. Always double-check the label to ensure you’re using the correct ingredient. If you’re unsure, learn more about the distinction in this Pinterest post.
4. Can I Make This Recipe Gluten-Free?
Absolutely! To make gluten-free pumpkin brownies, simply substitute the all-purpose flour with a gluten-free flour blend that contains xanthan gum. Brands like Bob’s Red Mill or King Arthur Baking offer excellent options. Make sure to check the packaging for a 1:1 substitution ratio.
5. How Do I Store Leftover Pumpkin Brownies?
- At Room Temperature: Store in an airtight container for up to 3 days.
- In the Fridge: For a firmer texture, refrigerate the brownies in a sealed container for up to a week.
- Freezing: Wrap individual brownies in plastic wrap, then place them in a freezer-safe bag or container. They’ll keep well in the freezer for up to 3 months. Thaw at room temperature or warm them in the microwave before enjoying.
6. Can I Add Toppings to My Pumpkin Brownies?
Yes, toppings are a great way to enhance the flavor and presentation of your brownies! Consider sprinkling chocolate chips, chopped nuts, or even crushed graham crackers over the batter before baking. For a festive touch, drizzle the finished brownies with caramel sauce or dust them with powdered sugar.
7. What’s the Secret to a Perfect Swirl?
Achieving the perfect marbled swirl is easier than it looks. Use a knife or skewer to drag through the brownie batter and pumpkin batter in a random pattern. Don’t over-swirl, as this can blend the layers too much. The key is to leave distinct streaks of pumpkin and chocolate for a stunning visual effect.
8. Can I Double This Recipe?
Yes! To double the recipe, use a larger baking pan (such as 11×15 inches) and bake for the same amount of time, checking for doneness around the 40-minute mark. Ensure the layers are spread evenly for consistent results.
9. Are These Brownies Kid-Friendly?
Absolutely! Kids love the rich chocolatey brownie base and the subtle sweetness of the pumpkin layer. Plus, the marbled design is a fun way to get them involved in the baking process.
10. What’s the Best Way to Serve Pumpkin Brownies at a Party?
For parties, cut the brownies into small, bite-sized squares for easy serving. Arrange them on a dessert platter and garnish with a sprinkle of pumpkin pie spice or a drizzle of melted chocolate for a festive touch.
PrintPumpkin Brownies

These Pumpkin Brownies are the ultimate fall dessert, combining the rich, fudgy texture of classic brownies with a creamy, spiced pumpkin layer. Swirled together for a stunning marbled effect, they’re as beautiful as they are delicious. Perfect for autumn gatherings, Thanksgiving dinners, or a cozy treat on a chilly evening, these brownies offer the perfect balance of chocolatey decadence and warm, aromatic pumpkin spice.
- Author: Clara
Ingredients
Ingredients:
For the brownie layer:
- 1 cup unsalted butter, melted
- 2 cups granulated sugar
- 4 large eggs
- 1 cup all-purpose flour
- ¾ cup unsweetened cocoa powder
- ½ tsp salt
- 1 tsp vanilla extract
For the pumpkin layer:
- 1 cup pumpkin puree
- ⅓ cup granulated sugar
- 1 large egg
- 1 tsp pumpkin pie spice
Instructions
Preheat your oven to 350°F (175°C) and grease a 9×13-inch baking pan.
In a mixing bowl, whisk together melted butter and sugar. Add eggs one at a time, followed by vanilla extract.
Sift together flour, cocoa powder, and salt in a separate bowl. Gradually fold the dry ingredients into the wet ingredients to form the brownie batter.
In another bowl, mix pumpkin puree, sugar, egg, and pumpkin pie spice until smooth.
Pour half of the brownie batter into the prepared pan and spread it evenly. Spoon the pumpkin mixture over the brownie layer, then top with the remaining brownie batter. Swirl the layers together with a knife to create a marbled effect.
Bake for 40-45 minutes, or until a toothpick inserted in the center comes out with a few moist crumbs. Let the brownies cool completely before cutting and serving.
Notes
Ingredient Tips
- Pumpkin Puree: Use 100% pure pumpkin puree, not pumpkin pie filling. If you prefer homemade, ensure it’s well-strained to remove excess moisture.
- Cocoa Powder: For the best chocolate flavor, use high-quality unsweetened cocoa powder, such as Dutch-process cocoa.
- Butter: Use melted unsalted butter for rich flavor. If using salted butter, reduce the added salt in the recipe.
- Pumpkin Pie Spice: Adjust the amount to taste, or make your own blend with cinnamon, nutmeg, ginger, and cloves.
Preparation Tips
- Swirling Technique: Be gentle and use a knife or skewer to create a marbled design. Avoid over-swirling to maintain distinct layers of chocolate and pumpkin.
- Even Layers: Spread each layer evenly to ensure consistent baking and the perfect brownie-to-pumpkin ratio in every bite.
- Room-Temperature Ingredients: For a smooth batter, let all ingredients, especially eggs, come to room temperature before mixing.
Baking Notes
- Check the brownies for doneness by inserting a toothpick into the center. A few moist crumbs indicate they’re perfectly baked.
- Allow the brownies to cool completely before slicing to ensure clean cuts and firm layers.
Storage and Freezing
- Store leftovers in an airtight container at room temperature for up to 3 days or in the refrigerator for up to a week.
- Freeze individually wrapped squares for up to 3 months. Thaw at room temperature before serving.
Customizations
- Add-ins: Stir in chocolate chips, chopped nuts, or even a handful of mini marshmallows to the brownie batter.
- Toppings: Drizzle with caramel or melted chocolate, or garnish with whipped cream for an extra indulgent treat.
- Gluten-Free Option: Replace the all-purpose flour with a gluten-free flour blend for a celiac-friendly version.
It tastes delicious! But I decided to just mix the pumpkin into the whole batter and it was very wet and floppy in my hand when I went to pick it up to eat. It did stay in one piece though!
★★★