The Magic of Peppermint Hot Chocolate Cake
When winter settles in and the air turns crisp, there’s one flavor combination that never fails to spark warmth and nostalgia: peppermint and hot chocolate. It’s a duo that captures the essence of the holiday season, evoking memories of snow days, cozy blankets, and festive mugs filled with sweet, steamy cocoa. Now imagine turning that comforting drink into an elegant dessert centerpiece—the peppermint hot chocolate cake does exactly that.
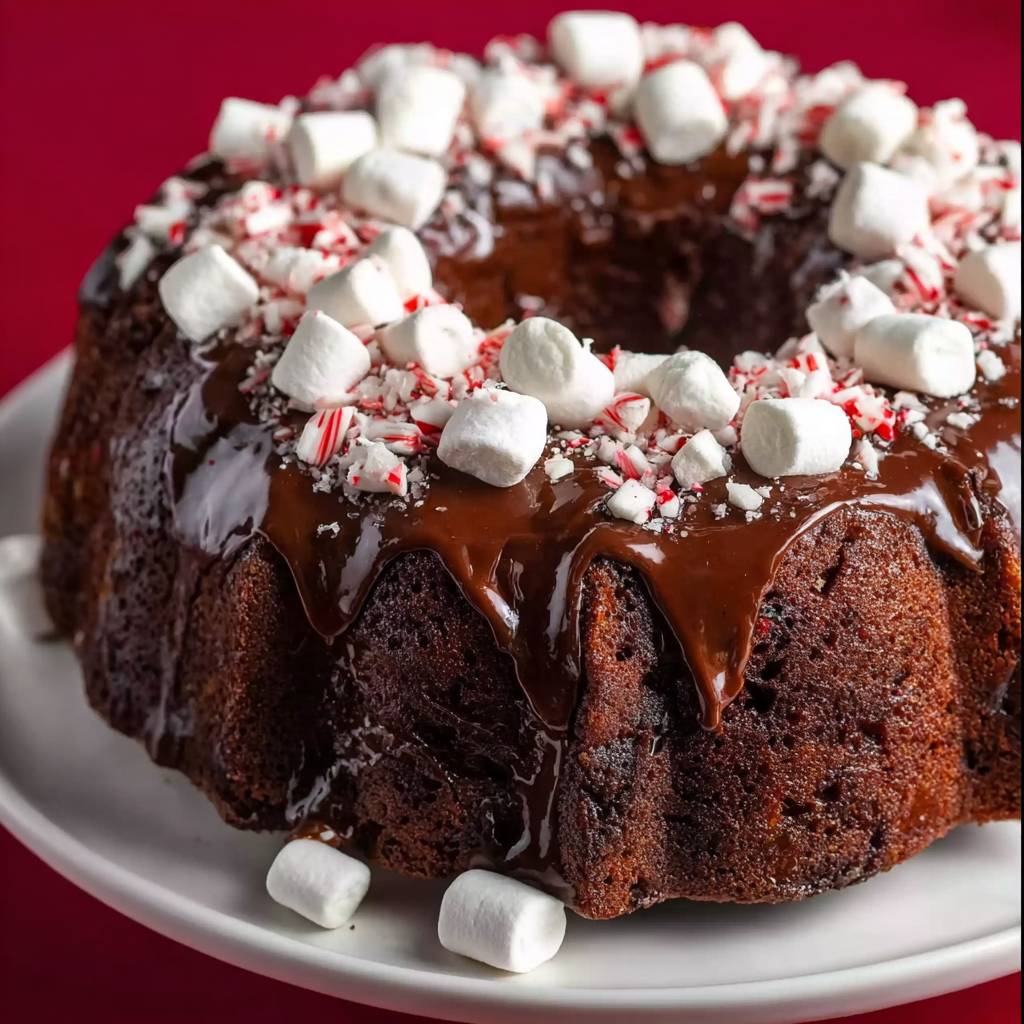
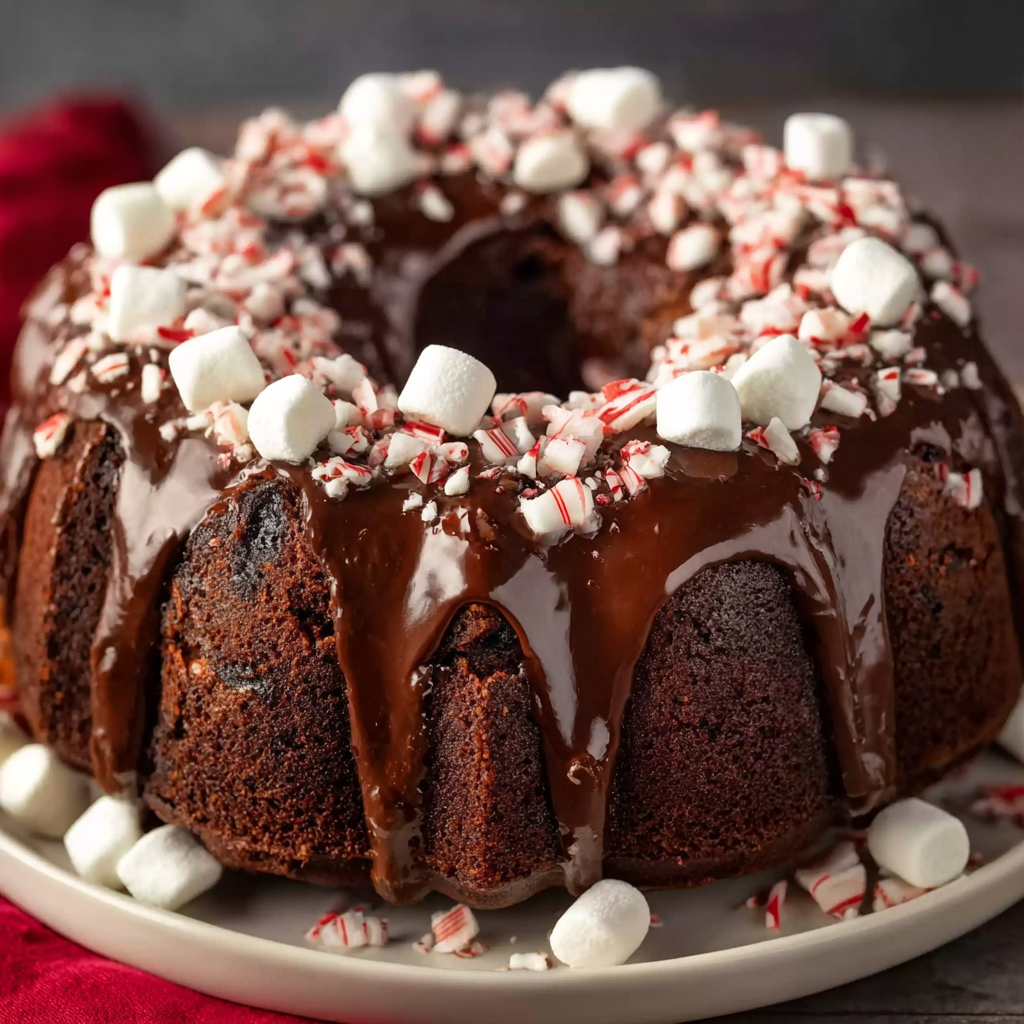
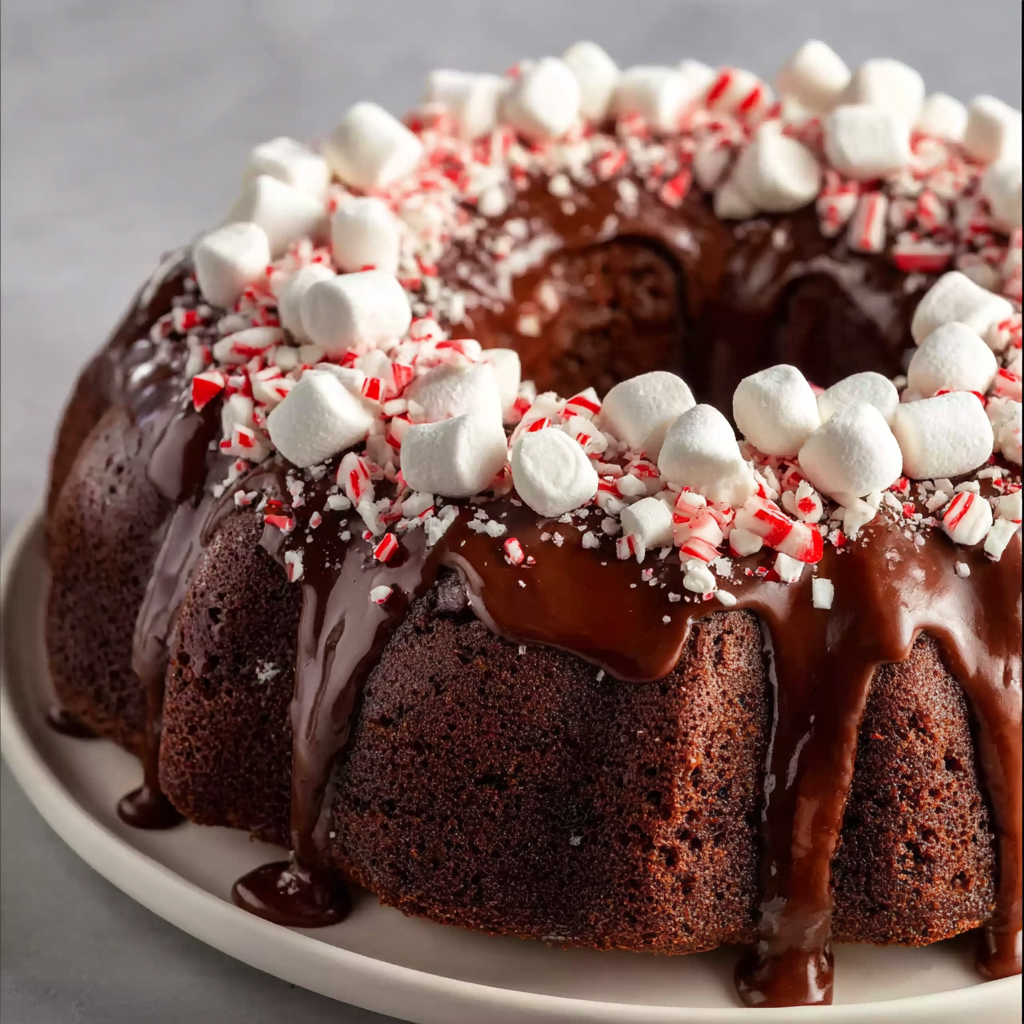
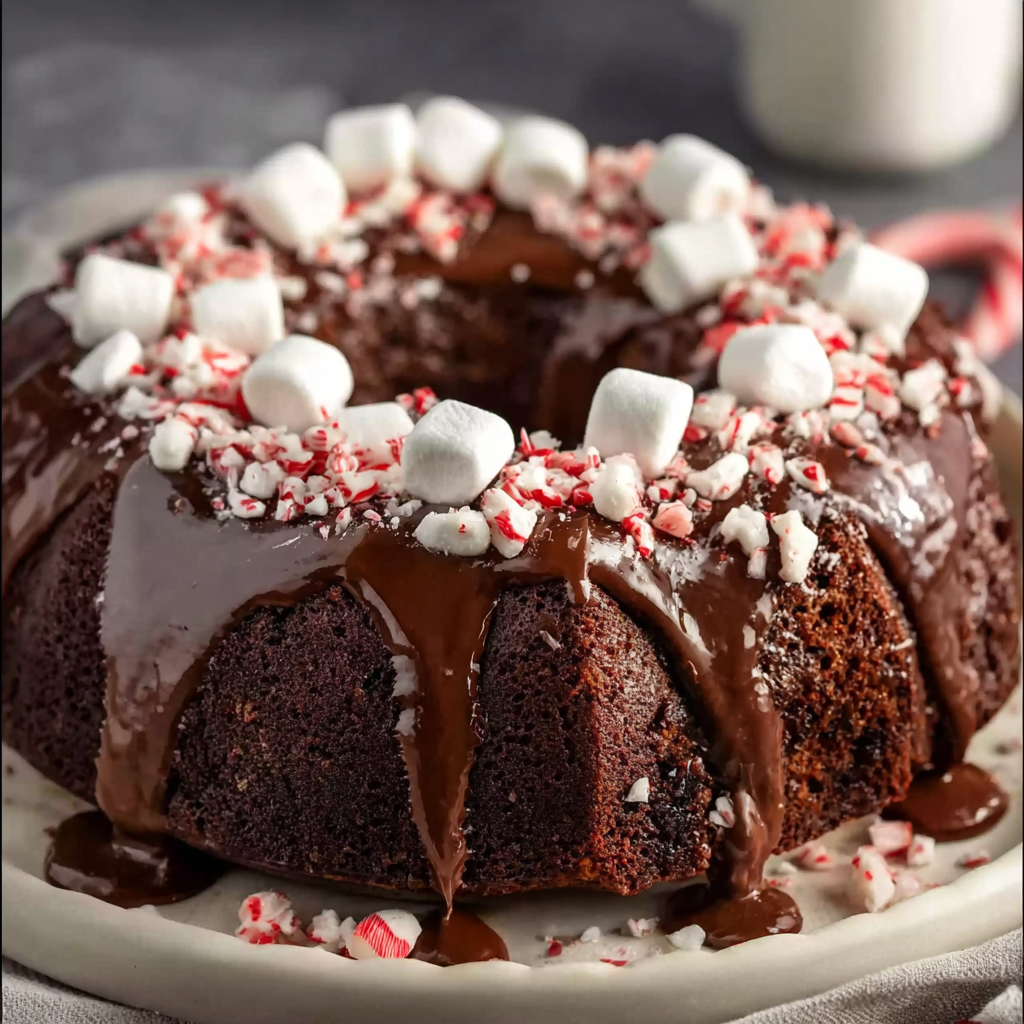
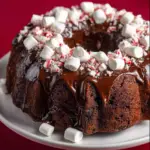
This decadent creation transforms your favorite holiday beverage into a rich and moist chocolate cake, infused with peppermint extract and layered with creamy cocoa butter frosting. Topped with crushed candy canes, mini marshmallows, and optional chocolate shavings, it brings all the cozy vibes of a warm drink into a show-stopping dessert.
The beauty of this cake lies not only in its taste but in its versatility and ease of preparation. With a few pantry staples like a boxed cake mix, sour cream, and vegetable oil, you can whip up a dessert that looks and tastes bakery-worthy. The use of cake mix may sound simple, but when enhanced with the right mix-ins, it creates a moist and flavorful base that rivals even homemade versions. According to Wikipedia, cake mixes were originally developed to simplify baking while still delivering excellent results—a tradition that continues with recipes like this one.
Perfect for Christmas parties, family dinners, or even winter birthdays, this cake is a true crowd-pleaser. Its bold flavor profile and festive look make it a standout among classic holiday desserts. For inspiration on how to decorate yours, Pinterest is full of winter cake decoration ideas that can take this treat to the next level, whether you go minimalist with candy canes or create an elaborate snow-themed design.
If you’re looking for the ultimate holiday dessert that combines taste, presentation, and simplicity, the peppermint hot chocolate cake might just become your new favorite tradition.
Ingredients Deep Dive – What You’ll Need
Creating a peppermint hot chocolate cake starts with choosing the right ingredients. While the recipe uses accessible, everyday components, each item plays a vital role in building flavor, texture, and visual appeal. Below, we break down what you’ll need and why each ingredient matters.
For the Cake
-
Boxed Chocolate Cake Mix
Using a boxed mix saves time and guarantees consistent results. Choose a high-quality dark chocolate or devil’s food cake mix for a rich base. This shortcut still allows for customization—adding sour cream and peppermint extract enhances moisture and flavor. -
Hot Water
Hot water helps bloom the cocoa powder in the mix, intensifying the chocolate flavor. According to Wikipedia, blooming cocoa brings out its aromatic oils and deeper notes. -
Vegetable Oil & Eggs
These provide structure and fat, which results in a tender crumb. Room temperature eggs work best for even mixing. -
Sour Cream
This ingredient is essential for adding richness and a soft texture. Sour cream also helps the cake stay moist for days—ideal for holiday gatherings where you may need to bake ahead. -
Peppermint Extract
A little goes a long way. Be sure to use peppermint, not mint extract, which can taste more like spearmint. The cooling, candy-cane flavor of peppermint is what gives this cake its festive touch. If you’re curious about the difference, check out the peppermint plant’s history and culinary uses.
For the Frosting
-
Unsalted Butter
Use room temperature butter for easier mixing. Creaming the butter properly results in a light and fluffy frosting base. -
Powdered Sugar
Essential for sweetness and structure. Sift it first to avoid lumps. -
Unsweetened Cocoa Powder
Adds depth to the chocolate flavor. Dutch-processed or natural cocoa both work, but Dutch-processed gives a darker color and smoother taste. -
Heavy Cream
This controls the frosting’s consistency. Add a little at a time until you reach a spreadable texture. -
Peppermint Extract & Salt
Just like in the cake, peppermint extract balances the richness, while a pinch of salt cuts through the sweetness and intensifies the chocolate notes.
Toppings That Make It Special
-
Crushed Peppermint Candies or Candy Canes
These add color, crunch, and a blast of peppermint. For best results, pulse them in a food processor or place in a sealed bag and crush with a rolling pin. To avoid clumping, review holiday baking tips on Pinterest for clever techniques. -
Mini Marshmallows
A nod to the hot cocoa theme, these make the cake feel playful and cozy. They also offer visual contrast and a soft chew against the dense cake. -
Chocolate Shavings (Optional)
Use a vegetable peeler on a chocolate bar to create elegant curls or flakes. This is a simple way to add sophistication to your decorations. For visual inspiration, explore mini marshmallow dessert ideas.
This balance of textures and flavors—creamy frosting, moist cake, crunchy peppermint, and soft marshmallow—makes each bite of peppermint hot chocolate cake taste like the holiday season itself.
Step-by-Step Baking Instructions
Bringing your peppermint hot chocolate cake to life is simple with a few key techniques. Follow these steps carefully for a perfect result every time.
Preparing the Cake Layers
-
Preheat and Prepare
Preheat your oven to 350°F (175°C). Grease and flour two 8-inch or 9-inch round cake pans, or line them with parchment paper for easy removal. -
Mix the Batter
In a large mixing bowl, combine:-
1 box of chocolate cake mix
-
1 cup hot water
-
1/2 cup vegetable oil
-
3 large eggs
-
1/2 cup sour cream
-
1 teaspoon peppermint extract
Beat the mixture using an electric mixer on medium speed for about 2 minutes until the batter is smooth. Be sure not to overmix, as this can lead to a dense cake.
-
-
Divide and Bake
Pour the batter evenly into the two prepared pans. Tap them gently on the counter to remove air bubbles. Bake for 25–30 minutes, or until a toothpick inserted in the center comes out clean. -
Cool the Cakes
Let the cakes cool in the pans for 10 minutes, then carefully turn them out onto a wire rack. Cool completely before frosting to avoid melting the butter-based icing.
Making the Frosting
-
Beat the Butter
In a mixing bowl, beat 1 cup of softened unsalted butter on high speed until creamy and pale, about 3–4 minutes. Proper creaming creates a fluffy texture. -
Add the Dry Ingredients
Gradually mix in 3 cups of powdered sugar and 1/2 cup unsweetened cocoa powder. Add a pinch of salt to enhance the chocolate flavor. -
Add Flavor and Cream
Pour in 1/4 cup heavy cream and 1/2 teaspoon peppermint extract. Beat on medium-high speed until the frosting is smooth and spreadable. Add more cream if needed for consistency.
Assembling the Cake
-
Layer and Frost
Place one cake layer on a serving plate. Spread a generous amount of frosting on top. Add the second layer and cover the top and sides with the remaining frosting. -
Decorate Thoughtfully
While the frosting is still soft, sprinkle with crushed peppermint candies or candy canes, then add mini marshmallows. For extra flair, use chocolate curls or shavings. Learn more about elegant presentation by browsing how to frost a cake guides on Pinterest. -
Chill Before Serving
Chill the cake for 20–30 minutes before slicing. This helps firm up the frosting and gives cleaner, bakery-style slices.
For additional chocolate-themed desserts that work well in the winter season, check out Christmas dessert ideas for more inspiration.
Why This Cake is Perfect for the Holidays
There’s something magical about serving peppermint hot chocolate cake during the holidays. It combines festive flavors, warm memories, and a picture-perfect appearance in every slice.
-
Nostalgic Taste
The peppermint-chocolate combination reminds people of holiday drinks and candy canes. With mini marshmallows and cocoa frosting, every bite feels like sipping a hot cup of cocoa by the fire. -
Seasonal Visual Appeal
Crushed candy canes create a snowy, glittery finish that perfectly fits the Christmas aesthetic. Chocolate curls add richness and sophistication. -
Easy to Make Ahead
Thanks to the moisture from sour cream and oil, this cake stays fresh for days. It’s perfect for preparing ahead of a busy holiday dinner. -
Great for All Ages
Kids love the candy topping, and adults appreciate the deep cocoa flavor. It’s a dessert that bridges generations.
With its cozy flavor, festive look, and easy preparation, this cake earns its place as a top-tier holiday treat. Learn more about the history and joy behind hot chocolate in this Wikipedia article.
Expert Tips & Tricks for Success
To make your peppermint hot chocolate cake bakery-worthy, these tried-and-true tips will help you avoid common mistakes and boost flavor.
-
Use Room Temperature Ingredients
Ingredients like eggs, butter, and sour cream mix better at room temperature, giving a smoother batter and frosting. -
Don’t Overmix
Overmixing can lead to a tough cake. Once the batter is combined and smooth, stop mixing. -
Crushing Peppermint Properly
To avoid sticky clumps, freeze your candy canes for 10 minutes before crushing. Use a sealed bag and a rolling pin, or pulse them briefly in a food processor. -
Frost Smoothly
Apply a crumb coat—a thin layer of frosting to trap loose crumbs—before the final layer. Chill briefly between coats for a clean finish. -
Decorate Just Before Serving
Crushed peppermint can melt if left too long on moist frosting. For best presentation, add it just before serving or display. -
Explore Visual Variations
For design inspiration, explore winter cake decoration ideas that make use of minimal elements for maximum impact.
With these expert strategies, your cake will not only taste delicious but also look professionally crafted.
Variations and Creative Twists
Looking to personalize your peppermint hot chocolate cake? Here are creative ways to modify the recipe for different dietary needs or flavor preferences.
-
Peppermint Mocha Version
Add 1 tablespoon of espresso powder to the cake batter. This intensifies the chocolate and gives a coffeehouse twist. -
Cupcake Conversion
Use the same batter to make cupcakes. Bake at 350°F for 15–18 minutes. Great for holiday parties and easier to serve. -
Add Ganache Drizzle
Melt 1/2 cup of dark chocolate with 1/4 cup heavy cream for a simple ganache. Drizzle over the frosted cake for an extra layer of richness. -
Layer with Peppermint Bark
For added texture and visual interest, place thin pieces of peppermint bark between the cake layers or garnish the top. -
Gluten-Free Option
Substitute a gluten-free chocolate cake mix and double-check all toppings. Make sure peppermint candies are certified gluten-free. -
Dairy-Free or Vegan
Use plant-based butter, dairy-free sour cream, and egg substitutes like flax eggs. Opt for vegan marshmallows and check your chocolate source.
These variations offer flexibility without compromising flavor, making this cake a fit for every guest.
Storage, Shelf Life & Make-Ahead Tips
Proper storage ensures your peppermint hot chocolate cake stays fresh and delicious throughout the holiday week.
-
Room Temperature or Fridge?
If unfrosted, you can store cake layers wrapped tightly in plastic wrap at room temperature for up to 2 days. Once frosted, refrigerate to keep the buttercream firm. -
How Long It Lasts
Frosted cake lasts 4–5 days in the fridge. Be sure to cover it to prevent it from drying out or absorbing fridge odors. -
Freezing Instructions
Freeze unfrosted cake layers by wrapping them in plastic and foil, then storing in a freezer bag. They can last up to 2 months. -
Best Containers
Use a cake dome or airtight container to protect decorations and preserve freshness. Avoid stacking anything on top of the cake to prevent smudging.
These tips allow you to bake ahead without sacrificing flavor or appearance, which is ideal during the hectic holiday season.
Printable Recipe Card (Optional Visual or Download)
Want to keep this festive recipe handy? Create a printable version with these summarized steps:
Ingredients:
-
Chocolate cake mix, hot water, oil, eggs, sour cream, peppermint extract
-
Butter, powdered sugar, cocoa powder, heavy cream, salt
-
Crushed peppermint, mini marshmallows, chocolate shavings
Instructions:
-
Mix cake ingredients and bake in 2 pans at 350°F for 25–30 min
-
Cool, then make peppermint cocoa frosting
-
Frost, decorate, chill, and serve
Save or print this for quick reference while baking.
FAQ – Peppermint Hot Chocolate Cake
Can I use homemade chocolate cake instead of a mix?
Yes, you can use your favorite from-scratch chocolate cake recipe. Just be sure to add peppermint extract and use a moist base like buttermilk or sour cream for a similar texture.
What’s the difference between peppermint and mint extract?
Peppermint extract has a sharp, cooling flavor, while mint extract is milder and can taste like spearmint. Always use peppermint for this cake to get that classic holiday taste. Learn more about the peppermint plant and its culinary uses.
Can I make this cake ahead of time?
Yes! You can bake the layers 1–2 days in advance and store them wrapped. Frost the day you plan to serve, and add peppermint toppings just before presentation for best results.
How do I crush peppermint without clumping?
Freeze candies first, then crush them in a zip-top bag using a rolling pin or a food processor. This prevents melting and sticking.
Can I make this cake gluten-free or vegan?
Absolutely. Use a gluten-free cake mix and plant-based substitutes for butter, eggs, and sour cream. Check all candy and chocolate labels to ensure they’re allergy-friendly.
Peppermint Hot Chocolate Cake: The Perfect Holiday Dessert
This Peppermint Hot Chocolate Cake is the ultimate holiday dessert. Moist chocolate cake layers are infused with peppermint, then frosted in rich cocoa buttercream and topped with crushed candy canes, mini marshmallows, and chocolate curls. Inspired by the comforting flavors of hot cocoa, it’s festive, flavorful, and perfect for winter celebrations.
- Author: Clara
Ingredients
For the cake:
- 1 box chocolate cake mix
- 1 cup hot water
- 1/2 cup vegetable oil
- 3 large eggs
- 1/2 cup sour cream
- 1 tsp peppermint extract
For the frosting:
- 1 cup unsalted butter, softened
- 3 cups powdered sugar
- 1/2 cup unsweetened cocoa powder
- 1/4 cup heavy cream (more if needed)
- 1/2 tsp peppermint extract
- Pinch of salt
For topping:
- Crushed peppermint candies or candy canes
- Mini marshmallows
- Chocolate shavings (optional)
Instructions
Preheat your oven to 350°F (175°C) and grease two 8-inch or 9-inch round cake pans.
In a large bowl, combine the cake mix, hot water, oil, eggs, sour cream, and peppermint extract. Mix until smooth and well combined.
Pour the batter evenly into the prepared pans and bake for 25–30 minutes, or until a toothpick inserted in the center comes out clean.
Let the cakes cool in the pans for 10 minutes, then turn out onto a wire rack to cool completely.
To make the frosting, beat the softened butter until light and creamy.
Add the powdered sugar, cocoa powder, peppermint extract, and salt. Slowly add the heavy cream while mixing until the frosting reaches a smooth, spreadable consistency.
Place one cake layer on a serving plate and spread frosting on top. Add the second layer and frost the top and sides of the cake.
Decorate with crushed peppermint candies, mini marshmallows, and chocolate shavings if desired.
Chill slightly before serving for cleaner slices.
Notes
-
Always use peppermint, not mint extract
-
Add toppings just before serving to avoid melting
-
Chill the cake briefly before slicing for cleaner cuts
-
Customize with ganache, peppermint bark, or espresso for variation
-
For clean edges, use a warm knife when slicing


