Why Upside Down Strawberry Cake is the Perfect Spring Dessert
There’s something effortlessly elegant about an upside down strawberry cake—a dessert that flips expectations and delivers a stunning presentation with minimal effort. As spring sets in and seasonal berries begin to ripen, this cake becomes a perfect way to showcase the natural sweetness and vibrant color of fresh strawberries. Unlike traditional cakes that hide their fruit inside, this one places it on full display, creating a moist, caramelized topping that glistens and draws attention. Spring is a season celebrated for fresh beginnings and light, flavorful desserts. From brunch tables to outdoor gatherings, incorporating fruit-based treats adds a refreshing note to any occasion. Whether you’re planning an Easter dessert, a Mother’s Day celebration, or simply indulging in seasonal baking, this cake offers both beauty and taste. Its visually layered top and rich golden crumb make it as eye-catching as it is satisfying. To enhance your baking skills, it’s useful to understand the concept of an upside-down cake, a method that has been around for centuries. Wikipedia’s overview of upside-down cakes explains how fruit is layered on the bottom of a pan, topped with batter, and flipped after baking. In the case of strawberries, their high water content and vivid hue caramelize beautifully when baked, making them a standout choice. Combined with a buttery, moist cake base, the result is both rustic and refined. Alongside strawberries, this cake uses essential pantry staples like all-purpose flour, baking powder, and sour cream, each playing a crucial role in creating texture and lift. If you’re curious about how these ingredients work together, this Wikipedia entry on baking powder offers deeper insight into its leavening effects. And if you’re looking to pair this cake with other spring-themed ideas, this Pinterest board provides fresh spring dessert ideas perfect for your seasonal menu. Now that you know why this dessert stands out, let’s explore what makes upside down cakes unique and how strawberries elevate this classic technique even further.
What Is an Upside Down Cake?
An upside down cake is a dessert baked with fruit arranged on the bottom of the pan, topped with cake batter. After baking, the cake is inverted to reveal the caramelized fruit topping, creating a glossy, decorative surface without needing additional frosting. This method has roots in early American and European baking traditions, where cast-iron skillets were used over open flames to cook cakes topped with fruit and sugar. The most iconic example is the pineapple upside down cake, but this technique adapts beautifully to other fruits—especially strawberries in spring. The process behind this cake’s construction is simple, yet the result is impressive. As the fruit bakes beneath the batter, it releases juices that blend with sugar and form a naturally thickened glaze. When flipped, the cooked fruit layer becomes the cake’s crowning glory. This approach allows the fruit to remain intact and beautifully caramelized without sinking into the batter. What sets strawberries apart in this context is their brightness and acidity, which contrast wonderfully with the cake’s sweetness. Their vibrant red hue creates a visually striking top layer once the cake is turned out of the pan. While strawberries aren’t traditionally used in upside-down cakes due to their moisture content, the use of cornstarch in the recipe helps absorb excess juice and prevents sogginess. To deepen your knowledge of this cake style, refer to Wikipedia’s article on upside-down cake, which outlines its history and variations. You’ll see that this method offers a versatile canvas for seasonal creativity. For visual inspiration, this Pinterest collection showcases decorative fruit layering and garnishing ideas, ideal for customizing your own version. Incorporating upside-down cakes into your baking repertoire opens up a world of presentation possibilities. Whether you’re using peaches, pineapples, or berries, the process stays the same, but the final look and flavor can change dramatically. When executed well, it’s a simple technique that delivers elevated results.Highlighting Fresh Strawberries: Seasonal Berries at Their Best
When it comes to upside down strawberry cake, using fresh strawberries makes all the difference. These berries are at their peak in spring, offering natural sweetness, vibrant color, and a soft texture that transforms beautifully when baked. Choosing ripe, in-season strawberries ensures the best flavor and a jammy, caramelized topping that looks as good as it tastes. Look for strawberries that are:- Bright red from top to bottom (avoid white or green tips)
- Firm but not hard
- Fragrant with a sweet aroma
- Free of bruises or soft spots
Moisture & Flavor: What Makes This Strawberry Cake So Juicy?
What truly sets this moist strawberry upside down cake apart is the cake layer. Rich, tender, and buttery, it complements the juicy strawberry topping while holding its own in flavor. The batter is built using classic baking techniques designed to create maximum softness and structure. Key components include:- Unsalted butter: Creamed with sugar to create air and lightness
- Sour cream and milk: Add moisture and create a soft crumb
- Eggs: Provide structure and richness
- Vanilla extract: Enhances the overall aroma
- Baking powder and baking soda: Give lift and balance acidity
- Greek yogurt for sour cream
- Buttermilk for milk
- Plant-based butter for dairy-free baking

Ingredient Breakdown (Detailed Section)
For the Strawberry Layer:
- 1 lb fresh strawberries, hulled and halved
- ¼ cup granulated sugar: Draws out juices and aids caramelization
- 2 tbsp cornstarch: Thickens the juices to form a glossy layer
For the Cake Batter:
- 1½ cups all-purpose flour: Base of the batter (learn more here)
- 1 tsp baking powder + ½ tsp baking soda: Provide rise (source)
- ¼ tsp salt: Enhances overall flavor
- ½ cup unsalted butter, softened: Adds richness and creaminess
- ¾ cup granulated sugar: Sweetens and helps cream the butter
- 2 large eggs: Binds and adds structure
- 1 tsp vanilla extract: Rounds out the flavor (vanilla extract info)
- ½ cup sour cream: Adds moisture and tang
- ¼ cup milk: Helps smooth out the batter
Substitutions:
- Gluten-free flour blends can replace all-purpose flour at a 1:1 ratio
- Non-dairy yogurt or plant-based milk can be used for dairy-free versions
Equipment Essentials: Tools for Success
To ensure the best results, using the right tools can make a big difference. Here’s what you need for a seamless baking experience:- 9-inch round cake pan: Ideal size for even baking
- Parchment paper: Prevents sticking and guarantees easy release
- Mixing bowls: Separate bowls for dry and wet ingredients
- Hand or stand mixer: For creaming butter and sugar properly
- Spatula and whisk: For folding and mixing without overworking the batter
- Cooling rack: Allows the cake to cool evenly
- Sharp knife: To run around the pan edges before inverting
Step-by-Step Instructions with Tips
Preheat & Prep the Pan
- Preheat your oven to 350°F (175°C).
- Grease a 9-inch round cake pan and line the bottom with parchment paper. This ensures the strawberry layer won’t stick.
Make the Strawberry Layer
- In a bowl, combine halved strawberries with ¼ cup sugar and 2 tbsp cornstarch.
- Toss well, then spread the mixture evenly across the bottom of the prepared pan.
- The cornstarch absorbs juices and helps create a thick, glossy topping.
Mix the Dry Ingredients
- In a medium bowl, whisk together 1½ cups flour, 1 tsp baking powder, ½ tsp baking soda, and ¼ tsp salt.
Cream the Butter & Sugar
- In a large bowl, beat ½ cup softened butter with ¾ cup sugar until light and fluffy.
- Add 2 eggs one at a time, beating after each addition.
- Mix in 1 tsp vanilla extract.
Add Wet Ingredients
- Blend in ½ cup sour cream, followed by ¼ cup milk.
- The batter may look slightly curdled—this is normal and will smooth out when the dry ingredients are added.
Combine & Layer
- Gradually add the dry mixture to the wet ingredients, mixing just until combined.
- Carefully spoon the batter over the strawberries in the pan, spreading evenly without disturbing the fruit.
Bake, Cool & Invert
- Bake for 40–45 minutes or until a toothpick inserted in the center comes out clean.
- Let the cake cool in the pan for 10–15 minutes.
- Run a knife around the edges, then invert onto a serving plate.
- Let cool completely before slicing.
Serving Suggestions: Make It a Showstopper
This cake is beautiful enough to stand on its own, but a few additions can elevate your presentation:- Top with fresh mint, sliced strawberries, or edible flowers
- Serve warm with a scoop of vanilla ice cream or a dollop of whipped cream
- Dust with powdered sugar for a delicate finish
Storage & Make-Ahead Tips
- Room temperature: Store covered for up to 2 days
- Refrigerator: Keeps well for up to 5 days in an airtight container
- Freezing: Wrap tightly in plastic wrap, then foil; freeze for up to 2 months
- Reheating: Microwave individual slices for 10–15 seconds or warm in a 300°F oven for 5 minutes
Recipe Variations & Customizations
Customize this cake to match your taste or the season:- Add lemon zest or a few drops of almond extract to the batter
- Swap strawberries with peaches, plums, or cherries
- Create individual mini upside-down cakes using a muffin tin
- Use a rectangular pan for a rustic look, then cut into squares for serving

FAQs – People Also Ask
Can I use frozen strawberries in upside down cake? Yes, but thaw and drain them thoroughly. Frozen strawberries release more water, so increase the cornstarch to avoid a soggy topping. Why is my upside down cake soggy? This can happen if the fruit releases too much liquid. Use cornstarch to thicken the fruit mixture and avoid overbaking, which can cause the bottom to steam instead of caramelize. Can I make this cake ahead of time? Yes, the cake can be made 1–2 days in advance. Store it covered in the fridge and bring to room temperature before serving. What type of pan works best for upside down cakes? A 9-inch round cake pan is ideal. Avoid using a springform pan, as the fruit juices can leak during baking. How do I stop the fruit from sticking to the pan? Use parchment paper on the bottom of the pan and grease the sides well. This ensures a clean release when flipping the cake. PrintMoist Strawberry Upside Down Cake – A Summery Crowd-Pleaser
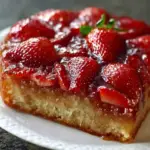
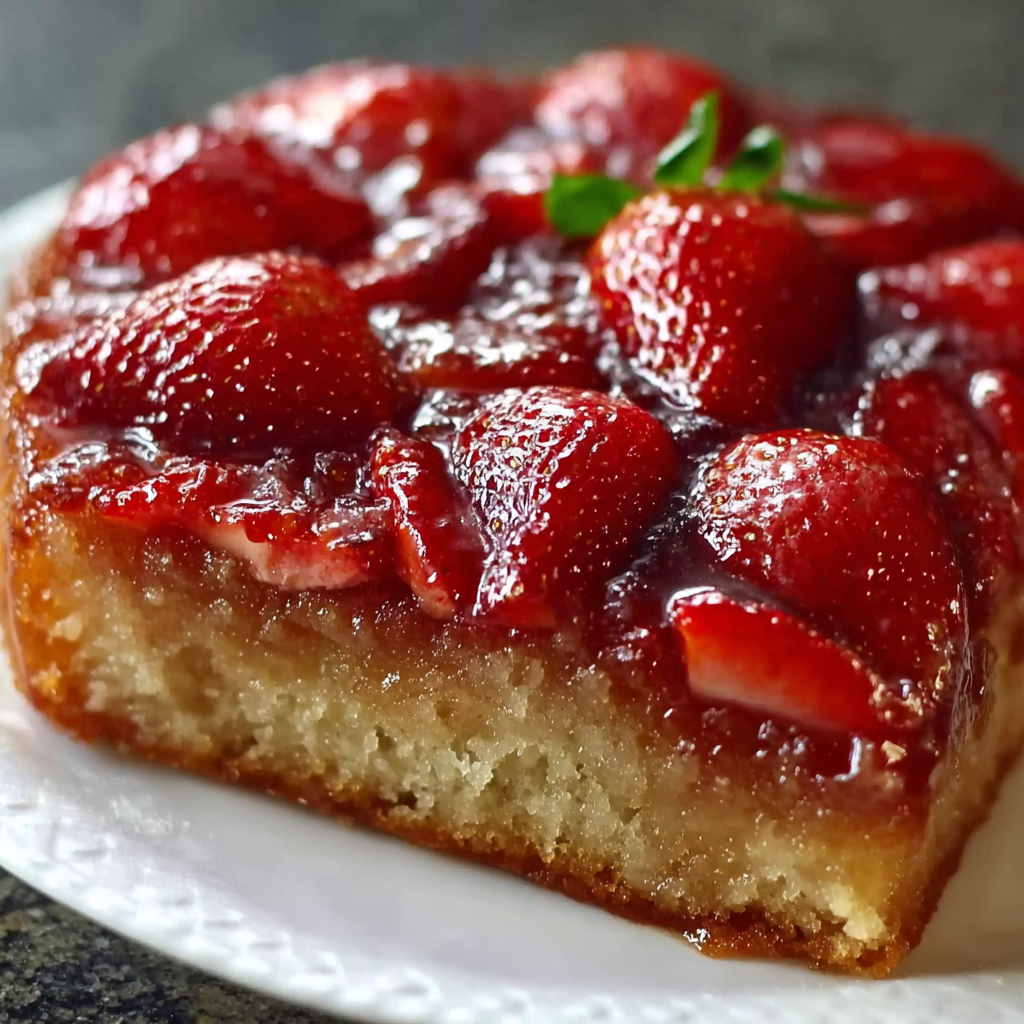
This moist strawberry upside down cake is a golden, tender dessert topped with a glossy, caramelized strawberry layer. It’s the perfect showstopper for spring occasions like Easter, baby showers, or garden parties. Fresh strawberries shine in this crowd-pleasing treat that’s as beautiful as it is delicious.
Ingredients
For the strawberry layer:
- 1 lb fresh strawberries, hulled and halved
- ¼ cup granulated sugar
- 2 tbsp cornstarch
For the cake batter:
- 1 ½ cups all-purpose flour
- 1 tsp baking powder
- ½ tsp baking soda
- ¼ tsp salt
- ½ cup unsalted butter, softened
- ¾ cup granulated sugar
- 2 large eggs
- 1 tsp vanilla extract
- ½ cup sour cream
- ¼ cup milk
Instructions
Preheat your oven to 350°F (175°C). Grease a 9-inch round cake pan and line the bottom with parchment paper.
In a bowl, mix strawberries with granulated sugar and cornstarch. Spread the mixture evenly in the bottom of the prepared pan.
In another bowl, whisk together the flour, baking powder, baking soda, and salt.
In a large bowl, cream the softened butter and sugar until light and fluffy. Beat in the eggs one at a time, then add vanilla extract.
Mix in the sour cream, followed by the milk.
Gradually add the dry ingredients to the wet mixture and mix until just combined.
Carefully spoon the batter over the strawberries and spread evenly.
Bake for 40–45 minutes or until a toothpick inserted in the center comes out clean.
Let the cake cool in the pan for 10–15 minutes, then run a knife around the edges and invert it onto a serving plate. Let cool completely before slicing.
Notes
-
Use ripe, fresh strawberries for best results.
-
Don’t skip the parchment paper—it ensures an easy release.
-
Let the cake cool slightly before inverting to avoid spills or breakage.
-
Store leftovers in the fridge to maintain moisture.
-
Customize the fruit topping with what’s in season.