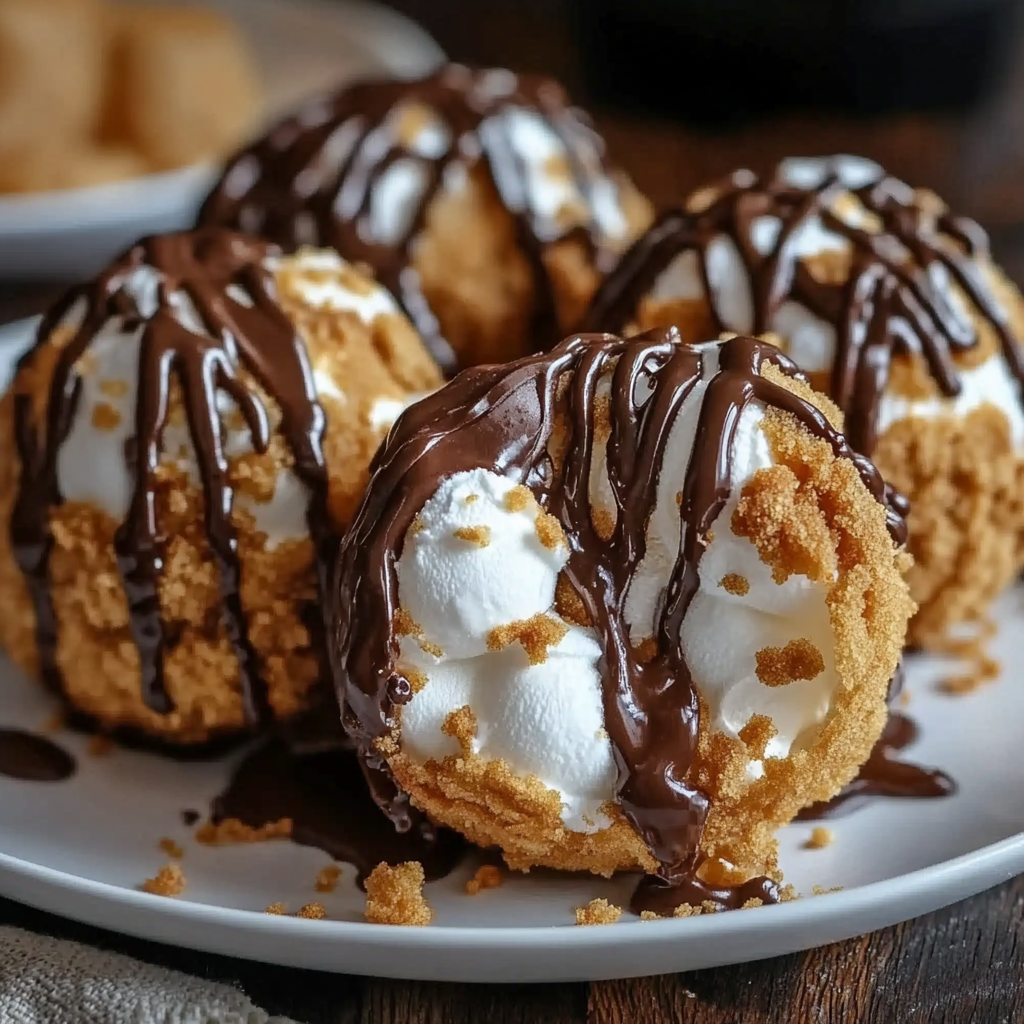
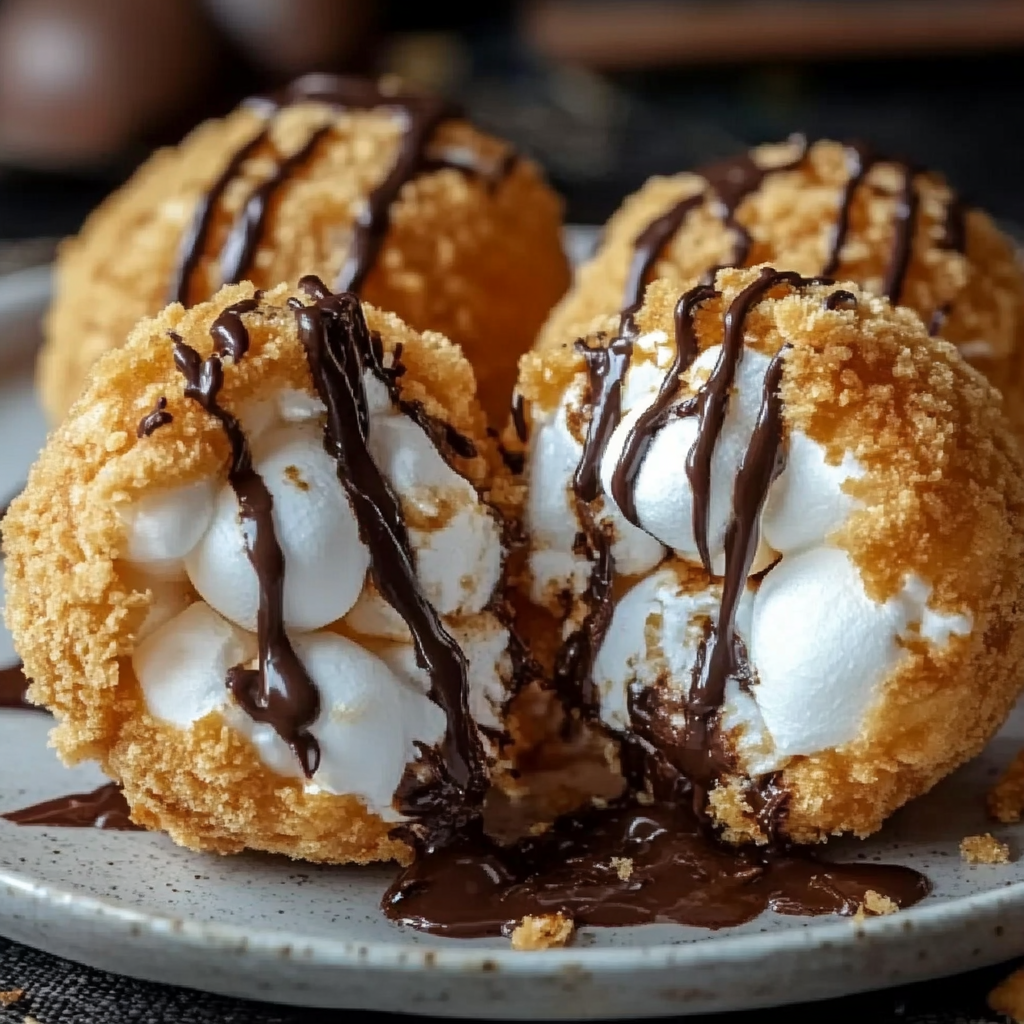
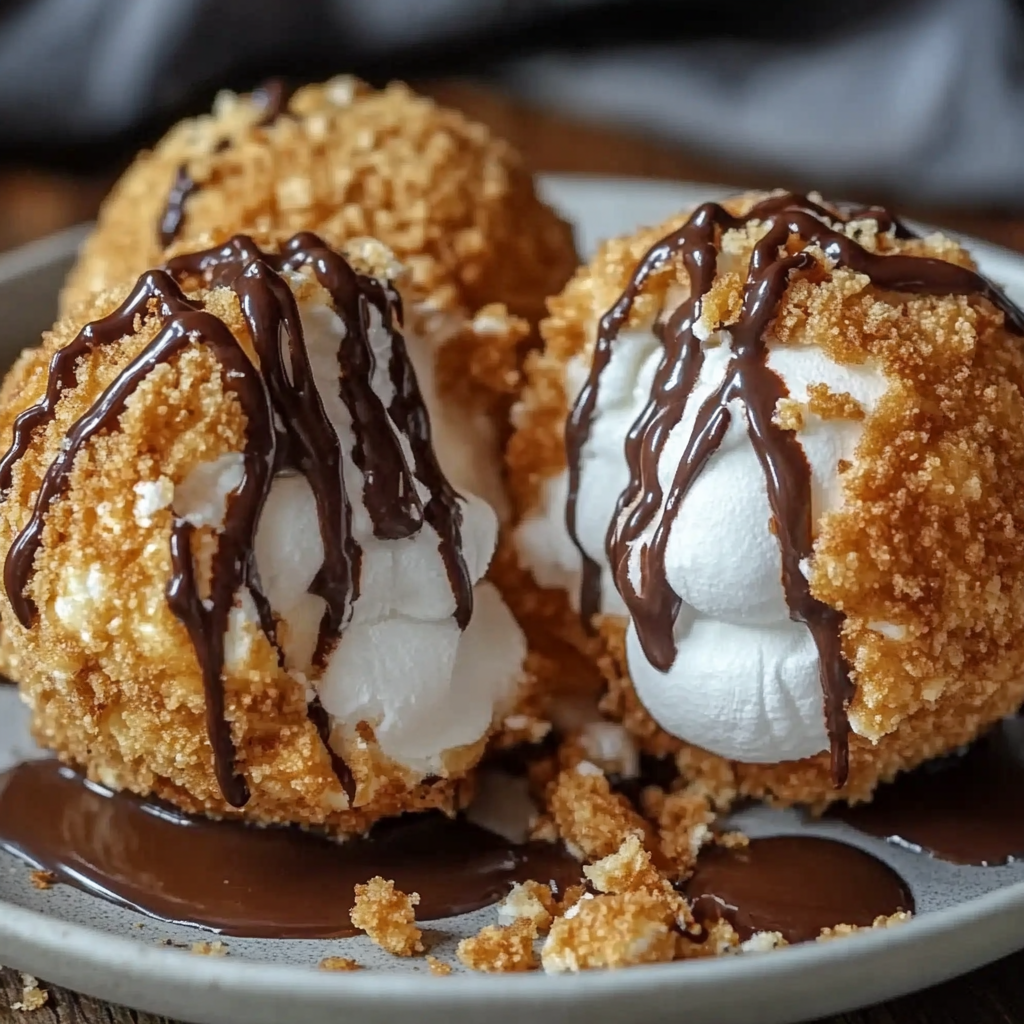
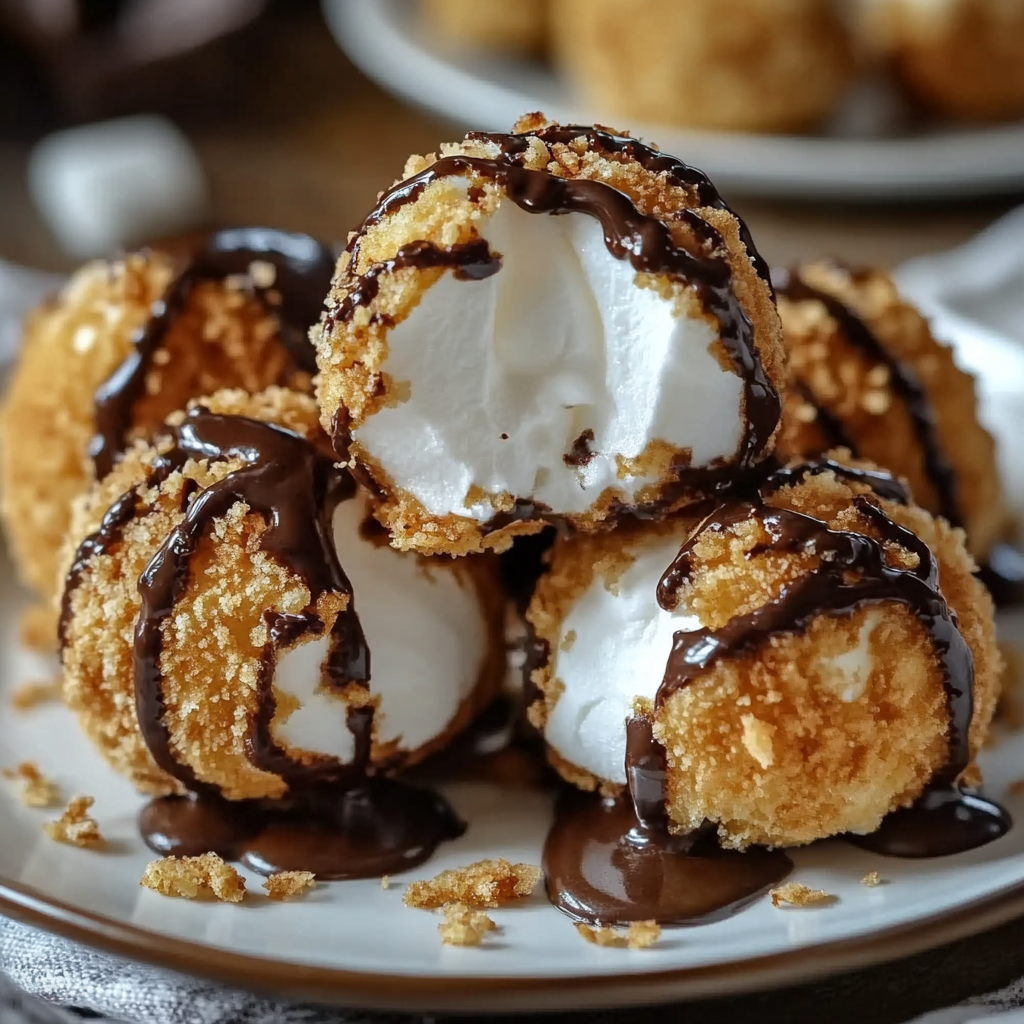
The classic s’mores treat, long associated with campfires and cozy nights, has undergone a delicious transformation. Welcome to the world of fried s’mores balls, where the beloved combination of chocolate, marshmallow, and graham crackers is encased in golden, crispy dough. This indulgent dessert brings together the comforting flavors of traditional s’mores with the irresistible crunch of frying, creating a snack that’s perfect for any sweet craving.
Unlike traditional s’mores, which rely on direct heat to melt the marshmallow and soften the chocolate, fried s’mores balls offer a unique texture contrast. The gooey center remains warm and rich, while the outer layer delivers a satisfying crispiness. This modern twist has grown popular not only in home kitchens but also in food fairs and party dessert tables, offering a visually appealing and palate-pleasing option for dessert lovers.
For those unfamiliar with s’mores, they trace their origins back to early 20th-century American camping traditions. According to Wikipedia, the name itself is a contraction of “some more,” hinting at how irresistible these treats are. Today, fried s’mores balls carry that legacy forward, combining nostalgic flavors with contemporary culinary creativity.
In addition to their mouthwatering taste, these desserts are incredibly versatile. By using ready-made ingredients like biscuit dough—as detailed on Wikipedia—home cooks can easily replicate this gourmet-style dessert without the need for specialized baking skills. Furthermore, incorporating graham cracker crumbs, as explained on Wikipedia, gives these bites their signature crunch and flavor.
The rise in popularity of fried s’mores balls also owes much to their adaptability. Whether you’re planning a family gathering, hosting a party, or simply indulging a late-night craving, this dessert offers a crowd-pleasing solution. The combination of textures and flavors makes them a standout addition to any dessert spread, ensuring guests will be coming back for more.
History and Origin of S’mores
The story of s’mores begins deep within American camping traditions. Early 20th-century campers, particularly those affiliated with organizations like the Girl Scouts, are often credited with popularizing the combination of graham crackers, chocolate, and marshmallows. According to Wikipedia, the first printed recipe appeared in a 1927 Girl Scouts handbook titled Tramping and Trailing with the Girl Scouts.
The genius of the original s’mores lies in its simplicity: layer a piece of milk chocolate and a toasted marshmallow between two graham crackers. The heat from the freshly toasted marshmallow gently melts the chocolate, creating a sticky, sweet, and crunchy bite. This easy preparation made it a staple at campfires, where minimal equipment was available, yet the craving for a sweet treat persisted.
Over the decades, s’mores have evolved from simple campfire fare into a versatile dessert concept found in bakeries, cafes, and home kitchens. The modern adaptation of fried s’mores balls elevates the original by introducing the element of deep frying, which offers a distinct texture and flavor profile. As described on Wikipedia, deep frying involves cooking food in hot oil, creating a crisp exterior while preserving moisture inside.
The shift from campfire to kitchen has allowed for endless experimentation. Home cooks now use pre-made biscuit dough, various types of chocolate, and alternative coatings beyond the traditional graham cracker. The accessibility of these ingredients has contributed to the widespread appeal of fried s’mores balls, making them a staple at modern gatherings where portable, easy-to-serve desserts are in high demand.
The enduring charm of s’mores lies not only in their taste but also in the nostalgia they evoke. For many, they symbolize childhood memories, family trips, and the simple joys of outdoor cooking. With innovations like fried s’mores balls, this beloved treat continues to capture hearts and taste buds, blending tradition with culinary creativity.
Why Fried S’mores Balls Are a Hit
The rising popularity of fried s’mores balls can be attributed to their perfect balance of flavor, texture, and convenience. They combine the nostalgic essence of traditional s’mores with a modern culinary twist that appeals to a wide audience, from children to gourmet food enthusiasts.
One of the main reasons for their success is the unique texture. While classic s’mores are known for their soft, gooey center and crunchy graham cracker base, frying adds an entirely new dimension. The exterior becomes crisp and golden while preserving the soft, molten center of chocolate and marshmallow. This contrast between crunch and gooeyness creates an indulgent eating experience that’s hard to resist.
Beyond texture, the ease of preparation makes these treats accessible to home cooks. By using pre-packaged biscuit dough, as explained on Wikipedia, and ready-made graham cracker crumbs from Wikipedia, even novice cooks can achieve professional-quality results. No extensive baking skills or specialized equipment are necessary, making fried s’mores balls an ideal choice for spontaneous dessert cravings or last-minute party preparations.
Another factor driving their popularity is their versatility. These bite-sized treats are perfect for a variety of occasions:
-
Parties and gatherings: Easy to serve and eat, making them ideal for buffets or dessert tables.
-
Family nights: A fun recipe to prepare together, offering both entertainment and reward.
-
Special events: Their rich flavor and eye-catching appearance make them suitable for holidays, birthdays, and other celebrations.
Additionally, fried s’mores balls can be customized to suit personal preferences. Whether experimenting with different types of chocolate—as detailed on Wikipedia)—or adding creative fillings like Nutella or peanut butter, the possibilities are endless. This flexibility allows for both classic and innovative variations, catering to diverse tastes and dietary needs.
Finally, the visual appeal of fried s’mores balls contributes to their popularity on platforms like Pinterest, where users share visually stunning desserts that inspire others to recreate them at home. Their compact size, glossy exterior, and powdered sugar dusting make them not only delicious but also highly photogenic—a key ingredient in today’s social media-driven food culture.
Required Ingredients and Tools
Making fried s’mores balls is straightforward, especially with easily accessible ingredients and basic kitchen equipment. The simplicity of this recipe is one of the reasons it has gained so much popularity.
Ingredients
To recreate the irresistible flavor and texture of fried s’mores balls, you will need the following:
-
1 package refrigerated biscuit dough (8 biscuits)
-
This convenient ingredient serves as the perfect shell. Store-bought biscuit dough, as described on Wikipedia, ensures a consistent, tender, and flaky outer layer.
-
-
8 large marshmallows
-
The heart of any s’mores dessert, marshmallows provide that gooey, melt-in-your-mouth center. More about their composition can be found on Wikipedia.
-
-
1/2 cup milk chocolate chips
-
Traditional s’mores use milk chocolate, known for its creamy texture and sweet profile. For an in-depth look at the production and types of chocolate, see Wikipedia.
-
-
1/2 cup crushed graham crackers
-
These add the signature flavor and crunch to the recipe. Learn more about graham crackers on Wikipedia.
-
-
Vegetable oil (for frying)
-
Essential for achieving the golden, crispy exterior through deep frying, explained in detail on Wikipedia.
-
-
1/4 cup powdered sugar (optional, for dusting)
-
Adds a light, sweet finish and enhances visual appeal.
-
Kitchen Tools
In addition to ingredients, having the right tools ensures safety and optimal results:
-
Deep pan or fryer: Essential for maintaining consistent oil temperature.
-
Thermometer: A reliable thermometer helps monitor the oil, ensuring it remains around 350°F (175°C), the ideal temperature for frying.
-
Slotted spoon: Allows you to safely remove the s’mores balls from the hot oil while draining excess grease.
-
Tongs: Useful for gently turning the balls during frying to achieve even browning.
-
Paper towels: Help absorb residual oil post-frying, keeping the exterior crisp.
Additional Tips
-
Use high-quality chocolate for richer flavor.
-
Chill the prepared dough balls briefly before frying to reduce the chance of filling leaks.
-
Crush graham crackers finely for an even coating and consistent texture.
With these ingredients and tools, you’ll be fully equipped to create fried s’mores balls that are not only delicious but also beautifully presented, perfect for sharing at events or enjoying as a personal indulgence. For more creative dessert recipes, explore inspiring visuals on Pinterest
Step-by-Step Recipe Instructions
Making fried s’mores balls may seem like a gourmet task, but the process is simple and highly rewarding. Follow these step-by-step instructions to ensure perfect results every time.
Preparing the Dough Balls
-
Flatten the dough:
-
Take each piece of refrigerated biscuit dough and gently flatten it into a small circle, roughly 3 to 4 inches in diameter. This creates a surface large enough to encase the filling completely.
-
-
Add the filling:
-
Place one large marshmallow in the center of the dough circle.
-
Add a few milk chocolate chips on top of the marshmallow to achieve the classic s’mores flavor.
-
Sprinkle a small amount of crushed graham crackers to enhance the signature taste and texture.
-
-
Seal the dough:
-
Carefully fold the edges of the dough over the filling, pinching them tightly together to form a sealed ball. Ensure there are no gaps, as open seams may cause the filling to leak during frying.
-
-
Chill (optional but recommended):
-
Place the prepared dough balls in the refrigerator for 10-15 minutes. This firms up the dough slightly, helping to maintain shape and prevent bursting in hot oil.
-
Frying Process
-
Heat the oil:
-
Pour vegetable oil into a deep pan or fryer, ensuring it’s deep enough to submerge the dough balls completely.
-
Heat the oil to 350°F (175°C). Use a reliable thermometer to maintain a consistent temperature, crucial for even deep frying as outlined on Wikipedia.
-
-
Fry in batches:
-
Carefully lower a few dough balls into the hot oil using a slotted spoon or tongs.
-
Avoid overcrowding the pan, which can lower the oil temperature and result in soggy, undercooked balls.
-
-
Monitor and turn:
-
Fry each batch for 2-3 minutes, turning occasionally to ensure even browning on all sides.
-
-
Drain and cool:
-
Use a slotted spoon to remove the balls from the oil and place them on paper towels to drain excess oil.
-
Finishing Touches
-
While still slightly warm, dust each fried s’mores ball with powdered sugar for a decorative, sweet finish.
-
Serve immediately for the best experience, when the center is gooey, and the exterior is crisp.
For additional frying tips and visual guides, check out Pinterest, which offers helpful visuals and creative serving ideas.
Variations, Tips, and Advanced Techniques
Recipe Variations and Customizations
The beauty of fried s’mores balls lies in their flexibility. You can easily modify the recipe to suit your taste preferences and dietary needs.
Chocolate Options
-
Use dark chocolate for a richer, more sophisticated flavor.
-
Substitute white chocolate for a sweeter, creamier filling.
-
Incorporate flavored chocolates like caramel-filled or mint chocolate for unique twists.
Alternative Fillings
-
Add a dollop of Nutella or peanut butter along with the marshmallow for added creaminess and flavor complexity.
-
Drizzle caramel or butterscotch inside for a decadent surprise.
Dough Substitutes
-
Try using puff pastry or crescent roll dough for a flakier, lighter exterior.
-
For a more rustic, homemade approach, prepare your own biscuit dough from scratch following Wikipedia guidelines.
Coating Variations
-
Blend the crushed graham crackers with crushed pretzels for a sweet-salty contrast.
-
Add a sprinkle of cinnamon or cocoa powder to the graham cracker coating for additional flavor layers.
Customizing your fried s’mores balls allows you to create a dessert that can cater to nearly any occasion or craving while preserving the essence of this beloved treat.
Healthier Alternatives and Air Fryer Option
For those seeking a lighter version of this indulgent dessert, several healthier alternatives can be employed.
Baking Instead of Frying
-
Preheat your oven to 375°F (190°C).
-
Place the prepared dough balls on a parchment-lined baking sheet.
-
Bake for 12-15 minutes, or until golden brown.
-
The texture will be less crispy than deep frying but still enjoyable.
Air Fryer Instructions
-
Preheat the air fryer to 350°F (175°C).
-
Spray the dough balls lightly with non-stick cooking spray.
-
Air fry for 8-10 minutes, turning halfway through for even cooking.
Ingredient Substitutions
-
Use low-fat biscuit dough and reduced-sugar chocolate to lower the calorie count.
-
Opt for organic or homemade marshmallows and graham crackers for cleaner ingredient lists.
For more innovative dessert recipes and alternative cooking methods, explore creative options on Pinterest.
Serving Suggestions
Fried s’mores balls can be presented in various ways to elevate their appeal:
-
Serve with a scoop of vanilla or chocolate ice cream.
-
Drizzle with caramel or hot fudge sauce.
-
Top with whipped cream and a cherry for a sundae-style presentation.
-
Arrange them on a decorative platter as a standout centerpiece for dessert buffets.
Creative presentation enhances the visual and taste experience, making them perfect for sharing on platforms like Pinterest.
Storage and Reheating Tips
Proper storage helps maintain the quality of any leftover fried s’mores balls:
-
Allow them to cool completely before storing.
-
Place in an airtight container and refrigerate for up to 3 days.
-
Reheat in an oven or air fryer at 300°F (150°C) for 5-7 minutes to restore crispness.
-
Avoid microwaving, as it can make the exterior soggy while overheating the filling.
Following these storage tips ensures your fried s’mores balls remain delicious even after the initial serving.
Common Mistakes and How to Avoid Them
Avoid these frequent errors to ensure your fried s’mores balls turn out perfect:
-
Overcrowding the fryer: Reduces oil temperature, resulting in greasy, undercooked balls.
-
Incorrect oil temperature: Use a thermometer to maintain 350°F (175°C). Too hot and they burn; too cool and they absorb oil.
-
Overfilling: Excess filling can cause bursting during frying.
-
Weak sealing: Ensure dough edges are tightly pinched to prevent leakage.
Following these guidelines guarantees a consistently excellent outcome.
Safety Tips for Frying
Deep frying requires careful attention to safety:
-
Use a deep, heavy-bottomed pan to reduce splashing.
-
Monitor oil temperature continuously with a thermometer.
-
Never leave hot oil unattended.
-
Keep a metal lid or baking sheet nearby to smother flames if necessary.
-
Ensure proper ventilation to minimize odors and smoke.
For comprehensive guidance on food handling, review best practices on Wikipedia.
Nutritional Information
While indulgent, understanding the nutritional content is important:
-
Calories per ball: Approximately 220
-
Fat: 12g
-
Carbohydrates: 25g
-
Sugar: 10g
-
Protein: 3g
Exact values may vary depending on ingredient brands and modifications.
Frequently Asked Questions (FAQs)
Can I use homemade dough instead of biscuit dough?
Yes. Homemade biscuit dough can offer a fresher flavor and allow you to control ingredients. See Wikipedia for traditional recipes.
What type of oil is best for frying?
Neutral oils with high smoke points like vegetable, canola, or peanut oil work best for consistent frying results, as outlined in deep frying techniques on Wikipedia.
Can I freeze fried s’mores balls?
It’s not recommended, as freezing can alter texture. However, you can freeze the prepared, uncooked dough balls and fry them directly from frozen, adding 1-2 minutes to the cooking time.
Why are my s’mores balls leaking during frying?
Leakage often results from insufficient sealing or overfilling. Ensure edges are pinched tightly, and avoid adding too much filling.
Can I make them in advance for a party?
Yes. Prepare and chill the dough balls a few hours ahead, then fry just before serving for optimal crispness.
PrintHow to Make Fried Smores Balls with Graham Cracker Crumbs

Fried S’mores Balls bring a modern, irresistible twist to the beloved campfire treat. With gooey marshmallow, rich chocolate, and crunchy graham cracker crumbs all encased in golden biscuit dough, this quick and simple recipe delivers maximum indulgence with minimal effort. Perfect for parties, gatherings, or personal cravings, these bite-sized desserts combine nostalgic flavors with crowd-pleasing appeal.
- Author: Clara
Ingredients
- 1 package refrigerated biscuit dough (8 biscuits)
- 8 large marshmallows
- 1/2 cup milk chocolate chips
- 1/2 cup crushed graham crackers
- Vegetable oil (for frying)
- 1/4 cup powdered sugar (optional, for dusting)
Instructions
Flatten each biscuit dough piece into a small circle.
Place one large marshmallow and a few chocolate chips in the center of each circle.
Sprinkle some crushed graham crackers on top of the chocolate and marshmallow.
Carefully wrap the biscuit dough around the filling, pinching the edges to seal completely and form a ball.
Heat vegetable oil in a deep pan or fryer to 350°F (175°C).
Carefully place the prepared dough balls into the hot oil, a few at a time. Fry for about 2-3 minutes or until golden brown, turning occasionally for even cooking.
Remove from the oil and drain on paper towels.
Dust with powdered sugar before serving, if desired.
Notes
-
Chill the balls before frying to help maintain their shape and prevent bursting.
-
Use a thermometer to maintain oil temperature and ensure even frying.
-
Experiment with fillings like peanut butter or flavored chocolates for creative variations.
-
Serve immediately for the best gooey texture and crispy shell.
-
Reheat in an oven or air fryer to maintain texture if not served fresh.