Culinary historians debate the true birthplace of Mexican fried ice cream: some trace it to Sonoran street-food vendors who first experimented with frying chilled desserts in crushed cornflakes spiced with cinnamon, while others credit mid-20th-century Texan chefs eager to expand Tex-Mex menus. One theory points to Chinese immigrants in Mexican port cities introducing deep-frying techniques, and another highlights American restaurateurs adapting the concept into novel desserts for diners’ delight. By the late 20th century, fried ice cream had leapt beyond Mexico’s borders—churrerías began offering it alongside churros, and food writers documented its growing popularity. As the treat landed on American restaurant menus, chefs dressed it up with whipped cream, sauces, and elaborate presentations, cementing its status as a beloved fusion dessert.

Cultural Significance and Modern Popularity
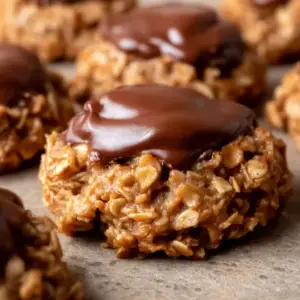
The irresistible contrast of hot, crispy shell and cold, creamy center in Mexican fried ice cream mirrors the celebration of sensory interplay so common in Mexican cuisine—at lively fiestas it’s often paired with churros and other fried treats to symbolize conviviality and festivity. Both restaurant chefs and home cooks have embraced this dessert: upscale kitchens plate it as an artful finale, crowned with whipped cream and drizzled with caramel or chocolate, while food-blog and video features have inspired countless creative presentations.
Modern twists on the classic coating include:
- A cinnamon-sugar cornflake crust for warm spice notes
- Panko breadcrumbs to dial up the crunch factor
- Crushed nuts or puffed rice cereal for a gluten-free alternative
- Crushed tortilla chips for a savory, salty edge
Follow our detailed recipe steps to try any of these variations yourself and experience firsthand how a few simple coating swaps can transform this festive dessert into your own signature treat.
Key Ingredients and Essential Equipment
Authentic Mexican fried ice cream starts with premium-quality vanilla ice cream scooped into uniform balls, then dipped first in a mixture of lightly beaten eggs and pure vanilla extract, dusted with a blend of all-purpose flour and granulated sugar, and finally rolled in crushed cornflakes to form a sturdy coating. To execute this properly, you’ll need an ice-cream scoop for consistent portions, plenty of freezer space to keep the coated balls ultra-cold, and a deep pot fitted with a reliable thermometer to maintain oil at 350 °F for a quick, 10–12-second fry. Gathering mixing bowls, a slotted spoon, and parchment paper ahead of time streamlines assembly, and for historical context or coating variations—like cinnamon-sugar or panko—see our Origins and Historical Context and Cornflakes guide, then follow the Detailed Step-by-Step Recipe Instructions for perfect results.
Detailed Step-by-Step Recipe Instructions
Begin your journey to perfect Mexican fried ice cream by following these organized steps. This section covers preparation of scoops, assembly of the breading station, and the precise frying process. With clear guidance, you’ll achieve a golden crust and a frozen center every time.
Preparing the Ice Cream Scoops
- Allow high-quality vanilla ice cream to soften at room temperature for approximately five minutes.
- Use an ice-cream scoop to form six evenly sized balls and place them on a parchment-lined tray.
- Immediately transfer the tray to the coldest part of your freezer for at least two hours so the scoops become rock solid.
- Refer back to the Key Ingredients and Essential Equipment section for recommended freezer settings and scoop techniques.
- For more on frozen dessert basics, see the Ice cream article or explore popular serving ideas at Ice cream cake recipes.
Setting Up the Breading Station
- While the scoops freeze, prepare three shallow bowls in sequence:
- All-purpose flour for the initial dredge
- Beaten eggs for adhesion
- Crushed cornflakes mixed with ground cinnamon and granulated sugar
- Press each chilled scoop firmly into the flour, then the egg wash, and finally roll it in the crispy cornflake mixture until fully coated.
- Return the coated scoops to the freezer immediately.
- Consult the Cornflakes entry for tips on crushing methods and texture variations, and revisit our Cultural Significance and Modern Popularity for contextual notes on coating choices.
Frying Process
Heat oil in a heavy pot to 350 °F (175 °C). Using an instant-read thermometer, maintain consistent temperature for even frying. Work in small batches of two scoops. Gently lower each coated ball into the oil with a slotted spoon. Fry for 10–12 seconds until the coating achieves a golden hue. Use fresh parchment to drain excess oil before returning scoops to the freezer for a crisp finish.
Assembly and Serving
- Working quickly, arrange four slices of pound cake (or your chosen base) on a chilled platter.
- Place two freshly fried ice cream balls atop the cake layer, spacing them evenly for balance.
- Gently cover with the remaining cake slices, creating a “sandwich” that locks the scoops in place.
- Add the final two fried scoops on top to form an appealing stack.
To elevate presentation and flavor:
- Whipped Cream Nest: Pipe or spoon dollops of whipped cream around each scoop, using a star tip for decorative flair.
- Drizzles: Warm caramel sauce or chocolate sauce slightly before drizzling in a zig-zag pattern. Aim for thin streams to showcase both sauces.
- Nutty Crunch: Sprinkle chopped pecans or peanuts over the whipped cream for texture contrast.
At this stage, timing is critical: serve immediately to preserve the crisp exterior and frozen center. Gently wipe any stray crumbs from plate edges to maintain a spotless presentation. For a seasonal twist, garnish with fresh berries or mint sprigs—bright hues that contrast with the golden crust.
Refer back to the Whipped Cream–Topped Fried Ice Cream Dessert section for variations on piping techniques and alternative drizzles. In large gatherings, consider assembling servings on a baking sheet lined with parchment, then transferring plates tableside to prevent melting during transport.

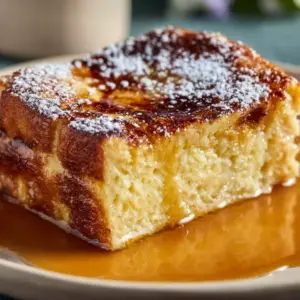
Whipped Cream–Topped Fried Ice Cream Variation
The Whipped Cream–Topped Fried Ice Cream variation elevates the classic dessert by adding a generous layer of whipped cream and complementary sauces. Ideal for festive occasions or as a statement finale, this approach balances texture and flavor.
To assemble, follow these steps:
- Prepare fried ice cream scoops according to the Detailed Step-by-Step Recipe Instructions.
- Arrange the golden scoops on chilled dessert plates.
- Pipe or spoon whipped cream around the base using a star tip or piping bag for decorative swirls.
- Warm caramel sauce or chocolate sauce until pourable and drizzle in a spiral or zigzag pattern.
- Sprinkle chopped pecans or finely chopped peanuts over the whipped cream for crunchy contrast.
For extra flair, garnish with fresh berries or mint sprigs. Explore additional topping ideas in the Crispy Ice Cream Cake Variation to adapt presentation. This twist showcases Mexican fried ice cream as a gourmet delight.
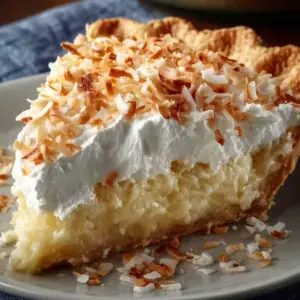
Crispy Ice Cream Cake Variation
The Crispy Ice Cream Cake variation transforms individual servings into an impressive cake-like dessert that layers fried ice cream with pound cake or sponge cake. Perfect for celebrations, this format highlights both texture and visual appeal.
Steps to create the crispy ice cream cake:
- Slice a store-bought vanilla pound cake into uniform half-inch pieces.
- Prepare six frozen fried ice cream balls following the Detailed Step-by-Step Recipe Instructions.
- Arrange four cake slices in a single layer on a chilled serving platter.
- Place two fried scoops evenly on the cake base.
- Top with four more cake slices, forming a “sandwich” to encapsulate the scoops.
- Add the final two fried balls on top to complete the tower.
Decorating tips:
- Smooth a layer of whipped cream around the exterior with an offset spatula.
- Drizzle warm chocolate sauce and caramel sauce alternately in thin streams.
- Press chopped nuts (pecans or peanuts) into the cream for texture and contrast.
- Garnish with fresh berries or mint leaves for color.
For creative inspiration, explore the Ice cream cake recipes gallery. This format brings a celebratory twist to Mexican fried ice cream, making it ideal for special festive gatherings.
Tips, Troubleshooting, and Pro Tips
Achieving the perfect Mexican Fried Ice Cream requires attention to detail. Use these tips to prevent common issues and elevate your dessert.
- Preventing Meltdown: Work swiftly when frying. Ensure scoops are ultra-cold by freezing at least two hours. Pre-chill plates or cake layers in the freezer.
- Maintaining Oil Temperature: Use an instant-read thermometer. Keep oil steady at 350 °F (175 °C). Adjust heat source to prevent temperature drops when scoops are added.
- Alternative Coatings: Experiment with:
- Panko breadcrumbs for extra crunch
- Crushed nuts (pecans or peanuts) for nutty aroma
- Crushed tortilla chips for savory notes
- Healthier Options: Try air-frying coated scoops at 375 °F (190 °C) for 6–8 minutes, flipping halfway. Use low-sugar or dairy-free ice cream.
- Make-Ahead Strategies: Coat scoops in morning and freeze. Assemble plates just before serving. Store fried balls on parchment-lined trays in a single layer.
- Presentation Pro Tips:
- Use a piping bag with different tips to vary whipped cream shapes.
- Drizzle sauces from a height for artistic thin lines.
- Garnish with edible flowers to impress guests.
For more ideas, revisit the Whipped Cream–Topped Fried Ice Cream Dessert or Crispy Ice Cream Cake Variation.

FAQs
What is Mexican fried ice cream?
Mexican fried ice cream is a ball of ice cream that’s coated in a crunchy shell—traditionally crushed cornflakes—then flash-fried so the exterior turns golden and crispy while the interior stays frozen.
How do you fry ice cream without it melting?
The secret is working with ultra-cold scoops and keeping your oil heated to 350 °F; a very brief fry time of 10–12 seconds seals the coating before the ice cream has a chance to thaw.
Can I use other coatings besides cornflakes?
Absolutely. You can swap in panko breadcrumbs, crushed nuts, shredded coconut, or even crushed tortilla chips for a savory twist on the classic.
Is fried ice cream authentically Mexican?
Its exact origin is debated, but fried ice cream is firmly rooted in Mexican and Tex-Mex dining traditions and is a popular treat on both sides of the border.
How far in advance can I prepare the scoops?
You can form and coat the scoops up to 24 hours before frying—just keep them tightly wrapped and stored in the freezer until you’re ready to serve.
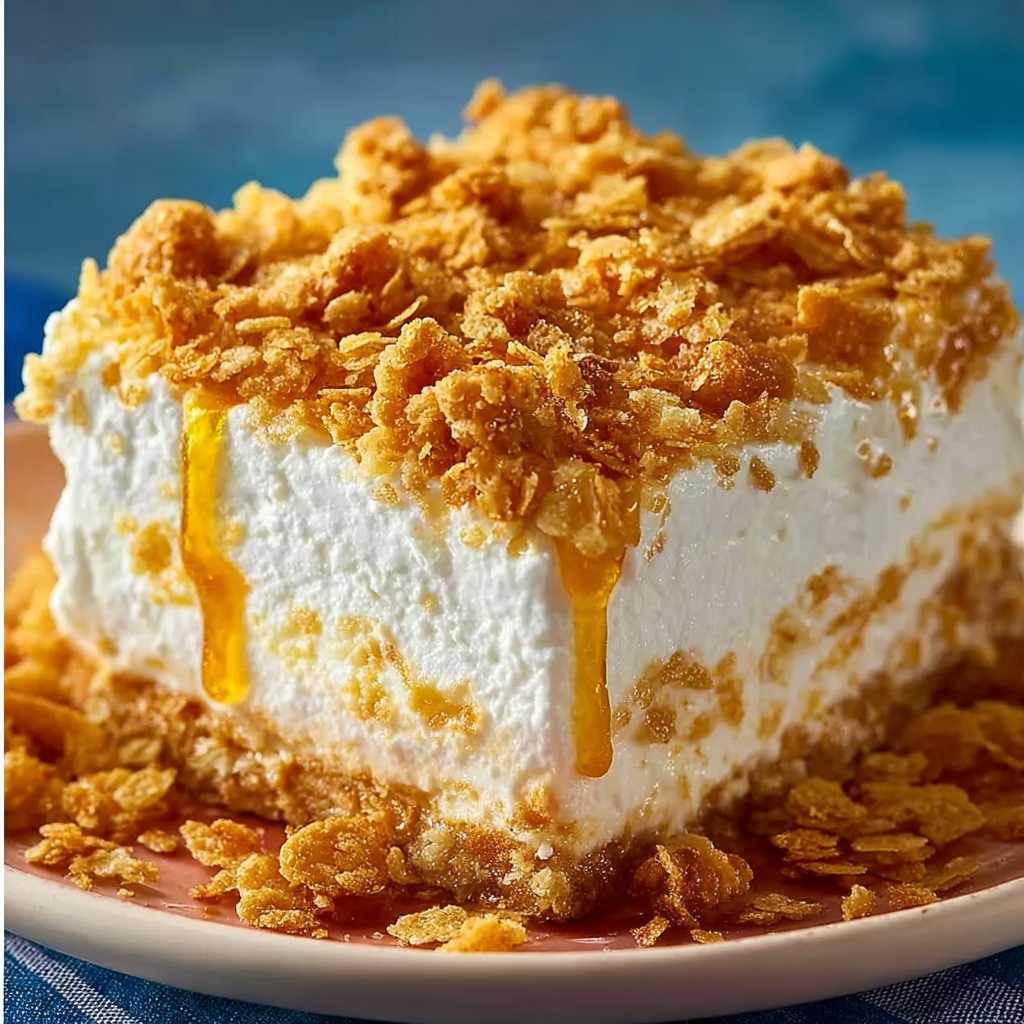
How to Make Fried Ice Cream Cake: A Step-by-Step Guide
Experience the irresistible fusion of temperatures and textures with this Mexican Fried Ice Cream recipe. Each scoop of cream-rich ice cream is enveloped in a crisp, cinnamon-sugar-dusted cornflake crust and flash-fried to golden perfection. The result is an eye-catching dessert that delivers a warm, crunchy shell giving way to a frozen, velvety interior. Whether dressed with a halo of whipped cream and swirls of caramel and chocolate sauce, or assembled into a festive Crispy Ice Cream Cake, this treat dazzles at dinner parties and casual gatherings alike. Simple to prepare yet dramatic on the plate, it’s a show-stopper that celebrates the vibrant spirit of Mexican cuisine through playful contrasts.
Ingredients
For the cake base:
- 1 store-bought vanilla pound cake (about 16 oz/450 g), sliced into eight ½-inch pieces
For the fried ice cream scoops:
- 1 quart (950 ml) vanilla ice cream
- 2 cups (60 g) cornflakes, crushed
- 1 tsp ground cinnamon
- ¼ cup (50 g) granulated sugar
- 2 large eggs, beaten
- ½ cup (60 g) all-purpose flour
- Vegetable oil, for frying
For garnish:
- 1 cup (240 ml) whipped cream
- ½ cup (120 ml) chocolate sauce
- ¼ cup (60 ml) caramel sauce
- ¼ cup (30 g) chopped nuts (pecans or peanuts)
- Fresh berries or mint leaves (optional)
Instructions
Allow the ice cream to soften slightly at room temperature for 5 minutes, then use a scoop to form six firm balls. Return the scoops to a parchment-lined tray and freeze for at least 2 hours so they’re rock solid.
Prepare three shallow bowls: one with flour, one with beaten eggs, and one with the crushed cornflakes mixed with cinnamon and sugar.
Heat about 2 inches of vegetable oil in a heavy pot or deep skillet until it reaches 350 °F (175 °C). Keep an instant-read thermometer in the oil to monitor temperature.
Working quickly, dredge each frozen ice cream ball first in flour, then dip in egg, and finally press into the cornflake mixture so each scoop is completely coated. Return to the freezer immediately after coating.
Once the oil is at temperature, fry two coated scoops at a time for about 10–12 seconds until the coating turns golden brown. Use a slotted spoon to transfer them back to a parchment-lined tray and immediately return to the freezer between batches.
Arrange four slices of the pound cake on a serving platter. Place two fried ice cream scoops on top of the cake layer. Add the remaining four cake slices over the scoops to form a sandwich, then top with the final two scoops.
Pipe or spoon whipped cream around the top and sides of the “cake,” then drizzle evenly with chocolate sauce and caramel sauce. Sprinkle chopped nuts over the top and garnish with fresh berries or mint if desired. Serve immediately.
Notes
-
Ice Cream Quality: Choose a high-fat, low‐overrun ice cream for a firmer texture and richer mouthfeel.
-
Chilling Protocol: Freeze scoops on a flat, cold surface to maintain shape; 2–4 hours minimum is essential.
-
Coating Consistency: Crush cornflakes to medium-fine crumbs—too coarse and they won’t adhere; too fine and you lose crunch.
-
Oil Management: Use a heavy-bottomed pot and monitor with a candy or deep-fry thermometer to stabilize at 350 °F (175 °C).
-
Rapid Frying: Limit fry time to 10–12 seconds. Overfrying risks melting the interior; underfrying yields a pale crust.
-
Sauce Preparation: Warm sauces just before serving to prevent chilling the fried shell.
-
Presentation Tips: Serve on chilled plates and garnish immediately to maintain contrast; wipe plate rims for a professional look.
-
Advance Prep: Coat and freeze up to a day in advance; fry and dress seconds before guests arrive.
-
Variations: Experiment with spiced breadcrumbs, toasted coconut, or nut-butter drizzles for unique flavor profiles.
-
Storage Advice: Best enjoyed fresh—leftover fried scoops may be refrozen but lose their original crispness.
Nice post. I was checking continuously this blog and I am impressed! Extremely helpful information particularly the last part 🙂 I care for such information much. I was looking for this certain info for a long time. Thank you and best of luck.