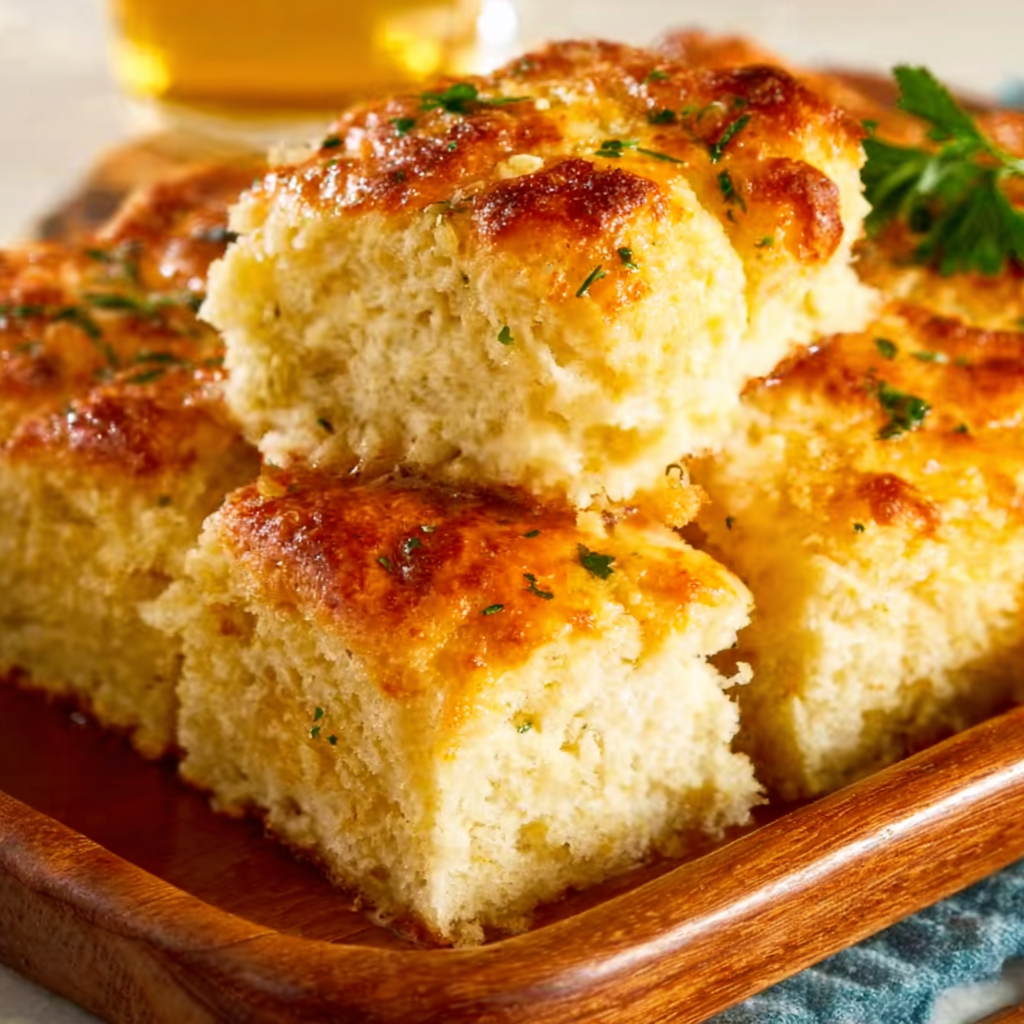
There’s something undeniably nostalgic about the scent of buttery biscuits rising in the oven. For many, it’s a taste of home — warm, flaky, and golden on the outside with a soft, melt-in-your-mouth interior. Garlic butter swim biscuits elevate this classic comfort food by infusing it with bold flavor and a uniquely indulgent texture that results from the “swim” technique — where the dough bakes while immersed in melted butter.
This isn’t just another biscuit recipe. It’s an irresistible biscuit recipe that combines simplicity with exceptional results, making it ideal for beginner bakers and seasoned cooks alike. What sets these biscuits apart is how they strike the perfect balance between flavorful garlic butter and a fluffy, layered crumb. The result? A side dish so versatile and addictive, it can easily steal the spotlight from any main course.
The method is rooted in classic Southern cuisine (source), where buttery breads are often a table staple. But the magic lies in the technique: by baking the biscuits in a bath of butter, they form a crisp, golden crust while remaining tender and moist inside. For a deeper understanding of how ingredients like buttermilk (source) and leavening agents work together to achieve that signature rise, it’s helpful to explore the science behind biscuit baking.
Whether served alongside a hearty chili, a roasted chicken, or as part of a weekend brunch spread, these garlic butter swim biscuits promise to be a go-to favorite. In the next section, we’ll break down what exactly makes a biscuit a “swim” biscuit, and how this method creates the unforgettable texture and flavor home cooks love.
2. What Are Butter Swim Biscuits?
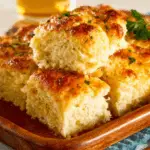
Butter swim biscuits are a delicious twist on traditional biscuits that quite literally bake in a pool of butter. Unlike standard biscuit recipes that call for butter to be cut into the dough and baked on a dry sheet, these biscuits are submerged in melted butter before they hit the oven. This results in a crisp, golden exterior and a rich, tender interior. The buttery base seeps up into every layer of the biscuit, creating a mouthwatering texture that’s both soft and slightly crisped on the edges.
The term “swim” refers to this unique baking method — the dough “swims” in butter as it cooks. This technique not only enhances the flavor but also ensures consistent moisture and tenderness throughout. Originating from Southern biscuit-making traditions (source), the method embraces both indulgence and simplicity.
Unlike rolled or laminated biscuits that require folding and cutting, some butter swim biscuit variations are simply pressed into a pan and scored before baking. However, in this garlic butter version, we enhance the texture further by folding the dough a few times before cutting, which creates delicate layers. That extra step combines the best of both worlds: traditional flaky biscuits and the rich butter-cooked technique.
To understand why these biscuits rise so beautifully while retaining a soft, pillowy interior, consider the science behind leavening agents like baking powder (source) and baking soda. These components react with the acid in buttermilk to release carbon dioxide, forming air pockets that lift the dough during baking. The result is an incredibly light biscuit, full of air and flavor.
On platforms like Pinterest, swim biscuits have gained popularity for their minimal prep and stunning presentation. Their rustic edges and golden tops make them photogenic — a favorite for home cooks and food bloggers alike.
Now that we’ve explored the concept behind these indulgent treats, let’s take a deeper look at the ingredients that make garlic butter swim biscuits so unforgettable.

3. Key Ingredients Breakdown
The beauty of garlic butter swim biscuits lies in their simplicity. With just a handful of staple ingredients, you can create a rich, flavorful biscuit that tastes like it came from a Southern bakery. Each ingredient plays a specific role in delivering that perfect blend of texture, rise, and flavor.
All-Purpose Flour
All-purpose flour is the structural backbone of the recipe. It has just the right protein content to create a soft but sturdy dough — ideal for layered biscuits. Unlike bread flour, which can make biscuits tough, or cake flour, which is too delicate, all-purpose strikes the perfect balance.
Baking Powder & Baking Soda
These are your leavening agents. Baking powder provides lift, while baking soda reacts with the acidity in the buttermilk for extra rise. Understanding how leavening agents (source) work can help you fine-tune the texture. Both must be fresh — old leaveners mean flat, dense biscuits.
Granulated Sugar
A small amount of sugar balances out the savory notes and promotes browning. It adds depth without making the biscuit sweet.
Kosher Salt
Salt enhances every other flavor in the recipe. Kosher salt is preferred because of its clean taste and easy-to-measure granules. It complements both the dough and the garlic butter topping, drawing out the richness in each bite.
Cold Unsalted Butter
This is the most critical element. Cold butter gets cut into the flour, creating little pockets that melt during baking, producing a flaky texture. Some bits of butter should remain the size of small peas. The butter also ensures rich flavor throughout the dough. When you pour melted butter into the pan — the “swim” part — the biscuit dough bakes in it, giving you crispy edges and golden bottoms. Check out this Pinterest board for visual tips on handling butter correctly in biscuits.
Buttermilk
A staple in Southern cuisine (source), buttermilk is essential for moisture, tenderness, and a slight tang that complements the garlic. It also activates the baking soda. If you’re out of buttermilk, you can substitute 1 cup of milk with 1 tablespoon of lemon juice or vinegar.
Garlic Butter Topping
This is where the flavor really comes alive. Melted unsalted butter is infused with minced garlic for a savory aroma and flavor punch. Garlic sautéed in butter for just one minute releases its oils without browning — keeping the flavor mellow but pronounced.
Fresh Parsley & Chives
Fresh herbs like parsley (source) and chives (source) add brightness and a pop of color to the final product. They balance out the richness of the butter and add a gourmet touch.
Together, these ingredients don’t just make a biscuit — they create a savory, tender, flavor-packed experience. In the next section, we’ll guide you through the step-by-step process to ensure flawless results every time.
4. Step-by-Step Instructions for Perfect Results
Achieving perfect garlic butter swim biscuits is all about precision, temperature control, and timing. This section walks you through each step of the process, ensuring that every batch comes out golden, flaky, and bursting with flavor.
1. Prepare the Dry Ingredients
Start by whisking together:
-
2 cups all-purpose flour
-
1 tablespoon baking powder
-
1 teaspoon granulated sugar
-
½ teaspoon baking soda
-
¾ teaspoon kosher salt
Mix until evenly combined. This ensures that the leavening agents are evenly dispersed, which is crucial for even rise and texture. Understanding the role of baking powder (source) and baking soda at this stage is key, as both will react later when wet ingredients are added.
2. Cut in the Cold Butter
Add 6 tablespoons of cold, cubed unsalted butter to the flour mixture. Use a pastry cutter or your fingertips to work the butter into the flour. You’re aiming for a crumbly texture with some butter pieces the size of small peas. These solid chunks of butter will melt during baking, creating steam and forming those signature flaky layers.
The importance of cold butter cannot be overstated — it must stay solid until it hits the oven. This step is one of the most vital for biscuit texture and is widely emphasized on platforms like Pinterest for good reason.
3. Mix in the Cold Buttermilk
Pour in 1 cup of cold buttermilk and gently stir with a wooden spoon or rubber spatula until just combined. Do not overmix — it’s okay if the dough looks slightly shaggy. Overworking the dough will activate the gluten in the flour and make the biscuits tough.
Buttermilk (source) not only adds tangy flavor but also triggers the leavening reaction with the baking soda, helping the biscuits rise beautifully.
4. Fold the Dough for Layers
Turn the dough out onto a lightly floured surface. Gently press it together and fold it over itself 4–5 times. This folding creates those gorgeous, flaky layers that elevate the texture. Avoid kneading — you’re building structure without activating too much gluten.
Then pat or roll the dough to a 1-inch thickness. This height gives the biscuits plenty of room to rise and develop those buttery layers.
5. Cut the Biscuits Cleanly
Use a 2½-inch round biscuit cutter. Press straight down without twisting — twisting seals the edges and prevents the biscuit from rising properly. Re-roll the scraps only once to avoid toughening the dough, and cut out the remaining biscuits.
Now that your biscuits are formed, it’s time to prepare the baking setup — and we’ll complete that process in the next half of this section.
6. Arrange and Chill the Biscuits
Place the cut biscuits on a parchment-lined baking sheet, spacing them about 1 inch apart. This allows them to rise and expand without crowding. If you’re baking them in a square or round cake pan, the sides of the biscuits will touch slightly — which helps them rise taller and creates softer edges.
Refrigerate the shaped biscuits for 10 minutes. Chilling helps re-solidify the butter, which leads to better layering and a more distinct crumb. Cold dough hitting a hot oven causes the butter to steam rapidly, creating lift and flakiness — a well-documented technique among baking experts on platforms like Pinterest.
7. Preheat and Bake
While the biscuits chill, preheat your oven to 425°F (220°C). Once ready, place the baking sheet in the center of the oven and bake for 12–14 minutes, or until the tops are golden and the edges are lightly browned.
Keep a close eye during the last few minutes of baking. The high heat activates the leaveners quickly, and the butter in the pan ensures even browning and rich flavor.
8. Prepare the Garlic Butter Topping
While the biscuits bake, melt 4 tablespoons of unsalted butter in a small skillet over low heat. Add 3 minced garlic cloves and sauté gently for about 1 minute, just until fragrant. Be careful not to brown the garlic — it can turn bitter.
Remove from heat and stir in 1 tablespoon chopped parsley (source), 1 teaspoon chopped chives (source), and a pinch of kosher salt. This creates a vibrant, herb-infused butter that complements the biscuit’s richness beautifully.
9. Brush and “Swim”
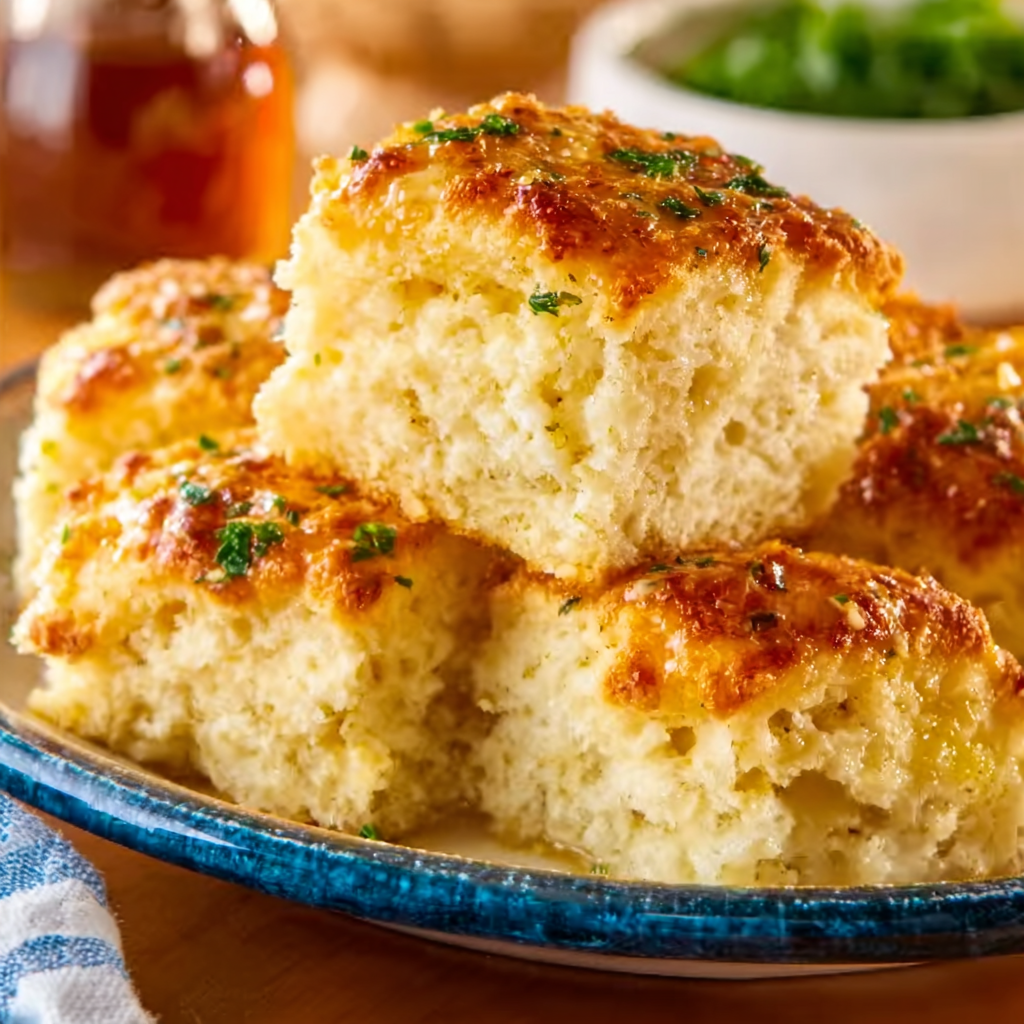
Remove the hot biscuits from the oven and transfer them to a wire rack. Immediately brush the warm tops generously with the garlic butter, letting some of the mixture drip down the sides and pool beneath — the essence of the “swim” technique.
The buttery base helps the bottom crisp up while soaking the biscuit in flavor. This garlic-herb infusion is what turns a simple biscuit into an irresistible garlic butter swim biscuit.
With your biscuits now fresh out of the oven, buttery and golden, you’re ready to serve them as the perfect side or indulgent snack. Up next, we’ll explore professional tips and tricks to guarantee perfect results every time.
5. Pro Tips for Success
Mastering garlic butter swim biscuits comes down to technique and ingredient handling. These tips will help you avoid common pitfalls and bake like a pro every time.
-
Keep everything cold
Cold butter and cold buttermilk are essential. Warm ingredients will start melting before the biscuits hit the oven, preventing them from developing flaky layers. Always chill your dough before baking. -
Do not overmix
Overworking the dough activates gluten, resulting in tough, dense biscuits. Mix just until the dough comes together — it’s okay if it looks slightly shaggy. -
Use fresh leaveners
Old baking powder or baking soda won’t give your biscuits the rise they need. Replace these every 6 months for the best results. -
Fold the dough
Folding creates visible layers. Aim for 4–5 folds to build structure without overhandling. -
Don’t twist the cutter
Twisting seals the edges and keeps biscuits from rising fully. Always press straight down. -
Use parchment paper
It prevents sticking and ensures even browning. Bonus: cleanup is easier. -
Let the butter pool
When brushing with garlic butter, don’t hold back. Let it “swim” around the biscuits to create crispy, flavorful bottoms.
For visual guidance on each step, check out this helpful Pinterest board on biscuit baking tips, which showcases layering and butter handling in real-time.
6. Creative Variations and Add-ins
Once you’ve mastered the base recipe, get creative with these flavorful twists. Just remember to adjust ingredients slightly to maintain dough consistency.
-
Cheddar Garlic Butter Biscuits
Add ½ to ¾ cup shredded sharp cheddar to the dough. The cheese adds richness and pairs perfectly with the garlic butter. For more cheese biscuit ideas, Pinterest has tons of variations you can explore. -
Jalapeño Garlic Biscuits
Stir in 1 small finely diced jalapeño for heat. Pair with cheddar for a Tex-Mex twist. -
Rosemary or Thyme Butter Topping
Swap parsley and chives for 1 tsp of minced rosemary or thyme. These robust herbs elevate the biscuits to gourmet status. -
Honey Butter Version
Leave out the garlic and add 1 tbsp of honey to the butter before brushing. Great for breakfast spreads. -
Bacon & Scallion Mix-in
Fold in 2 tablespoons of cooked, crumbled bacon and 1 tablespoon chopped scallions. A savory brunch upgrade.
The biscuit base is incredibly versatile, so you can personalize flavors without compromising texture. For herb inspiration, browse the fresh herb profiles on Wikipedia: parsley and chives.
7. Best Ways to Serve Garlic Butter Swim Biscuits
These biscuits are the perfect comfort food side but can also be the star of the meal. Here are some excellent serving ideas:
-
With Soups and Stews
Serve alongside tomato soup, beef stew, or creamy chowder. Their buttery base is perfect for sopping up broth. -
With Southern Favorites
Pair with fried chicken, collard greens, or smothered pork chops for a full Southern cuisine experience (source). -
At Brunch
Serve with scrambled eggs, sausage gravy, or as a breakfast sandwich base with eggs and cheese. -
As a Snack
Reheat and enjoy with a pat of butter or even a drizzle of honey for a sweet-savory bite. -
Holiday Meals
A great addition to Thanksgiving or Christmas spreads where buttery breads are always welcome.
Their rich, garlicky flavor makes them incredibly versatile — whether you’re feeding a crowd or just treating yourself.
8. Make-Ahead and Storage Tips
These buttery biscuits are best fresh, but they store and reheat well with a few tricks.
-
Make-ahead Dough
Mix and cut your dough, then chill or freeze unbaked biscuits. Place them on a baking sheet in the freezer. Once frozen, store in an airtight bag. Bake straight from frozen — add 2–3 extra minutes to the baking time. -
Store Baked Biscuits
Keep leftovers in an airtight container at room temperature for up to 2 days. Refrigerate for up to 4 days. -
Reheat Properly
Wrap in foil and warm in a 300°F oven for 8–10 minutes to revive the buttery texture. Avoid microwaving — it makes them soggy. -
Freezing
Baked biscuits can also be frozen. Cool completely, then wrap individually. Reheat from frozen wrapped in foil at 325°F for 15–18 minutes.
These storage techniques allow you to enjoy the magic of garlic butter swim biscuits on-demand, without compromising quality.
9. Common Mistakes to Avoid
Even a simple recipe can go wrong without the right approach. Here’s what to avoid:
-
Using warm ingredients
Room-temperature butter or buttermilk won’t create steam for rising. Always start cold. -
Overmixing the dough
Leads to tough biscuits. Mix just until the dough holds together. -
Skipping the chill time
Refrigerating the dough before baking helps solidify the butter and boost flakiness. -
Overbaking
Biscuits go from golden to dry quickly. Watch them closely at the 12-minute mark. -
Crowding the baking tray
Too-close placement can prevent even baking and rising. Give at least 1 inch of space between biscuits unless using a cake pan. -
Using dull cutters
A sharp biscuit cutter ensures a clean cut, promoting better rise and presentation.
Avoiding these mistakes ensures success whether you’re baking for the first time or perfecting your technique.

10. FAQs
What are butter swim biscuits?
Butter swim biscuits are a Southern-style biscuit that’s baked in a pool of melted butter. This gives them a golden, crisp base and a rich, moist interior — hence the term “swim.”
Why use buttermilk in biscuits?
Buttermilk (source) adds acidity, which activates baking soda for lift. It also adds a subtle tang and keeps the dough tender and moist.
How do you keep biscuits flaky?
Use cold butter, avoid overmixing, and fold the dough a few times before cutting. Chilling the dough before baking also helps preserve layers.
Can you freeze garlic butter biscuits?
Yes. You can freeze both unbaked and baked biscuits. Freeze unbaked biscuits on a tray, then bake from frozen. Store baked biscuits in foil and reheat in the oven.
What makes a biscuit rise higher?
Several factors: fresh leaveners, cold ingredients, clean cuts (no twisting), and proper oven temperature. Layering the dough also contributes to taller, flakier biscuits.
How to Bake Perfect Butter Swim Biscuits Every Time
Garlic Butter Swim Biscuits are the ultimate comfort side — golden and crisp on the outside, fluffy and rich inside, and bathed in a pool of savory garlic-herb butter. Inspired by Southern-style baking, these easy-to-make biscuits are layered, buttery, and perfect with any meal. Whether you’re serving them with soup, breakfast, or a hearty dinner, they’ll steal the spotlight every time.
- Author: Clara
Ingredients
- 2 cups (250 g) all-purpose flour
- 1 tbsp baking powder
- 1 tsp granulated sugar
- ½ tsp baking soda
- ¾ tsp kosher salt
- 6 tbsp (85 g) cold unsalted butter, cut into small cubes
- 1 cup (240 ml) buttermilk, cold
For the garlic butter topping:
- 4 tbsp (56 g) unsalted butter
- 3 garlic cloves, minced
- 1 tbsp fresh parsley, finely chopped
- 1 tsp fresh chives, finely chopped
- Pinch of salt
Instructions
In a large bowl whisk together the flour, baking powder, sugar, baking soda, and salt until evenly combined.
Use a pastry cutter or your fingertips to work the cold butter into the dry ingredients until the mixture resembles coarse crumbs with some pea-sized bits of butter remaining.
Pour in the cold buttermilk and stir gently with a wooden spoon or rubber spatula just until the dough comes together. Avoid overmixing.
Turn the dough out onto a lightly floured surface and fold it over itself 4–5 times to build layers. Pat or roll the dough to about 1-inch thickness.
Use a 2½-inch round biscuit cutter to cut out biscuits, pressing straight down without twisting. Gather scraps, gently re-pat to thickness, and cut out remaining biscuits.
Place the biscuits on a baking sheet lined with parchment paper, spacing them about 1 inch apart. Chill in the refrigerator for 10 minutes while the oven preheats to 425 °F (220 °C).
Bake until the tops are golden and the edges are lightly browned, about 12–14 minutes. Remove from oven and transfer to a wire rack.
Meanwhile, melt the butter in a small skillet over low heat. Add the minced garlic and sauté until fragrant but not browned, about 1 minute. Stir in the parsley, chives, and a pinch of salt.
Brush the warm biscuits generously with the garlic butter, allowing some to pool around the base so they can “swim” in flavor.
Notes
-
Always use cold butter and buttermilk for best results.
-
Avoid overworking the dough to maintain tenderness.
-
The garlic butter topping can be customized with your favorite herbs like rosemary, thyme, or dill.
-
Freeze the shaped dough for quick, fresh biscuits anytime.
-
Serve warm and don’t skimp on the butter — that’s the magic of the “swim.”