Cheesecake Brownie Dessert Cups
If you’re searching for a show-stopping treat that combines rich, indulgent flavor with elegant presentation, cheesecake brownie dessert cups are the perfect solution. These individually portioned delights marry the fudgy goodness of a brownie with the creamy, tangy smoothness of cheesecake, making them a crowd favorite for both casual family dinners and upscale parties.
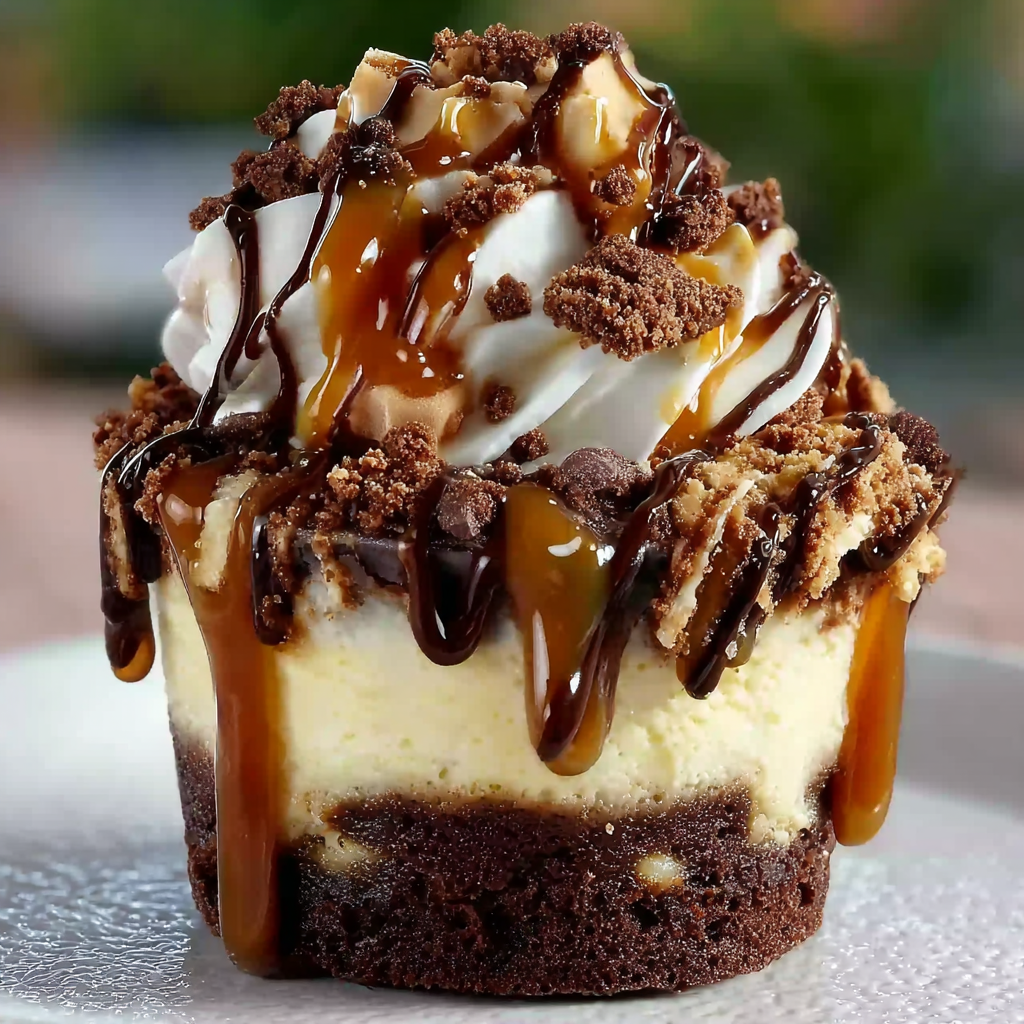
The magic of these mini desserts lies in their balance of textures and flavors. The base is a dense, chocolate-packed brownie, which supports a luscious cheesecake layer, all topped off with chocolate chips, crunchy nuts, or a decadent drizzle of caramel. It’s no surprise that this dessert format has gained popularity across Pinterest and baking blogs. You’ll often see these beautiful mini cheesecake brownie cups featured in party dessert presentation boards or mini dessert cups inspiration collections that highlight effortless elegance.
Unlike a full pan of brownies or a traditional cheesecake, these individual cheesecake cups are easy to serve, require no slicing, and travel well—making them ideal for events where you want both convenience and visual appeal. The ingredients are simple and easily accessible, and the method is straightforward enough for beginner bakers. If you’re already familiar with baking using a muffin tin, this recipe will feel completely approachable.
The beauty of these rich cheesecake cups for parties is not just in taste, but also in presentation. You can personalize each cup with variations in flavor, garnish, or filling, which we’ll explore later. Whether you’re whipping up a quick batch for a holiday gathering or preparing a platter for a wedding shower, these treats will disappear fast. From the first bite of dense, cocoa-rich brownie to the last swirl of creamy cheesecake, they deliver a satisfying finish that’s hard to resist. For a deeper dive into the origins of this indulgent dessert, check out the history of brownies and cheesecake.

What Are Cheesecake Brownie Cups?
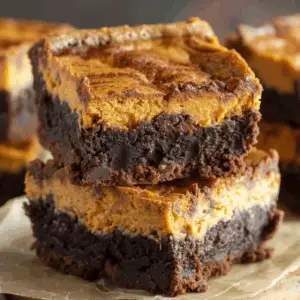
Cheesecake brownie cups are a modern twist on two beloved desserts: cheesecake and brownies. Rather than baking a full cheesecake or a slab of brownies, this recipe layers both into individual portions, typically baked in a muffin tin. Each cup features a dense, fudgy brownie base topped with a smooth and tangy cream cheese layer, baked together into a portable, party-ready treat.
Unlike full-size desserts that require slicing and plating, these individual cheesecake desserts are ideal for gatherings where ease of serving and presentation matter. Guests can simply grab a cup and enjoy—no forks or plates necessary. This makes them especially popular for potlucks, birthdays, and wedding dessert tables. You’ll often find them styled creatively on Pinterest dessert boards, where bakers showcase different flavor additions, from salted caramel to raspberry swirls.
What sets these cups apart is the textural contrast. The brownie bottom brings deep cocoa flavor and chewy satisfaction, while the cheesecake layer is light, creamy, and slightly tangy. Together, they deliver the perfect bite—every time. For those unfamiliar with baking ingredients like baking powder or cocoa powder, you can learn more about their roles in baking by visiting resources like baking powder and cocoa solids.
In short, cheesecake brownie dessert cups offer the ultimate hybrid dessert. They’re the answer when you can’t decide between a rich brownie or a creamy cheesecake. Whether made for a dinner party or a cozy weekend treat, they’re guaranteed to impress both in flavor and in presentation.
Key Ingredients & Tools Overview
Creating cheesecake brownie dessert cups requires just a handful of pantry staples, but each plays a crucial role in achieving the right balance of flavor and texture. Here’s a breakdown of the essential ingredients and tools, along with a few pro tips for best results.
For the Brownie Base
-
Unsalted butter (melted) – Provides moisture and richness; enhances the fudgy texture.
-
Granulated sugar – Sweetens and contributes to that shiny, crackly top layer.
-
Eggs – Act as a binder and add richness; essential for that chewy consistency.
-
Vanilla extract – Deepens flavor and balances the cocoa.
-
Unsweetened cocoa powder – Gives the brownies their deep chocolate flavor. Learn more about the types of cocoa solids used in baking.
-
All-purpose flour – Adds structure without making the brownies cakey.
-
Salt – Enhances the overall taste.
-
Baking powder – Adds a slight lift to keep the brownie layer from being too dense. For more details, see baking powder.
For the Cheesecake Layer
-
Cream cheese (softened) – The star ingredient for a silky, tangy cheesecake topping. Learn about different varieties of cream cheese.
-
Granulated sugar – Sweetens the cheesecake without overpowering its natural tang.
-
Egg – Helps create a smooth, custard-like texture when baked.
-
Vanilla extract – Complements the cream cheese flavor and adds depth.
For the Topping
-
Mini chocolate chips – Add extra chocolate richness and a little texture on top.
-
Chopped nuts (optional) – Walnuts or pecans offer crunch and visual appeal.
-
Caramel or chocolate drizzle (optional) – Adds elegance and enhances sweetness.
Tools You’ll Need
-
Muffin tin – Standard or mini size depending on your portion preference. For visual ideas, browse mini dessert cups.
-
Cupcake liners – Helps with removal and presentation.
-
Mixing bowls – One for the brownie batter, one for the cheesecake mixture.
-
Whisk or hand mixer – Ensures smooth mixing, especially for the cream cheese.
-
Spoon or cookie scoop – For evenly distributing batter and cheesecake layers.
For inspiration on how to present these in a party setting, check out this party dessert presentation board. These rich cheesecake cups for parties not only look elegant, but they also simplify prep and cleanup, especially when you use liners and muffin tins creatively.
By keeping your ingredients at room temperature—especially the cream cheese and eggs—you’ll ensure a smooth, lump-free cheesecake layer. Using quality vanilla extract and unsweetened cocoa also significantly enhances the final flavor. These small details can make the difference between good and unforgettable cheesecake brownie dessert cups.
Step-by-Step Guide to Making Cheesecake Brownie Cups
Mastering cheesecake brownie dessert cups is easier than it looks. With a simple step-by-step process, you’ll get clean layers, perfect texture, and crowd-pleasing results every time. Here’s exactly how to make them.
Step 1: Preheat and Prepare Your Tools
-
Preheat your oven to 350°F (175°C).
-
Line a muffin tin with cupcake liners. This makes removal easy and keeps the cups cleanly shaped.
-
Lightly spray liners with non-stick spray for extra security.
Step 2: Make the Brownie Batter
In a large mixing bowl:
-
Whisk together ½ cup melted unsalted butter and 1 cup granulated sugar until fully combined.
-
Add 2 large eggs and 1 tsp vanilla extract, then whisk until smooth.
-
Sift in ⅓ cup unsweetened cocoa powder, ½ cup all-purpose flour, ¼ tsp salt, and ¼ tsp baking powder.
-
Mix until a thick, glossy batter forms. Do not overmix.
The result should be a dense, chocolate-rich batter that forms the perfect base. Learn more about the origins of this fudgy treat on the brownie Wikipedia page.
Step 3: Portion the Brownie Layer
-
Spoon about 1 to 1.5 tablespoons of brownie batter into each cupcake liner.
-
Use the back of a spoon to spread it evenly across the bottom.
This forms the chewy foundation of your individual cheesecake desserts, giving each bite its signature fudgy texture.
Step 4: Make the Cheesecake Layer
In a separate bowl:
-
Beat 8 oz softened cream cheese with ¼ cup granulated sugar until smooth.
-
Add 1 large egg and ½ tsp vanilla extract, mixing until fully incorporated.
This should result in a velvety, pourable mixture. Make sure your cream cheese is room temperature to avoid lumps. If you’re curious about the science behind this ingredient, check out more on cream cheese.
Step 5: Assemble the Dessert Cups
-
Spoon the cheesecake mixture on top of the brownie batter, filling each liner nearly to the top.
-
Tap the muffin tin gently to remove air bubbles and level the tops.
Step 6: Add Toppings
-
Sprinkle mini chocolate chips and chopped nuts (optional) over each cup.
-
Drizzle caramel or chocolate sauce on top if desired.
Explore ideas for styling and decorating by browsing this curated cheesecake brownie recipe board.
Step 7: Bake and Cool
-
Bake for 20–25 minutes, or until the cheesecake layer is set and edges are lightly golden.
-
Remove from oven and allow to cool completely at room temperature.
-
Once cooled, refrigerate for at least 2 hours before serving to allow the layers to firm up.
Refrigeration is key to getting the perfect texture. The brownie base becomes even more dense, while the cheesecake layer sets to a rich, creamy finish. These cups are ideal for make-ahead planning, which we’ll cover later.
For those who want a bite-sized variation, consider using a mini muffin tin and refer to this easy dessert cups collection for ideas. No matter how you serve them, cheesecake brownie cups guarantee a hit at every event.

Tips for Perfect Cheesecake Brownie Dessert Cups
Even though this dessert is easy to make, a few baking tips can help you perfect every batch. These rich cheesecake cups for parties can easily become bakery-quality with some attention to detail.
Use Room Temperature Ingredients
-
Softened cream cheese and eggs mix more easily, resulting in a smoother cheesecake layer without lumps.
-
Cold ingredients can cause uneven baking and lumpy batter.
Don’t Overmix the Batter
-
Overmixing introduces air into the cheesecake filling, which may cause cracking as it bakes.
-
Gently mix ingredients until just combined for the creamiest results.
Avoid Overbaking
-
Overbaking can lead to dry brownie bottoms and cracked cheesecake tops.
-
Check for doneness around 20 minutes. The cheesecake should be slightly jiggly in the center but set around the edges.
Chill Before Serving
-
Cooling allows the cheesecake to firm up properly and enhances the flavor.
-
Chill for at least 2 hours for clean layers and easier removal from liners.
Use Quality Ingredients
-
Premium cocoa and real vanilla extract elevate the flavor.
-
Learn about the different types of cocoa solids used in baking on Wikipedia.
Customize with Flavors and Swirls
-
Swirl in peanut butter, fruit jam, or Nutella before baking.
-
Add crushed cookies or candy pieces for texture and flavor contrast.
For visual inspiration and presentation ideas, take a look at mini dessert cups or party-ready muffin tin desserts.
Flavor Variations and Creative Twists
One of the best parts about cheesecake brownie dessert cups is their versatility. You can easily adapt this base recipe to suit different flavors, themes, or dietary needs.
Flavor Ideas
-
Peanut Butter Swirl
Swirl in a spoonful of natural peanut butter into the cheesecake layer before baking. -
Salted Caramel
Add a layer of salted caramel between the brownie and cheesecake. Drizzle extra on top after baking. -
Mint Chocolate
Use peppermint extract in the brownie batter and top with crushed peppermint candies. -
Raspberry Swirl
Add a few teaspoons of raspberry preserves and swirl into the cheesecake topping for fruity flair. -
Cookies & Cream
Stir crushed chocolate sandwich cookies into the cheesecake mixture and sprinkle more on top.
These options are great for seasonal events or matching party themes. For more styling tips, check out this party dessert presentation board.
How to Serve Cheesecake Brownie Cups for Parties
Serving individual cheesecake desserts doesn’t just make portioning easier—it also lets you elevate your dessert table’s aesthetic. Here are some simple yet impressive serving ideas:
-
Chill and unwrap each cup before placing on a decorative tray or tiered dessert stand.
-
Add garnish like a light dusting of cocoa powder, fresh berries, or mint leaves for color.
-
Drizzle with caramel or chocolate sauce just before serving for a gourmet touch.
-
Use mini cupcake liners for bite-sized versions perfect for buffets or dessert platters.
-
Pair with coffee, dessert wine, or hot chocolate to complete the experience.
For event-specific inspiration, visit easy dessert cups and cheesecake brownie boards.
Storage & Make-Ahead Tips
These mini cheesecake brownie cups store beautifully, making them ideal for prepping ahead of time.
-
Refrigerator: Store in an airtight container for up to 5 days. Keep chilled until ready to serve.
-
Freezer: Freeze after baking and cooling. Wrap each cup tightly in plastic wrap, then store in a freezer-safe container for up to 2 months. Thaw in the refrigerator overnight.
-
Make-Ahead: Prepare the brownie and cheesecake mixtures the night before, then bake fresh the next day.
These tips ensure that you’ll always have a delicious, elegant dessert ready when you need it.
Healthier or Dietary Alternatives
Want to enjoy cheesecake brownie dessert cups with fewer calories or dietary adjustments? Try these alternatives:
-
Gluten-Free: Use a gluten-free all-purpose flour blend in the brownie base.
-
Lower Sugar: Replace sugar with monk fruit or erythritol for a reduced-sugar version.
-
Lighter Option: Use low-fat cream cheese or Greek yogurt in place of full-fat cream cheese.
-
Vegan Version: Substitute eggs with flax eggs and use vegan cream cheese alternatives.
These swaps can make the dessert more inclusive while still tasting indulgent. Refer to cream cheese for vegan-friendly options.

FAQs – Based on “People Also Ask”
Can I use boxed brownie mix for this recipe?
Yes. A good-quality boxed mix works well for the base. Just prepare according to package directions and layer with the cheesecake mixture.
Can you freeze cheesecake brownie cups?
Absolutely. Freeze once cooled and firmed up. Wrap individually and store in an airtight container. Thaw in the fridge before serving.
Why did my cheesecake layer crack or sink?
Overmixing or overbaking are common causes. Mix gently, avoid high-speed mixing, and remove from the oven when the center is still slightly jiggly.
How long do cheesecake brownies need to set?
Let them cool completely at room temperature, then refrigerate for at least 2 hours, ideally overnight for the best texture.
Can I use silicone muffin molds instead of paper liners?
Yes, silicone molds work well and allow for easier removal. Just be sure to grease them lightly for best results.
Fudgy Brownies Meet Cheesecake Desserts Top Dessert Cups Recipes

These cheesecake brownie dessert cups are the perfect fusion of rich, fudgy brownies and smooth, creamy cheesecake. Baked in a muffin tin, each individual portion is topped with chocolate chips, nuts, or caramel for a beautiful and decadent finish. Ideal for parties, holidays, or a simple weeknight treat, they combine the best of both worlds into one unforgettable dessert.
- Author: Clara
Ingredients
For the brownie base:
- 1/2 cup unsalted butter, melted
- 1 cup granulated sugar
- 2 large eggs
- 1 tsp vanilla extract
- 1/3 cup unsweetened cocoa powder
- 1/2 cup all-purpose flour
- 1/4 tsp salt
- 1/4 tsp baking powder
For the cheesecake layer:
- 8 oz (225g) cream cheese, softened
- 1/4 cup granulated sugar
- 1 large egg
- 1/2 tsp vanilla extract
For the topping:
- 1/4 cup mini chocolate chips
- 1/4 cup chopped nuts (optional)
Caramel or chocolate drizzle (optional)
Instructions
Preheat oven to 350°F (175°C) and line a muffin tin with cupcake liners.
In a mixing bowl, whisk together melted butter and sugar until combined. Add eggs and vanilla extract, mixing well.
Sift in cocoa powder, flour, salt, and baking powder. Stir until a thick brownie batter forms.
Spoon about 1 to 1.5 tablespoons of brownie batter into the bottom of each cupcake liner, spreading evenly.
In a separate bowl, beat softened cream cheese and sugar until smooth. Add the egg and vanilla extract, mixing until fully incorporated.
Spoon cheesecake mixture over the brownie layer, filling each cup nearly to the top.
Sprinkle mini chocolate chips and chopped nuts on top.
Bake for 20–25 minutes, or until the cheesecake is set and the edges are slightly golden.
Let cool completely, then refrigerate for at least 2 hours before serving. Drizzle with caramel or chocolate sauce if desired.
Notes
-
Cream cheese must be fully softened before mixing for a smooth cheesecake layer.
-
For best flavor, use high-quality cocoa and pure vanilla extract.
-
Allow the cups to cool completely and chill for at least 2 hours before serving.
-
Mini muffin tins make great bite-sized versions.
-
Customize with fruit swirls, caramel, or flavored extracts for endless variety.
-
Best enjoyed chilled, but also delicious at room temperature.