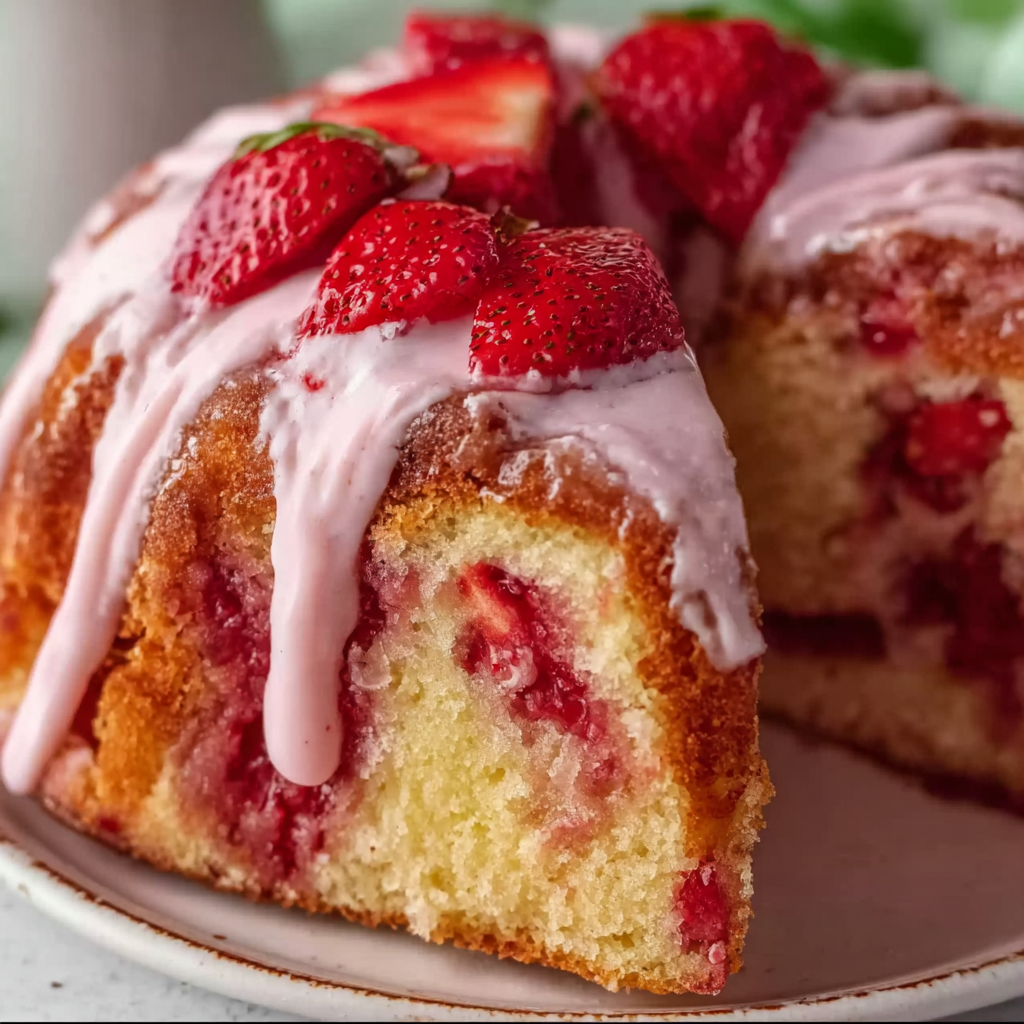

Why You’ll Love This Strawberry Honeybun Cake
This cake is more than just a dessert—it’s a centerpiece. Here’s why it stands out:- Ultra-moist texture thanks to sour cream and oil
- Sweet cinnamon swirl layered throughout
- Fresh strawberry flavor in both cake and icing
- Simple ingredients with impressive results
- Perfect for brunch, birthdays, showers, or casual gatherings
What Is a Honeybun Cake?
A honeybun cake is inspired by the classic honey bun pastry—soft, sweet dough swirled with cinnamon and sugar, then glazed. Instead of yeast dough, this version uses a rich cake batter and a cinnamon sugar swirl baked right into the middle. Traditionally topped with a simple glaze, this strawberry version elevates the concept with fruit and cream icing. The result? A tender vanilla-strawberry cake layered with cinnamon sweetness and finished with a silky strawberry cream icing that sets beautifully over the top.Ingredients for Strawberry Honeybun Cake
Here’s everything you’ll need to make this sweet and moist dessert.For the Cake Batter
- 3 cups (375 g) all-purpose flour
- 2 cups (400 g) granulated sugar
- 1 teaspoon baking soda
- ½ teaspoon salt
- 1 cup (240 ml) vegetable oil
- 1 cup (240 g) sour cream
- 3 large eggs
- 2 teaspoons pure vanilla extract
- 1 cup (150 g) finely chopped fresh strawberries
For the Cinnamon Swirl
- 1 cup (200 g) light brown sugar, packed
- 2 teaspoons ground cinnamon
For the Strawberry Cream Icing
- 2 cups (240 g) powdered sugar
- 3 tablespoons (45 g) unsalted butter, softened
- 3 tablespoons (45 ml) heavy cream
- ¼ cup (60 g) strawberry puree (fresh strawberries blended and strained)
- ½ teaspoon vanilla extract
Step-by-Step Instructions
1. Prepare the Pan and Oven
Preheat your oven to 350°F (175°C). Grease and lightly flour a 9×13-inch baking dish.2. Mix the Dry Ingredients
In a large mixing bowl, whisk together:- 3 cups (375 g) all-purpose flour
- 2 cups (400 g) granulated sugar
- 1 teaspoon baking soda
- ½ teaspoon salt
3. Add the Wet Ingredients
Add to the dry mixture:- 1 cup (240 ml) vegetable oil
- 1 cup (240 g) sour cream
- 3 large eggs
- 2 teaspoons vanilla extract
4. Create the Cinnamon Swirl
In a small bowl, combine:- 1 cup (200 g) packed light brown sugar
- 2 teaspoons ground cinnamon
5. Assemble the Cake
Pour half of the batter into the prepared pan and spread evenly. Sprinkle the cinnamon sugar mixture over the batter. Carefully spread the remaining batter on top. Use a knife to gently swirl through the layers, creating a marbled effect.6. Bake
Bake for 40–45 minutes, or until a toothpick inserted into the center comes out clean. Allow the cake to cool completely before icing.
Making the Strawberry Cream Icing
In a medium bowl, beat together:- 3 tablespoons (45 g) softened unsalted butter
- 2 cups (240 g) powdered sugar
- 3 tablespoons (45 ml) heavy cream
- ¼ cup (60 g) strawberry puree
- ½ teaspoon vanilla extract
Tips for a Perfectly Moist Strawberry Honeybun Cake
Use Fresh Strawberries
Fresh strawberries provide better flavor and texture. If using frozen strawberries, thaw and drain thoroughly to avoid excess moisture.Don’t Overmix the Batter
Overmixing can make the cake dense. Mix until just combined.Cool Completely Before Icing
Warm cake will melt the icing. Allow at least 1 hour for cooling.Swirl Gently
You want visible cinnamon layers—not a fully blended mixture.Variations and Flavor Ideas
- Add ½ cup (60 g) chopped pecans to the cinnamon swirl for texture.
- Substitute Greek yogurt for sour cream in equal amounts.
- Add ½ teaspoon almond extract for extra depth.
- Top with sliced fresh strawberries for presentation.
Serving Suggestions
This Strawberry Honeybun Cake pairs beautifully with:- Fresh fruit salad
- Whipped cream
- A cup of hot coffee or tea
- A scoop of vanilla ice cream
Storage and Make-Ahead Tips
Store covered at room temperature for up to 2 days, or refrigerate for up to 5 days. Bring to room temperature before serving for best flavor. You can bake the cake one day ahead and ice it the following day. To freeze: Wrap tightly (without icing) and freeze for up to 2 months. Thaw overnight before icing.Frequently Asked Questions
1. Can I use frozen strawberries instead of fresh?
Yes, frozen strawberries can be used if fresh are not available. However, there are important steps to ensure the texture of your cake remains perfect. Frozen strawberries contain more moisture due to ice crystals forming during freezing. When thawed, they release excess liquid that can make your batter too wet and affect baking consistency. To use frozen strawberries properly, thaw them completely and drain off all excess liquid. Pat them dry with paper towels before chopping and folding into the batter. You can also lightly dust the chopped strawberries with 1 tablespoon (8 g) of flour before adding them to the mixture. This helps suspend them evenly in the cake and prevents sinking. Keep in mind that frozen berries may soften more during baking, slightly altering texture, but the flavor will still be delicious.2. Why is my honeybun cake dense instead of fluffy?
A dense texture can result from several common baking mistakes. The most frequent cause is overmixing the batter. Once flour is added and combined with wet ingredients, gluten begins to develop. Too much mixing strengthens gluten strands, making the cake heavier rather than tender. Another factor could be incorrect measurement of flour. Always spoon flour into your measuring cup and level it off rather than scooping directly from the bag, which packs too much flour into the cup. Using a kitchen scale for 375 g ensures accuracy. Also check your baking soda freshness. Expired leavening agents won’t give proper lift. Lastly, avoid overbaking. Remove the cake as soon as a toothpick inserted in the center comes out clean.3. Can I make this cake ahead of time?
Absolutely. This cake actually tastes even better the next day because the flavors have time to settle and deepen. You can bake the cake up to 24 hours in advance and store it tightly covered at room temperature. Ice it the day you plan to serve it for the freshest presentation. If preparing further in advance, bake the cake, cool completely, wrap tightly in plastic wrap, and refrigerate for up to 3 days. You can also freeze the unfrosted cake for up to 2 months. Thaw overnight in the refrigerator and bring to room temperature before icing. For gatherings, making it a day ahead reduces stress and enhances flavor.4. Can I turn this recipe into cupcakes or a layer cake?
Yes, this recipe adapts beautifully. For cupcakes, line muffin tins with paper liners and fill each about two-thirds full. Add a small sprinkle of the cinnamon sugar mixture in the middle and swirl gently. Bake at 350°F (175°C) for 18–22 minutes. For a layer cake, divide the batter evenly between two 9-inch round cake pans. Layer the cinnamon swirl in the middle of each pan before baking. Bake for 30–35 minutes, checking for doneness with a toothpick. When making layers, consider doubling the icing for a thicker filling between layers. Allow cakes to cool completely before stacking to maintain structure.
Final Thoughts
Strawberry Honeybun Cake with Strawberry Cream Icing is the kind of dessert that feels comforting yet special at the same time. It brings together the nostalgic warmth of cinnamon-swirled cake and the fresh brightness of strawberries in a way that feels balanced and irresistible. The moist crumb, sweet swirl, and creamy icing create layers of flavor and texture that make each bite memorable. One of the most appealing aspects of this recipe is its versatility. It can be dressed up for celebrations with decorative toppings or served simply in generous squares for casual family dinners. It’s easy enough for beginner bakers yet impressive enough to earn compliments at any gathering. The ingredients are straightforward, the steps are simple, and the results are consistently delicious. Baking this cake also offers something beyond flavor. There is comfort in mixing, swirling, and watching a simple batter transform into a golden, fragrant dessert. Sharing a homemade cake creates moments—whether it’s laughter around the table, a quiet afternoon treat, or a festive event with friends. If you’re looking for a dessert that is sweet, moist, visually beautiful, and bursting with strawberry flavor, this Strawberry Honeybun Cake deserves a place in your kitchen. Once you try it, it may quickly become a go-to favorite for every season. PrintEasy Strawberry Honeybun Cake Recipe – Creamy Strawberry Icing

A tender, buttery vanilla cake ribboned with warm cinnamon sugar and bursts of juicy fresh strawberries, baked until perfectly moist and fragrant. Finished with a silky strawberry glaze that melts into every swirl, this vibrant, fruit-kissed dessert is light enough for brunch yet sweet and celebratory enough for special occasions — the kind of cake that feels comforting, colorful, and irresistibly homemade.
Ingredients
For the Cake Batter:
-
3 cups (375 g) all-purpose flour
-
2 cups (400 g) granulated sugar
-
1 teaspoon baking soda
-
½ teaspoon salt
-
1 cup (240 ml) vegetable oil
-
1 cup (240 g) sour cream
-
3 large eggs
-
2 teaspoons vanilla extract
-
1 cup (150 g) finely chopped fresh strawberries
For the Cinnamon Swirl:
-
1 cup (200 g) light brown sugar, packed
-
2 teaspoons ground cinnamon
For the Strawberry Cream Icing:
-
2 cups (240 g) powdered sugar
-
3 tablespoons (45 g) unsalted butter, softened
-
3 tablespoons (45 ml) heavy cream
-
¼ cup (60 g) strawberry puree
-
½ teaspoon vanilla extract
Instructions
-
Preheat oven to 350°F (175°C). Grease and flour a 9×13-inch baking dish.
-
In a large bowl, whisk together flour, sugar, baking soda, and salt.
-
Add oil, sour cream, eggs, and vanilla extract. Mix until smooth. Fold in chopped strawberries.
-
In a small bowl, combine brown sugar and cinnamon.
-
Pour half the batter into the prepared pan. Sprinkle cinnamon mixture evenly over batter. Top with remaining batter and gently swirl with a knife.
-
Bake for 40–45 minutes or until a toothpick inserted into the center comes out clean. Cool completely.
-
Beat butter and powdered sugar together. Add heavy cream, strawberry puree, and vanilla extract. Mix until smooth.
-
Spread icing evenly over cooled cake. Slice and serve.
Notes
-
Ensure strawberries are finely chopped to distribute evenly.
-
Allow cake to cool fully before icing to prevent melting.
-
Store covered at room temperature for 2 days or refrigerate up to 5 days.
-
Cake can be frozen (unfrosted) for up to 2 months.