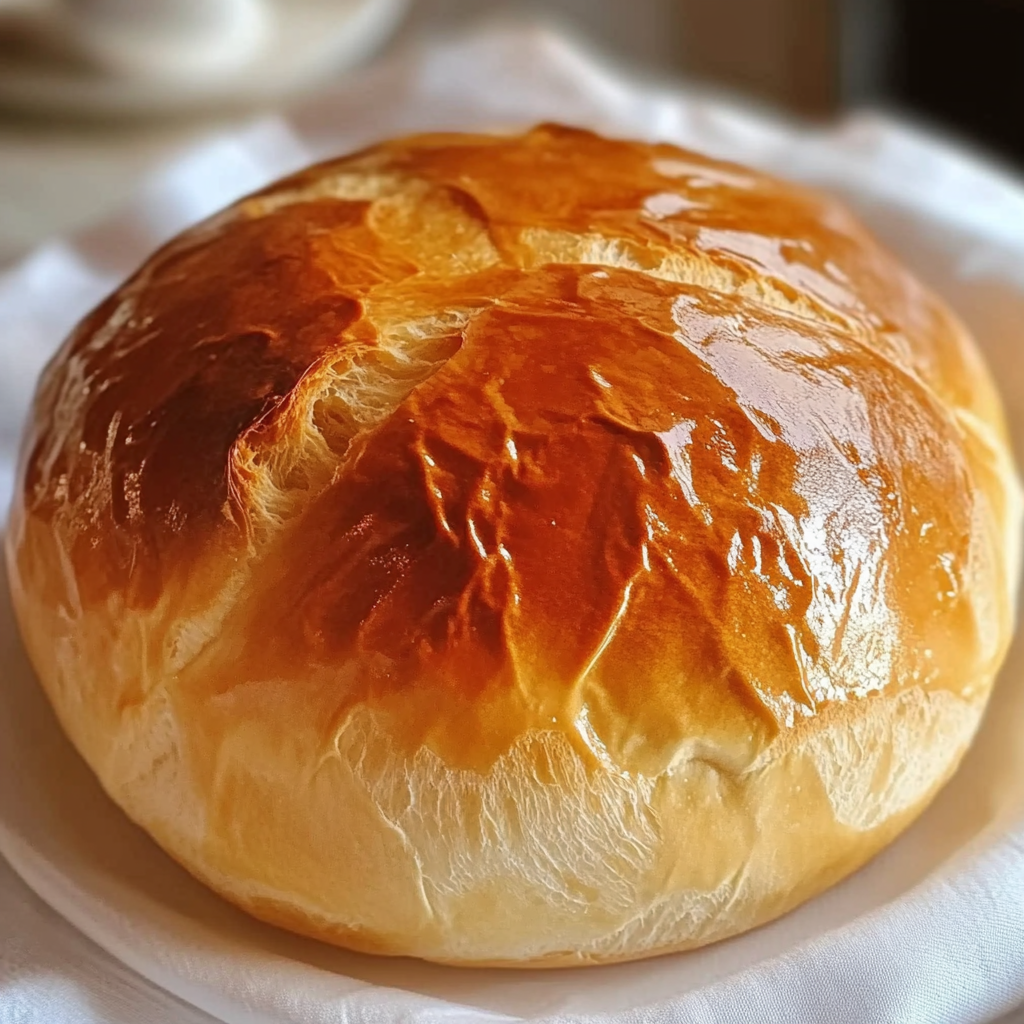
Did you know you can make soft, homemade bread without even using an oven? With this easy no-knead crockpot bread recipe, you can create a fluffy, golden loaf with minimal effort. Unlike traditional baking, where precise kneading and temperature control are essential, a crockpot simplifies the process—just mix, let it rise, and let your slow cooker do the rest!
Baking in a crockpot is perfect for beginners and busy home cooks who want freshly baked bread without the hassle. The slow-cooking method keeps the dough moist and soft, preventing it from drying out like conventional oven baking. Plus, it’s a great alternative if you don’t have access to an oven or want to save on energy costs.
This method works well for various bread recipes, including no-knead bread, whole wheat loaves, and even flavored artisan-style bread. If you’re curious about the science behind bread-making, you might find this Wikipedia article on bread insightful—it explains the different types of bread and how ingredients interact during baking. Additionally, understanding the role of yeast in bread-making can help you troubleshoot common baking issues.
So, why not try this no-knead crockpot bread today? With just a few simple ingredients, you’ll have a delicious, homemade loaf that pairs perfectly with soups, sandwiches, or just a generous spread of butter. Stay tuned for the next section, where we’ll explore why a crockpot is an excellent choice for bread baking!

Why Bake Bread in a Crockpot?
Baking bread in a crockpot might sound unconventional, but it has several advantages over traditional oven baking. Whether you’re a beginner or an experienced baker, this method offers simplicity, convenience, and a unique texture that’s hard to achieve in an oven.
1. Convenience & Hands-Off Baking
One of the biggest benefits of using a crockpot for bread is the ease of preparation. Unlike oven baking, which requires close monitoring of temperature and humidity, a slow cooker provides a stable, enclosed environment that allows the dough to rise and bake evenly.
- No need to preheat an oven or watch the clock.
- Perfect for hot weather, as it doesn’t heat up your kitchen.
- Ideal for those with busy schedules—just set it and forget it!
Since a crockpot naturally maintains moisture, it prevents the bread from drying out, which can sometimes happen in an oven. Plus, if you love slow cooking, you might enjoy exploring more slow cooker recipes on Pinterest, where you’ll find plenty of creative ways to use your crockpot.
2. Texture & Flavor Benefits
Unlike traditional baking, where high heat can create a thick, crunchy crust, a crockpot produces a loaf with a soft and fluffy texture. The slow, steady heat allows the yeast to develop deep, rich flavors, making the bread taste better with minimal effort.
- Creates a tender crumb, similar to artisan-style bread.
- Enhances the natural sweetness and complexity of the dough.
- Perfect for those who prefer soft, moist bread over crusty loaves.
If you’re curious about how slow cookers work, this Wikipedia article on slow cookers explains the mechanics behind this kitchen appliance.
3. Energy Efficiency & Cost Savings
Baking in an oven requires preheating and high temperatures, which can drive up electricity costs. A crockpot, on the other hand, consumes less energy while maintaining consistent heat, making it an eco-friendly alternative to traditional baking.
- Uses significantly less electricity than an oven.
- Great for small kitchens or dorm rooms where ovens aren’t available.
- Works as a backup option if your oven is out of commission.
If you’re interested in energy-saving cooking methods, you might also enjoy exploring alternative baking techniques on Pinterest, where you’ll find helpful baking hacks to improve your skills.
Baking bread in a crockpot is an excellent way to enjoy fresh, homemade loaves without the complexities of traditional baking. In the next section, we’ll break down the key ingredients and their roles in creating the perfect no-knead crockpot bread!
Key Ingredients & Their Roles
Making crockpot bread requires just a few simple ingredients, but each plays a crucial role in achieving the right texture, flavor, and rise. Understanding how these ingredients work together can help you troubleshoot any baking issues and even experiment with variations.
1. Flour – The Foundation of the Bread
Flour provides the structure of the bread, and choosing the right type can affect the final texture:
- All-Purpose Flour – Best for a soft and tender loaf with a mild flavor.
- Bread Flour – Contains more gluten, leading to a chewier texture.
- Whole Wheat Flour – Adds a nutty flavor and extra fiber but creates a denser loaf (best mixed with all-purpose flour for a lighter texture).
For a deeper dive into the role of gluten in bread-making, check out this Wikipedia article on gluten, which explains how it affects elasticity and structure.
2. Yeast – The Key to Rising Dough
Yeast is what makes the bread rise by producing carbon dioxide during fermentation. You can use:
- Active Dry Yeast – Requires proofing in warm water before mixing with the flour.
- Instant Yeast – Can be mixed directly into the flour without proofing.
If you’re new to baking, learning more about yeast and fermentation can help you understand how to get the best rise in your bread.
3. Salt – Enhancing Flavor & Controlling Fermentation
Salt is essential in bread-making, as it:
- Enhances the overall flavor.
- Strengthens the gluten structure.
- Slows down yeast activity, preventing over-fermentation.
A common mistake is adding salt directly to the yeast, which can kill it. Instead, mix it with the flour first.
4. Water – The Hydration Factor
The right water temperature is crucial for activating yeast:
- Too cold – The yeast won’t activate, leading to dense bread.
- Too hot (above 120°F/49°C) – The yeast will die, preventing the dough from rising.
- Ideal range: 105°F-110°F (40°C-43°C) for optimal yeast activation.
Some bakers prefer to use milk instead of water for a richer texture, but water keeps the bread light and airy.
5. Sweetener – Feeding the Yeast
Adding a small amount of sugar or honey helps activate the yeast by providing food for fermentation. You can use:
- Honey – Adds a subtle sweetness and enhances browning.
- Granulated Sugar – A neutral option that helps with yeast activation.
- Maple Syrup or Molasses – For a deeper, more complex flavor.
6. Olive Oil – Improving Texture & Moisture
While optional, adding olive oil improves the softness of the bread by:
- Coating the gluten strands, resulting in a more tender crumb.
- Enhancing the flavor and preventing the bread from drying out.
If you love experimenting with bread flavors, you might find inspiration from these artisan bread ideas on Pinterest!
Each of these ingredients contributes to the perfect loaf of crockpot bread. In the next section, we’ll go through the step-by-step instructions to bring it all together!
Step-by-Step Instructions
Making crockpot bread is incredibly simple, even if you’re new to baking. Follow these step-by-step instructions to create a soft, flavorful loaf with minimal effort.
1. Activate the Yeast
Before mixing the dough, you need to activate the yeast to ensure a good rise.
- In a small bowl, combine:
- 1 cup warm water (105°F-110°F / 40°C-43°C)
- 1 tbsp honey or sugar (to feed the yeast)
- Sprinkle 2 ¼ tsp (1 packet) active dry yeast over the water.
- Let it sit for 5-10 minutes until it becomes foamy. If there’s no foam, the yeast may be inactive, and you should start over with fresh yeast.
This activation process is known as proofing the yeast, and it’s a critical step for getting the best results. If you want to learn more about fermentation and how it affects bread, check out this Wikipedia article on fermentation in food processing.
2. Mix the Dough
Once the yeast is activated, it’s time to combine the ingredients.
- In a large mixing bowl, add:
- 3 cups all-purpose flour (or a mix of bread flour for a chewier texture)
- 1 ½ tsp salt (mix with flour first to prevent killing the yeast)
- Pour in the yeast mixture and 1 tbsp olive oil.
- Stir with a wooden spoon or spatula until a shaggy dough forms.
Unlike traditional bread recipes, this one requires no kneading, making it perfect for beginners. The dough will be sticky and slightly rough, which is exactly what you want!
3. Shape & Let It Rise
Now that your dough is mixed, it’s time to shape it before placing it in the crockpot.
- Lightly flour your hands and a flat surface.
- Form the dough into a round ball—no need for perfect shaping.
- Place the dough on a piece of parchment paper (this prevents sticking).
- Transfer the parchment paper and dough into the crockpot.
The slow cooker will naturally provide warmth, allowing the dough to rise as it bakes—a major advantage of this method!
4. Cook the Bread in the Crockpot
Once the dough is inside, it’s time to let the crockpot work its magic.
- Cover with the lid and set the crockpot to HIGH.
- Cook for 2 to 2 ½ hours—do NOT lift the lid too often, as this releases heat.
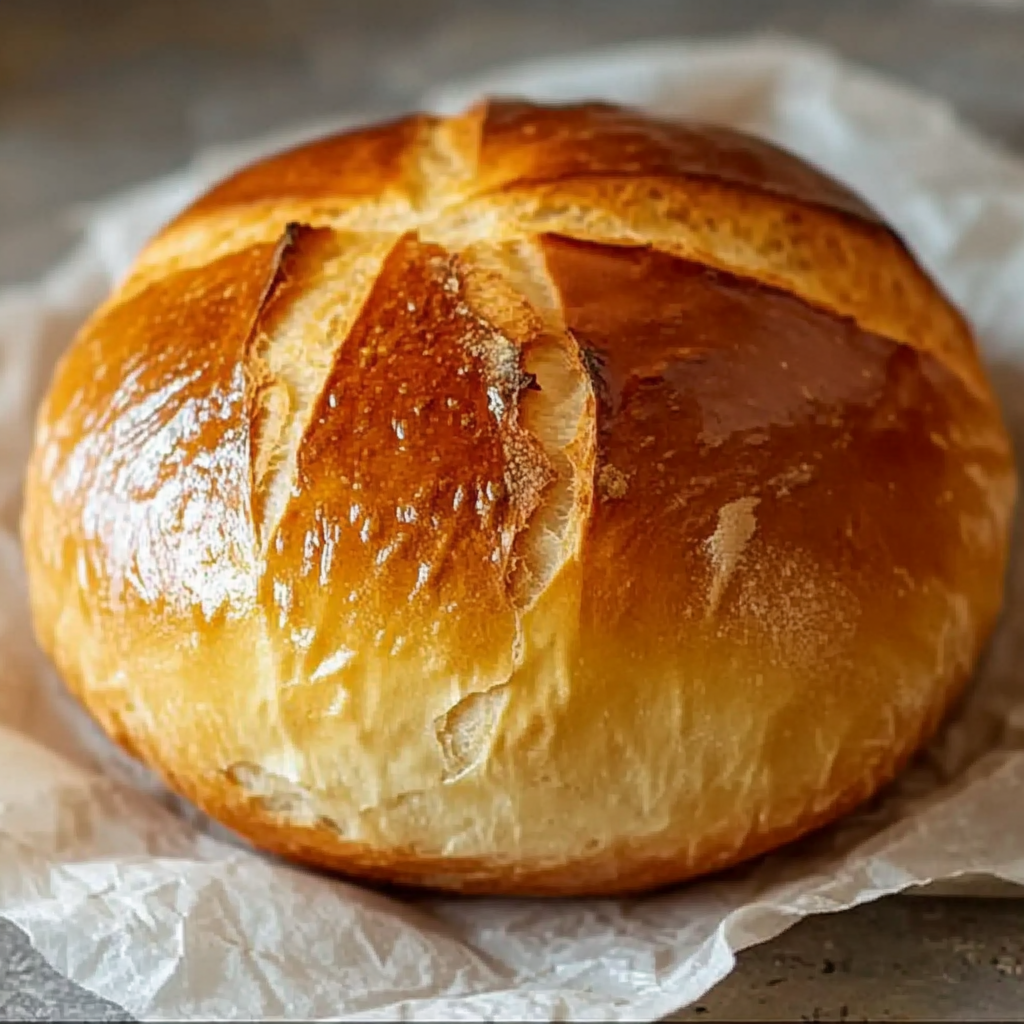
- The bread is done when the top is firm and the bottom is golden brown.
To test if your bread is fully baked, tap the bottom—it should sound hollow. If it’s still soft, let it cook for another 15 minutes.
5. Optional: Broil for a Crispy Crust
Because crockpot bread has a soft crust, you can finish it in the oven for a golden, crispy top.
- Preheat your oven to broil (450°F/230°C).
- Transfer the bread (without parchment paper) onto a baking sheet.
- Broil for 2-3 minutes until the top is golden brown. Watch closely to prevent burning!
For more bread-making tips, check out this collection of homemade bread tips on Pinterest.
6. Cool & Enjoy!
Once baked, let your bread cool for at least 15 minutes before slicing. This allows the internal structure to set, preventing a gummy texture.
Enjoy your warm, homemade crockpot bread with butter, jam, or as a side for your favorite soups and stews! In the next section, we’ll cover troubleshooting common issues to ensure perfect results every time.
Troubleshooting Common Issues
Even though crockpot bread is simple to make, sometimes things don’t go as planned. Here are the most common issues and how to fix them to ensure your bread turns out perfect every time.
1. Why Didn’t My Bread Rise?
If your bread is dense and flat, the yeast may not have activated properly. Here’s what could have gone wrong:
- Water Temperature Was Incorrect – If the water was too hot (above 120°F/49°C), it could have killed the yeast. If it was too cold, the yeast wouldn’t activate. Always aim for 105°F-110°F (40°C-43°C).
- Expired or Inactive Yeast – Check the expiration date on your yeast packet. If your yeast didn’t foam during proofing, it’s probably dead.
- Salt Was Added Directly to Yeast – Salt can kill yeast if it comes into direct contact. Always mix salt with flour first.
- Room Temperature Was Too Cold – If your kitchen is chilly, the yeast may take longer to activate. Try placing the dough in a warm spot before baking.
For a deeper understanding of how yeast fermentation works, check out this Wikipedia article on yeast.
2. Why Is My Bread Too Dense?
A heavy, dense loaf usually happens when the gluten doesn’t develop properly. Here’s how to fix it:
- Too Much Flour Was Used – Adding too much flour makes the dough dry and stiff, preventing proper expansion. Stick to 3 cups of flour, and if the dough is too sticky, dust with minimal additional flour.
- Under-Proofing – If the dough doesn’t have enough time to rise before baking, the bread will be dense. Since crockpot bread rises while cooking, be sure to check that the yeast is properly activated before mixing.
- Using Whole Wheat Flour Without Adjustments – Whole wheat flour absorbs more liquid and doesn’t rise as well as white flour. If using whole wheat, mix it with all-purpose flour (e.g., 2 cups all-purpose, 1 cup whole wheat).
If you’re looking for inspiration on making light, airy bread, check out these artisan bread recipes on Pinterest.
3. Why Is My Bread Undercooked in the Center?
Nothing is worse than slicing into your beautiful loaf only to find a raw, doughy center. If this happens:
- Increase Cooking Time – Some slow cookers vary in heat settings. If your bread isn’t done after 2 ½ hours, let it cook for another 15-30 minutes.
- Check for Doneness – Tap the bottom of the bread; it should sound hollow. If it’s still soft, it needs more time.
- Use a Thermometer – Fully cooked bread should have an internal temperature of 190°F-200°F (88°C-93°C).
4. How Do I Get a Crispier Crust?
Slow cookers trap steam, which keeps the bread soft but prevents a crisp crust. To achieve a golden, crunchy top:
- Broil in the Oven – After the crockpot is done, place the bread in the oven at 450°F (230°C) for 2-3 minutes.
- Remove the Lid for the Last 30 Minutes – Letting steam escape helps dry out the crust slightly.
- Brush with Olive Oil or Butter – This encourages browning and adds extra flavor.
If you love experimenting with slow cooker hacks, check out more tips on Pinterest.
5. Why Is My Bread Too Dry?
A dry loaf usually results from too much flour or overcooking. Here’s how to prevent it:
- Measure Flour Correctly – Use the spoon-and-level method rather than scooping flour directly from the bag.
- Don’t Cook Too Long – Set a timer to check the bread at 2 hours to prevent drying out.
- Use Olive Oil or Butter – Adding a little extra fat can help retain moisture.
By troubleshooting these common problems, you’ll be able to perfect your crockpot bread every time. In the next section, we’ll explore fun variations and customizations to take your bread to the next level!
Recipe Variations & Customizations
One of the best things about crockpot bread is how easily you can customize it! Whether you want a healthier version, a cheesy twist, or a sweet treat, there are plenty of ways to make this recipe your own.
1. Whole Wheat Crockpot Bread
For a nutty, fiber-rich loaf, swap some of the all-purpose flour for whole wheat flour:
- 2 cups all-purpose flour + 1 cup whole wheat flour – This keeps the bread light while adding extra nutrition.
- Increase water to 1 ¼ cups – Whole wheat flour absorbs more liquid, so a little extra water prevents dryness.
- Add 1 tbsp vital wheat gluten (optional) – This improves texture and helps with rising.
Since whole wheat flour contains more bran and fiber, it doesn’t rise as well as white flour. Mixing the two gives you the best of both worlds!
2. Herb & Garlic Bread
For a savory, aromatic loaf, try adding herbs and garlic to your dough:
- 1 tsp dried rosemary or thyme
- 1 tsp garlic powder (or 2 cloves minced garlic)
- ½ tsp onion powder
- 1 tbsp grated Parmesan (optional, for extra flavor)
These ingredients give your bread a deliciously fragrant and rustic taste, perfect for pairing with soups or pasta. You can also find more homemade bread tips and flavor ideas on Pinterest.
3. Cheesy Crockpot Bread
Love cheesy bread? Try mixing shredded cheese into your dough for a rich, melty texture:
- ½ cup shredded cheddar, mozzarella, or Parmesan – Fold it into the dough before shaping.
- Sprinkle extra cheese on top before baking for a crispy, cheesy crust.
- Optional: Add 1 tsp dried Italian seasoning for a pizza-inspired flavor.
If you enjoy experimenting with artisan-style breads, check out this collection of artisan bread recipes on Pinterest.
4. Gluten-Free Crockpot Bread
Want to make this gluten-free? Use a gluten-free flour blend and make the following adjustments:
- Use a 1:1 gluten-free flour substitute (one that contains xanthan gum).
- Increase liquid slightly – Gluten-free flours absorb more moisture. Start with 1 ¼ cups warm water and adjust as needed.
- Add 1 tsp apple cider vinegar – This helps with the structure and elasticity of the dough.
Since gluten-free bread lacks elasticity, the texture may be slightly different, but it will still be soft and delicious!
5. Sweet Cinnamon Raisin Bread
For a lightly sweet, breakfast-style bread, try adding cinnamon and raisins:
- 1 tbsp cinnamon
- ¼ cup raisins or dried cranberries
- 1 tbsp brown sugar or honey
This bread is perfect for toasting and serving with butter or cream cheese. If you love sweet bread variations, you might enjoy browsing more baking inspiration on Pinterest.
With so many ways to customize crockpot bread, you’ll never get bored of this easy, no-knead recipe! Up next, we’ll cover how to store and serve your homemade bread for the best flavor and freshness.
How to Serve & Store Your Bread
Now that you’ve baked a perfect loaf of crockpot bread, it’s time to enjoy it! Whether you’re using it for sandwiches, soups, or a simple snack, here’s how to serve it at its best and keep it fresh for as long as possible.
1. Best Ways to Enjoy Crockpot Bread
This soft, homemade bread is incredibly versatile. Here are a few delicious ways to serve it:
- Warm with butter and jam – A classic way to enjoy fresh bread.
- Toasted with garlic butter – Perfect as a side for pasta or soups.
- Grilled cheese sandwiches – The soft texture melts perfectly with cheese.
- French toast – The slightly dense crumb absorbs egg mixture beautifully.
- Dipped in soups and stews – Pairs perfectly with hearty dishes.
If you’re looking for more serving inspiration, check out these artisan bread ideas on Pinterest.
2. How to Store Crockpot Bread
To keep your homemade bread fresh, follow these storage tips:
- At Room Temperature – Store in an airtight bag or container for up to 3 days.
- In the Fridge – While refrigeration can make bread dry, it extends shelf life to 5-7 days. Wrap it in foil or a cloth to retain moisture.
- In the Freezer – Freeze for up to 3 months by wrapping it in plastic wrap and storing in a sealed bag.
3. How to Reheat Bread
Want to restore the fresh-baked taste? Try these reheating methods:
- In the Oven – Wrap in foil and bake at 350°F (175°C) for 10 minutes.
- In the Toaster – Best for crispy slices.
- In the Microwave – Wrap in a damp paper towel and heat for 15-20 seconds to soften.
For more bread storage and reheating tips, check out this collection of homemade bread tips on Pinterest.
With these storage and reheating techniques, you can enjoy your crockpot bread for days! Up next, we’ll answer the most common questions about this easy, no-knead recipe.

FAQs – Answering Common Questions
Baking crockpot bread is easy, but you may still have questions about ingredients, substitutions, and troubleshooting. Here are the most frequently asked questions about this no-knead bread recipe!
1. Can I Use Instant Yeast Instead of Active Dry Yeast?
Yes! If using instant yeast, you can skip the proofing step. Simply mix it directly with the flour and other dry ingredients. However, if you prefer to activate it first, you still can—it won’t harm the recipe.
2. Do I Need to Preheat My Crockpot Before Baking?
No. Unlike an oven, a crockpot doesn’t need preheating. The slow rise in temperature actually helps the bread develop a better texture and flavor. Just place your dough inside, set it to high, and let it bake!
3. How Do I Get a Crusty Top Without Using an Oven?
Since crockpot bread is naturally soft, achieving a crispy crust requires extra steps:
- Remove the lid for the last 30 minutes of cooking to allow steam to escape.
- Broil in the oven for 2-3 minutes after cooking for a golden, crunchy top.
- Brush with olive oil or melted butter before broiling for extra crispiness.
For more crust-enhancing tips, check out these artisan bread hacks on Pinterest.
4. Can I Double the Recipe to Make a Bigger Loaf?
Yes, but be cautious! A crockpot has limited space, and bread expands while baking. If doubling the recipe, make sure your slow cooker is large enough (at least 6 quarts) and extend the cooking time by 30-45 minutes.
5. Is This Bread Vegan?
Yes! This no-knead crockpot bread is naturally vegan since it contains:
- No dairy (uses water instead of milk).
- No eggs or butter (olive oil provides moisture).
To make it extra rich, you can replace olive oil with vegan butter or add nut milk instead of water.
6. Can I Make This Bread Overnight in a Crockpot?
No, because slow cookers on high take only 2-2 ½ hours to bake bread. If left overnight, the dough would likely overproof and collapse. However, you can let the dough rise overnight in the fridge and bake it the next day!
7. Why Did My Bread Turn Out Too Dry?
If your bread is dry or crumbly, it may be due to:
- Too much flour – Always measure correctly and avoid packing the flour.
- Overcooking – Check for doneness at 2 hours to prevent dryness.
- Low humidity – If your kitchen is dry, try adding an extra tablespoon of water or olive oil.
For more bread-baking tips, visit this homemade bread guide on Pinterest.
With these answers, you’re ready to master crockpot bread! Whether you stick to the classic recipe or try a fun variation, this easy no-knead bread is sure to become a household favorite. Happy baking! 🥖✨
PrintEasy No-Knead Crockpot Bread

This easy and hands-off Crockpot bread recipe is perfect for beginners and anyone looking to make fresh, homemade bread with minimal effort. You don’t need an oven, just your trusty slow cooker. The result is a soft, fluffy loaf with a golden-brown crust. You can customize it with your favorite herbs, spices, or even add-ins like garlic or cheese. Whether you’re looking for a convenient way to bake bread or want to avoid turning on your oven, this recipe will deliver a warm, comforting loaf every time.
- Author: Clara
Ingredients
- 3 cups all-purpose flour
- 1 packet (2 ¼ tsp) active dry yeast
- 1 ½ tsp salt
- 1 cup warm water (110°F/45°C)
- 1 tbsp honey or sugar
- 1 tbsp olive oil
Instructions
In a small bowl, mix warm water and honey (or sugar). Sprinkle yeast over the top and let it sit for 5-10 minutes until foamy.
In a large mixing bowl, combine flour and salt. Add the yeast mixture and olive oil, then mix until a shaggy dough forms.
Knead the dough on a floured surface for about 5-7 minutes until smooth and elastic.
Shape the dough into a round ball and place it on parchment paper inside the crockpot. Cover with the lid.
Cook on high for 2 to 2 ½ hours, or until the bread is golden and sounds hollow when tapped.
For a crispy crust, transfer the bread to an oven and broil for 2-3 minutes.
Let the bread cool for at least 15 minutes before slicing.
Notes
- Slow Cooker Size: The size of your Crockpot can impact the shape and size of your bread. A 5-6 quart Crockpot is ideal for this recipe.
- Cooking Time: Keep in mind that the cook time may vary slightly based on the size and model of your Crockpot. It’s best to check the bread after 2.5 hours to ensure it’s fully cooked. The bread should be golden brown on top and a toothpick inserted into the center should come out clean.
- Dough Consistency: The dough should be slightly sticky but manageable. If it’s too wet, add a bit more flour; if it’s too dry, add a little water, one tablespoon at a time.
- Crust: To get a crispier crust, you can lift the bread out of the Crockpot and bake it in the oven at 400°F for 10 minutes to brown the top.
- Customization: Feel free to add flavor variations such as herbs, garlic, or shredded cheese to the dough for a unique twist on the classic loaf.
- Storage: Once cooled, wrap the bread in a clean kitchen towel or store it in an airtight container to keep it fresh for up to 3 days. You can also freeze it for longer storage.


Incredibly helpful and thorough explanation on how to make Crockpot bread. Thank you for your research and expertise.
★★★★★
Can’t wait to try this!!