
Why You’ll Love This Chicken Crunch Wrap Recipe
This recipe brings together everything people love about wraps: crisp textures, savory fillings, and creamy sauces. But what makes this homemade crunch wrap especially appealing is how easy it is to prepare. Here are a few reasons this recipe stands out:- Quick and simple preparation
- Perfect for meal prep or family dinners
- Customizable fillings and toppings
- Balanced textures: crunchy, creamy, and savory
- Much more affordable than takeout
What Is a Chicken Crunch Wrap?
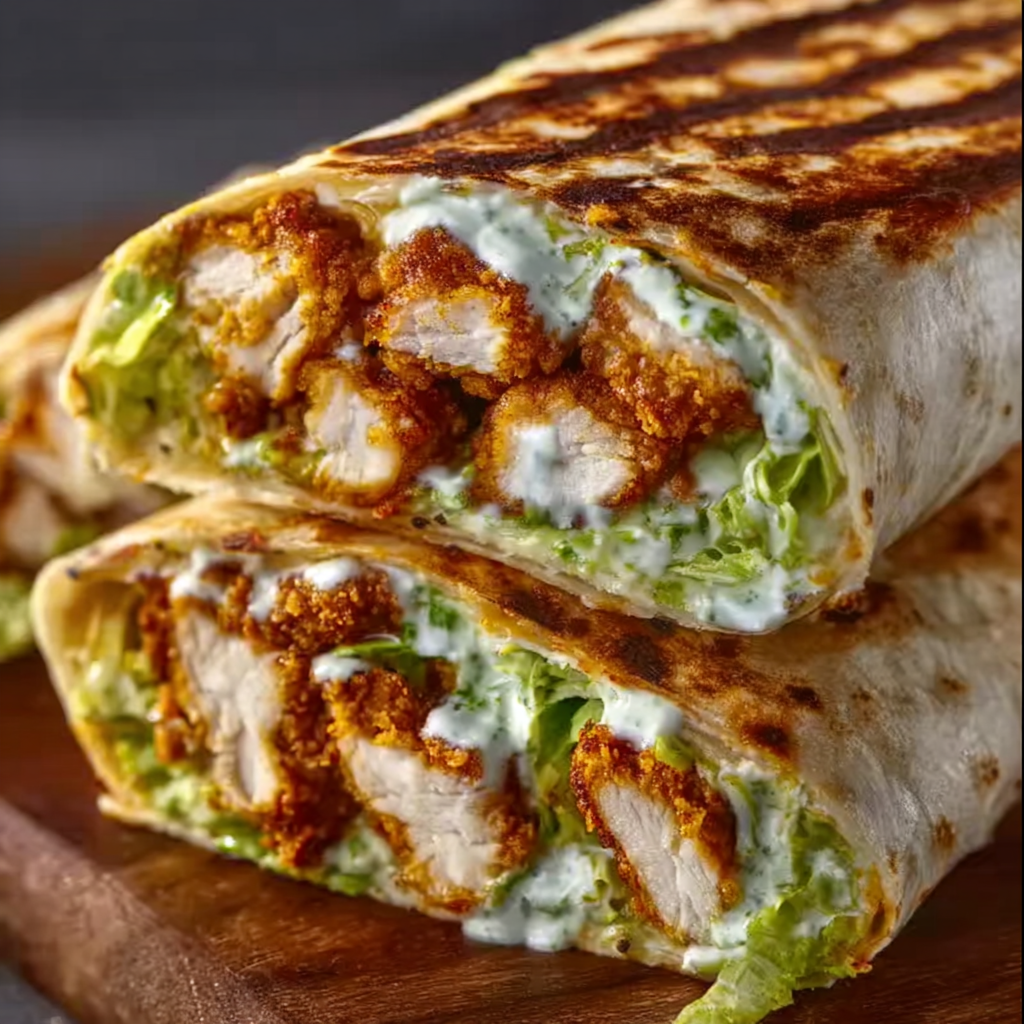
A Chicken Crunch Wrap is a layered tortilla wrap filled with seasoned chicken, crunchy tostada shells, fresh vegetables, creamy sauces, and melted cheese. The wrap is folded into a hexagon shape and then toasted in a pan until golden and crisp. The signature feature of this wrap is the crunchy layer inside, which gives it its name. That crunchy element contrasts perfectly with the juicy chicken and creamy sauces, creating a satisfying bite every time. Unlike standard wraps, the crunch wrap is sealed and toasted, which keeps everything neatly inside and adds a delicious crispy exterior.Ingredients for Chicken Crunch Wrap
To make 4 chicken crunch wraps, you will need the following ingredients:For the Chicken Filling
- 2 cups cooked chicken breast, shredded or diced (about 300 g)
- 1 tablespoon olive oil (15 ml)
- 1 teaspoon paprika (5 g)
- 1 teaspoon garlic powder (5 g)
- ½ teaspoon onion powder (2.5 g)
- ½ teaspoon ground cumin (2.5 g)
- ½ teaspoon salt (3 g)
- ¼ teaspoon black pepper (1 g)
For the Wrap Layers
- 4 large flour tortillas (10-inch / 25 cm)
- 4 tostada shells or crispy corn tortillas (about 20 g each)
- 1 cup shredded cheddar cheese (100 g)
- 1 cup shredded lettuce (50 g)
- 1 medium tomato, diced (150 g)
Creamy Sauce
- ½ cup sour cream (120 g)
- 2 tablespoons mayonnaise (30 g)
- 1 teaspoon lime juice (5 ml)
- ½ teaspoon garlic powder (2.5 g)
- Pinch of salt
Optional Additions
- ½ cup diced avocado (75 g)
- ¼ cup sliced green onions (25 g)
- ¼ cup salsa (60 g)
Kitchen Tools You’ll Need
Preparing chicken crunch wraps does not require special equipment. Most kitchens already have everything needed. Essential tools include:- Large skillet or frying pan
- Cutting board
- Sharp knife
- Mixing bowls
- Spatula
- Measuring spoons and cups
Step-by-Step Instructions
1. Prepare the Seasoned Chicken
Heat 1 tablespoon olive oil (15 ml) in a skillet over medium heat. Add the shredded chicken along with:- paprika
- garlic powder
- onion powder
- cumin
- salt
- black pepper
2. Make the Creamy Sauce
In a small bowl, combine:- ½ cup sour cream (120 g)
- 2 tablespoons mayonnaise (30 g)
- 1 teaspoon lime juice (5 ml)
- ½ teaspoon garlic powder (2.5 g)
- pinch of salt
3. Assemble the Crunch Wrap
Lay one large flour tortilla (10 inches / 25 cm) flat on a clean surface. Layer the ingredients in the center in this order:- About ½ cup seasoned chicken (75 g)
- ¼ cup shredded cheese (25 g)
- One tostada shell
- 2 tablespoons creamy sauce
- ¼ cup shredded lettuce (12 g)
- 2 tablespoons diced tomato (30 g)
4. Fold the Wrap
To create the signature crunch wrap shape:- Fold one edge of the tortilla toward the center.
- Continue folding around the tortilla, overlapping each fold.
- Create a hexagon shape that seals the filling inside.
5. Toast the Crunch Wrap
Heat a clean skillet over medium heat. Place the wrap folded-side down first in the pan. Cook for 2–3 minutes until golden brown and crisp. Flip carefully and cook another 2–3 minutes on the other side. The tortilla should become crisp while the cheese inside melts.6. Serve
Remove from the skillet and let it rest for 1 minute before slicing. Cut in half and serve warm with:- extra sauce
- salsa
- guacamole

Tips for the Best Crunch Wrap
Use Large Tortillas
A 10-inch (25 cm) tortilla gives enough room to fold the wrap properly.Do Not Overfill
Adding too many ingredients can make the wrap difficult to fold and seal.Cook Seam Side Down First
This helps the folds seal as the tortilla crisps.Keep the Heat Medium
Too much heat can burn the tortilla before the inside warms up.Delicious Variations
This recipe is flexible and can be adjusted in many ways.Spicy Chicken Crunch Wrap
Add:- ½ teaspoon chili powder
- ½ teaspoon cayenne pepper
- sliced jalapeños
Veggie Crunch Wrap
Replace chicken with:- grilled bell peppers
- black beans
- roasted corn
Cheesy Crunch Wrap
Add an extra ½ cup shredded mozzarella (50 g) for extra melty texture.Storage and Reheating
Refrigeration
Store leftover crunch wraps in an airtight container in the refrigerator for up to 3 days.Freezing
Wrap tightly in foil and freeze for up to 2 months.Reheating
Reheat in a skillet over medium heat for 4–5 minutes, flipping halfway to restore the crispy texture.Frequently Asked Questions
Can I use rotisserie chicken for this recipe?
Yes, rotisserie chicken works wonderfully for chicken crunch wraps and can save a lot of preparation time. Since the chicken is already cooked and flavorful, all you need to do is shred or dice it and warm it in the skillet with the spices listed in the recipe. This quick step enhances the flavor and ensures the seasoning coats the chicken evenly. Rotisserie chicken is also very convenient for busy weeknights when you want a homemade meal without spending too much time cooking. Because it is already tender and juicy, it blends perfectly with the other layers inside the crunch wrap. If you use rotisserie chicken, try removing the skin before shredding so the filling stays balanced and not overly greasy. Another benefit is that rotisserie chicken often has a slightly roasted flavor that adds depth to the wrap. When combined with crunchy tostada shells, creamy sauce, and fresh vegetables, it creates an incredibly satisfying texture and taste combination.What can I use instead of tostada shells?
Tostada shells create the signature crunch inside the wrap, but there are several alternatives if you do not have them available. One easy option is to use crispy corn tortillas that have been lightly toasted in a skillet or oven until firm and crunchy. Another option is tortilla chips. Simply place a small handful of sturdy chips in the center of the wrap to create a crunchy layer. This works surprisingly well and still provides the signature texture that makes crunch wraps so appealing. You could also use baked pita chips or even thin crackers if you want to experiment with different flavors. The key is to include something crisp that contrasts with the soft tortilla and creamy ingredients. This texture contrast is what makes the crunch wrap so enjoyable.Can I make chicken crunch wraps ahead of time?
Yes, you can prepare several components of the recipe ahead of time to make assembly quick and easy. The seasoned chicken can be cooked up to three days in advance and stored in an airtight container in the refrigerator. The sauce can also be mixed ahead and refrigerated. If you plan to meal prep, it is best to store the ingredients separately and assemble the wraps just before cooking. This prevents the tortilla from becoming soggy and keeps the crunchy layer crisp. Some people also assemble the wraps and refrigerate them before cooking. If you choose this method, place parchment paper between the wraps and cook them within 24 hours for the best texture. Preparing ingredients in advance makes this recipe perfect for busy schedules, family dinners, or quick lunches during the week.How do I keep my crunch wrap from opening while cooking?
One of the most common challenges when making crunch wraps at home is keeping the folded tortilla sealed. The best technique is to start cooking with the folded side facing down in the pan. The heat helps seal the tortilla edges together as they crisp. Make sure the wrap is folded tightly and that the fillings are placed directly in the center. Leaving a border around the edges gives enough tortilla space to create secure folds. Another helpful trick is to avoid overfilling the wrap. Too many ingredients make it difficult to fold properly and can cause the wrap to burst open during cooking. Cooking on medium heat also helps because the tortilla has time to crisp slowly while sealing the folds. Once the bottom becomes golden and firm, flipping the wrap becomes much easier.
Final Thoughts
The Chicken Crunch Wrap is one of those recipes that brings excitement back into everyday meals. It combines crispy textures, creamy sauces, and savory chicken into one perfectly folded tortilla that is both fun to make and incredibly satisfying to eat. Whether you are preparing a quick weeknight dinner, a weekend lunch, or a casual gathering meal, this recipe offers the kind of flavor and convenience that makes it a household favorite. One of the greatest advantages of this dish is its versatility. You can easily adjust the fillings depending on what ingredients you have available. Add extra vegetables, experiment with different cheeses, or try new sauces to create your own signature version of the crunch wrap. This adaptability means the recipe never becomes boring and can evolve with your tastes. Another reason this recipe is worth trying is how family-friendly it is. Many households enjoy setting up a small “wrap station” where everyone can assemble their own crunch wrap with their preferred ingredients. This interactive approach makes dinner more engaging, especially for kids or picky eaters who like choosing their own toppings. Homemade crunch wraps also offer a healthier alternative to takeout versions. By controlling the ingredients, you can use fresh vegetables, lean chicken breast, and moderate amounts of cheese and sauce. The result is a balanced meal that still feels indulgent and comforting. Once you master the folding and toasting technique, you will likely find yourself returning to this recipe again and again. It is simple enough for beginners yet delicious enough to impress guests. The combination of crisp tortillas, warm seasoned chicken, crunchy layers, and creamy toppings creates a flavor experience that is hard to resist. If you are looking for a meal that is easy, customizable, and packed with texture and flavor, the Chicken Crunch Wrap deserves a spot in your regular recipe rotation. With just a few pantry ingredients and a skillet, you can create a satisfying dish that rivals your favorite restaurant versions while enjoying the comfort of homemade cooking. PrintEasy Chicken Crunch Wrap – Crispy Chicken Wrap Dinner

A crunchy, satisfying wrap packed with seasoned chicken, crisp tostada layers, fresh lettuce and tomatoes, and a smooth creamy sauce, all folded inside a toasted golden tortilla. This handheld meal combines bold flavor with irresistible texture, making it perfect for a quick lunch, easy dinner, or homemade fast-food style treat.
Ingredients
2 cups cooked chicken breast, shredded or diced (300 g)
1 tablespoon olive oil (15 ml)
1 teaspoon paprika (5 g)
1 teaspoon garlic powder (5 g)
½ teaspoon onion powder (2.5 g)
½ teaspoon ground cumin (2.5 g)
½ teaspoon salt (3 g)
¼ teaspoon black pepper (1 g)
4 large flour tortillas (10 inch / 25 cm)
4 tostada shells
1 cup shredded cheddar cheese (100 g)
1 cup shredded lettuce (50 g)
1 medium tomato diced (150 g)
For the sauce
½ cup sour cream (120 g)
2 tablespoons mayonnaise (30 g)
1 teaspoon lime juice (5 ml)
½ teaspoon garlic powder (2.5 g)
Pinch of salt
Instructions
-
Heat olive oil in a skillet over medium heat. Add shredded chicken, paprika, garlic powder, onion powder, cumin, salt, and black pepper. Cook for 3–5 minutes until heated through.
-
In a bowl, mix sour cream, mayonnaise, lime juice, garlic powder, and salt to create the sauce.
-
Place a large tortilla on a flat surface. Add seasoned chicken in the center followed by shredded cheese.
-
Place a tostada shell on top of the chicken layer.
-
Spread 2 tablespoons of the sauce over the tostada shell, then add lettuce and diced tomato.
-
Fold the edges of the tortilla toward the center to form a hexagon shape.
-
Heat a skillet and place the wrap folded side down. Cook for 2–3 minutes until golden brown.
-
Flip and cook another 2–3 minutes until crispy.
-
Remove from pan, slice in half, and serve warm.


