
The Secret to a Golden, Buttery Crust
A truly great chicken pot pie starts with its crust. The golden, buttery crust isn’t just a vessel for the filling — it’s a defining feature of the dish. Creating a homemade crust may seem intimidating, but with a few key tips and the right technique, you’ll get a perfectly flaky, flavorful result every time. Let’s break down how to achieve it.Why Homemade Crust is Worth It
Store-bought crusts might save time, but nothing compares to the taste and texture of homemade pie crust. Making it from scratch gives you full control over the ingredients and the final texture. The flavor is deeper, the texture is flakier, and the end result feels more satisfying. Plus, using cold butter instead of shortening gives it a rich, bakery-style finish — a method perfected in many pastry cutter techniques. Homemade crust is:- Fresher, with no preservatives
- Easier to customize (salt level, thickness, butter-to-flour ratio)
- More forgiving than most people think
Ingredients Breakdown
To make the perfect crust, you’ll need:- 2½ cups of all-purpose flour – This is your foundation. It holds everything together and affects texture. You can explore how all-purpose flour works in baking for more depth.
- 1 teaspoon salt – Essential for flavor balance
- 1 cup unsalted butter, cold and cubed – Cold butter is key. It creates steam pockets that lead to flaky layers.
- 6–8 tablespoons ice water – Keeps the dough cold and helps bring it together without making it sticky
Step-by-Step Dough Preparation
- Mix the dry ingredients: In a large bowl, whisk together the flour and salt.
- Cut in the butter: Using a pastry cutter or fork, work the cold, cubed butter into the flour mixture until it resembles coarse crumbs. This ensures the butter is evenly distributed without melting.
- Add ice water: Add water one tablespoon at a time, gently mixing until the dough comes together. Don’t overmix — that leads to toughness.
- Divide and chill: Split the dough into two discs. Wrap each in plastic and refrigerate for at least 30 minutes. Chilling allows the butter to firm up again, which is crucial for flakiness.
Rolling Out for a Flaky Crust
When ready to use:- Let the dough sit for 5–10 minutes after chilling to soften slightly for easier rolling
- Roll one disc into a 12-inch circle for the bottom crust
- Repeat for the top, keeping it slightly thicker to handle slits for venting
Creamy Chicken Pot Pie Filling – What Goes Inside
While the crust is the first thing you see, the soul of a chicken pot pie lies in its creamy, flavorful filling. It’s hearty, savory, and bursting with textures from tender chicken and a medley of colorful vegetables. Creating the perfect filling means finding the right balance between richness, moisture, and depth of flavor. Here’s how to master it.Classic Ingredients for Comfort
The filling for this golden chicken pot pie is built on wholesome, familiar ingredients:- Cooked chicken: Use about 2 cups of shredded or cubed chicken breast. You can also substitute with chicken ham or even leftover rotisserie chicken for added convenience.
- Vegetables: A combination of diced carrots, frozen peas, and optional corn brings both sweetness and texture. Other options like green beans or celery work well too.
- Aromatics: Diced onions and minced garlic form the flavor base.
- Seasoning: Salt, pepper, and dried thyme (learn about the properties of dried thyme) add warmth and herbaceous depth.

Creating the Sauce
The creamy sauce is what binds everything together and gives the pie its signature richness. A simple butter-flour roux thickened with broth and milk creates the perfect consistency. For extra flavor, use homemade or low-sodium chicken broth — you can explore ideas for homemade chicken broth. Steps to create the sauce:- Melt 2 tablespoons of butter in a large skillet over medium heat.
- Sauté the onion and garlic until soft and fragrant.
- Add the vegetables and cook for 3–4 minutes to slightly tenderize.
- Stir in ⅓ cup of flour, mixing well to coat the veggies and cook the raw flour taste out (about 1–2 minutes).
- Slowly pour in 2 cups chicken broth and ½ cup milk, stirring constantly to avoid lumps. The roux will thicken the mixture into a luscious sauce.
- Add shredded chicken, season with salt, pepper, and ½ teaspoon of thyme. Let the mixture simmer briefly until thickened and creamy.
Assembly and Baking – Bringing It All Together
With the crust and filling ready, it’s time to assemble your cozy chicken pot pie and bake it to golden perfection. Steps for assembly:- Preheat the oven to 400°F (200°C).
- Roll out the chilled dough and fit the first disc into a 9-inch pie dish.
- Spoon the cooled filling into the bottom crust.
- Top with the second disc of dough, gently pressing to seal the edges. Crimp the edges with a fork or your fingers.
- Cut slits into the top crust to allow steam to escape during baking.
- Optional: Brush the top with a little milk or egg wash for extra golden color.
Tips for Success – Avoiding Common Pitfalls
A few smart techniques will ensure your pot pie turns out perfect every time:- Avoid a soggy bottom crust by preheating a baking sheet and placing the pie dish on top during baking. This helps cook the bottom crust evenly.
- Cool the filling slightly before adding it to the crust to prevent the butter in the dough from melting prematurely.
- Don’t skip the venting slits – without them, steam gets trapped and can make the crust soggy.
- Seal the edges well to avoid any filling bubbling out.
Delicious Variations to Try
One of the best things about chicken pot pie is how versatile it can be. Here are a few ways to make it your own:Protein Swaps
- Use leftover turkey for a post-holiday twist.
- Try rotisserie chicken to cut prep time.
Vegetarian Option
- Skip the meat and add mushrooms, diced potatoes, lentils, or even chickpeas for a hearty plant-based version.
Crust Alternatives
- Puff pastry can be used as a quick top crust.
- Biscuit topping makes for a rustic feel and quicker bake.
Dietary Adjustments
- Use dairy-free milk (like almond or oat) and vegan butter for a dairy-free version.
- For gluten-free: Use a gluten-free flour blend for the crust and a gluten-free thickener like cornstarch.
Storage, Freezing, and Reheating Instructions
Homemade chicken pot pie stores and reheats well, making it ideal for make-ahead dinners or leftovers.How to Store Leftovers
- Keep cooled leftovers in an airtight container in the refrigerator for up to 3 days.
Freezing Instructions
- To freeze unbaked: Assemble the pie, wrap tightly, and freeze. Bake straight from frozen at 375°F, adding 15–20 minutes to baking time.
- To freeze baked: Cool completely, wrap well, and freeze. Reheat from frozen at 350°F until warmed through.
Reheating Tips
- Oven: Best for preserving crust texture. Bake at 350°F for 15–20 minutes.
- Microwave: Use only if you’re in a hurry — the crust may soften.
Serving Suggestions – What Goes With Chicken Pot Pie?
Since the pot pie itself is rich and hearty, serve it with something light and fresh to balance the meal. Try pairing with:- Mixed green salad with vinaigrette
- Steamed or roasted vegetables like broccoli or asparagus
- A simple apple slaw for contrast
- A warm drink like spiced cider or chamomile tea

Frequently Asked Questions
Q1: Can I make chicken pot pie ahead of time? Yes! You can prepare the crust and filling a day in advance and store them separately in the fridge. Assemble and bake when ready. Q2: What is the best way to thicken pot pie filling? A butter-flour roux thickened with broth and milk is ideal. Let it simmer until thickened before pouring into the crust. Learn more about how to make a roux. Q3: How do I know when my pot pie is done baking? The crust should be deep golden brown and the filling should be bubbling slightly through the slits in the crust. Q4: Can I use store-bought crust? Absolutely. While homemade is best for flavor and texture, quality store-bought crusts work well when you’re short on time. Q5: What vegetables go best in chicken pot pie? Peas, carrots, corn, and green beans are popular. You can also add mushrooms, potatoes, or celery for variety. Q6: How do you keep chicken pot pie from getting soggy on the bottom? Preheating a baking sheet and placing your pie dish on it helps cook the bottom crust evenly. Also, let the filling cool before assembling. PrintCozy Chicken Pot Pie – Creamy Filling + Golden Buttery Crust

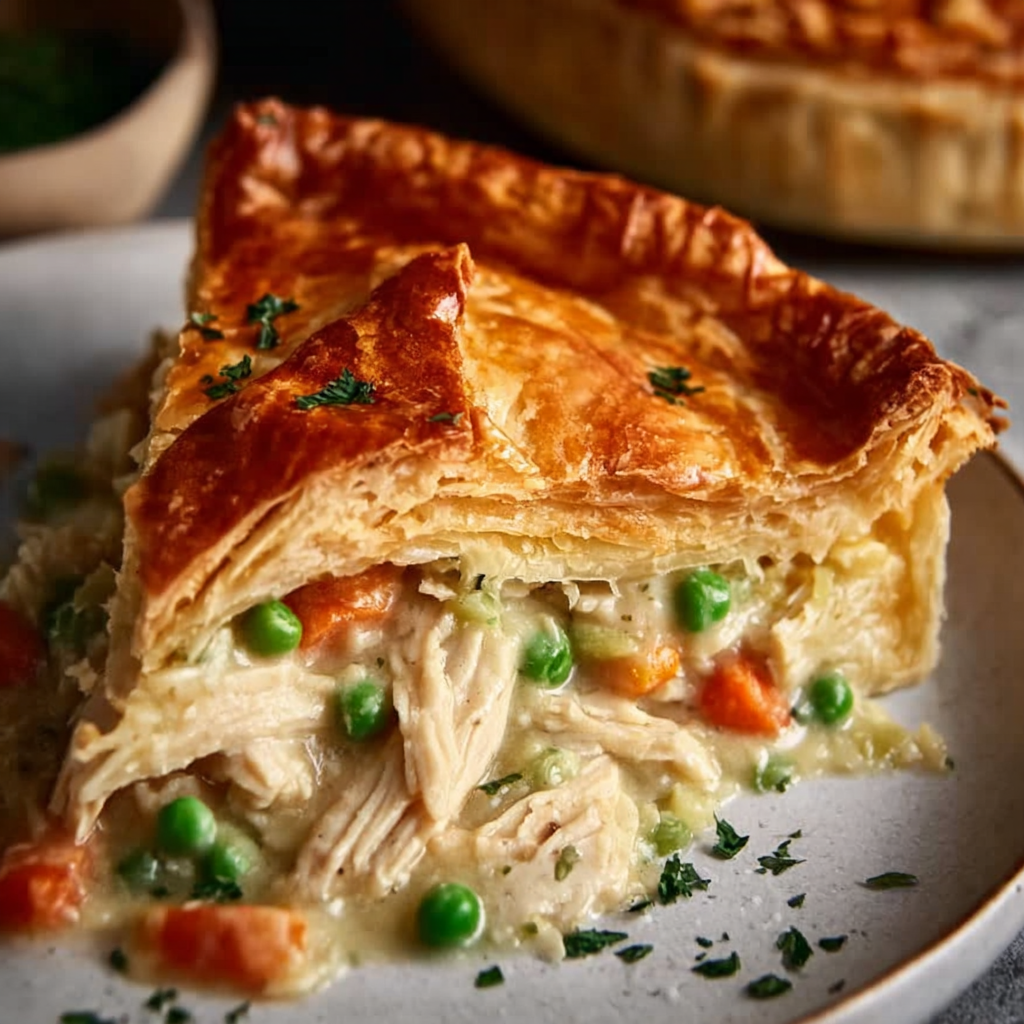
This golden chicken pot pie with a buttery, flaky crust and creamy chicken filling is the ultimate comfort food. Made from scratch with wholesome ingredients, it’s packed with tender chicken, colorful vegetables, and a savory sauce thickened to perfection. The homemade crust turns golden and crisp in the oven, locking in all the cozy flavors inside. It’s freezer-friendly, easily customizable, and perfect for cozy dinners any time of the year.
Ingredients
For the crust:
- 2 ½ cups all-purpose flour
- 1 tsp salt
- 1 cup unsalted butter, cold and cubed
- 6–8 tbsp ice water
For the filling:
- 2 tbsp butter
- 1 small onion, diced
- 2 garlic cloves, minced
- 2 cups cooked chicken breast or chicken ham, shredded or cubed
- 1 cup diced carrots
- 1 cup frozen peas
- ½ cup corn (optional)
- ⅓ cup all-purpose flour
- 2 cups chicken broth
- ½ cup milk
- Salt and pepper to taste
- ½ tsp dried thyme
Instructions
In a large bowl, mix flour and salt for the crust. Cut in the cold butter using a pastry cutter or fork until the mixture resembles coarse crumbs.
Add ice water one tablespoon at a time, mixing until the dough comes together. Divide into two discs, wrap in plastic, and chill for at least 30 minutes.
Preheat your oven to 400°F (200°C).
In a large skillet, melt butter over medium heat. Add onion and garlic and sauté until soft.
Stir in the carrots, peas, and corn. Cook for 3–4 minutes until slightly tender.
Sprinkle in the flour and stir to coat the vegetables. Cook for 1–2 minutes.
Gradually pour in chicken broth and milk, stirring constantly until the mixture thickens.
Add the cooked chicken and thyme. Season with salt and pepper. Remove from heat and let cool slightly.
Roll out one disc of dough and fit it into a 9-inch pie dish. Pour the filling into the crust.
Roll out the second disc and place it over the filling. Seal the edges and cut small slits in the top to vent.
Bake for 35–40 minutes or until the crust is golden brown.
Let cool for 10 minutes before slicing and serving.
Notes
-
Use cold butter and ice water for the flakiest crust.
-
Cool the filling before assembling to prevent a soggy bottom crust.
-
Customize with your favorite veggies or use up leftovers.
-
Freeze before or after baking for an easy make-ahead meal.
-
Brush the top crust with milk or egg wash for extra shine and color.
-
Serve with a light salad or roasted vegetables for a balanced meal.
Lemon Sugar Cookies

These Lemon Sugar Cookies are soft, chewy, and bursting with fresh citrus flavor. Made with real lemon juice and zest, these cookies offer the perfect blend of sweetness and tartness.
- Prep Time: 15 minutes
- Chill time: 30 minutes
- Cook Time: 20 minutes
- Total Time: 55 minutes
- Yield: 24 cookies (approximately 2.5-inch diameter each) 1x
- Category: Dessert
- Method: Baked
- Cuisine: American
Ingredients
Dry Ingredients:
2 3/4 cups all-purpose flour
1 teaspoon baking soda
1/2 teaspoon baking powder
1/2 teaspoon salt
Wet Ingredients:
1 cup unsalted butter, softened
1 1/2 cups granulated sugar
1 large egg
1 teaspoon vanilla extract
2 tablespoons fresh lemon juice
1 tablespoon lemon zest (from 1–2 lemons)
For Rolling:
1/4 cup granulated sugar
Instructions
1. Prep the Oven
-
Preheat your oven to 350°F (175°C).
-
Line two baking sheets with parchment paper or silicone baking mats.
2. Mix the Dry Ingredients
-
In a medium bowl, whisk together:
-
2 3/4 cups all-purpose flour
-
1 tsp baking soda
-
1/2 tsp baking powder
-
1/2 tsp salt
Set aside.
-
3. Cream Butter and Sugar
-
In a large bowl, use a hand or stand mixer to beat:
-
1 cup softened unsalted butter
-
1 1/2 cups granulated sugar
Beat on medium speed until light and fluffy (2–3 minutes).
-
4. Add Wet Ingredients
-
Mix in:
-
1 large egg
-
1 tsp vanilla extract
-
2 tbsp fresh lemon juice
-
1 tbsp lemon zest
Beat until fully combined.
-
5. Combine Wet and Dry
-
Slowly add the dry ingredients to the wet ingredients, mixing on low speed until a soft, uniform dough forms. Do not overmix.
6. Shape the Dough
-
Scoop 1-tablespoon portions of dough and roll into balls.
-
Roll each ball in the extra 1/4 cup sugar until fully coated.
-
Place the dough balls 2 inches apart on the prepared baking sheets.
7. Bake
-
Bake for 9–11 minutes, or until the edges are lightly golden and the centers are just set.
-
The cookies will continue to cook on the sheet after removal.
8. Cool
-
Let cookies cool on the baking sheet for 5 minutes.
-
Transfer to a wire rack to cool completely.
Notes
-
Fresh lemon zest gives stronger lemon flavor than juice alone.
-
For thicker cookies, chill the dough for 20 minutes before baking.
-
These cookies freeze well! Freeze raw dough balls or baked cookies in airtight containers for up to 3 months.
-
Want more tang? Add an extra teaspoon of lemon zest.
-
Avoid overbaking to maintain soft centers.


