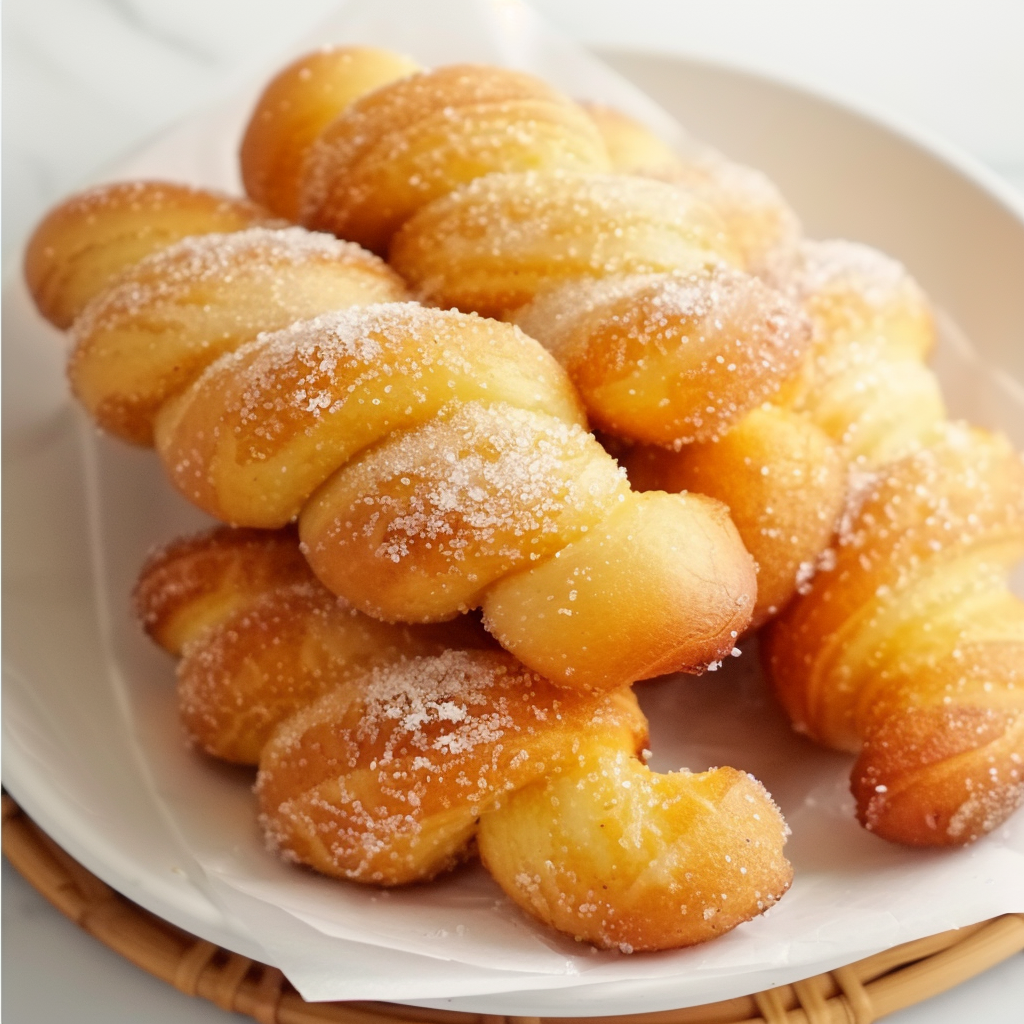
Cinnamon Twist Doughnuts
There’s something irresistible about biting into a soft, fluffy cinnamon twist doughnut fresh from the fryer. With their golden brown exterior, sweet coating, and delicate layers of twisted dough, these homemade treats deliver bakery-level flavor from the comfort of your kitchen. Whether you’re an experienced baker or just starting out, learning how to make twisted doughnuts is a deliciously rewarding process.
Twist-style doughnuts have gained popularity for their eye-catching shape and satisfying texture. Unlike traditional ring-shaped doughnuts, cinnamon twists offer a braided or rope-like appearance that holds coatings exceptionally well. Their dough, enriched with butter and egg, produces a tender crumb that’s hard to resist. This makes them a top choice for anyone looking to replicate homemade doughnuts that rival those from your favorite donut shop.
Using a simple recipe built around all-purpose flour, active dry yeast, and warm milk, you’ll master the basics of proofing, kneading, shaping, and frying. Understanding how yeast fermentation works can make a huge difference in achieving that airy, melt-in-your-mouth quality. If you’re curious about this process, check out yeast fermentation for a deeper dive into how your dough comes to life.
Unlike dense or dry commercial options, homemade cinnamon twist doughnuts offer unmatched freshness. You can skip preservatives and artificial flavors while exploring coatings like cinnamon sugar or a quick glaze. For visual inspiration, explore a variety of twisted doughnuts on Pinterest, which showcases different styles, shapes, and finishings you can try. The goal here isn’t just to recreate a recipe—it’s to understand what makes each twist tender, flavorful, and beautifully golden.
If you’re ready to ditch pre-packaged options and unlock the secrets to soft cinnamon twists, this guide will walk you through every step. From mixing ingredients to frying and coating, every technique is designed for success—even if it’s your first time making doughnuts. With a few pantry staples and a bit of patience, your homemade doughnuts will not only taste amazing but look like they came from a professional kitchen.

What Are Cinnamon Twists?
Cinnamon twists are a variation of doughnuts that stand out due to their unique rope-like shape and irresistible coating of sugar or cinnamon sugar. Rather than the typical circular doughnut with a hole in the center, these are created by twisting two strands of dough together before frying. The result is a doughnut that’s both visually appealing and texturally satisfying—crispy on the outside, soft and airy on the inside.
What makes cinnamon twists especially appealing is the versatility in both flavor and presentation. While the classic coating is granulated sugar mixed with ground cinnamon, you can also glaze them or add toppings like chopped nuts or chocolate drizzle. These donuts have roots in both American and Asian bakeries—often compared to Korean or Japanese twisted donuts—but the homemade version offers a more tender crumb and customizable flavor profile.
When made properly, cinnamon twists hold their shape beautifully during frying and absorb just enough sugar to add sweetness without overwhelming the dough. They are not only a delicious breakfast treat or dessert, but also a perfect way to experiment with basic dough techniques like kneading, proofing, and deep frying. You can explore more about frying methods used for pastries by visiting deep frying techniques, which explains the science behind golden, crisp results.
From a culinary perspective, these donuts highlight the importance of balance—between flavor and texture, sweetness and richness. If you’re drawn to baking projects that combine creativity with technique, cinnamon twists are an ideal starting point. You can also browse various homemade doughnut ideas on Pinterest to get inspired with different flavor and twist options.
Why Make Homemade Donuts?
Making homemade doughnuts—especially twisted ones coated in cinnamon sugar—offers an experience that far exceeds the convenience of store-bought options. One of the biggest advantages is the control you gain over ingredients, texture, and flavor. Unlike commercial versions, which often contain preservatives and artificial flavors, homemade doughnuts can be made with fresh, natural components like unsalted butter, fresh yeast, and high-quality all-purpose flour.
Another reason to go homemade is freshness. Doughnuts are best enjoyed within hours of frying, when they’re still warm, soft, and fragrant. Store-bought versions may sit for days, sacrificing texture and taste. Making them yourself means enjoying them at their absolute peak—crispy on the outside, light on the inside, and coated in just the right amount of sugar or glaze.
Plus, there’s a creative aspect to homemade baking that adds to the satisfaction. You can customize your twist doughnuts with different flavorings like cardamom or vanilla, or add toppings like a maple glaze, which pairs beautifully with cinnamon. For ideas on how to enhance your flavor combinations, explore doughnut glaze recipes, which showcase everything from simple sugar glazes to more adventurous toppings.
The process of making dough—from mixing to kneading and shaping—is not just about the end result; it’s also a skill-building opportunity. Learning how to knead dough properly helps you develop gluten for structure and elasticity, which you can explore further through this guide to kneading techniques. Whether you’re baking for your family, for an event, or just for yourself, mastering these steps can be both rewarding and fun.
In short, homemade doughnuts allow you to create a fresher, softer, and more flavorful treat than anything pre-packaged. And when you twist the dough into beautiful shapes and finish it with your favorite coating, you’re not just making food—you’re crafting an experience.
Key Ingredients Overview
Creating soft and fluffy cinnamon twist doughnuts starts with a few essential ingredients that work together to build structure, flavor, and texture. Each component plays a specific role in the dough-making and frying process. Here’s a breakdown of what you’ll need and why it matters.
-
Active Dry Yeast – This is the leavening agent that gives your doughnuts their rise. It feeds on sugar and produces carbon dioxide, which creates air pockets in the dough, making it light and airy. Learn more about this process in detail on yeast fermentation and how it’s used in baking.
-
Warm Milk (110°F or 43°C) – The warm temperature activates the yeast, encouraging it to bloom and start fermentation. Milk also adds moisture and richness, helping to create a tender crumb.
-
Granulated Sugar – A small amount is used in the dough to feed the yeast and enhance flavor. The rest is used for coating the twists after frying, especially when mixed with ground cinnamon to create the signature cinnamon sugar topping. You can explore creative ways to use cinnamon in desserts through this cinnamon spice overview.
-
All-Purpose Flour – The foundation of your dough. This flour has the right amount of protein to develop gluten during kneading, giving the dough enough strength to hold its shape without becoming too dense. For an in-depth look at flour types and how they affect baking, check out this guide to all-purpose flour.
-
Salt – Just a pinch helps balance the sweetness and enhances all the other flavors in the dough.
-
Egg – Adds structure and richness. It also improves the dough’s ability to hold air during frying, contributing to a fluffier texture.
-
Unsalted Butter – Softened butter makes the dough rich, moist, and flavorful. It also contributes to the tender bite of the finished twist.
-
Oil for Frying – Neutral oils like vegetable or canola oil are ideal. They have a high smoke point and won’t overpower the flavor of the doughnuts. Understanding the techniques of deep frying can help you maintain the perfect texture and prevent sogginess.
-
Coating: Granulated Sugar + Ground Cinnamon (Optional) – Rolling the twists in sugar while they’re still warm helps it stick and adds the classic finish. For variety, browse cinnamon sugar recipes for more coating ideas and flavor variations.
These ingredients are easy to find and form the basis of many classic baking recipes. When combined with proper technique, they create a dough that’s supple, easy to shape, and perfect for frying into golden, twisted treats.
Step-by-Step Doughnut Dough Preparation
Creating perfect cinnamon twist doughnuts begins with mastering the dough. This step determines the final texture, structure, and flavor of your homemade donuts. Following the process precisely will ensure your doughnuts come out soft, fluffy, and evenly cooked every time.
1. Proof the Yeast
In a small bowl, combine the active dry yeast with warm milk (around 110°F or 43°C). Stir gently and let it sit for 5 to 10 minutes. You’ll know the yeast is active when the mixture becomes frothy on top—a crucial step in creating that airy texture. If nothing happens, your yeast may be expired or your milk too hot or cold. You can learn more about this foundational step by exploring fermentation in baking.
2. Mix the Dry Ingredients
In a large mixing bowl, whisk together all-purpose flour, granulated sugar, and salt. This distributes the ingredients evenly and prevents salt from directly touching the yeast later, which could hinder fermentation.
3. Add Wet Ingredients
Pour the frothy yeast mixture into the dry ingredients. Then add in the egg and softened unsalted butter. Use a wooden spoon or dough hook attachment on a stand mixer to begin mixing until a soft dough forms. Avoid overmixing at this stage—you just want the ingredients to come together.
4. Knead the Dough
Transfer the dough onto a lightly floured surface. Knead for 8 to 10 minutes until smooth, elastic, and slightly tacky. Proper kneading helps the gluten develop, giving your dough strength and flexibility. To learn more about how kneading affects texture, see this article on kneading techniques.
5. First Rise
Place the dough in a greased bowl, cover it with a clean towel or plastic wrap, and let it rise in a warm, draft-free spot. After about an hour, it should double in size. This is a good time to prep your toppings or read more about twisted doughnut variations for later inspiration.
This completes the dough preparation. From here, the dough is ready to be shaped, rested again, and fried.
Shaping the Perfect Cinnamon Twist
Shaping is what gives cinnamon twist doughnuts their signature look and texture. This step isn’t just about aesthetics—it helps the dough fry evenly and hold onto more coating.
1. Divide the Dough
Once the dough has doubled in size, punch it down gently to release air. Turn it out onto a lightly floured surface and divide it into 12 equal pieces. Use a kitchen scale for accuracy, ensuring even cooking.
2. Form Ropes
Roll each piece into a rope about 8 inches long. If the dough shrinks back as you roll, let it rest for a minute to relax the gluten.
3. Create the Twist
Take two ropes and gently twist them around each other like a braid. Pinch the ends to seal. You can also view homemade doughnut shaping techniques for visual guidance and creativity in design.
4. Second Proofing
Place the twists on a parchment-lined tray, cover lightly, and let rise again for about 30 minutes. This second rise gives the dough a final puff, ensuring light, pillowy results when fried.
Proper shaping and proofing ensure your twists don’t unravel in the oil and stay fluffy inside with a crisp exterior.
Second Proofing for Light Texture
The second proofing—also called final rise—is what helps your doughnuts expand to their full volume before frying. This step is crucial for achieving a soft, fluffy interior and a golden, crisp shell.
Let your shaped twists rise in a warm place for 30 minutes, covered with a clean towel or plastic wrap. They should puff up visibly but not collapse when touched gently. If over-proofed, the doughnuts may deflate during frying. If under-proofed, they’ll be dense and tough.
A properly proofed twist will feel soft and spring back slowly when touched. Don’t rush this step—it’s the key to that melt-in-your-mouth texture.

Frying the Doughnuts the Right Way
Frying is where your doughnuts transform from soft dough into crispy, golden perfection. The goal is to achieve an even fry without absorbing excess oil, resulting in a doughnut that’s crisp outside and airy inside.
1. Heat the Oil
Use a deep fryer or heavy-bottomed pot. Heat neutral oil (like vegetable or canola) to 350°F (175°C). Maintaining this temperature is essential for proper frying. Too hot, and the outside burns before the inside cooks; too cold, and the doughnuts absorb oil and become greasy. Refer to deep frying best practices for maintaining temperature control.
2. Fry in Batches
Gently lower a few twists at a time into the oil. Don’t overcrowd the pan—this lowers the temperature and leads to uneven cooking. Fry each side for 2–3 minutes or until golden brown. Flip with tongs halfway through for even browning.
3. Drain and Cool
Remove the doughnuts with a slotted spoon and transfer them to a paper towel-lined tray to drain excess oil.
4. Coat While Warm
Immediately roll the warm doughnuts in granulated sugar or cinnamon sugar. This ensures the coating sticks properly. Explore more cinnamon sugar variations if you want to add cardamom or nutmeg to the mix.
Frying doughnuts correctly is the final and most satisfying step before serving or glazing.
Coating and Flavoring Options
Once your doughnuts are fried and still warm, it’s time to finish them with a coating. The most traditional method for cinnamon twist doughnuts is a mixture of granulated sugar and ground cinnamon. This creates a sweet, aromatic crust that complements the tender dough.
Other coating options include:
-
Classic Sugar – Roll in plain granulated sugar for a clean, simple taste.
-
Cinnamon Sugar – Mix ½ cup sugar with 1 tsp cinnamon.
-
Powdered Sugar – Sift over cooled doughnuts for a lighter sweetness.
-
Simple Glaze – Combine powdered sugar, milk, and vanilla. Dip twists halfway and let set.
-
Maple or Chocolate Glaze – Add cocoa powder or maple extract for depth. Explore glaze recipes for more inspiration.
You can also coat the twists in crushed nuts, shredded coconut, or even drizzle with caramel for an upscale twist.
Storage and Freshness Tips
Freshness is key when it comes to doughnuts. These twists are best enjoyed the day they’re made, but with proper storage, you can keep them fresh for a little longer.
-
Room Temperature – Store in an airtight container for up to 2 days. Add a slice of bread to help maintain moisture.
-
Freezing – Wrap each doughnut individually in plastic wrap, place in a freezer-safe bag, and freeze for up to 2 months. Thaw at room temperature and reheat in the oven for 5–7 minutes at 300°F (150°C).
-
Avoid Refrigeration – This can dry them out quickly and ruin the texture.
Twisted Doughnut Variations to Try
Once you’ve mastered the classic cinnamon twist, try these delicious variations to expand your skills:
-
Maple Glazed Twists – Dip cooled twists in a homemade maple glaze for fall-inspired flavor.
-
Chocolate-Dipped Twists – Use melted dark chocolate and sprinkle with chopped nuts.
-
Filled Twists – Pipe pastry cream, jam, or Nutella between layers or into the center.
-
Savory Twists – Skip the sugar and add herbs, garlic butter, or cheese.
-
Vegan Option – Use plant-based milk, margarine, and flaxseed meal to replace dairy and egg.
You can browse more homemade doughnut variations to get creative in your kitchen.
Troubleshooting Common Mistakes
Every baker hits a few bumps along the way. Here’s how to fix the most common doughnut issues:
-
Dough Didn’t Rise – Yeast was old or milk was too hot. Always check your yeast for freshness.
-
Too Greasy – Oil temperature was too low. Use a thermometer to maintain 350°F (175°C).
-
Dense Texture – Dough was under-proofed or over-kneaded. Follow proofing times and knead just until smooth.
-
Uneven Browning – Oil was too hot or doughnuts overcrowded. Fry in small batches for consistency.
Expert Tips for Perfect Doughnuts Every Time
-
Use a thermometer for oil to maintain exact frying temperature.
-
Don’t rush proofing—rising time impacts texture more than any other step.
-
Weigh your dough pieces for uniform size and cooking time.
-
Twist the dough gently to avoid tearing and maintain structure.
-
Use Pinterest’s doughnut boards for inspiration and presentation ideas.
Serving Ideas & Pairings
Cinnamon twist doughnuts are best served fresh and warm. Pair them with:
-
Hot coffee or espresso
-
Chai tea or spiced cider
-
Whipped cream or fruit preserves on the side
-
A drizzle of honey or maple syrup
Serve them at brunch, as a snack, or for dessert—they’re versatile and crowd-pleasing.

Frequently Asked Questions (FAQs)
Can I bake instead of fry cinnamon twist doughnuts?
Yes, you can bake them at 375°F (190°C) for 15–18 minutes. However, the texture will be more like a soft bread roll than a traditional doughnut.
What’s the best flour for soft doughnuts?
All-purpose flour works best for a balance of structure and softness. Bread flour will create a chewier texture.
How do I store leftover doughnuts?
Store them in an airtight container at room temperature for up to 2 days, or freeze for longer storage.
Can I make the dough the night before?
Yes. Prepare the dough, let it rise once, shape the twists, then refrigerate overnight. Let them come to room temp and rise slightly before frying.
What’s the difference between a twisted doughnut and cruller?
A cruller typically uses a choux-based dough and is piped into a twist, while twisted doughnuts are made from yeast-raised dough shaped by hand.
Cinnamon Twists Homemade Doughnuts Recipe for Soft and Fluffy Results

These homemade cinnamon twist doughnuts are golden on the outside and perfectly soft and fluffy on the inside. Twisted by hand and coated in cinnamon sugar, they’re a deliciously satisfying treat that’s ideal for breakfast, brunch, or dessert. Fry them fresh and serve warm for the ultimate bakery-style experience at home.
- Author: Clara
Ingredients
- 2 ¼ teaspoons active dry yeast
- ¾ cup warm milk (about 110°F or 43°C)
- ¼ cup granulated sugar
- 2 ½ cups all-purpose flour
- ¼ teaspoon salt
- 1 large egg
- ¼ cup unsalted butter, softened
- Oil for frying
For coating:
- ½ cup granulated sugar
- 1 teaspoon ground cinnamon (optional)
Instructions
- In a small bowl, dissolve yeast in warm milk and let it sit for 5-10 minutes until frothy.
- In a large bowl, mix together the flour, sugar, and salt.
- Add the egg, softened butter, and the yeast mixture. Mix until a soft dough forms.
- Knead the dough on a lightly floured surface for about 8-10 minutes until smooth and elastic.
- Place the dough in a greased bowl, cover, and let it rise in a warm place for about 1 hour or until doubled in size.
- Punch down the dough and divide it into equal portions (about 12).
- Roll each portion into a rope and twist two ropes together to form a twist shape. Pinch the ends to seal.
- Place the twists on a parchment-lined tray, cover, and let rise again for about 30 minutes.
- Heat oil in a deep fryer or deep pan to 350°F (175°C).
- Fry the donut twists in batches until golden brown on all sides, about 2-3 minutes per side.
- Drain on paper towels and while still warm, roll in granulated sugar or cinnamon sugar.
- Serve fresh and enjoy.
Notes
-
For extra lightness, ensure the dough proofs in a warm, draft-free area.
-
Always coat the doughnuts while warm to help the sugar stick evenly.
-
Use a thermometer for oil to ensure a consistent 350°F frying temperature.
-
To glaze instead of sugar-coat, let the doughnuts cool slightly before dipping.
-
Feel free to experiment with spices like cardamom, nutmeg, or pumpkin spice in the sugar coating for seasonal variations.