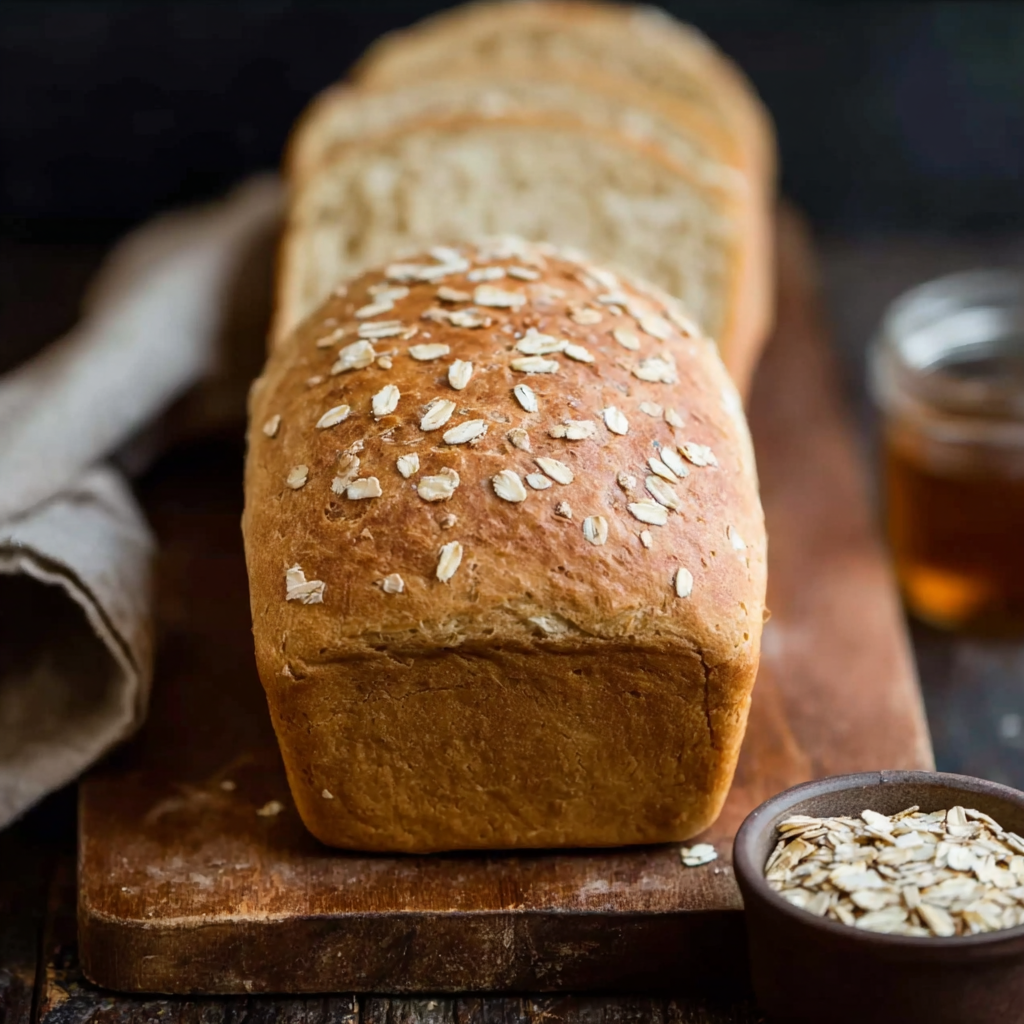
1.Big Batch Honey Oat Bread
Making homemade sandwich bread is a deeply satisfying kitchen ritual—especially when the result is a soft, fluffy loaf with a golden crust and light sweetness. This big batch honey oat bread recipe checks every box: it’s wholesome, delicious, and made for batch baking. With just a few basic ingredients, you’ll end up with multiple loaves perfect for meal prep or freezing.
Baking in batches offers more than just convenience. If you’re already making the effort to proof yeast, knead dough, and heat up the oven, why not make four loaves instead of one? It saves time in the long run and gives you fresh bread for the week—or longer, if you freeze some loaves properly. This process aligns perfectly with meal prepping basics, a strategy explained well on Wikipedia for those looking to streamline weekly cooking.
Unlike typical store-bought options filled with preservatives and additives, this bread uses real ingredients—like rolled oats, honey, and a blend of flours—to deliver maximum flavor and nutrition. Oats, in particular, add heartiness and depth to the texture. They’re a nutritional powerhouse (source) and an easy pantry staple to incorporate into baked goods.
Whether you’re packing lunchboxes, making breakfast toast, or just need something reliable for sandwiches, this honey oat sandwich bread is versatile and forgiving. The recipe allows for slight customization, making it a great foundation for more adventurous variations down the road.
2. Why Make Homemade Bread in Big Batches?
Baking homemade bread in big batches isn’t just about quantity—it’s about smart planning. A single baking session can yield enough fluffy loaves to cover breakfasts, lunches, and snacks for the entire week. Whether you’re baking for a family or simply want to stock your freezer, this strategy offers several practical and economical benefits.
First, there’s the obvious cost-saving advantage. A loaf of honey oat sandwich bread made at home is significantly cheaper than artisan bakery versions, especially when you factor in premium ingredients like oats and honey. When baking in batches, the savings multiply. Buying ingredients like flour and rolled oats in bulk further reduces cost, while avoiding the premium on individually packaged loaves.
Health is another major incentive. Homemade bread allows you to control exactly what goes into each loaf—no preservatives, unnecessary sugar, or filler ingredients. The use of natural sweeteners like honey and the heartiness of oats makes this bread a nutritious option for the whole family. Plus, baking with yeast fermentation, as detailed in this Wikipedia article, adds complexity to flavor and may aid digestion.
Meal prepping becomes much easier with big batch baking. With multiple loaves cooled, wrapped, and either stored or frozen, you’re never more than a few minutes away from a satisfying meal or snack. Sliced and frozen, this bread thaws quickly and can be toasted straight from the freezer—ideal for busy mornings or last-minute sandwiches. For ideas, browse freezer-friendly meal prep boards on Pinterest to visualize how others incorporate homemade bread into their weekly routines.
Finally, baking multiple loaves also means less energy waste. You’re heating the oven once for several loaves, reducing your overall energy consumption—a win for both your utility bill and the environment.
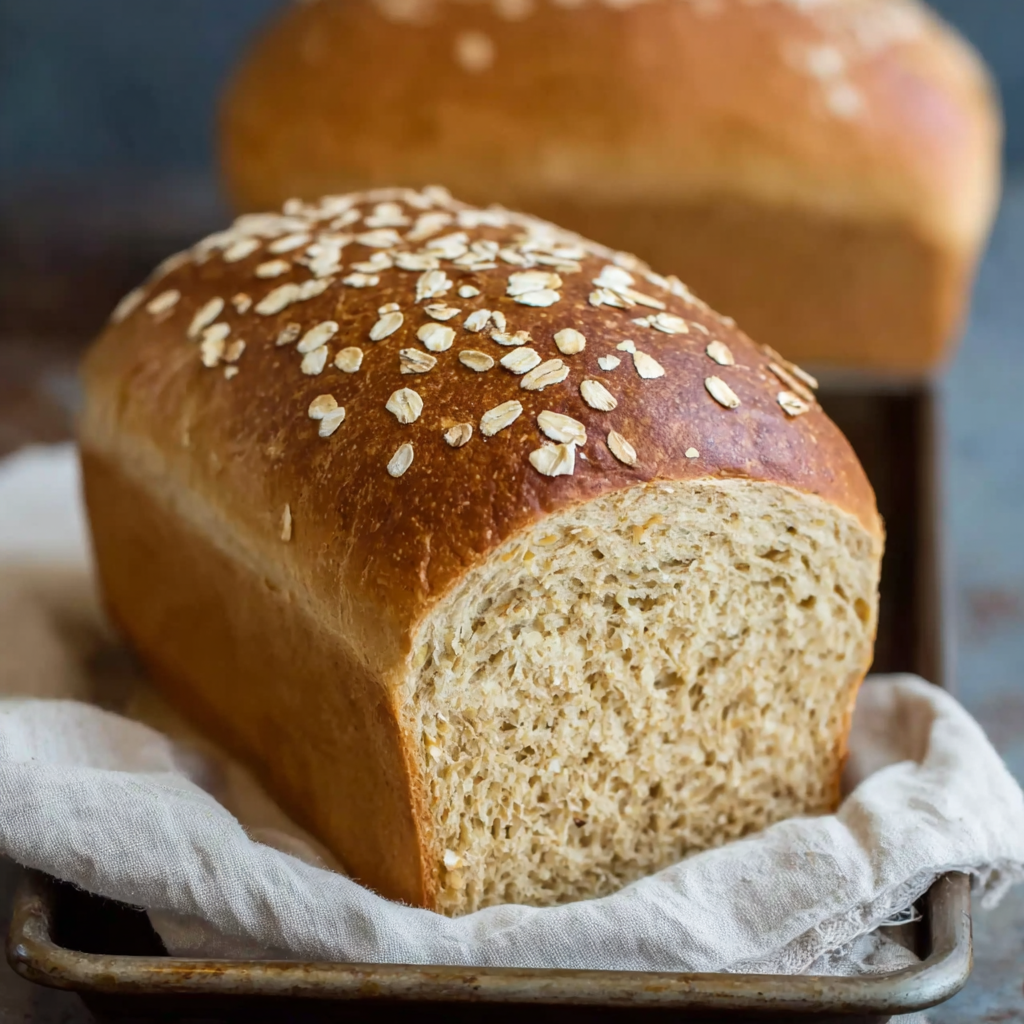
3. What Makes This Honey Oat Bread Special?
Not all homemade sandwich bread is created equal, and what sets this honey oat bread apart is its balance of simplicity, texture, and flavor. Designed to be made in large batches, this recipe ensures consistent results that are both freezer-friendly and family-approved.
At the heart of this bread is the generous use of old-fashioned rolled oats, which soften after being soaked in boiling water. This technique gives the bread a moist, tender crumb while also adding nutritional depth. According to Wikipedia, oats are packed with fiber, protein, and essential minerals, making them an ideal addition to everyday bread.
Then there’s the subtle sweetness from honey. Unlike granulated sugar, honey imparts not just sweetness but moisture and complexity. It also plays a role in browning the crust and helping to preserve freshness. This makes it a great choice for meal prep, where extended shelf life is essential.
The recipe’s oil or melted butter component further boosts the softness of the crumb. This fat element helps create a rich texture that holds up to slicing and toasting—ideal for sandwiches and breakfast toast. If you’re planning kid-friendly meals or lunchbox options, you’ll find that this bread pairs beautifully with both sweet spreads and savory fillings. For inspiration, check out this Pinterest board featuring kid-friendly lunchbox meals.
Finally, the light golden crust is a result of proper yeast fermentation and oven timing. Understanding how gluten development in bread affects the final texture is key (Wikipedia). This recipe strikes a perfect balance between elasticity and tenderness, making it beginner-friendly yet professional in result.
4. Ingredient Breakdown & Substitutions
The ingredients in this recipe are simple but thoughtfully selected. Here’s a closer look at what each one does, and how you can substitute based on your needs:
-
Old-fashioned rolled oats (4 cups)
These give the bread structure, chew, and nutrition. Avoid using steel-cut oats (they don’t soften enough) or instant oats (they’ll break down too much). You can use oatmeal bread variations as inspiration if you want to experiment. -
Boiling water (4 cups)
Poured over the oats, it softens them and helps form a moist, tender crumb. -
Salt (2 tablespoons)
Enhances flavor and controls yeast growth. Don’t skip it or reduce it too much. -
Warm water (2 cups at 110°F)
Activates the yeast without killing it. Too hot or too cold will ruin your rise. -
Active dry yeast (2 tablespoons)
Responsible for the rise and airy texture. You can substitute instant yeast (use 25% less), but active dry gives a more controlled fermentation. Learn more about this process in the yeast fermentation entry. -
Honey (1/2 cup)
Natural sweetener that adds flavor and helps with browning. Alternatives: maple syrup or agave, but honey performs best in this recipe. -
Vegetable oil or melted butter (1/2 cup)
Fat contributes to softness and shelf life. Butter adds a richer taste; oil keeps it neutral and slightly moister. -
Flour (12–13 cups all-purpose or a mix with whole wheat)
All-purpose gives structure; whole wheat adds fiber and flavor. You can start with 50/50 and adjust based on your preferences. For an easy guide to baking success, check these Pinterest tips on bread baking techniques.
Customizing your flour ratio and sweetener allows you to adapt the bread to your dietary needs without compromising quality.
5. Step-by-Step Instructions with Tips
This recipe is designed to produce four soft, fluffy loaves that are perfect for slicing and storing. Here’s a breakdown of the steps along with essential tips for success:
-
Soften the oats
In a large bowl, pour the boiling water over the oats and salt. Stir and let sit for 30 minutes. This hydrates the oats and builds moisture into the bread. Cooling is essential before adding yeast, or you’ll kill it. -
Activate the yeast
In a separate bowl, mix the warm water and active dry yeast. Wait 5–10 minutes until it becomes foamy. If it doesn’t foam, your yeast may be expired or the water too hot/cold. -
Combine ingredients
Stir honey and oil (or butter) into the oat mixture. Make sure the oats are lukewarm—not hot. Then add the yeast mixture and stir to combine. -
Add flour gradually
Begin mixing in the flour, one cup at a time. Once it’s too stiff to stir, transfer to a floured surface. -
Knead the dough
Knead for 8–10 minutes until the dough is smooth and elastic. To check for proper gluten development, use the windowpane test—stretch a piece of dough thinly; it shouldn’t tear easily. -
First rise
Place the dough in a greased bowl, cover it, and let it rise in a warm space for about an hour or until doubled in size. -
Divide and shape
Punch down the dough, divide it into four equal parts, and shape each into a loaf. Place into greased pans. -
Second rise
Cover the pans and let the loaves rise again until they crown just above the top of the pan—about 30–45 minutes. -
Bake
Preheat the oven to 350°F (175°C). Bake for 30–35 minutes or until the crust is golden and the loaves sound hollow when tapped. -
Cool
Remove from pans and cool on wire racks completely before slicing. This prevents sogginess and locks in texture.
Each of these steps contributes to achieving that lightly sweet, soft sandwich bread texture that makes this recipe a keeper.
6. Storage & Freezing Instructions
To get the most out of your meal prep bread, proper storage is essential. This bread holds up beautifully when stored correctly.
-
Cool completely before storing
Bread should be fully cooled to prevent condensation, which leads to soggy loaves. -
Short-term storage (3–5 days)
Wrap in plastic wrap or store in a bread box. Avoid refrigeration—it dries out the crumb. -
Freezing
-
Wrap loaves tightly in plastic wrap, then in foil or a freezer-safe bag.
-
You can also slice the bread before freezing for easy single-serve access.
-
Label with date and type.
-
To thaw: remove from the freezer, unwrap, and leave at room temp, or toast straight from frozen.
-
Freezer-friendly meal prep ideas show how pre-sliced bread can be built into weekly menus seamlessly.
7. Meal Prep Ideas Using Honey Oat Bread
This big batch bread is the ultimate meal prep companion. Its neutral flavor and tender crumb make it perfect for every meal.
-
Breakfast
-
Toast with peanut butter and banana
-
French toast with cinnamon and maple syrup
-
Toasted with avocado and a fried egg
-
-
Lunchbox ideas
-
Classic turkey and cheese sandwich
-
Hummus and veggie stack
-
Almond butter with apple slices
-
-
Snacks
-
Cut into cubes and baked into croutons
-
Homemade breadcrumbs for casseroles or meatballs
-
Mini toasts with jam or cheese
-
-
Freezer-friendly prep
-
Make sandwiches ahead and freeze individually
-
Freeze whole loaves for later slicing
-
These uses make the bread a true kitchen staple for any meal-prep routine.
8. Scaling the Recipe Up or Down
This recipe is easily adjustable depending on your needs.
-
Halve the recipe
Use half of every ingredient to make two loaves instead of four. Useful if you have limited oven space. -
Double the recipe
For serious batch baking, double all ingredients and ensure your mixing bowl and counter space can handle the larger volume. -
Adjust baking tools
If using different pan sizes, reduce or increase baking time accordingly. Mini loaves will bake faster; larger ones may need more time. -
Storage consideration
If making more loaves, plan for freezer space. Wrap loaves individually and organize by date.
Easy bread baking tips can help you stay organized and efficient during larger baking sessions.
9. Troubleshooting Common Bread Baking Problems
Even experienced bakers can run into issues. Here’s how to fix them:
-
Dough didn’t rise
Yeast may be expired, water too hot/cold, or room too cool. -
Dense or gummy bread
Under-kneading or not enough rise time. Be patient and let gluten form. -
Over-baked crust
Use an oven thermometer to ensure accuracy. Tent loaves with foil halfway through if browning too fast. -
Dough too sticky
Add flour gradually. Weather can affect dough consistency. -
Loaf collapsed after baking
Possibly over-proofed. Reduce rise time or handle dough more gently.
Gluten development is essential for structure, and small tweaks to time and temperature make all the difference.
10. Variations on the Basic Recipe
Customizing this honey oat bread makes it easy to keep things interesting:
-
Sweet add-ins
-
Raisins, dried cranberries, cinnamon
-
Honey glaze or oat topping
-
-
Savory upgrades
-
Shredded cheddar, fresh herbs, garlic powder
-
Top with seeds like sunflower or sesame
-
-
Flour alternatives
-
Use 100% whole wheat for more fiber
-
Try spelt or einkorn flour for a different flavor
-
-
Vegan version
-
Use maple syrup or agave instead of honey
-
Replace butter with vegetable oil
-
Explore Pinterest boards for inspiration on creative variations.
11. Frequently Asked Questions (FAQs)
Can I use quick oats instead of rolled oats?
Yes, but the texture may be softer and slightly less chewy.
What makes homemade bread soft and fluffy?
Proper kneading, proofing, and the inclusion of fat like oil or butter.
Can I freeze homemade honey oat bread?
Absolutely. Slice before freezing for easy access.
Why is my homemade sandwich bread dense?
Usually due to under-kneading, inactive yeast, or insufficient rise time.
How long can I store homemade bread?
Up to 5 days at room temperature; up to 3 months in the freezer.
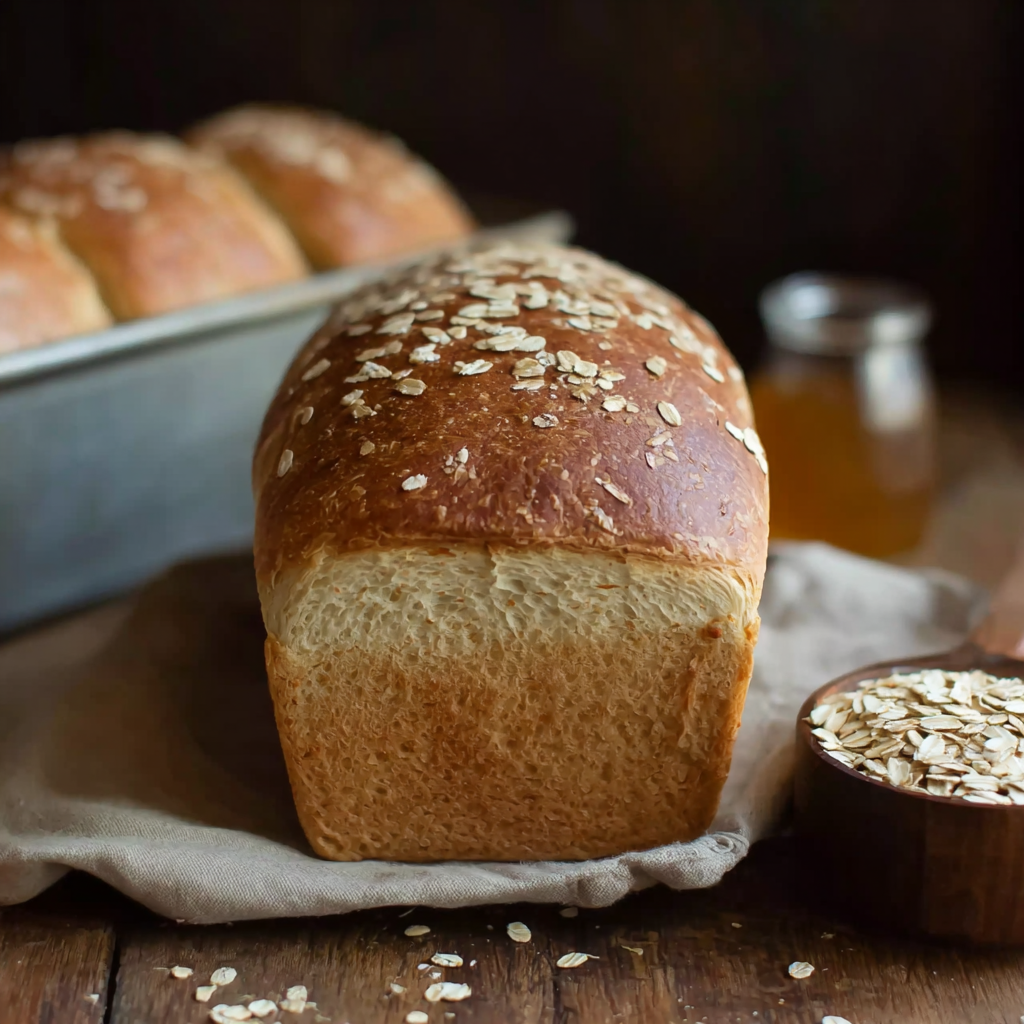
Big Batch Honey Oat Bread: Soft Homemade Sandwich Loaves for Meal Prep

This big batch honey oat bread is soft, mildly sweet, and designed for meal prep. With four golden loaves per recipe, it’s perfect for sandwiches, toast, or snacking. The rolled oats give it heartiness, while honey and oil ensure a moist, tender crumb. It’s a reliable, family-friendly bread that stores and freezes beautifully.
- Author: Clara
Ingredients
- 4 cups old-fashioned rolled oats
- 4 cups boiling water
- 2 tablespoons salt
- 2 cups warm water (about 110°F)
- 2 tablespoons active dry yeast
- 1/2 cup honey
- 1/2 cup vegetable oil or melted butter
- 12 to 13 cups all-purpose flour (or a mix of whole wheat and all-purpose)
Instructions
- In a large bowl, pour the boiling water over the oats and salt. Stir and let sit for about 30 minutes to cool and soften.
- In a separate bowl, combine warm water and yeast. Let it sit for 5–10 minutes until foamy.
- Stir honey and oil into the oat mixture once it’s lukewarm.
- Add the yeast mixture to the oats and stir to combine.
- Begin adding flour, 1 cup at a time, stirring after each addition. Once the dough becomes too stiff to stir, turn it out onto a floured surface.
- Knead the dough for about 8–10 minutes, adding flour as needed until the dough is smooth and elastic.
- Place the dough in a greased bowl, cover, and let rise in a warm place until doubled in size, about 1 hour.
- Punch down the dough and divide it into 4 equal portions. Shape each into a loaf and place into greased loaf pans.
- Cover and let rise again until the dough crowns over the top of the pans, about 30–45 minutes.
- Preheat the oven to 350°F (175°C).
- Bake the loaves for 30–35 minutes, or until golden brown and they sound hollow when tapped.
- Remove from pans and cool on wire racks before slicing.
Notes
-
Ensure oats cool completely before mixing in yeast to avoid killing it.
-
Use a thermometer to verify water temperature (110°F) for yeast activation.
-
Knead dough thoroughly to ensure a soft, structured loaf.
-
Slice and freeze loaves to make meal prep easier throughout the week.
-
Experiment with whole wheat flour or savory add-ins for variety.