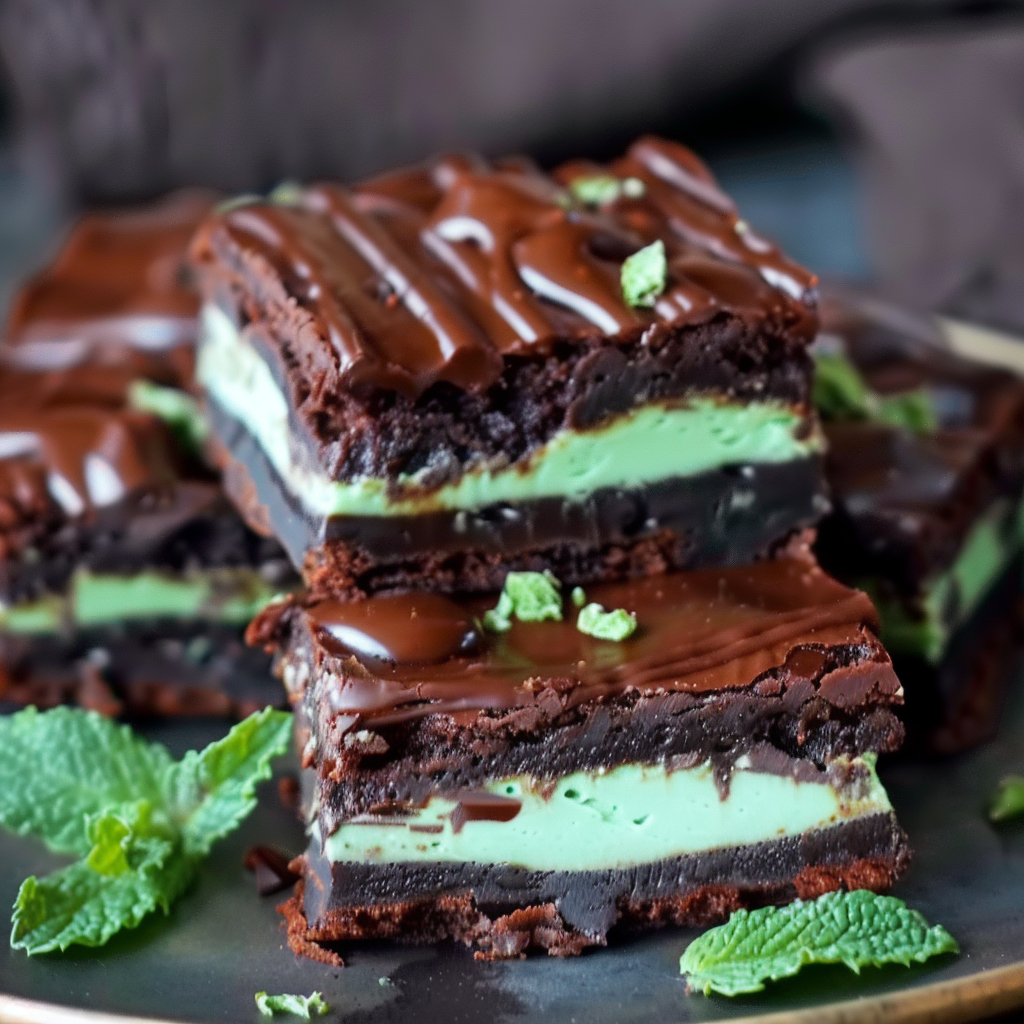
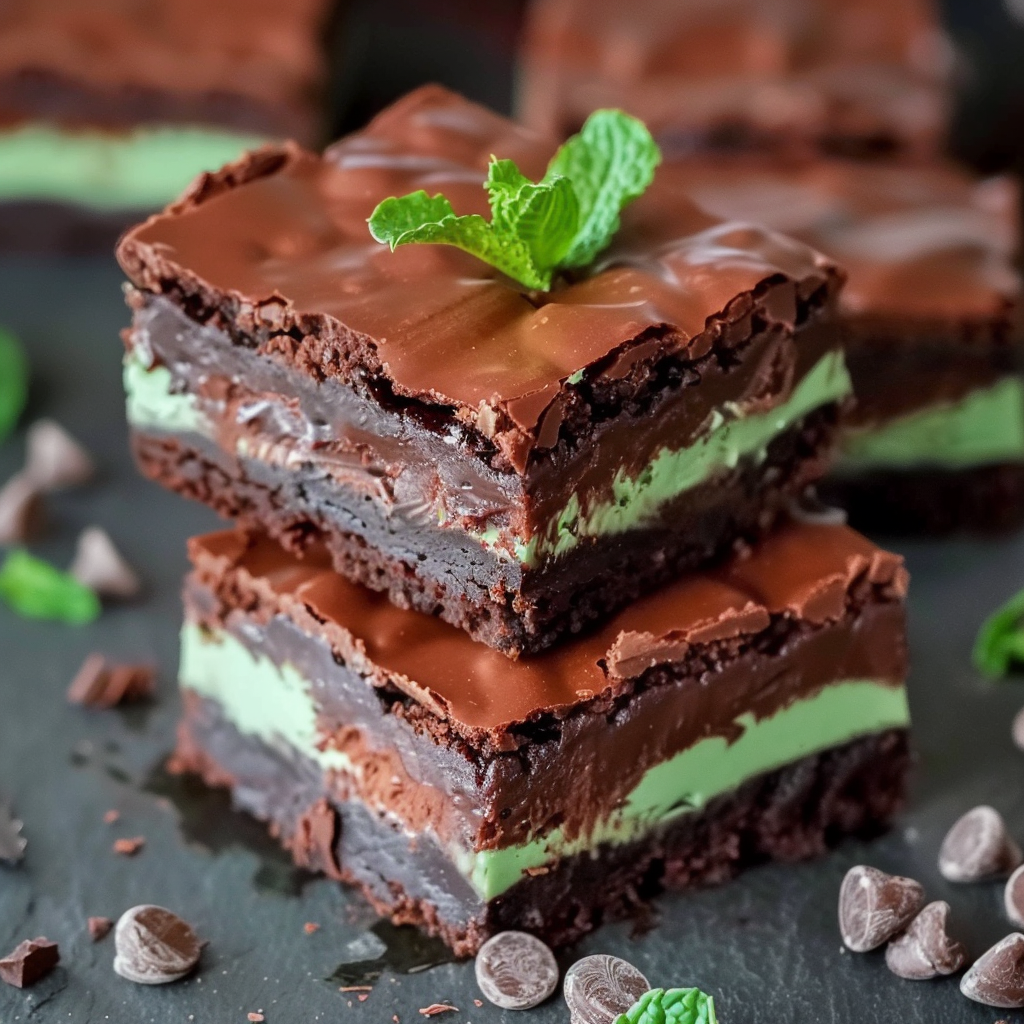
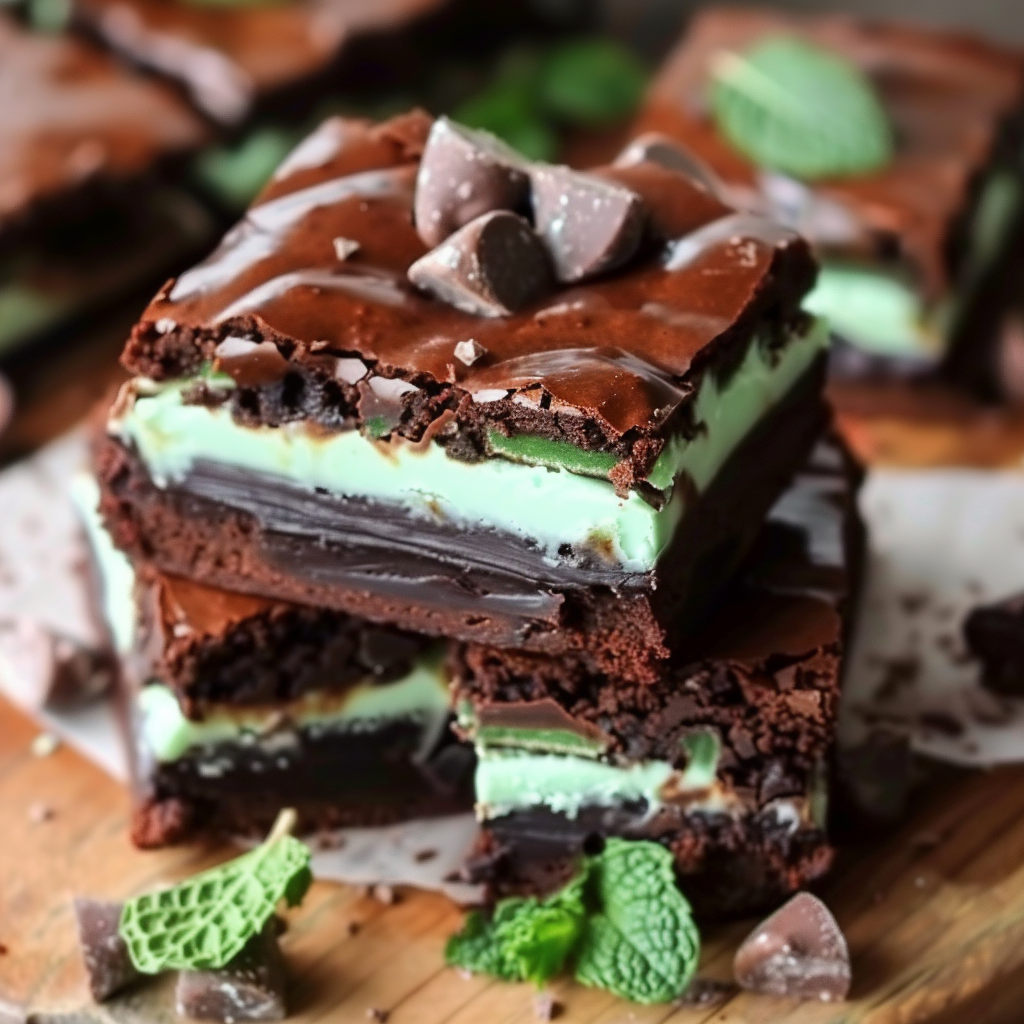
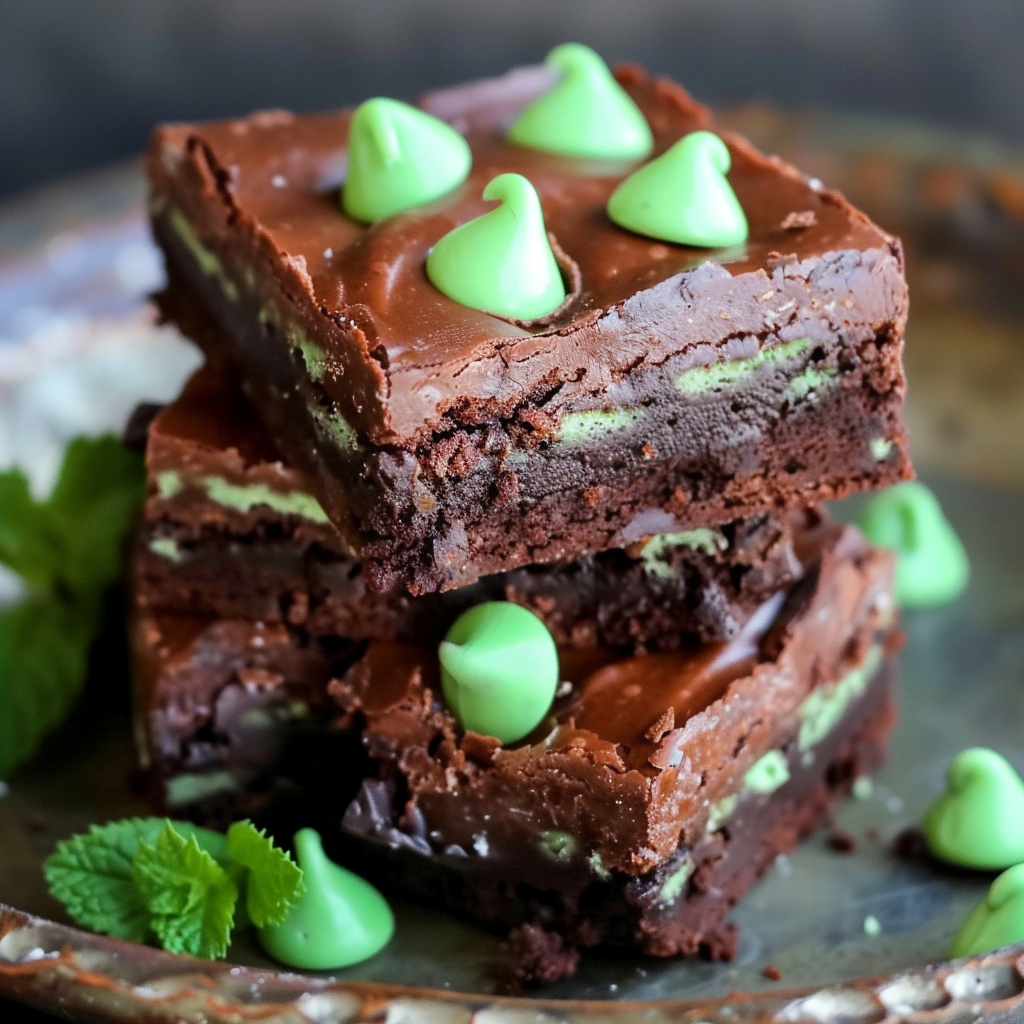
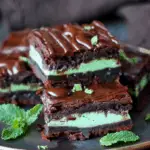
Mint Brownies with Chocolate Frosting
Few desserts offer the perfect blend of richness and freshness like mint brownies with chocolate frosting. This decadent treat delivers three irresistible layers: a fudgy chocolate brownie base, a creamy peppermint frosting, and a smooth chocolate ganache topping. Whether you’re baking for the holidays, a birthday, or a cozy night in, these brownies are an ideal way to satisfy both chocolate and mint lovers.
These layered mint brownies bring texture, flavor, and visual appeal to the table. The dense and moist brownie base contrasts beautifully with the airy mint layer, while the final chocolate coating adds a professional, glossy finish. For bakers seeking a high-impact dessert with simple ingredients and easy steps, this recipe checks all the boxes. Not only do they taste divine, but they slice beautifully for parties or gifting.
Incorporating essential elements like cocoa powder and peppermint extract, these brownies are more than just another variation—they’re a celebration of classic flavors with a refined twist. Learn more about the role of cocoa powder in baking and how it influences the rich taste and texture of these treats. Meanwhile, peppermint extract adds the signature coolness, balancing the sweetness and richness of the dessert—explained further in this link to peppermint extract.
What makes this recipe stand out is not just the taste, but the harmony of flavors and ease of execution. It’s perfect for beginners who want a guaranteed hit, as well as for seasoned bakers experimenting with holiday tray bakes. For presentation inspiration, check out holiday dessert tray ideas that feature mint chocolate desserts. Want to take your brownie aesthetic even further? Explore brownie presentation tips to enhance the visual appeal of your batch.
From fudge-like bases to peppermint-swirled centers, mint brownies with chocolate frosting are an indulgent, yet surprisingly simple dessert that everyone will love.
What Makes These the Best Mint Brownies?
These mint brownies with chocolate frosting stand out because they strike a rare balance between richness, freshness, and visual appeal. Each layer plays a crucial role in delivering a complete dessert experience. The brownie base is dense and moist with a crackly top — the hallmark of a perfectly baked brownie. It creates a sturdy foundation for the luscious mint frosting and the smooth chocolate glaze on top.
What elevates this recipe above others is the layering technique, which ensures clean cuts and distinct sections of flavor. The peppermint layer isn’t overpowering—it offers just enough cool, minty contrast to complement the deep chocolate notes. This is largely thanks to the proper use of peppermint extract, which you can learn more about in this Wikipedia guide on peppermint. It explains the botanical and culinary uses of peppermint and how it enhances desserts like this one.
The final chocolate topping acts like a ganache but is simpler to make. It adds a glossy, professional finish that makes these brownies visually striking. To understand why the texture is so satisfying, consider how the fudge-like consistency is created through precise ingredient ratios. Explore more about this in the fudge Wikipedia entry to see how sugar crystallization plays a role in achieving a rich, smooth consistency.
Another reason these are considered the best mint brownies is their versatility. You can cut them into clean squares for a holiday tray or serve them slightly warm with ice cream for a more indulgent treat. Pinterest is filled with mint chocolate dessert inspiration, offering ideas for customization and decoration.
Lastly, the brownies are not overly sweet. The semi-sweet chocolate used in the glaze provides a deeper chocolate note without overwhelming the palate. Learn more about different types of chocolate and their role in desserts from the baking chocolate Wikipedia page. It highlights how different chocolate types impact flavor and texture in layered recipes like this one.
Key Ingredients Breakdown
Each component in these mint brownies with chocolate frosting contributes to the final taste, texture, and structure. Understanding the function of each ingredient ensures consistent results and helps you make confident substitutions if needed. Let’s break down what makes this recipe so successful from top to bottom.
Brownie Layer Ingredients:
-
Unsalted butter (1 cup, melted): Provides richness and creates a fudgy texture. Using melted butter instead of creamed gives a denser base.
-
Granulated sugar (2 cups): Sweetens and helps form the glossy, crackly crust on top.
-
Eggs (4 large): Bind the ingredients and add moisture. Eggs also contribute to that signature chewiness.
-
Vanilla extract (1 teaspoon): Enhances chocolate flavor by balancing bitterness.
-
All-purpose flour (1 cup): Offers structure while keeping the texture tender.
-
Unsweetened cocoa powder (1 cup): The foundation of chocolate flavor. You can learn more about how cocoa solids affect taste and texture in baking from the cocoa powder Wikipedia page.
-
Salt (½ teaspoon): Balances sweetness and boosts chocolate flavor.
Together, these ingredients create a fudgy, chewy brownie base with a slight crisp on the surface—ideal for supporting the layers above. If you’re planning a small batch version or need a tweak for dietary restrictions, check out small batch baking tips on Pinterest.
Mint Layer Ingredients:
-
Unsalted butter (½ cup, softened): Creates a creamy base for the frosting.
-
Powdered sugar (2 cups): Provides a smooth, sweet structure that firms up when chilled.
-
Milk (2 tablespoons): Loosens the frosting to the right consistency.
-
Peppermint extract (1 teaspoon): Adds that signature coolness without overpowering. Learn more about its culinary uses in the peppermint extract Wikipedia article.
-
Green food coloring (optional): Gives the mint layer a visual cue that adds to its appeal. Natural alternatives like spinach powder or matcha can be used for a more organic look.
This middle layer is fluffy and light, offering a refreshing contrast to the dense brownie. It’s customizable—adjust the peppermint intensity or skip the coloring based on preference.
Chocolate Topping Ingredients:
-
Semi-sweet chocolate chips (1 cup): Offer a balanced chocolate flavor that isn’t too sweet. These melt smoothly when combined with butter.
-
Unsalted butter (½ cup): Ensures a glossy finish and prevents the chocolate from hardening too much. This creates a ganache-like topping that slices cleanly.
To master the melting process for a smooth chocolate layer, the double boiler technique is highly recommended. This method gently melts chocolate to prevent burning and produces a satiny finish.
Each layer is thoughtfully constructed to contrast and complement the others. The result? Mint brownies that look as good as they taste and deliver a bite of richness, coolness, and indulgence in every square.
Achieving a perfectly fudgy brownie base is essential for these mint brownies to work. The texture must be dense, rich, and moist—not cakey. While the ingredient list sets the foundation, it’s the method that locks in that signature chew. Follow these tips to master the first and most important layer.
1. Use Melted Butter Instead of Creamed Butter
Melted butter gives brownies a denser, more fudge-like consistency than creamed butter, which incorporates air and leads to a more cake-like result. When whisked with sugar, the butter helps create that shiny, crackly top that makes brownies visually appealing and texturally unique.
2. Mix Sugar and Eggs Thoroughly
After combining butter and sugar, adding eggs one at a time and whisking until the mixture becomes pale and thick creates a stable emulsion. This step also helps develop structure and a chewy texture. Over-mixing here isn’t a concern, but once flour is added, mix only until just combined.
3. Sift the Dry Ingredients
To prevent lumps and ensure even distribution of cocoa powder, salt, and flour, sift them before adding to the wet mixture. Cocoa powder is known to clump easily, and proper sifting avoids dry patches in the batter. Learn more about the characteristics of cocoa solids in the cocoa powder Wikipedia page to better understand their role in texture and flavor.
4. Avoid Overmixing Once Flour Is Added
Once the dry ingredients are folded in, stir just until there are no visible streaks of flour. Overmixing at this stage develops gluten, which leads to a tougher, cake-like texture rather than the dense, moist crumb we’re aiming for.
5. Bake at the Right Temperature and Time
Preheat your oven to 350°F (175°C) and bake the brownie layer for 25–30 minutes. Do not overbake—insert a toothpick into the center and look for moist crumbs rather than a clean toothpick. This indicates the center is set but still soft.
If your brownie edges are pulling away from the pan, it’s a sign they’re done. The center will continue cooking slightly as it cools. For precision and better texture consistency, consider using an oven thermometer.
6. Cool Completely Before Adding the Mint Layer
Patience is key—adding the mint layer while the brownie is still warm will cause it to melt. Allow the brownies to cool completely in the pan before proceeding. This ensures your mint buttercream sits neatly and doesn’t mix into the base.
Mastering these steps guarantees a fudgy, stable foundation that perfectly balances the creamy mint and glossy chocolate layers above. For bakers working with smaller portions, Pinterest offers excellent small batch baking tips that help maintain quality even when downsizing the recipe.
Step-by-Step: Making the Mint Buttercream Layer
The mint buttercream layer is what gives these brownies their signature cooling effect and bright contrast to the rich base. It should be light, fluffy, and stable enough to hold the top chocolate glaze without melting or shifting. Here’s how to get it just right.
1. Start with Room Temperature Butter
Use unsalted butter, softened to room temperature. This ensures the frosting beats up smoothly without lumps. Cold butter won’t mix properly, and melted butter will result in a greasy, unstable frosting.
2. Beat Until Creamy and Light
Using a stand or hand mixer, beat the butter until it turns pale and fluffy. This aeration helps the frosting stay light and easy to spread.
3. Add Powdered Sugar Gradually
Slowly add powdered sugar (also called icing sugar), mixing between each addition. This helps avoid clumping and gives you better control over consistency.
4. Adjust with Milk and Peppermint Extract
Add milk a little at a time to loosen the frosting to a spreadable texture. Incorporate the peppermint extract carefully—start with the listed amount, then adjust to taste. For those interested in how peppermint enhances desserts, the peppermint Wikipedia page gives a detailed look at its flavor compounds and culinary uses.
5. Add Green Coloring (Optional)
If desired, add a drop or two of green food coloring for that classic mint dessert look. For a natural option, matcha or spinach powder can be used in small amounts. Check mint chocolate dessert ideas for color inspiration.
6. Spread Evenly and Chill
Once mixed, gently spread the frosting over the cooled brownie layer in an even, level sheet. Then, place the pan in the refrigerator for at least 30 minutes. This helps the buttercream firm up and hold its shape when you add the chocolate glaze.
This layer should feel smooth, sweet, and refreshing—never runny or too stiff. The chilled structure ensures clean layers and a perfect bite every time.
Achieving the Silky Chocolate Frosting Layer
The final chocolate topping is what visually seals the deal and adds an extra layer of indulgence. It’s simple but must be done correctly to get a smooth, glossy finish without cracking or separating.
1. Use the Right Chocolate and Butter Ratio
This glaze uses semi-sweet chocolate chips and unsalted butter. The butter prevents the chocolate from hardening into a brittle shell and keeps it sliceable. For background on different chocolate types, visit the baking chocolate Wikipedia entry to understand why semi-sweet is best here.
2. Melt Gently for a Glossy Finish
Combine chocolate chips and butter in a heatproof bowl and melt them together. Use a double boiler technique or microwave in short bursts, stirring often. This prevents the chocolate from seizing or becoming grainy.
3. Let It Cool Slightly Before Pouring
Allow the melted chocolate mixture to cool for 5–7 minutes. Pouring hot chocolate onto the chilled mint layer can cause melting or mixing of layers.
4. Spread Evenly and Chill Again
Pour the cooled chocolate over the chilled mint layer and spread it out evenly with an offset spatula. Return the entire pan to the refrigerator until the top is fully set—at least 1 hour.
This topping forms a clean, ganache-like finish that slices beautifully and enhances both the flavor and presentation. For advanced presentation ideas, explore brownie presentation tips for professional finishes.
Layering and Chilling for Best Results
Proper layering and chilling are what turn this simple dessert into a showstopper. Each step builds on the last, and rushing the process can cause the layers to smudge or collapse.
1. Cool Each Layer Before Adding the Next
Let the brownie base cool completely before adding the mint layer. The same applies before pouring the chocolate topping—each layer needs to firm up for at least 30 minutes.
2. Chill Between Steps
Use refrigeration to your advantage. Cold layers hold their shape and allow for even spreading. If you’re preparing for a special occasion, you can make the layers over the course of a day or two.
3. Clean Cuts Matter
Once all layers are chilled and firm, use a sharp knife dipped in hot water to slice the brownies. Wipe the knife between each cut for those picture-perfect squares you see on Pinterest.
Following these layering tips ensures each bite has distinct, beautiful layers of fudgy brownie, creamy mint, and silky chocolate. It also helps your brownies travel and store better, making them ideal for events and gifts.
Recipe Variations You’ll Love
These mint brownies are endlessly customizable. Whether you’re looking to change the flavor, make a healthier version, or add a twist, here are a few delicious variations:
-
Thin Mint-Inspired Brownies: Add crushed Thin Mint cookies or other chocolate-mint cookies into the mint layer for crunch and extra mint flavor.
-
Vegan Mint Brownies: Use plant-based butter, dairy-free milk, and flax eggs. Choose vegan chocolate chips for the topping.
-
Double Chocolate Mint Swirl: Mix some of the mint buttercream into the brownie batter before baking for a marbled effect.
-
Andes Mint Chocolate Brownies: Fold chopped Andes Mints into the mint layer or sprinkle them over the chocolate topping before it sets.
These variations let you personalize the flavor profile while keeping the layered look. For more inspiration, browse mint chocolate dessert recipes on Pinterest.
Serving Suggestions and Pairings
Serve your mint brownies in a way that matches the occasion or season. Here are a few easy ways to elevate presentation and enjoyment:
-
Chilled or Room Temperature: For clean layers and firmer texture, serve cold. For a softer bite, let them sit at room temperature for 15 minutes.
-
With Ice Cream: Vanilla or chocolate ice cream pairs beautifully with the mint-chocolate profile.
-
Holiday Themed: Add festive sprinkles, edible glitter, or crushed candy canes during the holidays. For inspiration, explore holiday dessert tray ideas to plan your dessert layout.
-
Coffee or Hot Chocolate Pairing: The rich texture of these brownies pairs well with a hot drink, enhancing the chocolate-mint balance.
Storage Tips and Freezing Instructions
Proper storage is key to preserving flavor and texture. These brownies hold up well if stored correctly:
-
Refrigeration: Store in an airtight container in the fridge for up to 5 days. Keep parchment paper between layers if stacking.
-
Freezing: Wrap each brownie tightly in plastic wrap, then foil. Place in a freezer-safe container and freeze for up to 2 months.
-
Thawing: Let frozen brownies sit in the fridge overnight or at room temperature for a few hours. Avoid microwaving to keep layers intact.
These tips ensure your mint brownies with chocolate frosting stay fresh, flavorful, and presentable—whether you’re serving them tomorrow or next month.
Troubleshooting Common Problems
Even experienced bakers can run into issues. Here’s how to fix the most common problems:
-
Cakey Brownies Instead of Fudgy: You may have overmixed the batter or added too much flour. Stick to the precise measurements and mix only until combined.
-
Mint Frosting Too Runny: The butter may have been too soft or warm. Chill the frosting for 10–15 minutes before spreading.
-
Chocolate Topping Cracked: This happens if the topping was poured while hot or if the brownies were sliced straight from the fridge. Let the top cool slightly before slicing or use a warm knife.
FAQs: People Also Ask
What is the best way to cut layered brownies cleanly?
Use a long, sharp knife dipped in hot water. Wipe the blade clean after each cut to maintain sharp, tidy edges.
Can I use peppermint oil instead of peppermint extract?
Yes, but peppermint oil is much stronger. Use ¼ teaspoon of oil in place of 1 teaspoon of extract. Adjust to taste carefully.
Why did my chocolate frosting turn grainy?
Overheating chocolate or introducing moisture can cause graininess. Melt slowly using a double boiler and stir until smooth.
How strong is the mint flavor in these brownies?
It’s balanced—not overpowering. You can increase or decrease the peppermint extract to suit your taste. Start small, then adjust as needed.
Can I make mint brownies ahead of time?
Absolutely. Make them up to 2 days in advance and store in the fridge. For longer storage, freeze and thaw as needed.
Are mint brownies suitable for kids?
Yes, just ensure the mint flavor isn’t too strong and that there are no allergens like nuts. Skip the food coloring if desired.
Best Mint Brownies with Chocolate Frosting
These Mint Brownies with Chocolate Frosting are a decadent, three-layered dessert featuring a rich, fudgy brownie base, a fluffy peppermint buttercream center, and a glossy chocolate topping. Perfect for holidays, parties, or casual indulgence, each square delivers a harmonious bite of cool mint and deep chocolate. Easy to prepare with everyday ingredients, these brownies are as visually stunning as they are delicious.
- Author: Clara
Ingredients
For the brownie layer:
- 1 cup unsalted butter, melted
- 2 cups granulated sugar
- 4 large eggs
- 1 teaspoon vanilla extract
- 1 cup all-purpose flour
- 1 cup unsweetened cocoa powder
- ½ teaspoon salt
For the mint layer:
- ½ cup unsalted butter, softened
- 2 cups powdered sugar
- 2 tablespoons milk
- 1 teaspoon peppermint extract
- Green food coloring (optional)
For the chocolate topping:
- 1 cup semi-sweet chocolate chips
- ½ cup unsalted butter
Instructions
Preheat your oven to 350°F (175°C) and grease a 9×13-inch baking pan.
In a large bowl, whisk together melted butter and sugar. Add eggs and vanilla, mixing until smooth.
Sift in flour, cocoa powder, and salt. Stir until fully combined.
Pour the batter into the prepared pan and spread evenly. Bake for 25–30 minutes, or until a toothpick inserted comes out with moist crumbs. Let cool completely.
For the mint layer, beat softened butter until creamy. Add powdered sugar, milk, peppermint extract, and food coloring if using. Beat until light and fluffy.
Spread the mint mixture evenly over the cooled brownies. Place in the refrigerator to chill for 30 minutes.
For the chocolate topping, melt chocolate chips and butter together until smooth. Let it cool slightly, then pour over the mint layer and spread evenly.
Refrigerate until the chocolate is set. Slice and serve.
Notes
-
For clean layers, chill brownies between each step.
-
Use high-quality cocoa and chocolate for best results.
-
Adjust peppermint extract to your taste—start with less and build up.
-
Optional: Add crushed mint candies or chocolate chips for texture.
-
Best served chilled or at room temperature with coffee or hot chocolate.