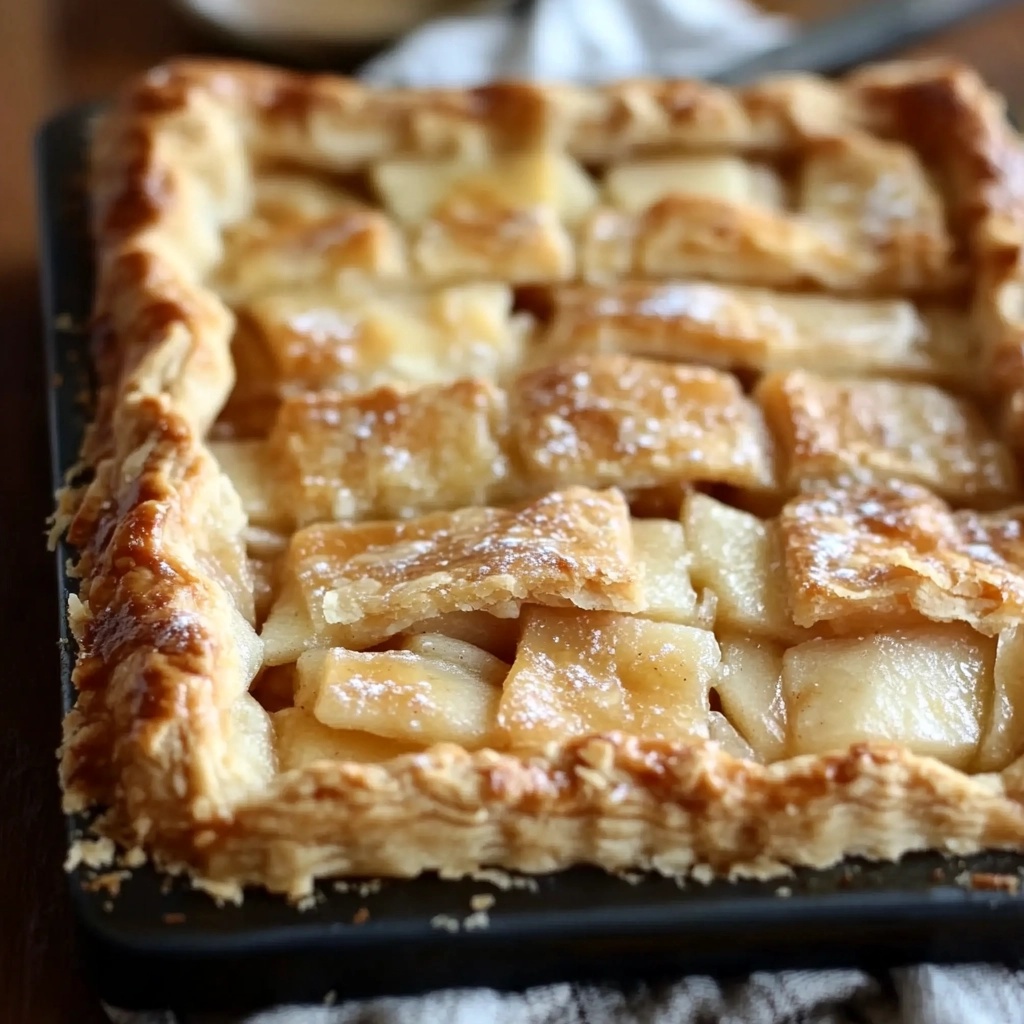
Apple slab pie is a delicious twist on the classic apple pie, offering all the rich flavors of the traditional dessert but in a larger, more shareable format. Whether you’re preparing for a family dinner, holiday gathering, or a potluck event, this recipe will help you create a dessert that’s easy to make, perfect for serving, and sure to please a crowd. Unlike a traditional apple pie, which is typically round and serves 6-8 people, a slab pie is rectangular, making it much easier to cut and serve larger groups. The beauty of this dessert lies in its simplicity, while still offering all the comforting flavors of a homemade apple pie.
The key to a perfect slab pie lies in the balance of the crust and filling. A buttery, flaky crust complements the tender apples, which are spiced just right with cinnamon and nutmeg. The result is a dessert that’s not only visually impressive but also incredibly satisfying to eat. One of the reasons this apple slab pie is a crowd favorite is its versatility. Whether you prefer a more tart apple like Granny Smith or a sweet, juicy variety like Honeycrisp, this recipe can be customized to suit your taste. Plus, the generous amount of apple filling ensures each bite is filled with flavor.
If you’re searching for a way to make your next gathering extra special, this recipe for apple slab pie will definitely become a new favorite. It’s easy to prepare, requires minimal ingredients, and most importantly, it tastes incredible.
What Makes This Apple Slab Pie Special
An apple slab pie stands out because of its larger-than-life proportions and the ease with which it can be shared. Whether it’s a family reunion or a holiday celebration, making a slab pie ensures that everyone gets a slice. Unlike a traditional pie that typically serves a small group, a slab pie allows for easy serving and is great for groups of 10 or more. The beauty of this dessert is not just in its ability to serve many people, but in its crust-to-filling ratio, which is perfectly balanced for a satisfying bite every time.
What makes this apple slab pie special is its buttery crust, which is tender, flaky, and holds up beautifully under the weight of the spiced apples. The filling is a blend of sweet and tart apples, sugar, cinnamon, and nutmeg, with a hint of lemon to brighten the overall flavor. The combination of these ingredients creates a deeply comforting, classic flavor profile that people love. The dough is simple to make from scratch but incredibly effective in creating a pie crust that rivals even the most complex recipes.
If you want to elevate the flavor of this slab pie even further, consider using a combination of apples. Granny Smith apples provide a tangy kick, while Honeycrisp apples bring natural sweetness and juiciness to the filling. This mix creates a balanced flavor profile that enhances the overall experience of eating the pie.
This recipe also offers flexibility in terms of customizing the flavors. If you want a sweeter pie, you can increase the amount of sugar or add a touch of caramel to the filling. For a more aromatic flavor, a pinch of ginger or cloves can be added to the mix. Another popular variation is to sprinkle a little coarse sugar on top of the crust to give it a slight crunch and added sweetness. These small tweaks allow you to personalize your apple slab pie, ensuring it fits your preferences perfectly.
In addition to being delicious, apple slab pie is relatively easy to prepare. The recipe requires minimal hands-on time, and the process itself is simple, making it a great choice for both novice and experienced bakers. The large, rectangular format makes assembly straightforward, and you don’t have to worry about intricately designing a pie crust to fit a round pan. Instead, you can focus on perfecting the filling and the overall flavor.
For those looking to make a larger dessert without the fuss of individual servings, the apple slab pie is the perfect solution. It’s the ultimate comfort food, and its size makes it ideal for events where you want to treat a large number of people without the hassle of making several smaller pies. With this apple slab pie, you’ll impress your guests while serving them a slice of comfort and joy that everyone will enjoy.
Learn more about the history of pie and how this classic dessert has evolved into the modern apple slab pie.
The Ingredients for the Apple Slab Pie
Creating the perfect apple slab pie starts with using the right ingredients. The simplicity of this recipe means that you only need a handful of key items, yet each one plays a crucial role in bringing out the best flavors and textures. Here’s a breakdown of the essential ingredients for both the crust and filling.
For the Crust
The crust is the foundation of any great pie, and the right ratio of ingredients will yield a buttery, flaky texture that perfectly complements the apple filling. The ingredients you’ll need for the crust are:
-
2 ½ cups all-purpose flour: This is the main structure of your pie crust. All-purpose flour provides the perfect balance of elasticity and tenderness when mixed with the right amount of fat.
-
1 tsp salt: A pinch of salt enhances the flavors of the dough and helps balance the sweetness of the filling.
-
1 cup unsalted butter, cold and cut into cubes: Cold butter is key for creating a flaky crust. The cold fat, when cut into the flour, creates layers of butter that will expand as the pie bakes, resulting in a crispy, tender texture.
-
¼ cup granulated sugar: A small amount of sugar is added to the dough for a slightly sweet flavor that complements the apples.
-
6-8 tbsp ice water: Ice water helps bind the dough together and keeps the butter cold, which is essential for creating that flaky, melt-in-your-mouth texture.
For the Filling
The filling is the star of the apple slab pie, and it’s what makes this dessert irresistible. The combination of tart and sweet apples, spiced with cinnamon and nutmeg, will fill your kitchen with an irresistible aroma. Here’s what you’ll need:
-
6 cups apples, peeled, cored, and sliced: Granny Smith apples are often recommended for their tartness and firm texture, but you can also use Honeycrisp apples for a sweeter, juicier filling. A combination of both can provide the perfect balance of flavors.
-
¾ cup granulated sugar: This will help sweeten the apples, while still allowing the natural flavors of the fruit to shine through.
-
½ cup packed brown sugar: Brown sugar adds moisture and depth to the filling, giving it a rich, caramel-like flavor.
-
2 tbsp all-purpose flour: The flour helps thicken the filling as it cooks, ensuring that the apples release their juices without making the crust soggy.
-
1 ½ tsp ground cinnamon: Cinnamon is a classic spice that gives the pie its signature warmth and flavor.
-
¼ tsp ground nutmeg: Nutmeg adds a subtle, earthy flavor that complements the cinnamon and enhances the apple filling.
-
1 tbsp lemon juice: The acidity of lemon juice helps balance the sweetness of the apples, and it also prevents the apples from browning too quickly.
-
1 tbsp unsalted butter, cut into small pieces: The butter is dotted on top of the filling to add richness and ensure the apples cook evenly and remain tender.
For the Egg Wash
An egg wash is applied to the crust before baking to give it a beautiful, golden-brown color. Here’s what you’ll need for the egg wash:
-
1 egg, beaten: The egg creates a shiny, golden finish on the crust.
-
1 tbsp milk or water: This helps dilute the egg slightly, making it easier to apply evenly.
-
Coarse sugar for sprinkling (optional): A light dusting of coarse sugar adds a touch of sweetness and a slight crunch to the finished pie.
Each of these ingredients plays a key role in creating the perfect apple slab pie. When combined, they form a delicious dessert that will impress anyone who takes a bite. The balance of sweet, tart, and spicy flavors, along with the flaky crust, make this dessert a showstopper for any occasion.
If you’re interested in learning more about different types of apples and their characteristics for baking, check out this detailed guide on Apple Varieties.
Preparing the Crust
Making the perfect pie crust is essential to achieving the buttery, flaky texture that will make your apple slab pie stand out. While some may be intimidated by the idea of making dough from scratch, this simple method ensures that you’ll get the ideal texture every time. Here’s how to prepare the crust step by step:
Step 1: Combine Dry Ingredients
Start by mixing the dry ingredients together. In a large mixing bowl, combine:
-
2 ½ cups all-purpose flour
-
1 tsp salt
-
¼ cup granulated sugar
Mix these dry ingredients together so they’re evenly distributed. The sugar is especially important because it gives the crust a slight sweetness, which balances the tartness of the apples.
Step 2: Cut in the Cold Butter
Next, you’ll add the cold, cubed butter. It’s crucial that the butter stays cold throughout the process, as it contributes to the flaky texture of the pie crust. Using a pastry cutter, fork, or your hands, cut the butter into the flour mixture. You want the mixture to resemble coarse crumbs with pea-sized pieces of butter throughout. This is the step where the crust gets its flakiness, as the cold butter will melt during baking, creating steam and pockets in the dough.
Step 3: Add Ice Water
Once the butter is incorporated into the flour mixture, it’s time to add the ice water. Add 6-8 tablespoons of ice water, one tablespoon at a time, mixing gently after each addition. Stop adding water when the dough begins to come together. It’s important to avoid overworking the dough at this stage. The goal is to form the dough into a ball without it becoming too wet or sticky.
Step 4: Divide and Roll Out the Dough
Turn the dough out onto a lightly floured surface and divide it into two equal portions. Roll out one portion into a large rectangle, about 10×15 inches, making sure it’s thin but still sturdy enough to support the filling. Carefully fit the dough into a greased 9×13-inch baking dish, gently pressing the dough into the corners and edges of the pan. You can trim off any excess dough at the edges to make it neat and even.
Step 5: Chill the Dough
Once the dough is in the pan, it’s a good idea to refrigerate it for 15-20 minutes before adding the filling. Chilling the dough helps to firm it up, ensuring that the crust holds its shape during baking.
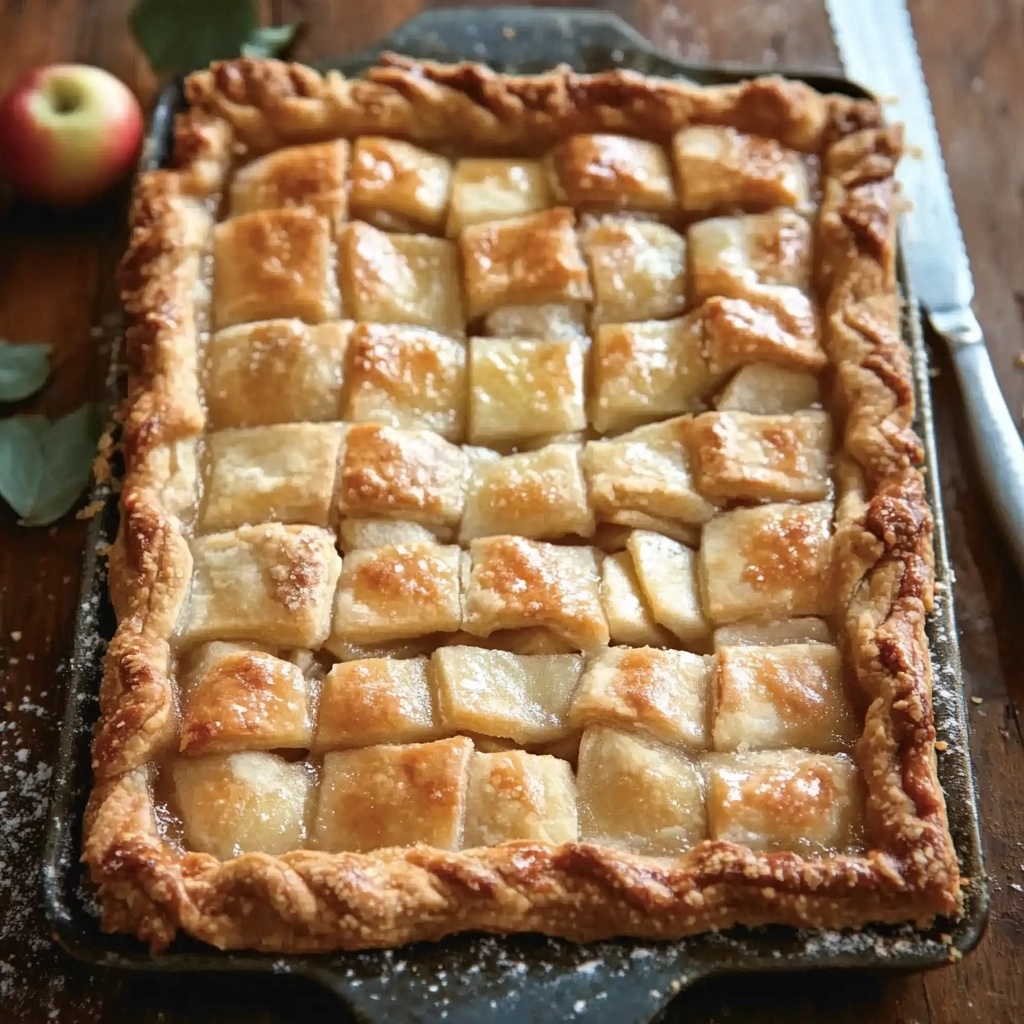
Step 6: Repeat for the Top Crust
Roll out the second portion of dough in the same manner, into a rectangle that fits over the filled pie. The top crust will be placed over the apple filling, so you’ll need to ensure it covers the entire pie. You can use the second rolled-out dough to create a lattice crust or leave it as a solid sheet of dough with a few slits cut into it to allow steam to escape during baking.
Making the Apple Filling
The apple filling is the heart of this recipe, and the key to achieving the perfect balance of sweetness, tartness, and warmth. The right combination of spices and sweeteners will complement the apples and bring out their best flavors. Here’s how to prepare the apple filling step by step:
Step 1: Prepare the Apples
Start by peeling, coring, and slicing 6 cups of apples. A combination of tart apples, such as Granny Smith, and sweet apples, like Honeycrisp, will give the filling a perfect balance of flavor and texture. Slice the apples into even, thin slices, ensuring they cook evenly. If you want a bit more texture in the filling, leave some of the apple slices thicker.
Step 2: Mix the Sugar and Spices
In a separate bowl, combine the following ingredients:
-
¾ cup granulated sugar
-
½ cup packed brown sugar
-
2 tbsp all-purpose flour
-
1 ½ tsp ground cinnamon
-
¼ tsp ground nutmeg
-
1 tbsp lemon juice
Toss the apples in this mixture until they are evenly coated. The sugar and flour will work together to create a thick syrup while the apples bake, ensuring that your filling isn’t too runny. The cinnamon and nutmeg will infuse the apples with that quintessential apple pie flavor, while the lemon juice adds a bit of acidity to balance the sweetness.
Step 3: Dot with Butter
Once the apples are coated in the sugar and spice mixture, take 1 tbsp of unsalted butter and cut it into small pieces. Dot the butter on top of the apple filling. This will help enrich the filling, adding a layer of richness that perfectly complements the tender apples.
Assembling the Apple Slab Pie
Now that you’ve prepared both the crust and filling, it’s time to assemble your apple slab pie. This is where all the elements come together, and you’ll see your delicious dessert start to take shape. Here’s how to put everything together:
Step 1: Layer the Bottom Crust
After chilling the bottom layer of dough, spread the apple filling evenly over the crust in your prepared 9×13-inch baking dish. Be sure to distribute the apples evenly so that each bite has a perfect amount of filling.
Step 2: Add the Top Crust
Roll out the second portion of dough to fit over the apple filling. You can either cover the pie with a solid top crust or create a lattice pattern for a more decorative look. If you opt for a solid crust, be sure to cut a few slits in the top to allow steam to escape while baking.
Step 3: Crimp the Edges
Once the top crust is in place, trim any excess dough and crimp the edges together to seal the pie. This will help prevent the filling from leaking out during baking and give the pie a neat, polished look.
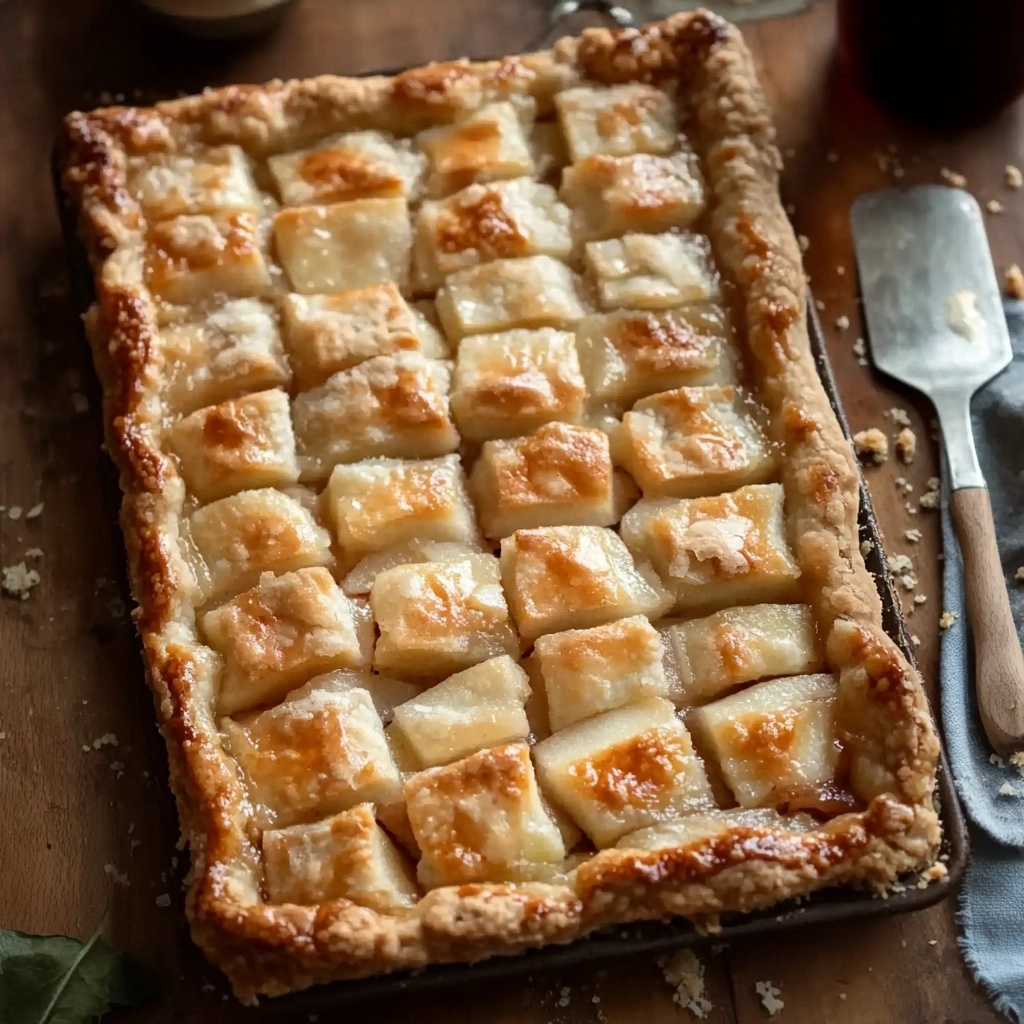
Step 4: Apply the Egg Wash
To give the crust a beautiful golden sheen, brush the top crust with the egg wash. To make the egg wash, whisk together 1 beaten egg with 1 tbsp of milk or water. Brush the mixture over the top crust, and if desired, sprinkle a little coarse sugar for added sweetness and texture.
Baking the Apple Slab Pie
Once the apple slab pie is assembled and the egg wash has been applied, it’s time to bake! The baking process is crucial for achieving the perfect golden-brown crust and tender apple filling. Follow these steps to ensure your pie turns out just right:
Step 1: Preheat the Oven
Before you start baking, preheat your oven to 375°F (190°C). A well-heated oven ensures that the pie cooks evenly and that the crust becomes golden and flaky.
Step 2: Bake the Pie
Place the pie in the oven on the middle rack and bake for 45-50 minutes. Keep an eye on the pie as it bakes. The crust should turn golden brown, and the apple filling should bubble up through the slits or lattice. If the edges of the crust begin to brown too quickly, cover them with foil to prevent burning.
Step 3: Check for Doneness
The pie is done when the crust is golden and crispy, and the apples are tender. You should be able to easily insert a fork or knife into the filling, and the juices should be thickened, not runny. If the filling is still too liquidy, let the pie bake for an additional 5-10 minutes.
Step 4: Let It Cool
Once the pie is baked, remove it from the oven and allow it to cool for at least 30 minutes before serving. This cooling time allows the filling to set and makes the pie easier to slice.
How to Serve Apple Slab Pie
Now that your apple slab pie is perfectly baked, it’s time to serve! The beauty of slab pie is that it’s easy to slice and share with a large group. Here’s how to serve it:
-
Slice into squares or rectangles: Depending on your preference, slice the pie into generous squares or smaller rectangles for bite-sized servings.
-
Add a topping: This pie is delicious on its own, but you can elevate it further by adding a scoop of vanilla ice cream, a dollop of whipped cream, or a drizzle of caramel sauce. These toppings complement the spiced apple filling and buttery crust, adding richness and sweetness.
-
Serve warm or at room temperature: Apple slab pie is wonderful when served warm, but it also holds up well at room temperature. You can enjoy it the next day, and it often tastes even better as the flavors meld together.
Storing Leftovers
If you happen to have leftovers (which is unlikely, given how delicious this pie is!), it’s easy to store them:
-
At room temperature: Apple slab pie can be kept at room temperature for up to 2 days. Make sure it’s covered or wrapped tightly with plastic wrap or foil.
-
In the refrigerator: For longer storage, refrigerate leftover pie. Wrap it in plastic wrap or aluminum foil, and it will keep for up to 5 days.
-
Reheating: If you prefer your pie warm, simply reheat individual slices in the microwave for 20-30 seconds or in the oven at 350°F (175°C) for about 10 minutes, until heated through and the crust regains its crispness.
Expert Tips for Perfect Apple Slab Pie
-
Use a mix of apples: The best apple pies often combine both tart and sweet apples. A mix of Granny Smith (for tartness) and Honeycrisp (for sweetness) creates a flavor balance that’s perfect for a slab pie.
-
Don’t overwork the dough: When making the pie crust, handle the dough as little as possible to ensure a flaky texture. Overworking the dough can lead to a tough crust.
-
Keep the butter cold: Make sure the butter stays cold throughout the process. This is crucial for creating a flaky texture, as the cold butter forms layers in the dough that will puff up as it bakes.
-
Chill the dough before baking: Refrigerating the dough for at least 15-20 minutes after assembling the pie helps prevent the crust from shrinking during baking.
Variations of the Apple Slab Pie
While this classic apple slab pie recipe is absolutely delicious, you can experiment with different variations to make it your own:
-
Add caramel: For a richer flavor, try drizzling caramel sauce over the apples before adding the top crust. You could also sprinkle a bit of caramelized sugar on top for extra sweetness.
-
Incorporate nuts: For added texture and flavor, fold some chopped walnuts or pecans into the apple filling.
-
Make a lattice crust: Instead of covering the pie with a full top crust, create a lattice crust for a beautiful, rustic presentation.
-
Other fruit combinations: Don’t be afraid to get creative with the filling. Try adding pears, cherries, or even a few cranberries to the apple mixture for a twist.
FAQ (Frequently Asked Questions)
Can I use frozen pie crust for this recipe?
Yes, you can use a store-bought frozen pie crust to save time. However, homemade crusts are preferred for their texture and flavor. If using a frozen crust, make sure to follow the instructions on the package for baking.
How do I prevent the filling from being too watery?
To prevent a watery filling, make sure to use firm apples that hold up well during baking, like Granny Smith or Honeycrisp. Additionally, the flour in the filling helps to thicken the juices released by the apples. Avoid overfilling the pie, as this can cause it to become too soggy.
Can I make this pie in advance?
Yes, you can prepare the pie in advance. You can either bake it the day before and store it in the refrigerator or freeze it before baking. If freezing, assemble the pie (but don’t bake), cover it tightly, and freeze for up to 3 months. When you’re ready to bake, let it thaw slightly before putting it in the oven.
How long does the pie last?
Apple slab pie will last for about 2 days at room temperature and up to 5 days in the refrigerator. If you want to keep it longer, you can freeze individual slices for up to 3 months.
What other fruits can I use in a slab pie?
While apple slab pie is a classic, you can experiment with other fruits. Pears, peaches, plums, or cherries all work wonderfully in slab pies. Just be sure to adjust the sugar levels depending on the sweetness or tartness of the fruit you use.
PrintApple Slab Pie Recipe: The Perfect Dessert for Every Occasion

This Apple Slab Pie recipe is the perfect way to make the classic apple pie in a large, shareable format that’s perfect for family gatherings, holidays, or potlucks. With a buttery, flaky crust and a filling made from tender, spiced apples, this pie is both easy to make and incredibly satisfying. Whether you’re a novice baker or an experienced one, this recipe will guide you to creating a beautiful and delicious dessert that everyone will love.
- Author: Clara
Ingredients
For the crust:
- 2 ½ cups all-purpose flour
- 1 tsp salt
- 1 cup unsalted butter, cold and cut into cubes
- ¼ cup granulated sugar
- 6–8 tbsp ice water
For the filling:
- 6 cups apples, peeled, cored, and sliced (Granny Smith or Honeycrisp work well)
- ¾ cup granulated sugar
- ½ cup packed brown sugar
- 2 tbsp all-purpose flour
- 1 ½ tsp ground cinnamon
- ¼ tsp ground nutmeg
- 1 tbsp lemon juice
- 1 tbsp unsalted butter, cut into small pieces
For the egg wash:
- 1 egg, beaten
- 1 tbsp milk or water
- Coarse sugar for sprinkling (optional)
Instructions
Preheat your oven to 375°F (190°C).
To make the crust, combine the flour and salt in a large mixing bowl. Add the cold butter and use a pastry cutter or fork to cut it into the flour until the mixture resembles coarse crumbs. Add the granulated sugar and stir to combine.
Gradually add the ice water, one tablespoon at a time, mixing until the dough begins to form. Turn the dough out onto a lightly floured surface and divide it into two equal parts. Roll out one part into a large rectangle, about 10×15 inches, and carefully fit it into a greased 9×13-inch baking dish.
For the filling, place the sliced apples in a large bowl. In a separate bowl, mix together the granulated sugar, brown sugar, flour, cinnamon, nutmeg, and lemon juice. Toss the apple slices in the sugar mixture until evenly coated.
Pour the apple mixture into the prepared crust, spreading it evenly. Dot the top with small pieces of butter.
Roll out the second portion of dough and place it over the apple filling. Trim any excess dough and crimp the edges to seal. Cut a few slits in the top to allow steam to escape during baking.
For the egg wash, whisk together the beaten egg and milk (or water) and brush it over the top of the pie. Sprinkle with coarse sugar if desired.
Bake for 45-50 minutes or until the crust is golden brown and the apples are tender. If the crust begins to brown too quickly, cover the edges with foil and continue baking.
Allow the pie to cool for at least 30 minutes before serving.
Notes
-
Apples: Use a mix of tart and sweet apples for the best flavor balance. Granny Smith and Honeycrisp are ideal.
-
Butter: Make sure the butter stays cold throughout the process to achieve a flaky pie crust.
-
Spices: Feel free to experiment with additional spices like ginger or cloves if you want a more complex flavor.
-
Storage: This pie keeps well for several days, making it perfect for leftovers, and it can be frozen for longer storage.