1.Apple Bundt Cake
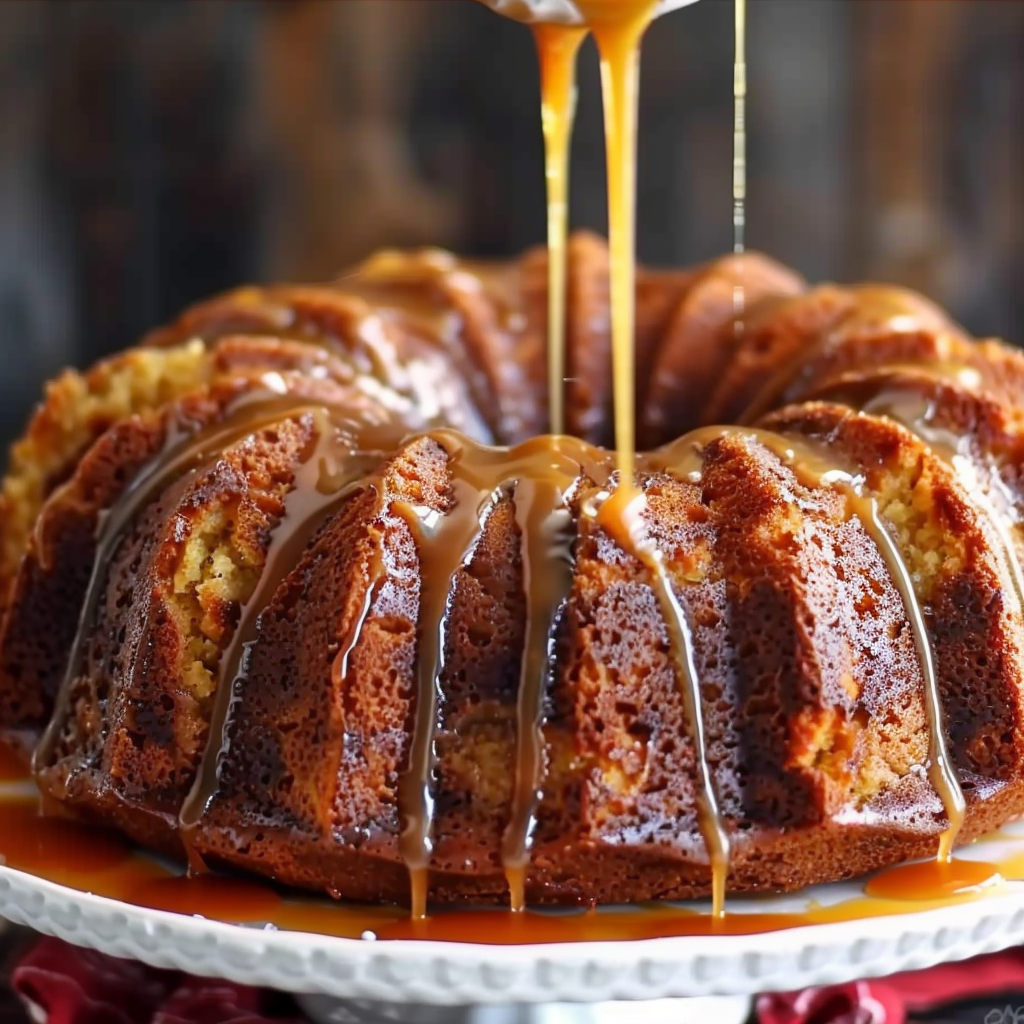
As crisp air and changing leaves signal the arrival of fall, apple bundt cake emerges as one of the most comforting and crowd-pleasing desserts. This classic dessert isn’t just about apples—it’s about building layers of flavor and texture that come together in a bakery-style cake that feels like it came straight from a pastry chef’s kitchen. It’s no surprise that apple bundt cakes remain a favorite for potlucks, holidays, and cozy weekends alike.
Unlike sheet cakes or layer cakes, bundt cakes are known for their distinct ring shape and moist, dense crumb. That unique shape comes from the bundt pan, which allows for more surface area and caramelization. If you’re curious about the origin of this iconic bakeware, learn more about the history of Bundt cakes and how it gained popularity through American kitchens.
What sets this particular apple bundt cake recipe apart is its reliance on fresh apples, its flexible option for adding sour cream for extra moisture, and its finishing touch: a homemade caramel glaze. The use of fresh fruit not only delivers bold flavor but also offers a natural sweetness that elevates the entire cake. We’ll also discuss how to properly prepare your bundt pan to avoid sticking—a common issue for first-time bakers.
If you’re planning fall gatherings or brainstorming seasonal gifting ideas, this cake checks all the boxes. You’ll also find inspiration in decorative bundt cake presentations, such as these Bundt cake decoration ideas on Pinterest, which highlight how a simple cake can look absolutely stunning with just a drizzle of glaze and a bit of garnish.
With the perfect blend of comfort food charm and professional-level polish, this cake isn’t just a recipe—it’s a staple you’ll come back to year after year. Ready to bake? Let’s start with the ingredients.
2. Ingredients List – What You’ll Need
Crafting a bakery-style apple bundt cake begins with gathering the right ingredients. This recipe uses pantry staples combined with fresh seasonal produce to create a cake that’s rich in flavor and texture. From the warmth of cinnamon to the sweetness of fresh apples, every element serves a purpose.
Dry Ingredients
-
3 cups all-purpose flour – Offers structure to the cake. For a deeper understanding of how different flours impact texture, check out this comparison of cake flour vs. all-purpose flour.
-
1 teaspoon baking soda – Helps the cake rise, especially when used with acidic ingredients like sour cream or apples.
-
1 teaspoon salt – Enhances flavor and balances sweetness.
-
1 teaspoon ground cinnamon – Delivers warm, aromatic spice. Learn more about cinnamon’s origins and uses.
-
½ teaspoon ground nutmeg – Adds depth and a slightly nutty spice note.
Wet Ingredients
-
1 cup vegetable oil – Keeps the crumb moist without altering the flavor.
-
1¾ cups granulated sugar – Sweetens the batter while helping with browning.
-
3 large eggs – Bind the ingredients and add richness.
-
2 teaspoons vanilla extract – Enhances overall flavor. Discover more about vanilla extract and its culinary value.
Fresh Add-ins
-
4 cups apples (peeled and chopped) – The star of the recipe. Use baking apples like Granny Smith or Honeycrisp, which hold their shape and flavor well during baking. Refer to this guide on types of baking apples for more options.
-
1 cup chopped walnuts (optional) – Adds crunch and a hint of bitterness to contrast the sweetness.
Sour Cream Option
To make the cake even more tender, you can substitute ½ cup of the oil with ½ cup sour cream. This adds richness, improves the crumb, and gives the cake a subtle tang. If you’re unfamiliar with how sour cream interacts with baking, learn about what sour cream is and why it’s a common choice for enhancing texture.
For more fall baking ideas that incorporate sour cream, explore this Pinterest board on fall baking, which offers great seasonal inspiration for your kitchen.
Here’s a quick reference table for your convenience:
| Ingredient | Amount |
|---|---|
| All-purpose flour | 3 cups |
| Baking soda | 1 tsp |
| Salt | 1 tsp |
| Ground cinnamon | 1 tsp |
| Ground nutmeg | ½ tsp |
| Vegetable oil | 1 cup |
| Granulated sugar | 1¾ cups |
| Eggs | 3 large |
| Vanilla extract | 2 tsp |
| Apples (peeled, chopped) | 4 cups |
| Walnuts (optional) | 1 cup |
With your ingredients ready, you’re well on your way to creating a moist, flavorful, and beautifully spiced apple bundt cake. Up next, we’ll dive into why using fresh apples makes all the difference.
3. Why Use Fresh Apples?
The key to a truly memorable apple bundt cake lies in using fresh apples rather than canned pie filling or applesauce. Fresh apples bring unmatched flavor, texture, and moisture to the cake, giving it that bakery-style edge. They add natural sweetness, subtle tartness, and even a slight bite that contrasts beautifully with the soft crumb of the cake.
Canned fillings often contain added sugars and starches, which can make the cake overly sweet or gummy. In contrast, fresh apples provide moisture without overpowering the batter. This creates a more balanced dessert, especially when combined with ingredients like cinnamon, nutmeg, and vanilla extract.
When selecting apples for baking, you’ll want varieties that hold their shape and don’t become mushy. The best types of apples for bundt cake include:
-
Granny Smith – Tart and firm, perfect for balancing sweetness.
-
Honeycrisp – Juicy with a nice blend of sweet and tart.
-
Fuji – Naturally sweet and crisp, ideal for a softer apple texture.
-
Braeburn – Slightly spiced and firm, enhances the cake’s warm flavor profile.
You can read more about suitable baking apples in this detailed Wikipedia guide to culinary uses of apples.
Before adding apples to your batter, be sure to peel, core, and chop them into small, even pieces. This ensures they bake evenly and distribute well throughout the cake. Uneven pieces can result in raw apple pockets or an inconsistent crumb.
Another tip: Pat the chopped apples with a paper towel to absorb excess moisture, especially if you’re using high-water-content apples like Fuji or Gala. This prevents sogginess and keeps your cake light and fluffy.
For more visual inspiration and serving ideas using fresh apples in baking, check out this beautiful Pinterest board on giftable holiday baked goods, featuring cakes, pies, and breads perfect for the season.
By choosing fresh apples, you’re not just making a cake—you’re creating a layered, flavorful dessert that truly celebrates the essence of fall baking.
4. Preparing the Bundt Pan Properly
One of the most common challenges when baking a bundt cake is removing it from the pan in one clean piece. The intricate design of a bundt pan makes this tricky—but with proper preparation, you can prevent sticking and ensure a flawless release every time. This step is just as critical as mixing your batter or choosing the right apples.
Start by selecting a quality non-stick bundt pan with a well-defined shape. Even so, don’t rely on the non-stick coating alone—greasing thoroughly is essential. There are two reliable methods to prep your pan:
-
Butter and flour method: Coat every crevice of the pan with soft butter using a pastry brush. Then dust with flour, tapping out the excess.
-
Baking spray with flour: Use a baking spray that contains flour, like Baker’s Joy or Pam for Baking. Spray evenly, holding the can about 6 inches away from the pan.
Be especially thorough around the inner tube and detailed ridges—any missed spots can cause the cake to tear. After greasing, let the pan sit while you mix the batter. This allows the coating to settle, making it more effective when you pour in the batter.
Once the cake is baked, let it cool in the pan for 15 minutes. This cooling period allows the structure to firm up slightly and pull away from the edges. Trying to remove the cake too early or too late can cause breakage.
To release the cake:
-
Gently run a thin knife or spatula around the edges and center tube.
-
Invert the pan over a wire rack and tap it firmly but carefully.
-
If the cake resists, let it sit inverted for a few more minutes before trying again.
These tips are crucial if you want a perfectly shaped cake that’s ready for drizzling with glaze or decorating. For more on how bundt pans create their signature look and why surface area matters for baking, explore the history of Bundt cakes and their rise in popularity.
With your pan properly prepared, you’re ready to dive into the step-by-step baking process that transforms simple ingredients into a showstopping dessert.
5. Step-by-Step Instructions for the Apple Bundt Cake
Creating a bakery-style apple bundt cake from scratch is easier than you think, especially when you follow a clear, step-by-step process. This recipe walks you through every stage—from combining ingredients to baking the cake to perfection. Follow each step closely for a tender crumb, balanced flavor, and a beautiful rise.
Step 1: Preheat and Prep the Pan
Preheat your oven to 325°F (165°C). While it heats, grease your bundt pan using either butter and flour or a baking spray that contains flour. Set the pan aside.
Step 2: Mix Dry Ingredients
In a medium bowl, whisk together the following:
-
3 cups all-purpose flour
-
1 teaspoon baking soda
-
1 teaspoon salt
-
1 teaspoon ground cinnamon
-
½ teaspoon ground nutmeg
This mix forms the flavor base and structural foundation of your cake.
Step 3: Blend Wet Ingredients
In a large mixing bowl, combine:
-
1 cup vegetable oil
-
1¾ cups granulated sugar
-
3 large eggs
-
2 teaspoons vanilla extract
Mix thoroughly until the ingredients are well blended and the mixture becomes slightly pale and creamy. This helps incorporate air, which aids in rising.
Step 4: Combine Wet and Dry Mixtures
Gradually add the dry ingredients to the wet mixture in three parts, stirring just until incorporated each time. Avoid overmixing, as this can toughen the cake.
Step 5: Add Apples and Walnuts
Fold in:
-
4 cups peeled and chopped fresh apples
-
1 cup chopped walnuts (optional)
Even distribution ensures every slice includes sweet apple pieces and a crunchy texture contrast.
Step 6: Fill and Bake
Pour the batter into the prepared bundt pan. Tap the pan lightly on the counter to release any air bubbles and smooth the top with a spatula.
Place in the preheated oven and bake for 60–75 minutes, or until a toothpick inserted into the center comes out clean.
Step 7: Cool and Remove
Let the cake cool in the pan for 15 minutes, then carefully invert it onto a wire rack to cool completely before adding the glaze.
With the baking complete, your cake is now ready for its final touch—the rich, buttery caramel glaze.

6. Optional Sour Cream Variation for Extra Moisture
For an even softer and richer crumb, you can incorporate sour cream into the batter. This variation is ideal if you prefer cakes that are slightly denser yet melt-in-your-mouth moist.
To use this option:
-
Substitute ½ cup of the vegetable oil with ½ cup full-fat sour cream.
-
Blend the sour cream into the wet ingredients before adding the dry mixture.
Sour cream adds acidity, which reacts with the baking soda to produce a better rise and more tender crumb. If you’re curious about how it works, you can read more about what sour cream is and its role in baking chemistry.
You may need to add 5–10 minutes to the baking time depending on your oven and bundt pan size. Be sure to check doneness with a toothpick.
7. Common Mistakes to Avoid
Even simple recipes can go wrong without attention to detail. Here are common mistakes to avoid when baking your apple bundt cake:
-
Overmixing the batter – This develops too much gluten and makes the cake dense or rubbery. Stir only until ingredients are combined.
-
Using the wrong apple variety – Soft or overly juicy apples can create a mushy texture. Stick to firm baking apples like Granny Smith or Honeycrisp.
-
Skipping pan preparation – The intricate design of bundt pans requires thorough greasing. Always grease generously, even if using a non-stick pan.
-
Unmolding too soon or too late – Letting the cake cool for 15 minutes in the pan is the sweet spot. Less time can cause breakage; more time can cause sticking.
Avoid these pitfalls and your cake will look as good as it tastes.
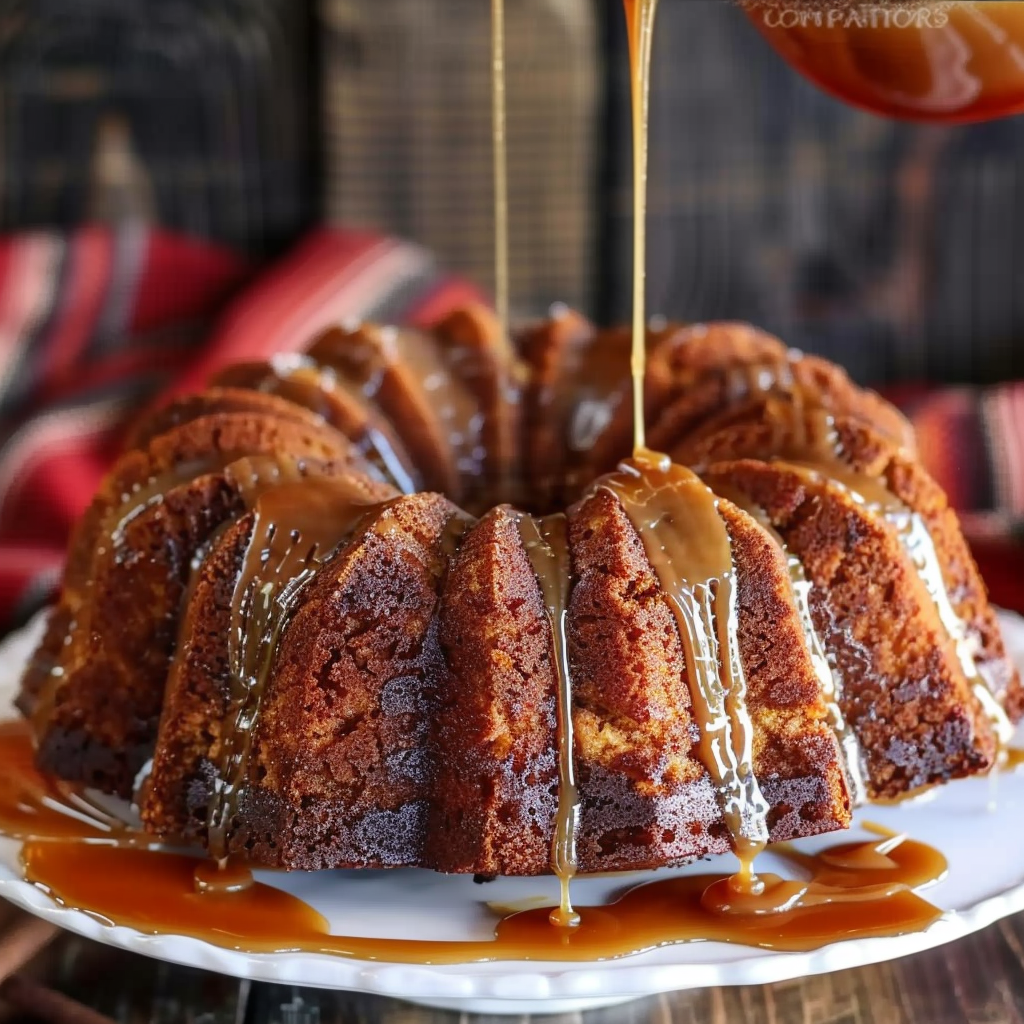
8. How to Make the Caramel Glaze (Step by Step)
This caramel glaze adds the perfect sweet, buttery finish to your cake, with a deep golden sheen and rich flavor that complements the spiced apple base. It’s quick to make and requires only a few ingredients.
Ingredients:
-
½ cup packed brown sugar
-
¼ cup butter
-
2 tablespoons milk
-
½ teaspoon vanilla extract
Instructions:
-
In a small saucepan, combine brown sugar, butter, and milk.
-
Cook over medium heat, stirring constantly, until the mixture comes to a gentle boil.
-
Boil for 1 minute, then remove from heat.
-
Stir in the vanilla extract and let the glaze cool for 2–3 minutes to thicken slightly.
-
Drizzle the glaze over the completely cooled bundt cake.
For variations, you can add:
-
A pinch of sea salt for a salted caramel twist.
-
A sprinkle of cinnamon for enhanced warmth.
Want to learn more about how caramel forms? Visit this guide on caramel for the science behind the process.
9. Serving Suggestions
This apple bundt cake is incredibly versatile and can be dressed up or served simply, depending on the occasion.
Serve it with:
-
A scoop of vanilla bean ice cream
-
A dollop of fresh whipped cream
-
A drizzle of extra glaze or caramel sauce
-
Sliced apples or cinnamon sticks for garnish
Presentation tips:
-
Use a decorative bundt pan for an elegant look.
-
Dust with powdered sugar after glazing for a festive finish.
-
For special occasions, serve on a cake stand with fall-themed decor.
Want more ideas for seasonal presentations? Browse this Pinterest board on bundt cake decoration ideas to explore creative finishing touches.
10. How to Store and Freeze Apple Bundt Cake
Proper storage ensures your apple bundt cake stays fresh, moist, and delicious for days after baking.
To store at room temperature:
-
Wrap the cooled cake tightly in plastic wrap or store it in an airtight container.
-
It will stay fresh for up to 3 days.
To refrigerate:
-
Store in an airtight container to prevent drying out.
-
Best enjoyed within 5 days.
To freeze:
-
Slice the cake and wrap each piece individually in plastic wrap, then place in a freezer-safe bag.
-
Freeze for up to 3 months.
-
Thaw at room temperature or warm slices gently in the microwave or oven.
Freezing tip: If you plan to freeze, don’t glaze the cake until after thawing to maintain the glaze’s texture and shine.
You’ll find more inspiration for make-ahead holiday treats on this Pinterest board of giftable baked goods.
11. Make Ahead Tips for Holidays & Gifting
This apple bundt cake is perfect for prepping ahead, especially for holiday gatherings or edible gifts.
Make-ahead baking tips:
-
Bake the cake 1–2 days in advance, store it wrapped in the fridge, and glaze on the day of serving.
-
The flavor actually improves after a day as the spices and apple flavor meld.
For gifting:
-
Wrap the cooled, glazed cake in cellophane and tie with ribbon.
-
Place in a gift box with a label including ingredients and storage instructions.
-
Include a note with reheating directions or serving suggestions.
This cake also ships well, making it ideal for mailing to friends and family during the holidays. For more fall gifting inspiration, visit this Pinterest board for fall baking.

12. Apple Bundt Cake FAQ – Based on “People Also Ask” on Google
What makes a Bundt cake different from a regular cake?
Bundt cakes are baked in a special ring-shaped pan that allows for even baking and a caramelized exterior. The shape also makes them ideal for glazing and serving without frosting.
What are the best apples for baking cakes?
Firm varieties like Granny Smith, Honeycrisp, Braeburn, and Fuji hold their texture and offer the best balance of sweetness and tartness.
Can I add sour cream to any cake recipe?
Yes, sour cream can be added to many cake batters to boost moisture and richness. It also reacts with leavening agents like baking soda for a better rise.
How do I keep my Bundt cake from sticking to the pan?
Thoroughly grease and flour every crevice of the pan or use a baking spray with flour. Allow the cake to cool in the pan for 15 minutes before inverting.
Can I make this cake gluten-free?
Yes, by using a gluten-free 1:1 baking flour blend. Be sure to check the consistency and adjust the baking time slightly if needed.
Is it better to use butter or oil in Bundt cake?
Oil yields a moister crumb and neutral flavor, making it ideal for dense cakes like this one. However, you can use a mix of butter and oil for richer flavor if preferred.
Apple Bundt Cake Recipe Step By Step With Sour Cream Option And Caramel Finish

This Apple Bundt Cake with Caramel Glaze is the ultimate fall dessert. Made with fresh apples, warm spices, and a moist batter, it bakes into a tall, golden cake with a tender crumb and bakery-style texture. Finished with a rich, buttery caramel glaze, this cake is perfect for cozy weekends, holiday gatherings, or edible gifts. Includes an optional sour cream variation for extra richness and tips for freezing, storage, and presentation.
- Author: Clara
Ingredients
For the cake:
- 3 cups all-purpose flour
- 1 tsp baking soda
- 1 tsp salt
- 1 tsp ground cinnamon
- ½ tsp ground nutmeg
- 1 cup vegetable oil
- 1 ¾ cups granulated sugar
- 3 large eggs
- 2 tsp vanilla extract
- 4 cups apples, peeled and chopped
- 1 cup chopped walnuts (optional)
For the glaze:
- ½ cup packed brown sugar
- ¼ cup butter
- 2 tbsp milk
- ½ tsp vanilla extract
Instructions
Preheat the oven to 325°F (165°C) and grease a bundt pan.
In a medium bowl, whisk together the flour, baking soda, salt, cinnamon, and nutmeg.
In a large bowl, combine the oil, sugar, eggs, and vanilla extract. Mix until well blended.
Gradually add the dry ingredients to the wet ingredients, stirring just until combined.
Fold in the chopped apples and walnuts.
Pour the batter into the prepared bundt pan and smooth the top.
Bake for 60–75 minutes or until a toothpick inserted in the center comes out clean.
Remove from the oven and let cool in the pan for 15 minutes, then turn out onto a wire rack to cool completely.
To make the glaze, combine brown sugar, butter, and milk in a small saucepan. Bring to a boil, stirring constantly. Remove from heat and stir in vanilla.
Drizzle the glaze over the cooled cake before serving.
Notes
-
Apple Tip: Use firm, tart apples like Granny Smith for the best texture.
-
Sour Cream Swap: Replace ½ cup oil with ½ cup full-fat sour cream for a denser, richer cake.
-
Glaze Timing: Wait until the cake is fully cooled before glazing to avoid melting or soaking.
-
Storage: Wrap tightly and store at room temperature for up to 3 days or freeze for up to 3 months.
-
Pan Prep: Don’t skip thorough greasing and flouring—it’s essential for easy release.
-
Variations: Add a pinch of salt to the glaze or stir in raisins or dried cranberries for added dimension.