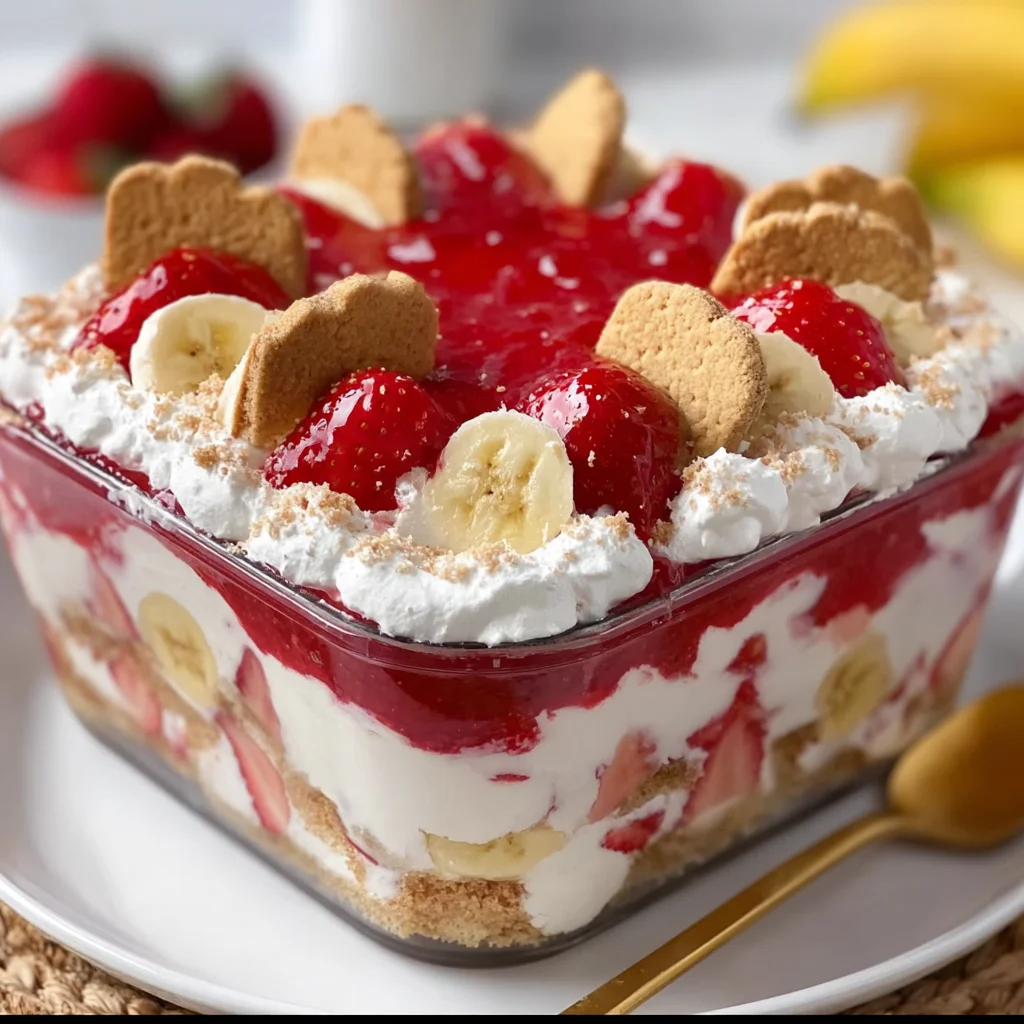
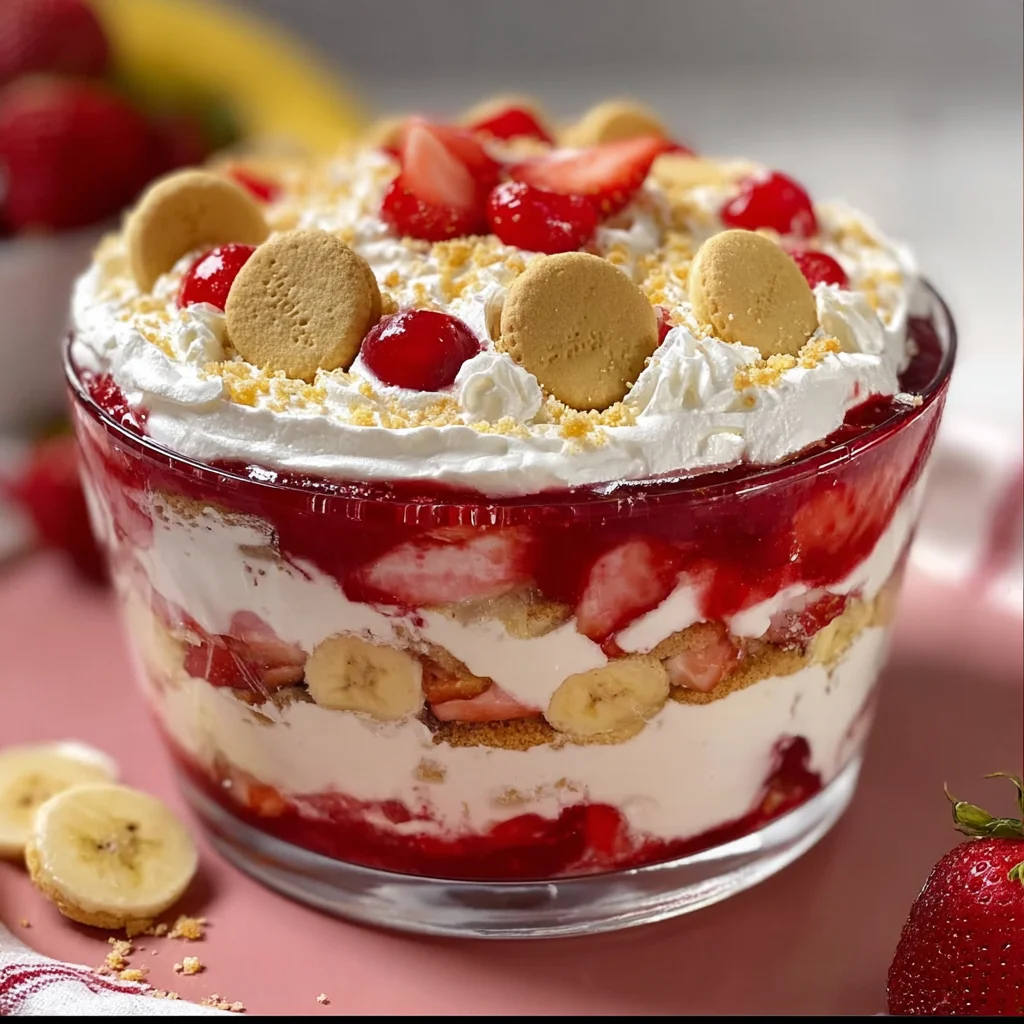
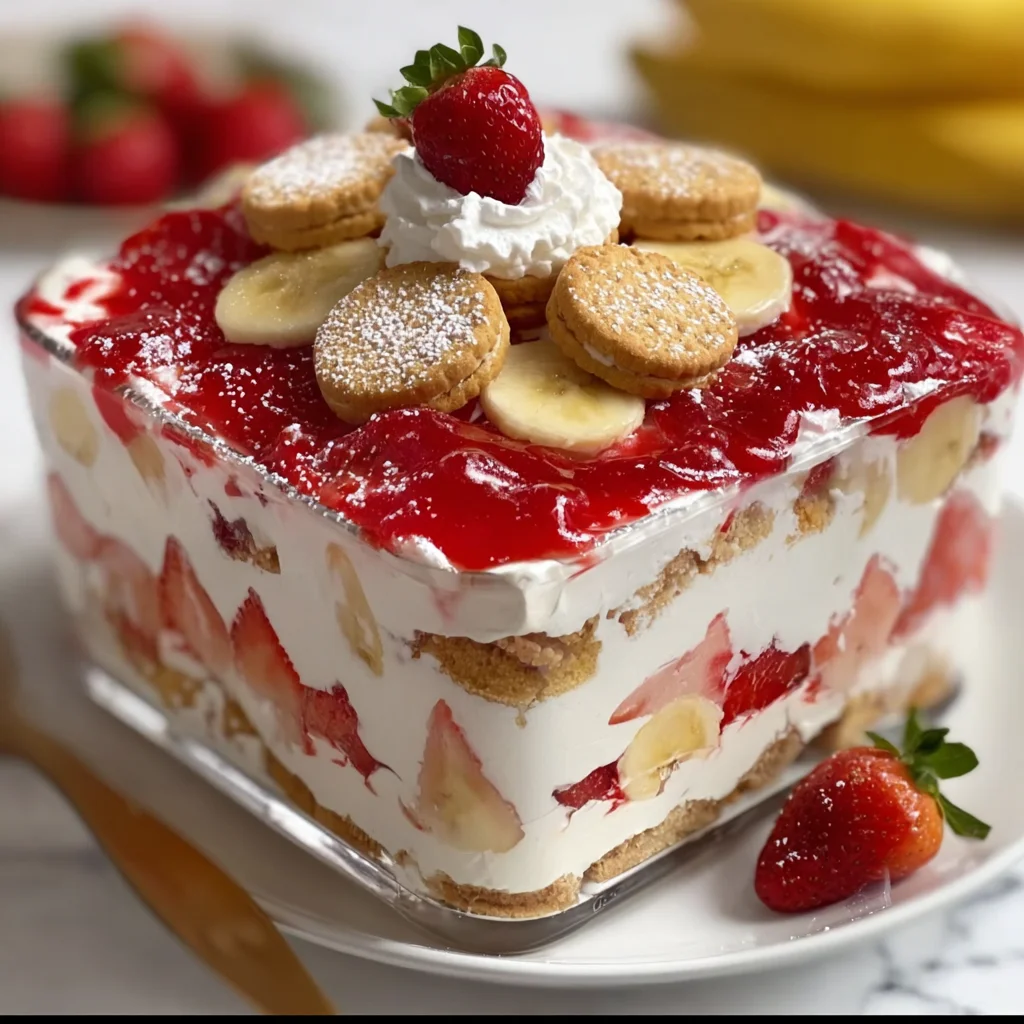
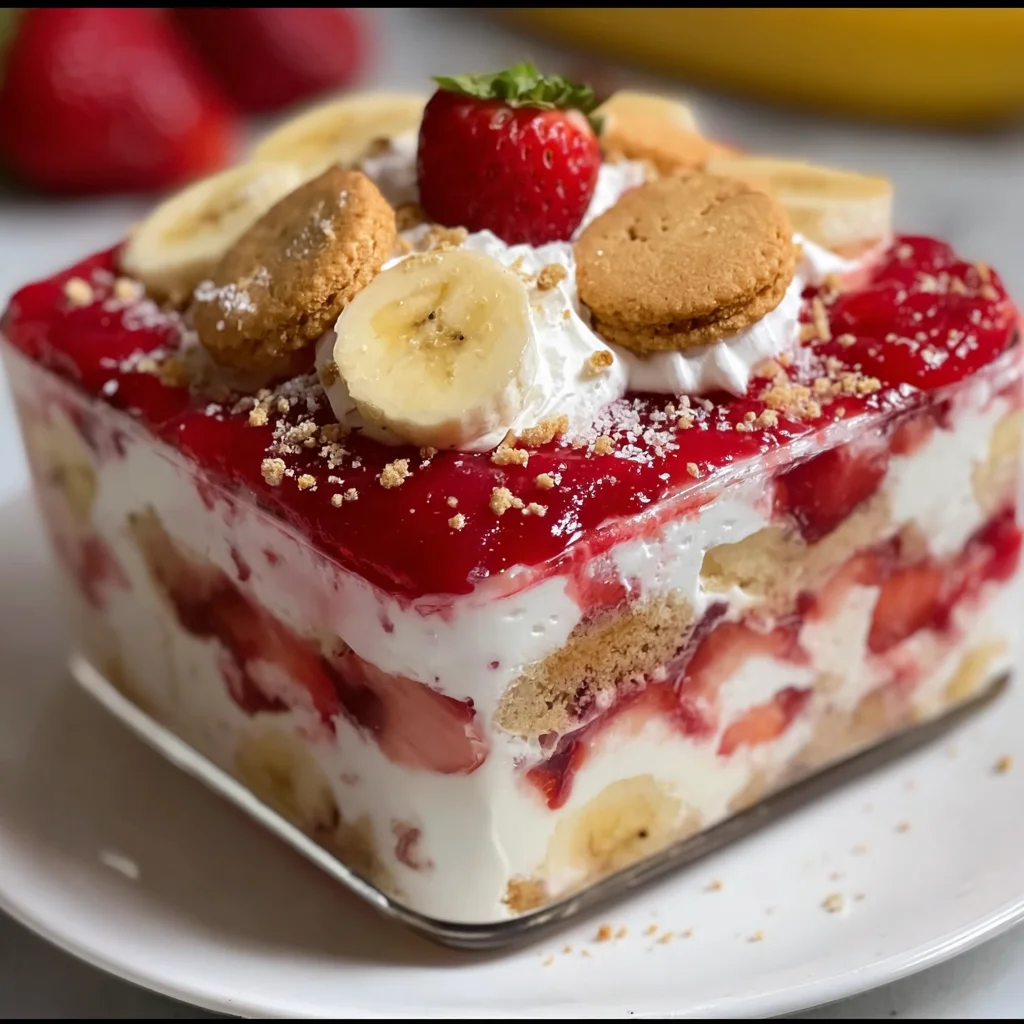
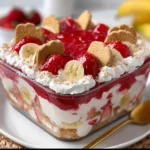
If you’re craving something refreshing, fruity, creamy, and nostalgic, this Strawberry Banana Pudding Dream is the perfect dessert. With luscious layers of vanilla wafers, silky pudding, fresh strawberries, and ripe bananas, it’s a no-bake masterpiece that requires minimal effort but delivers maximum flavor. This dessert brings together the classic southern banana pudding with a berry twist, resulting in an eye-catching and crowd-pleasing dish.
No-bake desserts are having a moment—especially when they’re quick to assemble, easy to customize, and don’t require heating up the kitchen. This pudding dream fits all those needs, making it a summer staple, a holiday favorite, and an all-around go-to treat. The base of vanilla wafer cookies (a bit like the nostalgic Vienna finger) offers a soft, buttery crust that supports the creamy, fruity layers above it. Inspired by traditional Southern banana pudding but with the addition of fresh strawberries, this dish stands out as a showstopper at any gathering. For presentation ideas, check out layered dessert inspiration that elevate this no-bake beauty even further.
With components like ripe bananas, whipped topping, and cream cheese, this dish is not only a flavor explosion but also a visual feast. The contrast of yellow and red fruit layered against fluffy cream makes it a stunning addition to parties and potlucks. Plus, if you’re looking for how to present layered puddings for special events, check out this Pinterest board for stunning serving ideas that make it even more irresistible.
🧂 Ingredients breakdown and role of each component
Understanding each element of this Strawberry Banana Pudding Dream can help you appreciate the harmony of flavors and textures in every bite. Here’s what you’ll need and why each ingredient plays a vital role.
Crust
-
2 cups crushed vanilla wafers (about 60 cookies): The base of the dessert, providing structure and a slightly crunchy texture that softens as it chills.
-
6 tablespoons unsalted butter, melted: Helps bind the wafer crumbs and gives them richness.
-
1 tablespoon granulated sugar (optional): Enhances the sweetness of the crust.
The vanilla wafer cookies make a buttery, mildly sweet foundation that blends well with the fruity and creamy layers.
Filling
-
1 (5.1 oz) box instant vanilla pudding mix: Forms the creamy body of the dessert quickly, without cooking. It mimics the consistency of custard-style desserts with ease.
-
2 cups cold milk (whole or 2%): Activates the pudding mix and keeps it light.
-
8 oz cream cheese, softened: Adds a slightly tangy depth and dense creaminess.
-
1 cup sweetened condensed milk: Provides smoothness and deep sweetness.
-
1 teaspoon pure vanilla extract: Enhances all the dessert’s flavors.
-
8 oz whipped topping (like Cool Whip), thawed: Adds volume and lightens the texture.
You could also explore cream cheese in desserts for more ways to incorporate it into no-bake treats.
Fruit Layers
-
3 large ripe bananas, sliced: These ripe bananas offer a naturally sweet, soft contrast to the pudding’s creaminess.
-
2 cups fresh strawberries, sliced: The addition of fresh strawberries brings brightness and tartness that balances the richness of the cream layers.
Garnishes (optional but highly recommended)
-
Crushed vanilla wafers
-
Fresh strawberry slices
-
Banana coins (best added right before serving)
-
Mint leaves
-
Extra whipped topping
Garnishing not only boosts flavor and freshness but also makes your dessert presentation-ready. For aesthetic garnish ideas, consider browsing fruit garnishing techniques.
👩🍳 Step-by-step recipe instructions
Making this Strawberry Banana Pudding Dream is straightforward and satisfying. Below is a foolproof guide to preparing each layer and assembling it into a beautiful dessert.
Make the crust
-
Crush the vanilla wafers: Use a food processor or place cookies in a zip-top bag and crush with a rolling pin until finely ground.
-
Combine with melted butter (and sugar, if using): Mix until the crumbs are evenly coated.
-
Press into a 9×13-inch dish: Use the bottom of a flat cup or spoon to compact the crust evenly.
-
Chill the crust in the refrigerator while preparing the filling.
This step is crucial, as chilling allows the crust to set and become a sturdy base.
Prepare the pudding layer
-
In a mixing bowl, whisk the instant pudding mix with 2 cups of cold milk.
-
Beat for about 2 minutes until thick.
-
Refrigerate for 5-10 minutes to allow it to set properly.
Instant pudding adds a quick, creamy layer that mimics homemade custard without the cooking time.
Make the cream cheese filling
-
Beat softened cream cheese in a large bowl until smooth and lump-free.
-
Add sweetened condensed milk and vanilla extract, mixing until fully combined.
-
Fold in the chilled vanilla pudding mixture.
-
Gently fold in the whipped topping until fully incorporated and fluffy.
Whipped topping substitutes like whipped cream can be used, but keep in mind they may not hold up as long in the fridge.
Assemble the layers
-
Spread the prepared crust across the bottom of your dish.
-
Add a single layer of banana slices over the crust.
-
Spread half of the cream cheese-pudding mixture evenly.
-
Top with a layer of sliced strawberries.
-
Spread the remaining cream mixture on top, smoothing with a spatula.
Layering is not just about flavor but also visual appeal. For creative presentations, check out trifle presentation ideas.
Chill and garnish
-
Cover the dish with plastic wrap and refrigerate for at least 4 hours, or overnight for best results.
-
Before serving, top with crushed wafers, strawberry slices, banana coins (freshly cut), and mint leaves.
-
Serve chilled with a large spoon or slice and plate individually.
Chilling allows all the flavors to meld and the layers to firm up, ensuring clean slices and a more cohesive dessert.
💡 Tips for the perfect strawberry banana pudding dream
For the best texture, flavor, and appearance, keep these tips in mind:
-
Banana ripeness matters: Use bananas that are yellow with few brown spots for ideal sweetness and texture.
-
Prevent browning: Lightly brush banana slices with lemon juice to maintain color without overpowering flavor.
-
Use homemade whipped cream only if serving immediately. Otherwise, stick with Cool Whip or stabilized whipped topping for structure.
-
Alternate crusts: Try graham crackers or shortbread cookies for a flavor twist.
-
Even layers: Use a spatula or the back of a spoon to smooth each layer for the cleanest look when slicing.
For a wider variety of summer dessert ideas, explore easy no-bake desserts to inspire your next creation.
🥄 Nutritional profile and dietary tips
While indulgent, you can tailor this dessert to suit dietary preferences:
-
Calories: Approximately 280–350 calories per serving (depending on ingredients and portion size).
-
Make it lighter: Use low-fat cream cheese, light whipped topping, and reduced-fat pudding mix.
-
Gluten-free adaptation: Replace vanilla wafers with gluten-free cookies.
-
Dairy-free option: Use almond or oat milk and dairy-free cream cheese.
This pudding dream offers flexibility without compromising flavor, making it ideal for guests with different dietary needs.
🧊 Make-ahead, storage, and serving suggestions
One of the best things about this Strawberry Banana Pudding Dream is how well it holds up when made in advance.
-
Make ahead: Prepare up to 24 hours in advance to allow flavors to meld.
-
Refrigeration: Keeps well in the fridge for up to 3 days.
-
Freezing: Not recommended, as the texture of the bananas and cream may become grainy.
-
Individual servings: Assemble in small jars or cups for easy serving at parties.
For best results, always add fresh banana slices right before serving to avoid browning.
🍫 Creative variations and add-ins
You can customize this no-bake dessert to fit your taste or theme. Here are a few exciting variations:
-
Chocolate twist: Use chocolate pudding instead of vanilla for a decadent spin.
-
Tropical version: Add crushed pineapple between layers for extra brightness.
-
Berry mix-up: Swap strawberries with raspberries or a berry medley.
-
Layer of jam: Spread a thin layer of strawberry jam for added sweetness.
-
Nut topping: Sprinkle chopped pecans or walnuts on top for crunch.
Each variation brings a new personality to this dreamy dessert, so don’t hesitate to experiment.
🎉 Occasions & seasonal serving ideas
This dessert shines at any event. Here’s when it truly stands out:
-
Summer BBQs and picnics: No need to heat the oven, and it’s refreshingly cool.
-
Valentine’s Day: Heart-shaped strawberries and layered presentation make it a romantic treat.
-
Mother’s Day brunch: Add edible flowers or mint leaves for elegance.
-
Christmas version: Layer red and green fruit for a festive holiday twist.
-
Birthday parties: Customize with sprinkles or colored whipped topping for a themed celebration.
Check out more seasonal ideas with this Pinterest board on fruit garnish tips.
❓ FAQs
Can I use banana pudding instead of vanilla?
Absolutely. Banana pudding intensifies the banana flavor and adds a deeper yellow color. However, the combination of vanilla pudding with real bananas creates a more balanced flavor in this recipe.
How do I keep bananas from turning brown in pudding?
-
Slice bananas just before layering.
-
Lightly brush with lemon juice.
-
Ensure they are fully covered by cream mixture to limit air exposure.
Can I make this dessert in individual cups?
Yes, and it’s highly recommended for parties! Use clear plastic or glass cups for the best visual presentation. See mini layered dessert ideas for inspiration.
Can I use fresh whipped cream instead of Cool Whip?
You can, but keep in mind that fresh whipped cream doesn’t hold as well. Use stabilized whipped cream if making ahead.
How long does banana pudding last in the fridge?
Generally, up to 3 days. After that, the bananas may start to brown and the texture may change. Always cover tightly and store in the coldest part of your refrigerator.
🍰 Conclusion: why this is the ultimate no-bake dessert
Strawberry Banana Pudding Dream isn’t just a dessert—it’s an experience. From the creamy layers to the bright fresh fruit and the buttery crust, every spoonful delivers comfort and delight. It’s incredibly simple to prepare, requires no baking, and offers endless customization for any season or celebration.
Whether you’re preparing a dish for a family gathering, a backyard BBQ, or just a Tuesday night treat, this pudding will satisfy your sweet tooth and impress your guests. And with so many creative variations and presentation options, you’ll never get bored of making it.
PrintStrawberry Banana Pudding Dream
This Strawberry Banana Pudding Dream is a light, fluffy, and fruity no-bake dessert perfect for any season. It layers crushed vanilla wafers, ripe banana slices, juicy strawberries, and a luscious cream cheese vanilla pudding filling—all topped with whipped topping and garnishes for a show-stopping finish.
- Prep Time: 25 minutes
- Chill time: 4 hours
- Total Time: 4 hours 25 minutes
- Yield: 12 servings 1x
- Category: Dessert
- Method: No-Bake
- Cuisine: American
Ingredients
For the Crust
2 cups crushed vanilla wafers (about 60 wafers)
6 tablespoons unsalted butter, melted
1 tablespoon granulated sugar (optional)
For the Filling
1 (5.1 oz) box instant vanilla pudding mix
2 cups cold milk (whole or 2%)
8 oz cream cheese, softened to room temperature
1 cup sweetened condensed milk
1 teaspoon pure vanilla extract
8 oz whipped topping (like Cool Whip), thawed
For the Layers
3 large ripe bananas, sliced into coins
2 cups fresh strawberries, sliced
For Garnish (Optional but Recommended)
Crushed vanilla wafers
Fresh strawberry slices
Banana coins (add just before serving)
Mint leaves
Extra whipped topping
Instructions
Step 1: Prepare the Crust
-
Crush the vanilla wafers into fine crumbs using a food processor or by placing them in a zip-top bag and crushing with a rolling pin.
-
Mix crumbs with melted butter (and sugar if using) in a bowl until evenly coated.
-
Press mixture evenly into the bottom of a 9×13-inch baking dish.
-
Chill in the refrigerator while preparing the filling.
Step 2: Make the Pudding Layer
-
In a large bowl, whisk the vanilla pudding mix with 2 cups of cold milk.
-
Whisk for about 2 minutes until thick.
-
Place in the refrigerator for 5–10 minutes to set.
Step 3: Make the Cream Cheese Mixture
-
In another bowl, beat the softened cream cheese until smooth and creamy.
-
Add the sweetened condensed milk and vanilla extract, and mix until well combined.
-
Gently fold in the chilled pudding mixture.
-
Fold in the whipped topping until the filling is light, fluffy, and evenly mixed.
Step 4: Assemble the Layers
-
Layer 1: Spread the chilled crust evenly at the bottom of the dish.
-
Layer 2: Arrange sliced bananas over the crust in a single layer.
-
Layer 3: Spread half of the cream filling on top of the bananas.
-
Layer 4: Add an even layer of sliced strawberries.
-
Layer 5: Top with the remaining cream filling and smooth the surface with a spatula.
Step 5: Chill
-
Cover with plastic wrap and refrigerate for at least 4 hours, or overnight for best results.
Step 6: Garnish and Serve
-
Just before serving, add extra whipped topping, crushed wafers, banana coins, fresh strawberry slices, and mint leaves if desired.
-
Slice and serve chilled.
Notes
-
Bananas: Use ripe bananas with yellow skins and a few brown specks for the best flavor.
-
Prevent browning: Lightly coat banana slices in lemon juice if prepping ahead to keep them from turning brown.
-
Whipped topping: Use a stabilized topping like Cool Whip if making ahead. Homemade whipped cream works if serving immediately.
-
Crust alternatives: Try graham crackers, digestive biscuits, or shortbread cookies for a different base.
-
Layering tip: Use a clear dish to show off the beautiful dessert layers.