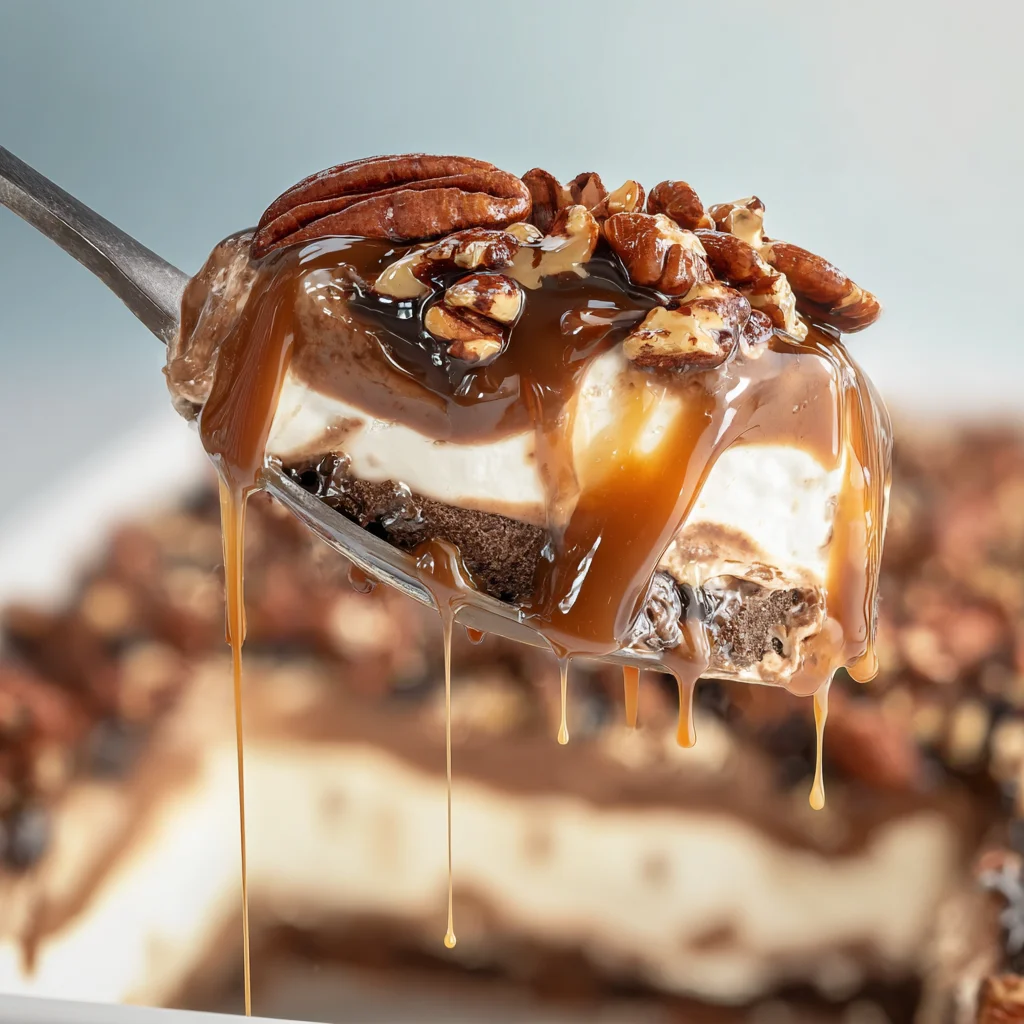
There’s something undeniably irresistible about a dessert that blends rich chocolate, sweet caramel, and crunchy pecans — all without needing to turn on the oven. That’s where the No Bake Turtle Lush comes in, an indulgent, creamy layered dessert that’s perfect for holidays, gatherings, or any day you’re craving something decadent but easy.
This dessert combines all the beloved flavors of a classic turtle candy in a chilled, creamy, multi-layered format. With an Oreo crust, whipped cream, cream cheese, and chocolate pudding, this lush dessert is layered to perfection and topped with pecans, caramel sauce, and chocolate syrup.
For those looking for no-bake dessert ideas, Pinterest offers an endless supply of inspiration, but this recipe stands out thanks to its unique combination of flavors and textures. If you’re unfamiliar with ingredients like whipped topping or want to know more about the base made from Oreo, this article covers everything from preparation to customization.
💖 Why you’ll love this no bake turtle lush
This dessert doesn’t just look amazing — it tastes even better. Whether you’re serving it to a crowd or making it just for yourself, there are plenty of reasons to fall in love with No Bake Turtle Lush.
-
No baking required – Ideal for summer days or busy holiday prep.
-
Layered texture – Creamy, crunchy, fluffy, and gooey all in one bite.
-
Crowd-pleasing flavors – Chocolate, caramel, and pecans are a universal favorite.
-
Make-ahead friendly – Perfect for planning ahead for gatherings.
-
Visually stunning – Drizzled toppings make it beautiful for presentation.
If you’re exploring turtle dessert inspiration, you’ll find plenty on Pinterest, but few desserts are as easy and satisfying as this one.
🧾 Key ingredients breakdown
Understanding each ingredient is crucial to perfecting the No Bake Turtle Lush. Here’s a deep dive into what makes this dessert unforgettable.
Oreo crust
The base is a classic Oreo cookie crust made with:
-
3 cups Oreo cookie crumbs
-
8 tablespoons unsalted butter, melted
Tips:
-
Use a food processor for fine, even crumbs.
-
Mix thoroughly with melted butter and press firmly into a 13×9 dish.
-
Freeze for at least 20 minutes to set before adding other layers.
Cream cheese layer
This layer adds a creamy tanginess and richness:
-
1 package (8 oz) cream cheese, softened (More on cream cheese)
-
1/2 cup powdered sugar
-
8 oz whipped topping (like Cool Whip)
Tips:
-
Make sure the cream cheese is at room temperature for smooth blending.
-
Combine using a hand mixer for a fluffy texture.
Chocolate pudding layer
This is the chocolatey heart of the dessert:
-
1 box (5.9 oz) instant chocolate pudding mix (Chocolate pudding explained)
-
3 cups cold milk
Tips:
-
Use cold milk and whisk for about 2 minutes until thickened.
-
Let it rest for 2–3 more minutes before layering.
Whipped topping
Adds a light, fluffy finish:
-
8 oz whipped topping
You can learn more about what’s in whipped topping and even make your own if you prefer.
Toppings
These final touches make it a true turtle dessert:
-
1 cup chopped pecans (Learn about pecans)
-
1/2 cup caramel sauce (Caramel explained)
-
1/4 cup chocolate syrup
Optional Additions:
-
Sea salt sprinkle
-
Chocolate shavings
-
Crushed turtle candies
👩🍳 Step-by-step instructions with pro tips
Each step in making this no bake turtle lush contributes to its perfect texture and balance. Follow this process for best results.
Step 1: Make the Oreo crust
-
Mix 3 cups of Oreo crumbs with 8 tablespoons of melted butter.
-
Press into a 13×9-inch pan.
-
Freeze for 20 minutes to firm up.
Pro tip: Press the crust with the bottom of a glass for a smooth, even base.
Step 2: Prepare the cream cheese layer
-
Blend 8 oz cream cheese and 1/2 cup powdered sugar until smooth.
-
Fold in 8 oz whipped topping until fully incorporated.
-
Spread evenly over the chilled Oreo crust.
-
Sprinkle 1/2 cup chopped pecans and press them lightly into the layer.
Step 3: Mix the chocolate pudding
-
Combine 1 box instant chocolate pudding with 3 cups cold milk.
-
Whisk for 2 minutes, then let sit for 2–3 more to thicken.
-
Spread evenly over the cream cheese layer.
Pro tip: Chill the bowl and whisk before mixing to speed up thickening.
Step 4: Add final whipped topping layer
-
Spread remaining 8 oz whipped topping evenly on top.
Pro tip: Use an offset spatula to smooth the surface.
Step 5: Chill and decorate
-
Cover with plastic wrap and refrigerate for at least 4 hours or overnight.
-
Before serving, drizzle caramel sauce and chocolate syrup.
-
Top with the remaining 1/2 cup chopped pecans.
Pro tip: Use a hot knife to cut clean slices.
🧁 Turtle lush variations & substitutions
One of the best things about this dessert is how adaptable it is. Here are some ideas to make it your own:
-
Nut-free option:
-
Omit pecans
-
Substitute toffee bits or crushed pretzels
-
-
Alternative crusts:
-
Crushed Biscoff cookies
-
Gluten-free sandwich cookies
-
Flavor swaps:
-
Add a layer of peanut butter
-
Use white chocolate or butterscotch pudding
-
Mix chocolate chips into the pudding layer
-
-
Healthier changes:
-
Use light cream cheese
-
Sugar-free pudding mix
-
Reduced-fat whipped topping
-
🧊 Storage and make-ahead tips
One of the most convenient aspects of the No Bake Turtle Lush is how well it stores. It’s a dream dessert for party prep.
-
Refrigerator:
-
Store covered in the fridge for up to 4 days.
-
Best eaten within 48 hours for maximum freshness.
-
-
Freezer:
-
Not recommended due to texture changes in pudding and whipped topping.
-
If needed, freeze up to 2 weeks but expect minor consistency loss.
-
-
Make-ahead:
-
Assemble 1–2 days ahead for holidays or events.
-
Add toppings just before serving for best visual impact.
-
🍽️ Serving suggestions
To make your no bake turtle lush the centerpiece of any dessert table, consider these presentation tips:
-
Chill thoroughly before slicing — overnight is ideal.
-
Use a hot knife — run under hot water and dry between cuts.
-
Serve with drinks:
-
Hot coffee or espresso
-
Iced lattes or cold brew
-
Cold milk
-
-
Presentation ideas:
-
Serve in individual cups for personal portions.
-
Top with a dollop of whipped cream and extra caramel drizzle.
-
Sprinkle with sea salt flakes for a gourmet touch.
-
Explore layered presentation ideas on Pinterest for more inspiration.

⚠️ Common mistakes to avoid
Although simple, this dessert can be affected by a few avoidable mistakes:
-
Not chilling long enough:
-
Layers won’t set properly and slicing becomes messy.
-
-
Using warm butter in the crust:
-
Can create a soggy base — cool slightly before mixing with crumbs.
-
-
Overmixing the pudding:
-
It may break down and become runny. Stop as soon as it thickens.
-
-
Using generic whipped topping:
-
Some store brands are too watery — opt for a quality brand or homemade version.
-
-
Skipping the pecans or toppings:
-
These elevate the texture and flavor; if skipping nuts, replace with something crunchy.
-
❓ FAQs section (People also ask)
Here are some common questions people search about no bake turtle lush:
What is a lush dessert?
A lush dessert is a layered, no-bake dessert typically made with a cookie crust, cream cheese layer, pudding or fruit, and whipped topping. It’s chilled before serving and known for its creamy texture.
Can you make turtle lush ahead of time?
Yes, it’s actually recommended. Making it a day ahead allows the layers to firm up and flavors to blend. Just add toppings right before serving.
What is the best way to cut layered desserts?
Use a sharp knife dipped in hot water. Wipe it clean between each slice to maintain clean layers.
Can I make this gluten-free or dairy-free?
Yes! Use gluten-free Oreos, dairy-free cream cheese, plant-based whipped topping, and almond or oat milk in the pudding mix.
What can I use instead of pecans in a turtle dessert?
Try walnuts, crushed pretzels, sunflower seeds, or skip nuts entirely and add cookie crumbles or toffee pieces.

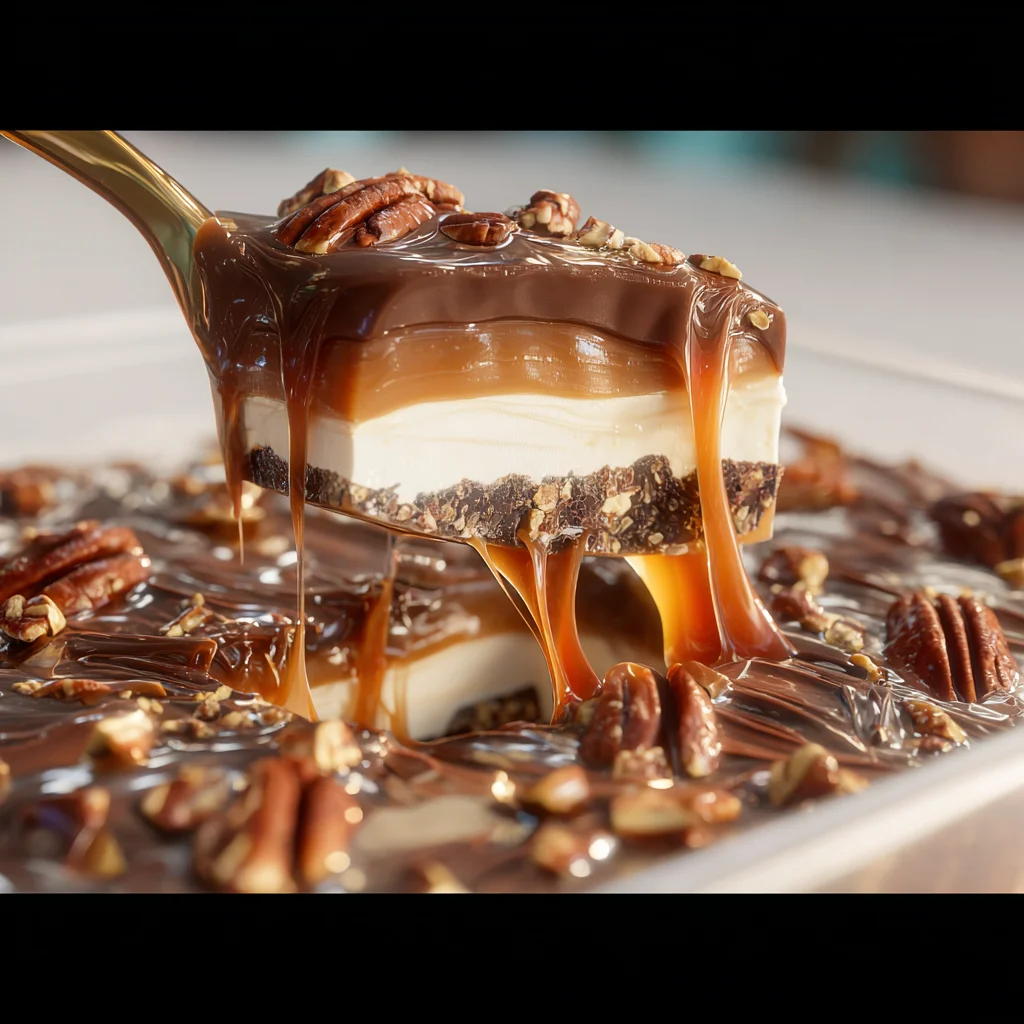
🏁 Conclusion + final tips
The No Bake Turtle Lush is the kind of dessert that impresses every time — but without the stress of baking. With layers of smooth cream cheese, rich chocolate pudding, crunchy pecans, and sweet caramel, it’s a perfect union of textures and flavors.
It’s incredibly flexible too. Whether you’re adapting it for dietary needs or customizing it with new flavors, this dessert is hard to mess up and always delivers.
Final tips to remember:
-
Chill thoroughly for the cleanest slices.
-
Customize your toppings for flair.
-
Make it ahead to save time on the big day.
With just a few pantry staples and no oven in sight, No Bake Turtle Lush might just become your go-to dessert. Explore more no-bake layered desserts through Pinterest or learn more about each component like cream cheese and chocolate pudding to experiment with your own twist.
Enjoy every decadent bite! 🥄
PrintNo Bake Turtle Lush
No Bake Turtle Lush is a rich, creamy, multi-layered dessert featuring an Oreo crust, a fluffy cream cheese filling, chocolate pudding, and whipped topping. Finished with caramel, chocolate drizzle, and crunchy pecans, this indulgent no-bake treat is perfect for holidays, potlucks, or just a cozy dessert night. It’s decadent, easy to make, and always a crowd favorite!
- Prep Time: 25 minutes
- Chill time: 4 hours
- Total Time: 4 hours 25 minutes
- Yield: 12–15 servings 1x
- Category: Dessert
- Method: No-Bake
- Cuisine: American
Ingredients
For the crust:
3 cups Oreo cookie crumbs (about 30 Oreo cookies)
8 tablespoons (1 stick) unsalted butter, melted
For the cream cheese layer:
8 ounces cream cheese, softened
1/2 cup powdered sugar
8 ounces whipped topping (like Cool Whip), thawed
For the chocolate pudding layer:
1 (5.9-ounce) box instant chocolate pudding mix
3 cups cold milk (preferably whole or 2%)
For the topping:
8 ounces whipped topping (remaining from second tub or new one)
1 cup chopped pecans, divided
1/2 cup caramel sauce (store-bought or homemade)
1/4 cup chocolate syrup
Instructions
Step 1: Make the crust
-
In a mixing bowl, combine the Oreo crumbs and melted butter.
-
Stir until the crumbs are fully coated and have the texture of wet sand.
-
Press the mixture firmly into the bottom of a 13×9-inch baking dish.
-
Place in the freezer for at least 20 minutes to set.
Step 2: Prepare the cream cheese layer
-
In a large bowl, beat the softened cream cheese and powdered sugar with an electric mixer until smooth and creamy.
-
Fold in 8 ounces of thawed whipped topping and mix until fully combined.
-
Spread the cream cheese mixture evenly over the chilled Oreo crust.
-
Sprinkle 1/2 cup chopped pecans over the cream cheese layer and press them in gently.
Step 3: Make the chocolate pudding
-
In another large bowl, whisk together the instant chocolate pudding mix and 3 cups of cold milk.
-
Whisk for 2 minutes until the pudding begins to thicken.
-
Let it rest for another 2-3 minutes to fully set.
-
Gently spread the pudding over the cream cheese and pecan layer.
Step 4: Add whipped topping
-
Spread the remaining 8 ounces of whipped topping evenly over the chocolate pudding layer.
-
Use a spatula to smooth the top.
Step 5: Chill and garnish
-
Cover the dish with plastic wrap and refrigerate for at least 4 hours (overnight is best).
-
Just before serving, drizzle caramel sauce and chocolate syrup over the top.
-
Sprinkle with the remaining 1/2 cup of chopped pecans.
-
Slice and serve chilled.
Notes
-
Softening cream cheese: Leave it at room temperature for 30 minutes for easier mixing.
-
Pudding mix: Use instant pudding, not the cook-and-serve kind.
-
Nut-free option: Replace pecans with toffee bits or leave them out entirely.
-
For clean slices: Use a hot, sharp knife and wipe it clean between cuts.
-
Crust tips: Press crust firmly using the bottom of a glass to create an even, stable base.