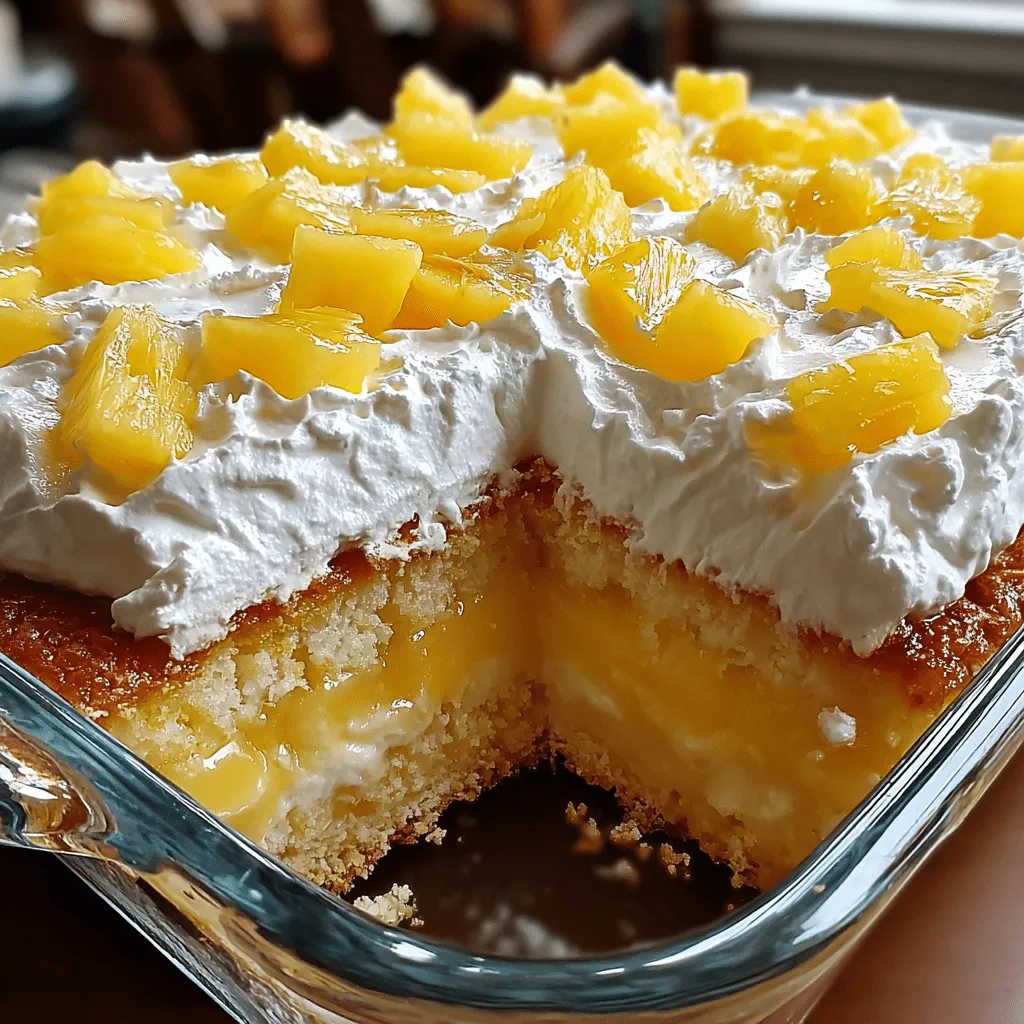
When it comes to delightful desserts that combine tropical flavor and creamy indulgence, the Juicy Pineapple Heaven Cake is an unbeatable classic. This crowd-pleasing treat is moist, fluffy, and bursting with the bright tang of pineapple. Whether you’re hosting a summer potluck, attending a birthday party, or simply satisfying a sweet tooth at home, this cake delivers the perfect balance of fruity and creamy in every bite.
Unlike traditional cakes that can be heavy or overly rich, the Pineapple Heaven Cake stands out for its light texture and juicy fruitiness. The marriage of crushed pineapple with a boxed yellow cake mix results in an ultra-moist base that holds its shape beautifully while remaining delightfully tender.
In fact, pineapple-based desserts have seen a surge in popularity lately, especially during warmer months. According to Wikipedia, pineapple has long been a symbol of hospitality and abundance. You can explore more pineapple desserts for inspiration on Pinterest, where thousands of variations await your baking creativity.
🍰 What makes it “heaven” cake?
The phrase “Heaven Cake” is not just for show—it refers to a dessert so light, fluffy, and irresistibly tasty that it feels heavenly with every forkful. What elevates the Juicy Pineapple Heaven Cake above a standard pineapple cake is its combination of a soft, yellow cake base and an ethereal topping made from whipped topping, instant vanilla pudding, and—you guessed it—more crushed pineapple.
This indulgent topping is whipped until light and smooth, then generously spread over the cooled cake. It’s then chilled to perfection, giving it a refreshing bite that feels like a summer breeze in dessert form. Unlike buttercream or cream cheese frostings, this topping doesn’t weigh down the cake. Instead, it enhances the overall texture and flavor while keeping the dessert airy.
The use of whipped topping and instant pudding offers a shortcut that doesn’t sacrifice flavor, making this recipe accessible to beginner bakers and perfect for quick gatherings. For a visual breakdown of easy cake recipes that use similar components, check out this board on Pinterest.
🧾 Ingredients breakdown
The success of a Juicy Pineapple Heaven Cake lies in its simple yet effective ingredient list. Each item plays a crucial role in delivering flavor, texture, and structure.
For the cake base:
-
1 box yellow cake mix
A convenient and reliable base that produces a consistent texture every time. You can read more about yellow cake and its composition for further insight. -
1 can (20 oz) crushed pineapple in juice, undrained
This is the star ingredient. The juice adds moisture while the fruit pieces add texture. -
3 large eggs
They provide the necessary structure and help the cake rise. -
1/2 cup vegetable oil
Adds richness and ensures a tender crumb.
For the topping:
-
1 tub (8 oz) whipped topping (such as Cool Whip)
Light and creamy, this creates the “heaven” element of the cake. -
1 package (3.4 oz) instant vanilla pudding mix
Offers a thick, luscious texture and a sweet vanilla flavor. -
1 can (20 oz) crushed pineapple in juice, undrained
Doubles down on the pineapple flavor and balances the topping with acidity and sweetness.
Can you use fresh pineapple instead of canned? Technically yes—but it’s not recommended unless you adjust for the liquid volume. Canned pineapple provides both sweetness and necessary moisture.
👩🍳 Step-by-step instructions
Making the Juicy Pineapple Heaven Cake is wonderfully straightforward and suitable for all skill levels.
-
Preheat your oven to 350°F (175°C).
-
Grease a 9×13-inch baking dish thoroughly.
-
In a large mixing bowl, combine:
-
Yellow cake mix
-
Crushed pineapple (with juice)
-
Eggs
-
Vegetable oil
-
-
Beat the mixture until it’s fully blended and smooth.
-
Pour the batter evenly into your prepared pan.
-
Bake for 30 to 35 minutes. Test for doneness by inserting a toothpick in the center—it should come out clean.
-
Let the cake cool completely in the pan.
Prepare the topping:
-
In a medium bowl, fold together:
-
Whipped topping
-
Instant vanilla pudding mix
-
Crushed pineapple (with juice)
-
-
Mix until smooth and fully combined.
-
Spread this topping evenly over the cooled cake.
-
Refrigerate for at least 1 hour before serving.
Once chilled, the cake is ready to enjoy. For more baking tips, Wikipedia offers helpful foundational knowledge.
🍽 Serving suggestions
This Juicy Pineapple Heaven Cake is best served chilled, which enhances the tropical flavor and creamy texture. Here are some fun serving ideas:
-
Add a garnish of shredded coconut or maraschino cherries.
-
Top with fresh mint leaves for a refreshing contrast.
-
Serve with a scoop of vanilla ice cream for an extra treat.
-
Slice into squares for easy potluck or picnic servings.
This cake is a staple for:
-
Summer BBQs
-
Birthday parties
-
Holiday dinners
-
Church functions
You can explore more summer dessert inspirations from Pinterest that complement this cake perfectly.
🧊 Storage and make-ahead tips
Proper storage ensures the Juicy Pineapple Heaven Cake maintains its texture and flavor:
-
Refrigerate: Store in an airtight container in the fridge for up to 4 days.
-
Freezing: While the cake base freezes well, the topping does not. If you plan to freeze, do so before adding the topping.
-
Make-ahead tip: Bake the cake a day in advance and prepare the topping separately. Assemble just before serving for best results.
Keep the cake away from heat, as the whipped topping may melt or separate.
🧁 Variations and customizations
Want to put your own spin on the Juicy Pineapple Heaven Cake? Here are some creative variations:
Cake mix swaps:
-
White cake mix for a lighter vanilla base
-
Pineapple cake mix to intensify the fruity flavor
-
Angel food cake mix for a spongier texture (adjust baking time)
Topping twists:
-
Add 4 oz of softened cream cheese to the topping for extra richness
-
Use lemon or coconut pudding instead of vanilla for a tangy or tropical vibe
Mix-ins:
-
Chopped walnuts or pecans for crunch
-
Coconut flakes to enhance the tropical profile
-
Diced maraschino cherries for bursts of sweetness and color
Find more tropical cake ideas on Pinterest to spark your creativity.
🥗 Nutritional information
Here’s a breakdown of the estimated nutrition per slice (1 of 12):
| Nutrient | Amount |
|---|---|
| Calories | 360 kcal |
| Total Fat | 18g |
| Saturated Fat | 6g |
| Cholesterol | 55mg |
| Sodium | 320mg |
| Total Carbohydrates | 45g |
| Sugars | 28g |
| Protein | 3g |
| Fiber | 1g |
Note: Values may vary based on exact ingredients used.
For a lighter version, opt for:
-
Sugar-free pudding mix
-
Lite whipped topping
-
Egg substitutes
🎂 Why use boxed cake mix?
Some bakers shy away from boxed mixes, but they offer several advantages:
-
Consistency: Every time you bake, you’ll get the same results.
-
Speed: Ideal for quick prep and last-minute desserts.
-
Customizable: Easy to adapt with mix-ins or flavor boosters.
To upgrade a boxed mix:
-
Add vanilla or almond extract
-
Substitute milk for water
-
Add sour cream or yogurt for extra richness
Using a mix doesn’t mean sacrificing quality. In fact, it makes home baking more approachable, especially for beginner bakers.
🧁 Can this be made into cupcakes or layer cake?
Yes, you can easily adapt the Juicy Pineapple Heaven Cake for other formats:
For cupcakes:
-
Use cupcake liners and bake at 350°F for 18–20 minutes.
-
Add topping only after cooling.
For a layered cake:
-
Divide batter into two 9-inch round pans.
-
After cooling, add the topping between layers and on top.
-
Decorate with fresh fruit or edible flowers for an elegant touch.
These variations are great for parties or when you want a more formal presentation.
⚠️ Common mistakes to avoid
Even easy recipes can have pitfalls. Here’s how to avoid common mistakes:
-
Overbaking the cake makes it dry. Always test with a toothpick.
-
Using fresh pineapple without adjusting moisture can lead to texture issues.
-
Not refrigerating the cake: The topping needs time to set.
By watching for these issues, you ensure a perfectly balanced and flavorful dessert every time.
❓ FAQs – people also ask
Can I use fresh pineapple instead of canned?
Yes, but be sure to add pineapple juice or water to match the liquid content of canned pineapple.
Can I make this cake a day ahead?
Absolutely! It tastes even better after a night in the fridge.
What can I substitute for Cool Whip?
You can use stabilized whipped cream or whipped topping alternatives like TruWhip.
Can I freeze Pineapple Heaven Cake?
Freeze the cake without the topping. Add the topping after thawing for best texture.
Is Pineapple Heaven Cake gluten-free?
Only if you use a gluten-free yellow cake mix. Always check labels for other ingredients.
Can I use pineapple chunks instead of crushed pineapple?
Not recommended. Crushed pineapple distributes more evenly in both the cake and topping.
🥄 Final thoughts & serving happiness
If you’re searching for a dessert that’s easy, fruity, creamy, and impossible to resist, the Juicy Pineapple Heaven Cake is your answer. Its simplicity, combined with its tropical flair, makes it a repeat favorite in any household.
Best of all, this cake proves that baking doesn’t need to be complicated to be delicious. With its moist crumb, creamy topping, and burst of pineapple flavor, this dessert lives up to its heavenly name. Be sure to explore more Cool Whip desserts from Pinterest to expand your summer baking list.
Ready to bake your way into pineapple paradise? Let this be the start of many joyful, fruity baking adventures.
PrintJuicy Pineapple Heaven Cake

The Juicy Pineapple Heaven Cake is a moist, tropical sheet cake layered with a dreamy pineapple-vanilla topping. Made with boxed yellow cake mix and crushed pineapple, it’s incredibly easy to prepare and perfect for summer picnics, birthdays, or potlucks.
- Prep Time: 10 minutes
- Cook Time: 35 minutes
- Total Time: 45 minutes
- Yield: 12 servings 1x
- Category: Dessert
- Method: Baking
- Cuisine: American
Ingredients
For the Cake:
1 box yellow cake mix (approximately 15.25 oz)
1 can (20 oz) crushed pineapple in juice, undrained
3 large eggs
½ cup vegetable oil
For the Topping:
1 tub (8 oz) whipped topping (e.g., Cool Whip), thawed
1 package (3.4 oz) instant vanilla pudding mix
1 can (20 oz) crushed pineapple in juice, undrained
Instructions
Step 1: Preheat and Prep
-
Preheat your oven to 350°F (175°C).
-
Lightly grease a 9×13-inch baking dish with butter or non-stick spray.
Step 2: Mix the Cake Batter
-
In a large mixing bowl, combine:
-
1 box yellow cake mix
-
1 can (20 oz) crushed pineapple with juice
-
3 large eggs
-
½ cup vegetable oil
-
-
Beat using a hand mixer or whisk for 2–3 minutes until smooth and well combined.
Step 3: Bake the Cake
-
Pour the batter into the prepared 9×13 pan.
-
Bake for 30–35 minutes, or until a toothpick inserted in the center comes out clean.
-
Let the cake cool completely in the pan.
Step 4: Prepare the Topping
-
In a medium mixing bowl, fold together:
-
1 tub (8 oz) whipped topping
-
1 package (3.4 oz) instant vanilla pudding mix
-
1 can (20 oz) crushed pineapple with juice
-
-
Mix until fully blended and fluffy.
Step 5: Assemble the Cake
-
Once the cake has cooled, spread the pineapple topping evenly over the entire surface.
-
Refrigerate the cake for at least 1 hour before slicing and serving.
Notes
-
Don’t drain the pineapple: The juice is essential for moisture and flavor in both the cake and topping.
-
Use only canned pineapple in juice, not syrup, for balanced sweetness.
-
For a tangy twist, swap the vanilla pudding with lemon or coconut instant pudding.
-
You can add 1/2 cup shredded coconut or chopped nuts to the topping for extra texture.
-
Fresh pineapple is not recommended unless cooked and adjusted for liquid content.
-
If you’re freezing, freeze the baked cake only and add topping after thawing.