
Few dishes combine comfort food creativity with finger-food fun quite like bacon cheeseburger stuffed tater tot cones. These indulgent little bites are more than just a trend—they’re the perfect blend of crispy, savory, cheesy goodness. Ideal for parties, game-day snacks, or just satisfying a craving, this recipe transforms familiar ingredients into an unforgettable appetizer that wows guests and delights kids and adults alike.
Unlike traditional sliders or nachos, these tater tot cones bring visual appeal and crunch in every bite. Plus, they’re portable, dippable, and endlessly customizable. Inspired by the viral food movement blending stuffed foods with classic diner favorites, they tick all the boxes for modern food lovers.
This guide will walk you through everything you need to know—from ingredients and prep to variations and storage tips—while also diving into expert tricks, FAQs, and nutritional details. And to add even more flavor, we’ll connect you with helpful external resources like what tater tots are and cheeseburger history, so you can explore the background of this iconic flavor profile. On Pinterest, recipes like cheeseburger-stuffed tater tots and tater tot party food are blowing up—proving just how beloved these little cones have become.
🧠 The inspiration behind this cheesy delight
The inspiration for these bacon cheeseburger stuffed tater tot cones comes from the best of both worlds: the juicy decadence of a cheeseburger and the crispy texture of golden tater tots. By merging these two iconic comfort foods, we get something totally new—and totally addictive.
Stuffed and bite-sized foods have exploded in popularity on platforms like TikTok and Pinterest. Think of mozzarella-stuffed meatballs, jalapeño popper dip, and now these cheesy cones. Unlike greasy fast-food versions, this recipe offers control over ingredients and flavor balance, using turkey bacon instead of pork and offering room for healthier substitutions if needed.
The aesthetic appeal of these cones is another reason they’ve taken off. With the ability to serve them in creative ways like skewers or cones standing upright in a cup, they’re perfect for party tables. Inspired by dishes like bacon cheeseburger bites and game day food ideas, this recipe brings visual flair to the table.

🛒 Ingredients breakdown: what you’ll need for the magic ✨
To create the ultimate bacon cheeseburger stuffed tater tot cones, you’ll need a balance of meaty, creamy, and cheesy elements. Each component plays a crucial role in delivering that melty, crunchy goodness.
🍔 For the cheeseburger filling:
-
1 pound of lean ground beef (85/15 or 90/10 works best)
-
6 slices of turkey bacon, cooked and crumbled
-
¼ cup diced white or yellow onion
-
¼ cup ketchup
-
¼ cup mayonnaise
-
¼ cup yellow mustard
-
Salt and black pepper to taste
🥔 For the crispy cones and cheese:
-
24 frozen tater tots (choose a sturdy brand)
-
4 ounces shredded cheddar cheese (sharp preferred)
-
4 ounces shredded mozzarella cheese (for stretchiness)
The cheddar provides tangy sharpness while the mozzarella gives that gooey, melty texture. Don’t skip either—they balance each other perfectly.
For those curious about the cheese itself, you can learn more about the characteristics of cheddar cheese and mozzarella to better understand why these two work so well together.
If you’re wondering about alternative fillings, there are many ideas on stuffed snack recipes, showing how others are customizing these bites.
🔧 Tools and kitchen prep essentials 🛠️
Before you get started, make sure you have the right kitchen tools for ease and efficiency.
-
Large nonstick skillet
-
Baking sheet lined with parchment paper
-
Small spoon or paring knife (for hollowing the tots)
-
Mixing bowl
-
Cheese grater (if using block cheese)
-
Oven preheated to 425°F (218°C)
Prepping everything in advance ensures a smooth process and keeps your tots from sitting too long before baking.
👨🍳 Step-by-step recipe instructions for perfection
Creating these cones is as fun as it is rewarding. Follow these steps for flawless execution:
🔥 Step 1: Cook the ground beef
In a skillet over medium heat, cook the ground beef until fully browned. Drain the excess fat.
🥓 Step 2: Add the bacon and mix-ins
Add your crumbled turkey bacon, diced onions, ketchup, mayonnaise, and mustard. Stir well until everything is combined. Season with salt and black pepper to taste. Remove from heat.
🕳️ Step 3: Hollow out the tater tots
Let the tater tots sit at room temp for a few minutes to soften slightly. Use a small spoon or knife to gently carve out the center of each tot, creating a cone or pocket. Be patient—it’s worth the effort.
🍔 Step 4: Fill the cones
Using a small spoon or piping bag, fill each hollowed tater tot with the warm cheeseburger mixture. Press down lightly to ensure they’re fully stuffed.
🧀 Step 5: First cheese topping
Sprinkle shredded cheddar cheese generously over the tops of the filled cones.
🔥 Step 6: First bake
Place the cones on a parchment-lined baking sheet and bake for 15–20 minutes, or until the cheddar melts and the tots become golden.
🧀 Step 7: Mozzarella mix and second topping
In a bowl, mix the remaining cheeseburger mixture with shredded mozzarella. Remove the tray from the oven and top each cone with this cheesy mixture.
🔥 Step 8: Final bake
Return the tray to the oven and bake for an additional 5–10 minutes, until the mozzarella is bubbling and golden.
✅ Step 9: Serve hot!
Serve these cheesy masterpieces immediately while the cheese is melty and irresistible.
Looking for more ideas like this? Check out tater tot party food for crowd-pleasing ways to serve them.
💡 Pro tips for perfect tater tot cones every time
Achieving perfection is all about the little details. Here are expert tips to help your cones turn out crispy and loaded every time:
-
Let tater tots thaw slightly before hollowing to avoid crumbling
-
Use thick, sturdy brands of tots for better structural integrity
-
Press filling firmly into each cone to maximize flavor
-
Bake on the middle rack for even heat circulation
-
Allow cones to rest for 3–5 minutes before serving to firm up
Bonus tip: You can also use an air fryer for reheating to keep them crispy!

🌶️ Fun variations and delicious add-ons
Want to personalize your cones? Try these flavor-boosting variations:
-
Spicy kick: Add chopped jalapeños or hot sauce to the filling
-
BBQ twist: Swap ketchup for BBQ sauce
-
Tex-Mex style: Add cumin, chili powder, and a spoonful of salsa
-
Vegetarian version: Use meatless crumbles or black beans as a base
-
Slider cones for kids: Make mini versions with smaller tots and a milder cheese
The beauty of this recipe lies in its adaptability. The flavor combinations are endless—browse stuffed snack recipes for even more inspiration.
🍽️ Serving suggestions for maximum wow factor
Presentation matters! Here are some fun and creative ways to serve your cones:
-
Arrange upright in mini shot glasses or paper cones
-
Skewer them and place on a platter with dipping sauces
-
Serve in muffin tins for easy grab-and-go portions
Top dipping sauces:
-
Chipotle mayo
-
Ranch dressing
-
Spicy ketchup
-
Garlic aioli
They also pair great with loaded nachos, sliders, or wings for a full party spread.
🧊 How to store and reheat leftovers
These cones taste best fresh, but you can save leftovers for another day:
-
Refrigerator: Store in an airtight container for up to 3 days
-
Freezer: Freeze individually on a tray, then transfer to a bag. Good for 1 month.
-
Reheating: Bake at 375°F for 10 minutes or use an air fryer for maximum crispiness
Avoid microwaving—they’ll get soggy and lose texture.
🥗 Nutritional breakdown and healthier swaps
Each cone is a hearty bite, so keep portions in mind. Approximate nutritional values per cone:
-
Calories: ~120
-
Protein: 6g
-
Carbs: 10g
-
Fat: 8g
Healthier modifications:
-
Use lean ground turkey or plant-based protein
-
Replace mayo with Greek yogurt
-
Use low-fat cheeses or reduce the amount
-
Swap traditional tater tots for sweet potato tots for added fiber
Explore more about tater tots if you’re curious about their history and nutritional profile.
❓ FAQs about bacon cheeseburger stuffed tater tot cones
Can I make these ahead of time?
Yes! Prep the filling and hollow out the tots in advance. Fill and bake when ready to serve.
What can I use instead of ground beef?
Ground turkey, chicken, or meatless crumbles all work great.
How do I keep tater tots from falling apart when hollowing?
Let them thaw slightly first and use a sharp paring knife. Be gentle and hollow just enough to hold filling.
Can I freeze the cones after baking?
Yes, but reheat them in an oven or air fryer—not a microwave—to retain texture.
Can I use an air fryer instead of an oven?
Absolutely! Air fry at 375°F for about 10–12 minutes for extra crispiness.
🎉 Final thoughts and share-worthy ideas
Bacon cheeseburger stuffed tater tot cones are a fun, unique, and highly customizable dish that everyone will love. Whether you’re serving them for a casual movie night or a holiday party, these cones deliver both flavor and wow-factor presentation.
Get creative, share your own versions online, and tag your photos—this recipe is made for showing off! If you’re hungry for more inspiration, explore game day food ideas and don’t forget to check out the history of the cheeseburger to appreciate where all this deliciousness began.
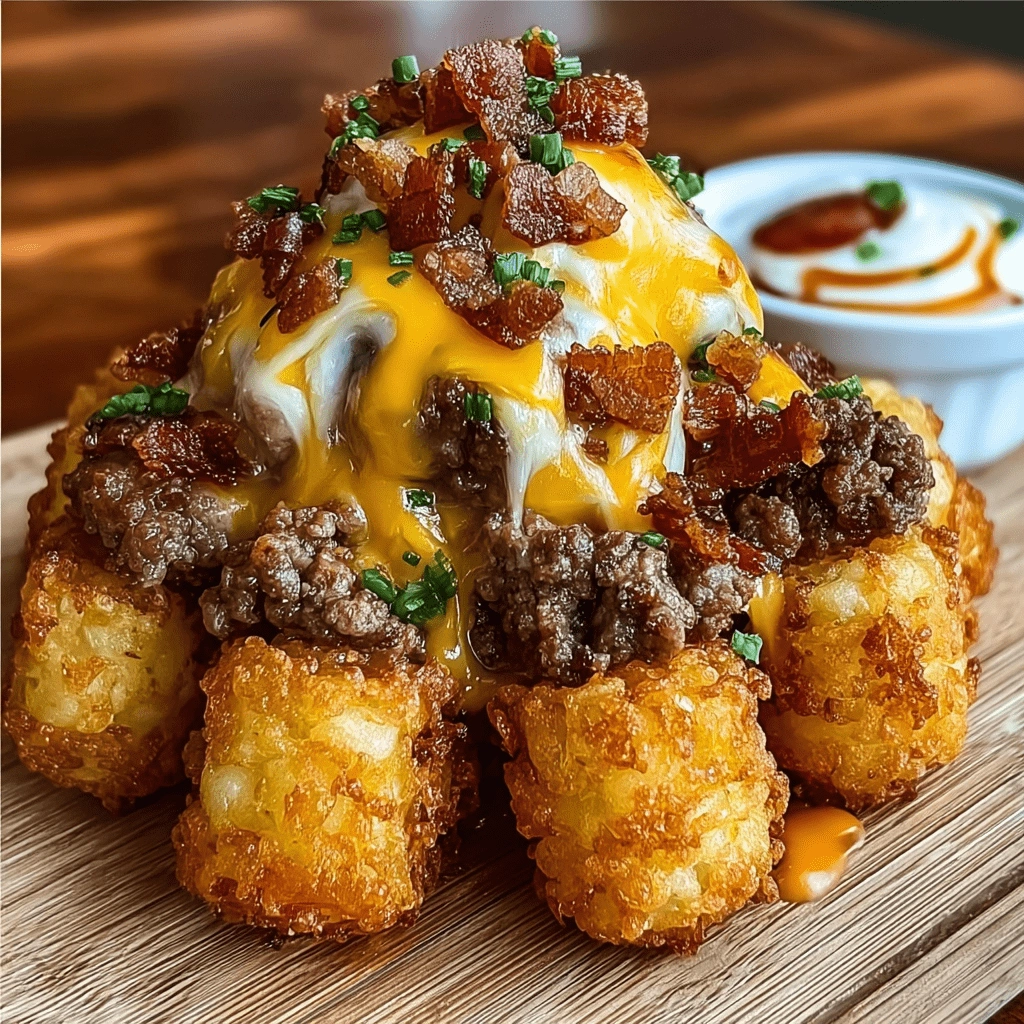
PrintBacon Cheeseburger Stuffed Tater Tot Cones

These bacon cheeseburger stuffed tater tot cones are the ultimate bite-sized comfort food. A crispy, golden tater tot shell is hollowed and stuffed with a juicy ground beef and turkey bacon filling, then topped with melty cheddar and mozzarella cheese.
- Prep Time: 20 minutes
- Cook Time: 30 minutes
- Total Time: 50 minutes
- Yield: 24 cones (approx. 6 servings) 1x
- Category: Dinner
- Method: Baked
- Cuisine: American
Ingredients
Cheeseburger Filling
1 pound lean ground beef (85/15 or 90/10)
6 slices turkey bacon, cooked until crisp and crumbled
¼ cup diced yellow or white onion
¼ cup ketchup
¼ cup mayonnaise
¼ cup yellow mustard
Salt and black pepper to taste
Tater Tot Cones & Cheese
24 frozen tater tots (standard size)
4 oz shredded sharp cheddar cheese
4 oz shredded mozzarella cheese
Instructions
In a large skillet over medium heat, cook the ground beef until browned and cooked through. Drain off excess grease.
Add crumbled turkey bacon, diced onions, ketchup, mayonnaise, and mustard to the beef. Stir until fully combined. Season with salt and black pepper to taste. Remove from heat.
Let the tater tots sit at room temperature for about 5 minutes to soften slightly. Carefully use a small knife or spoon to carve out the centers of each tot, creating a cone or pocket shape. Be gentle to avoid breaking them.
Spoon the cheeseburger mixture into each hollowed tater tot. Press down gently to ensure each cone is fully packed.
Place filled cones on a parchment-lined baking sheet. Sprinkle cheddar cheese over the top of each cone.
Bake in a preheated oven at 425°F (218°C) for 15–20 minutes, until tater tots are golden and cheddar cheese is melted.
Combine any remaining beef mixture with shredded mozzarella cheese. Top each cone with this extra cheesy blend.
Return the tray to the oven and bake for an additional 5–10 minutes, or until the cheese is bubbly and slightly golden on top.
Let the cones rest for 2–3 minutes after baking. Serve warm with dipping sauces like ranch, spicy ketchup, or chipotle mayo.
Notes
-
Tater Tot Tip: Let tots soften a bit before carving to prevent breaking.
-
Cheese Options: Try pepper jack for a spicy version.
-
Storage: Store leftovers in an airtight container in the fridge for up to 3 days.
-
Reheating: Best reheated in an oven or air fryer at 375°F for 10 minutes.
-
Freezing: Freeze before or after baking. Reheat directly from frozen in the oven.